Turn on suggestions
Auto-suggest helps you quickly narrow down your search results by suggesting possible matches as you type.
Showing results for
- Republic of Gamers Forum
- Discussions
- Case Mods & PC Builds
- Project: Mod in a Week // "Fallout Cause SP" (Comp...
Options
- Subscribe to RSS Feed
- Mark Topic as New
- Mark Topic as Read
- Float this Topic for Current User
- Bookmark
- Subscribe
- Mute
- Printer Friendly Page
Project: Mod in a Week // "Fallout Cause SP" (Completed)
Options
- Mark as New
- Bookmark
- Subscribe
- Mute
- Subscribe to RSS Feed
- Permalink
06-12-2012
03:13 AM
- last edited on
03-06-2024
08:36 PM
by
![]() ROGBot
ROGBot
Hi Everyone,
This is the third and final mod of the season for me. I am currently waiting for my philips ambx to arrive for my "AIO AL" (a.k.a. "Nameless" mod also posted on here) and to get my hands dirty on finishing the remake of the horns and other details on "Diabolo" (also posted on here). All three will be on show at the MLP event in Murcia, Spain from the 6th to the 11th of December.
Fallout Cause SP (Slim & Passive) is the succesor to my fav mod of my own creation "Fallout Cause", it was just a paintjob yet it was before I got in to making worklogs and I´ve learnt so much since then that I want to do something new in the same style as FC was.
About the conditions, maybe some of you remember my previous "Mod in a Week" project (a.k.a. Acid Burn), the conditions are the same, Start to Finish happens within a week, starting to day, Saturday 26-11-11 so it will be finished by Saturday the 3rd of December as the latest.
All products needed have to be bought/ordered and received within this period. This of course puts limitations on what I can use but that´s also part of the fun in this kind of project.
I chose to start today as the products from the sponsors for this project arrived.

Informatica Outlets is simply the must go to website in Spain for great deals on hardware and all needed components to build a PC. So thank you very much Informaticaoutlets.com for your sponsorship on this project!
The products sponsored for this project are:
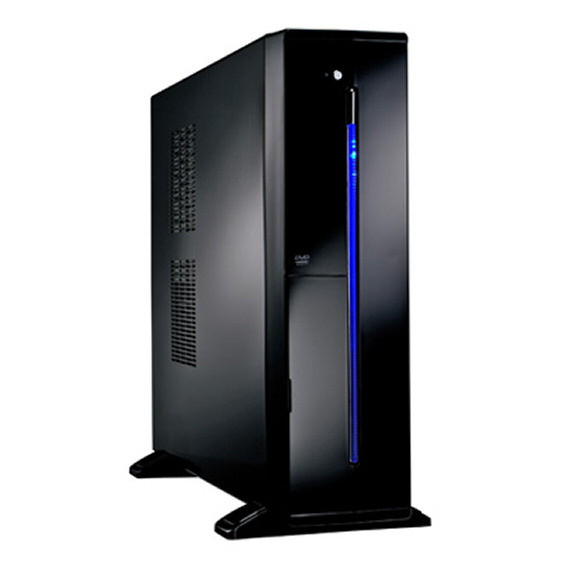
B-Move Slim II M-ATX low profile case
Intel Celeron Dual Core E3400

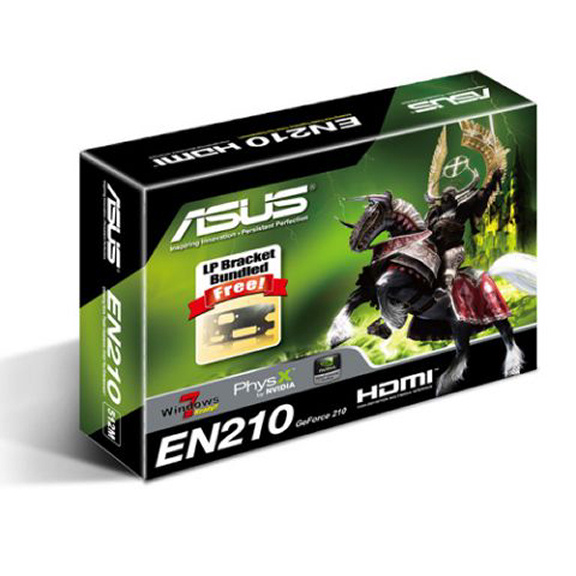
ASUS EN210 GeForce
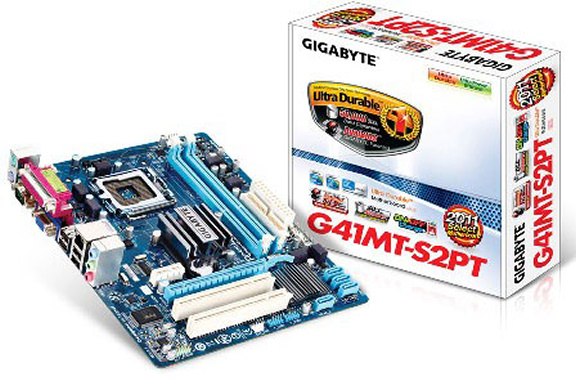
Gigabyte G41MT-S2PT Motherboard
Other products sponsored include a memory card reader for the case, a 250gb seagate barracuda sata2 hard drive and an LG CD/DVD rewriter.
As the name of the project suggests, I am aiming for making the whole computer passive, i.e. no fans, which is why I´ve gone for the ASUS 210 low profile silent GPU, and the celeron intel cpu, as it´s a low end basic cpu, it should be the easiest socket 775 cpu to cool without fans, just a heatsink and decent thermal paste. Other products I´ve acquired today for this project are:
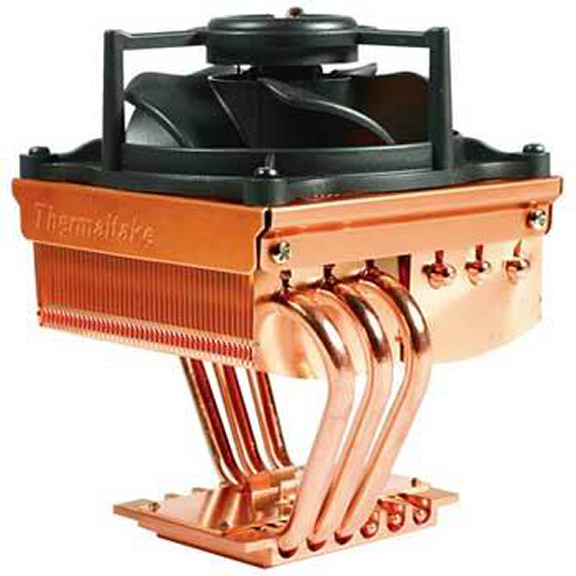
Thermaltake Mini-Typhoon CPU Cooler
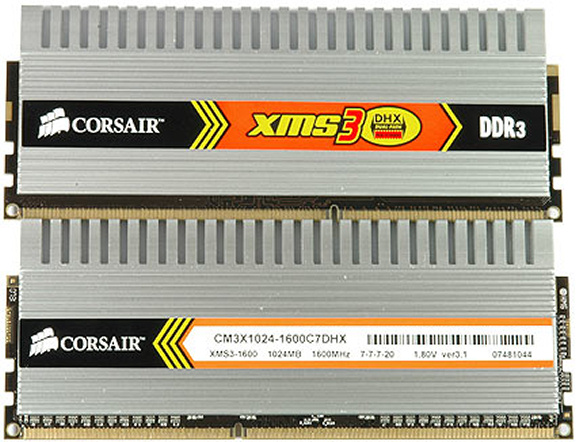
2x2Gb Corsair XMS3 1600Mhz (I know this mobo supports up to 1333 but its fine, it will help keep the ram cool to underclock it plus I got a simply great deal on them).
Let´s start then.
1st Day - Saturday 26-11-2011
So I´ve done a quick bench-test to make sure all the hardware is working fine and in deed, no problems whatsoever.
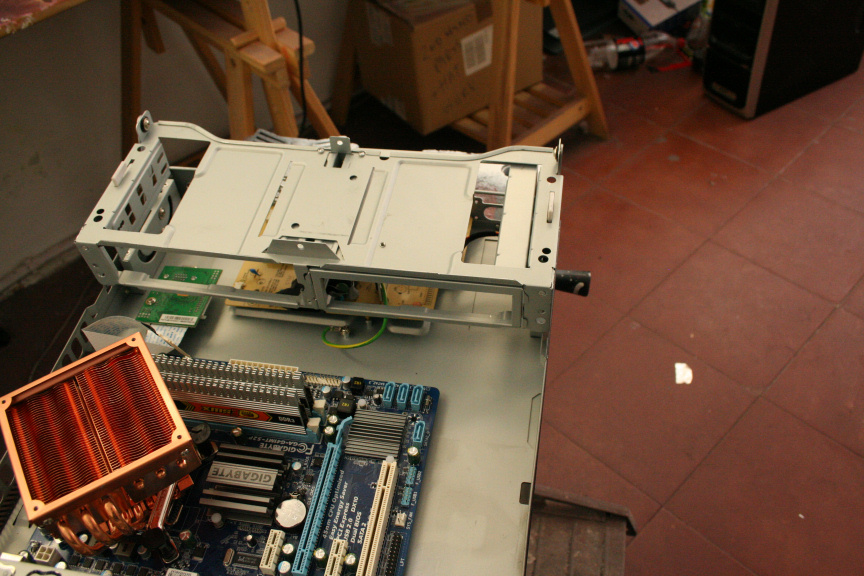
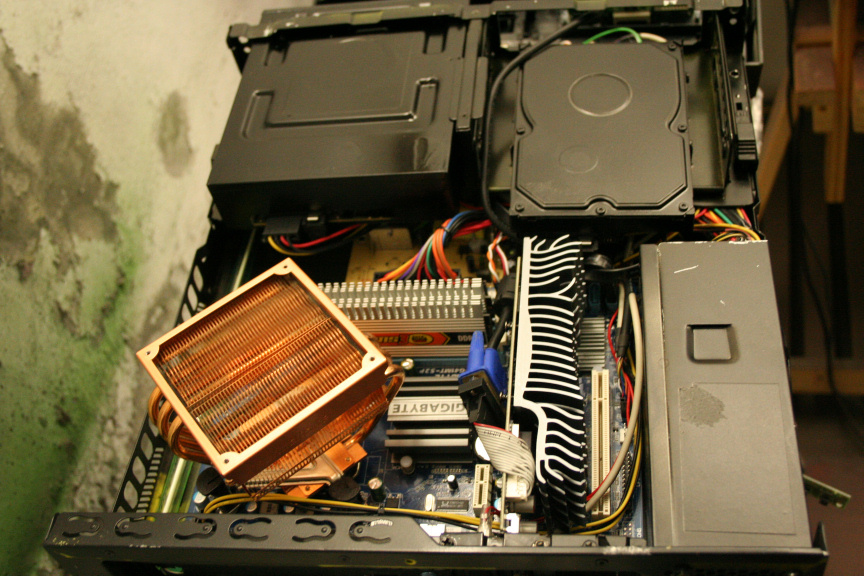
Because the B-Move Slim II is a low profile m-atx case I pressume meant for an HTPC, most aftermarket heatsinks will not fit, but I can´t use the stock intel heatsink because it´s cooling power is virtually non-existant without a fan. So I´ve gone for the thermaltake mini-typhoon as I got a great deal on it and it has a decent copper surface that should keep the cpu cool enough without a fan. So I mounted it with Noctua NX-1 thermalpaste, and went on to do some temp testing without a mounted fan. On idle I get 54c, on stress testing, it doesn´t go over 76c now, this are high temps for such a cpu, but remember it´s being passive cooled and the temps are within safe boundaries so I can check that off the list.
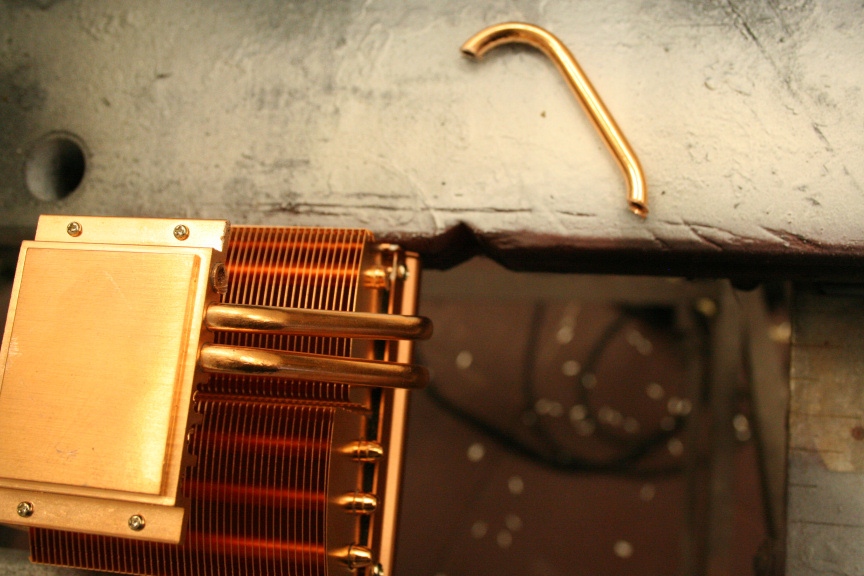
Again because the case is low profile, the cooler will not fit even without a fan, I knew this, hell, I wanted this to happen so I could cut a hole on the side of the case to expose the copper which will add to the final look, if any of you have seen my original Fallout Cause, you´ll know exactly what I mean : )
So, 1st, let´s cut the hole:
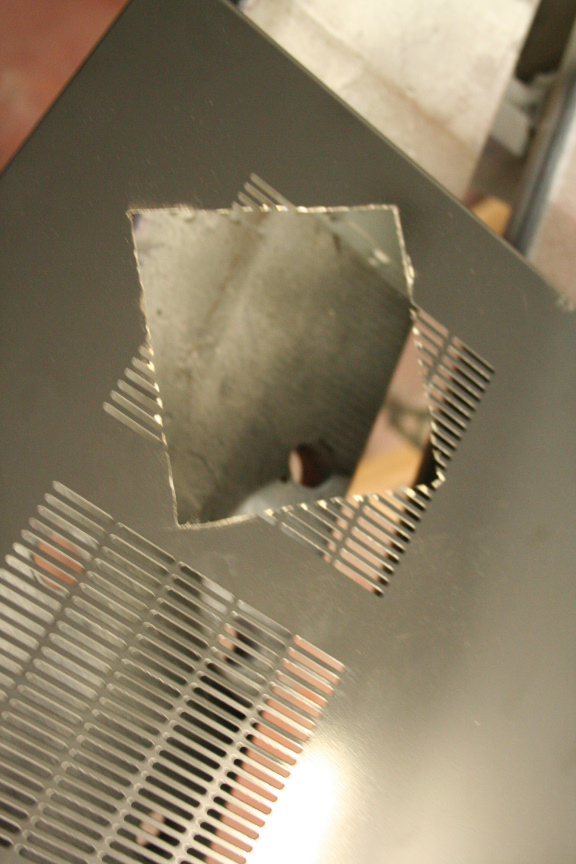
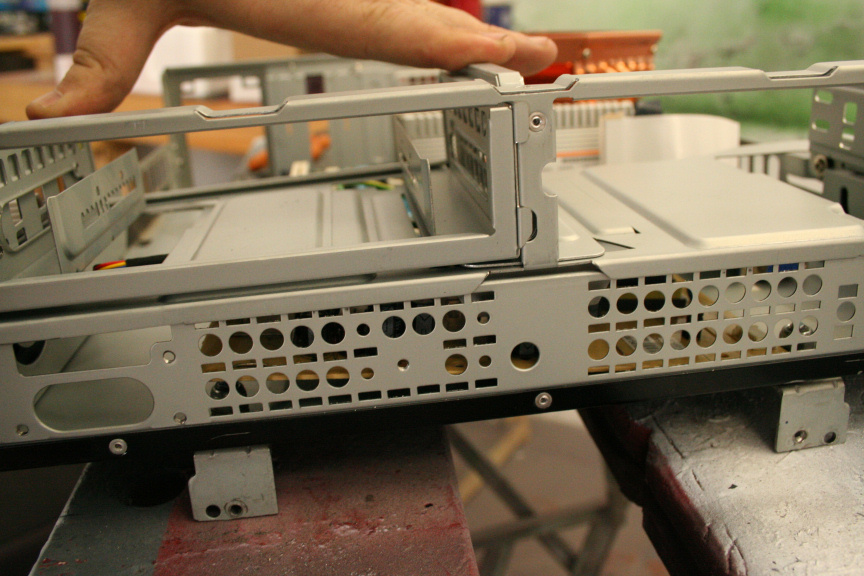
Now to test it on the case:
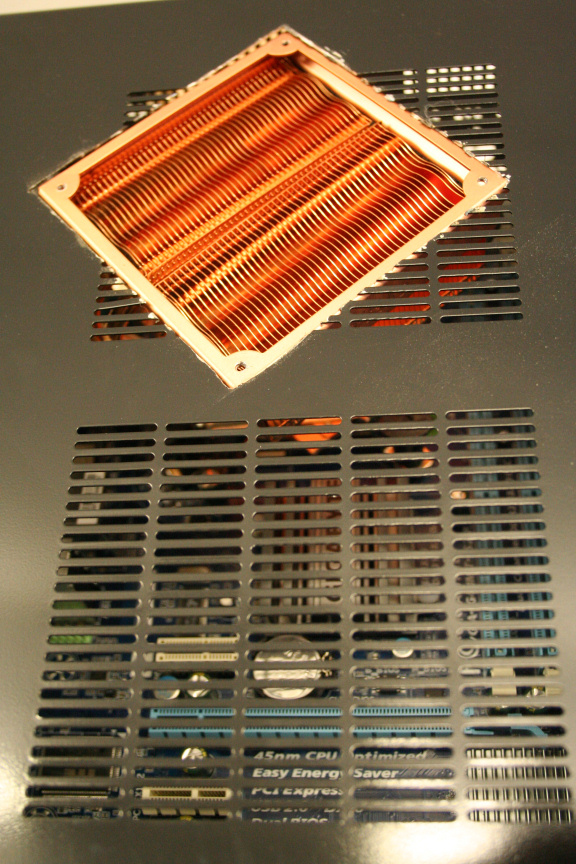
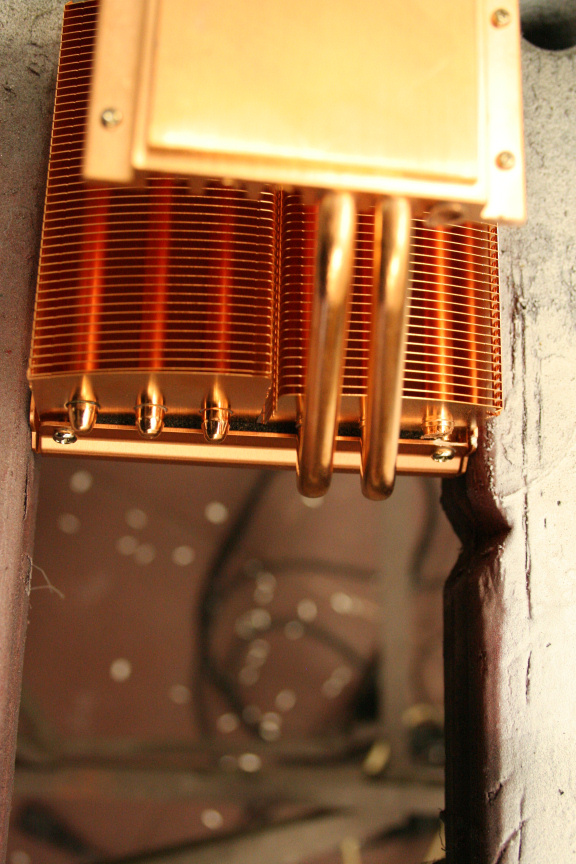
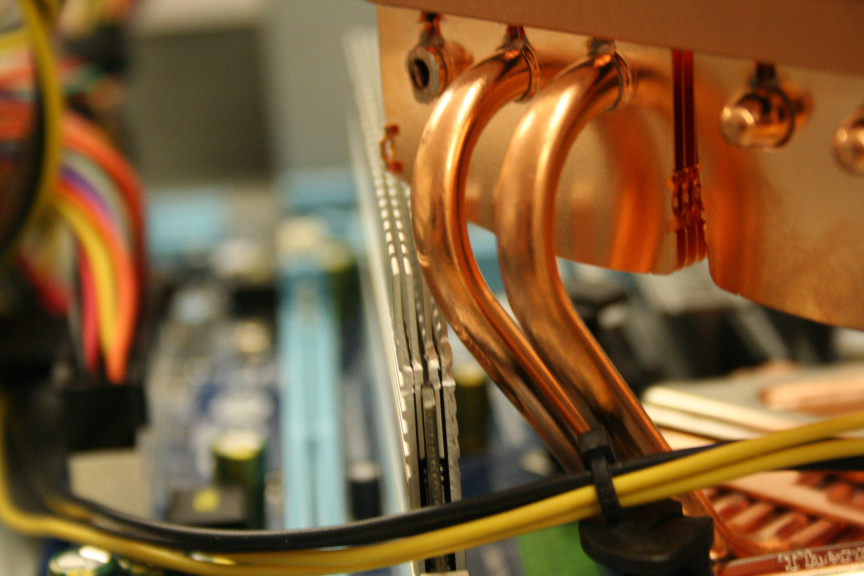
Very nice fit! next issue, the cpu cooler´s mounting possition means that the ram doesn´t fit because of it´s cooler, thing is, I like the cooler and rather not have to shave the trimmings off, so, did some measurements, and it would seem cutting off one of the cpu cooler´s pipes is the way to go, so that´s what I did:
Modding Portfolio
Neonit Customs
This is the third and final mod of the season for me. I am currently waiting for my philips ambx to arrive for my "AIO AL" (a.k.a. "Nameless" mod also posted on here) and to get my hands dirty on finishing the remake of the horns and other details on "Diabolo" (also posted on here). All three will be on show at the MLP event in Murcia, Spain from the 6th to the 11th of December.
Fallout Cause SP (Slim & Passive) is the succesor to my fav mod of my own creation "Fallout Cause", it was just a paintjob yet it was before I got in to making worklogs and I´ve learnt so much since then that I want to do something new in the same style as FC was.
About the conditions, maybe some of you remember my previous "Mod in a Week" project (a.k.a. Acid Burn), the conditions are the same, Start to Finish happens within a week, starting to day, Saturday 26-11-11 so it will be finished by Saturday the 3rd of December as the latest.
All products needed have to be bought/ordered and received within this period. This of course puts limitations on what I can use but that´s also part of the fun in this kind of project.
I chose to start today as the products from the sponsors for this project arrived.
Informatica Outlets is simply the must go to website in Spain for great deals on hardware and all needed components to build a PC. So thank you very much Informaticaoutlets.com for your sponsorship on this project!
The products sponsored for this project are:
B-Move Slim II M-ATX low profile case
Intel Celeron Dual Core E3400
ASUS EN210 GeForce
Gigabyte G41MT-S2PT Motherboard
Other products sponsored include a memory card reader for the case, a 250gb seagate barracuda sata2 hard drive and an LG CD/DVD rewriter.
As the name of the project suggests, I am aiming for making the whole computer passive, i.e. no fans, which is why I´ve gone for the ASUS 210 low profile silent GPU, and the celeron intel cpu, as it´s a low end basic cpu, it should be the easiest socket 775 cpu to cool without fans, just a heatsink and decent thermal paste. Other products I´ve acquired today for this project are:
Thermaltake Mini-Typhoon CPU Cooler
2x2Gb Corsair XMS3 1600Mhz (I know this mobo supports up to 1333 but its fine, it will help keep the ram cool to underclock it plus I got a simply great deal on them).
Let´s start then.
1st Day - Saturday 26-11-2011
So I´ve done a quick bench-test to make sure all the hardware is working fine and in deed, no problems whatsoever.
Because the B-Move Slim II is a low profile m-atx case I pressume meant for an HTPC, most aftermarket heatsinks will not fit, but I can´t use the stock intel heatsink because it´s cooling power is virtually non-existant without a fan. So I´ve gone for the thermaltake mini-typhoon as I got a great deal on it and it has a decent copper surface that should keep the cpu cool enough without a fan. So I mounted it with Noctua NX-1 thermalpaste, and went on to do some temp testing without a mounted fan. On idle I get 54c, on stress testing, it doesn´t go over 76c now, this are high temps for such a cpu, but remember it´s being passive cooled and the temps are within safe boundaries so I can check that off the list.
Again because the case is low profile, the cooler will not fit even without a fan, I knew this, hell, I wanted this to happen so I could cut a hole on the side of the case to expose the copper which will add to the final look, if any of you have seen my original Fallout Cause, you´ll know exactly what I mean : )
So, 1st, let´s cut the hole:
Now to test it on the case:
Very nice fit! next issue, the cpu cooler´s mounting possition means that the ram doesn´t fit because of it´s cooler, thing is, I like the cooler and rather not have to shave the trimmings off, so, did some measurements, and it would seem cutting off one of the cpu cooler´s pipes is the way to go, so that´s what I did:
Neonit Customs
8,811 Views
11 REPLIES 11
Options
- Mark as New
- Bookmark
- Subscribe
- Mute
- Subscribe to RSS Feed
- Permalink
06-12-2012 03:14 AM
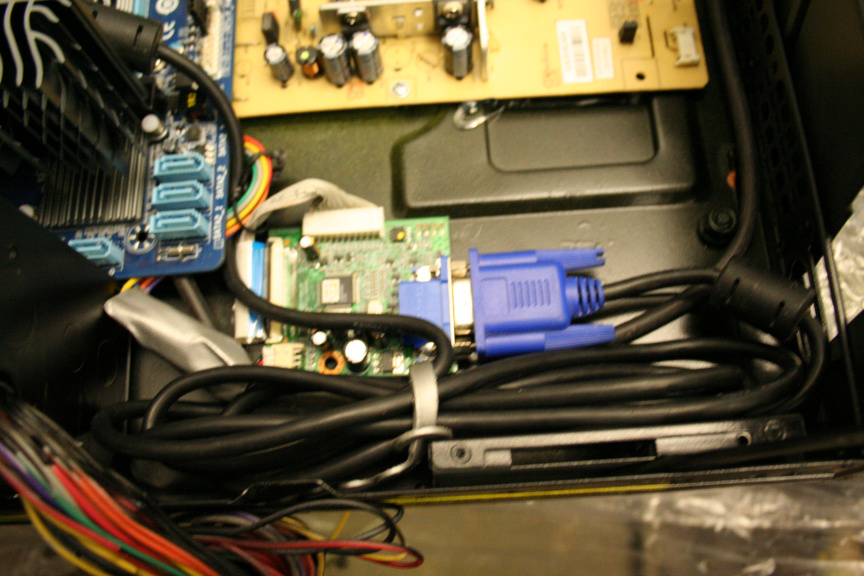
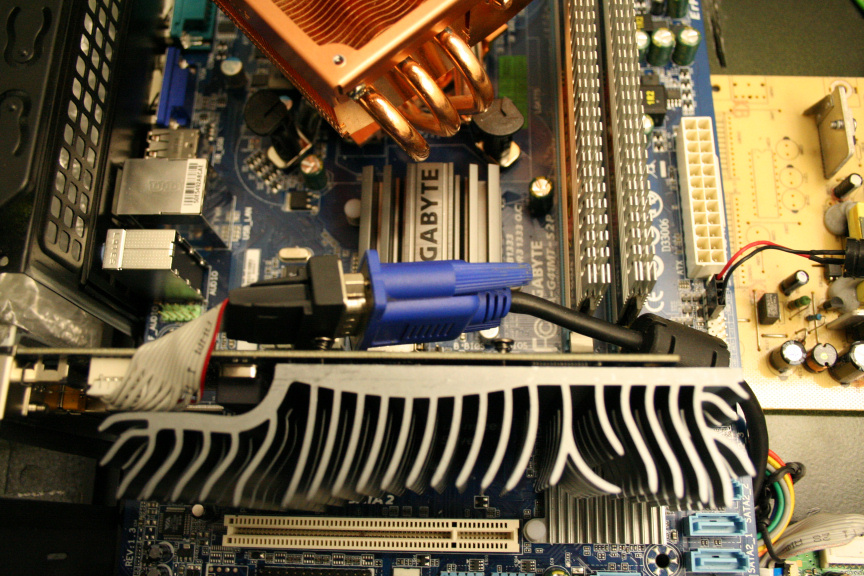
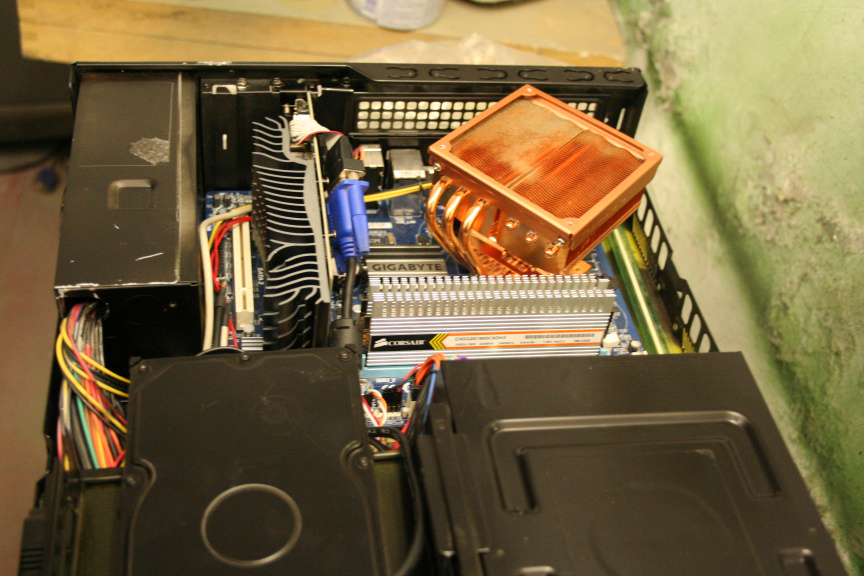
Now for mounting tests:
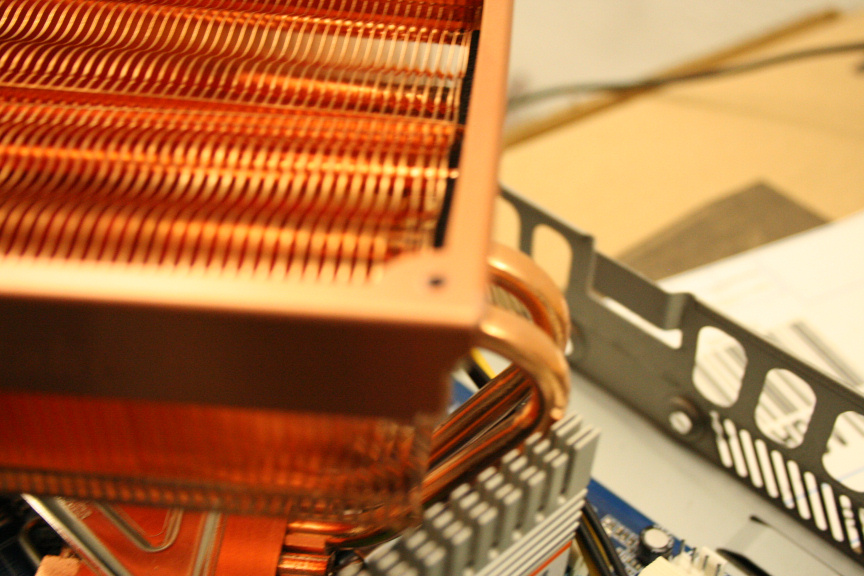
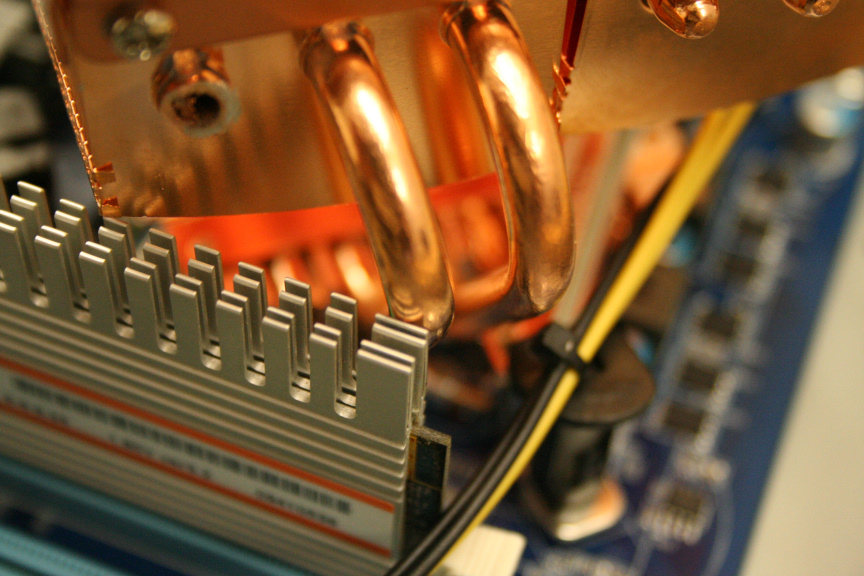
Now as you can see it fits fine but its in contact with the ram stick by very little, my question is, would this affect anything in any way? would it transfer heat to the ram heatsink or the other way round? Should I trim the ram heatsink?
That´s it for today, tomorrow I prep further modification to the case, I am planning on openings and signs of aging and damage caused by rust and the extreme conditions of a fallout post-apocalyptic wasteland.
Thanks for reading! : )
///
2nd Day - Sunday 27-11-11
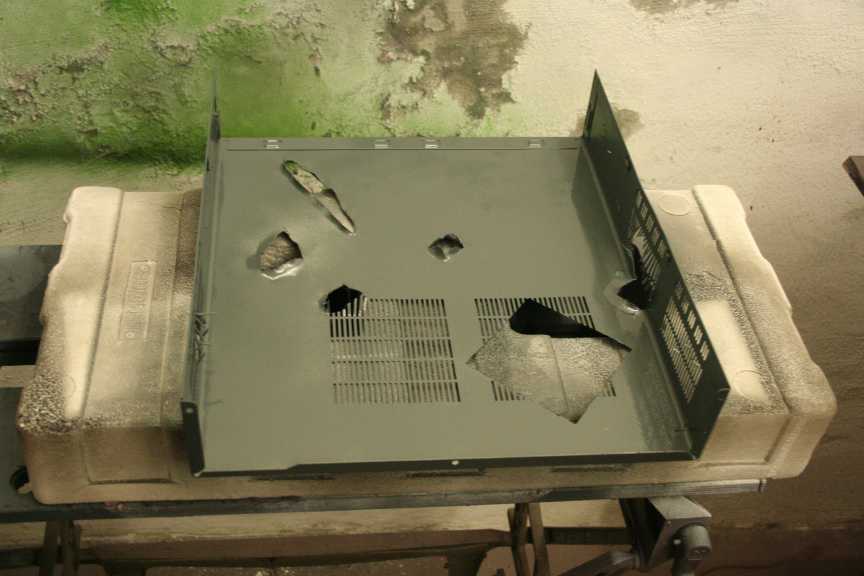
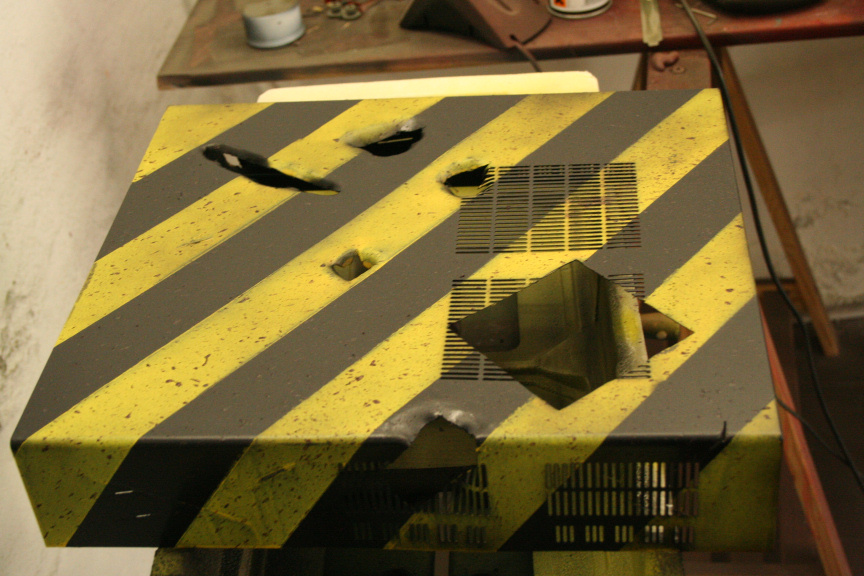
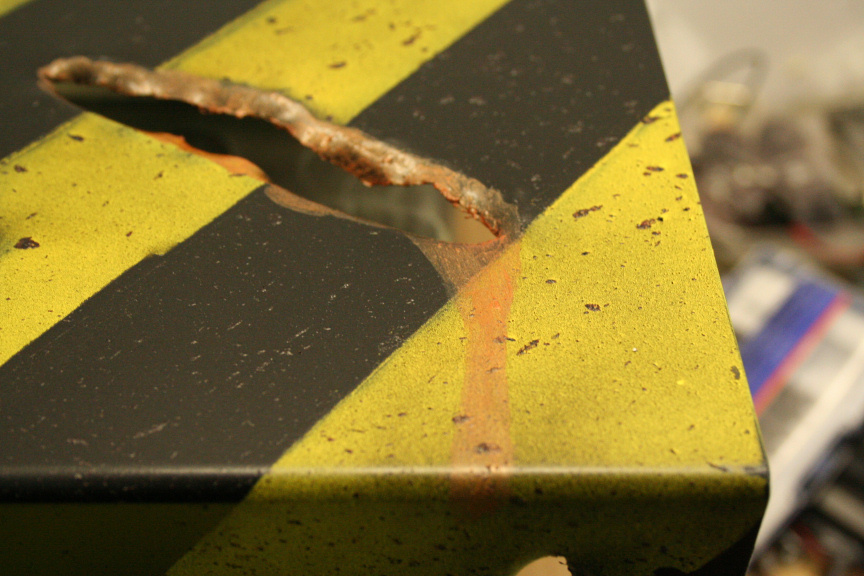
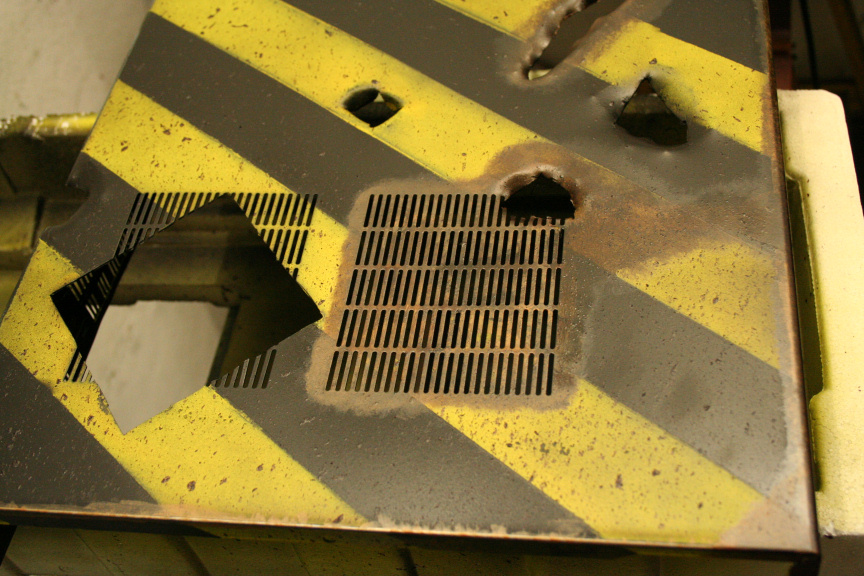
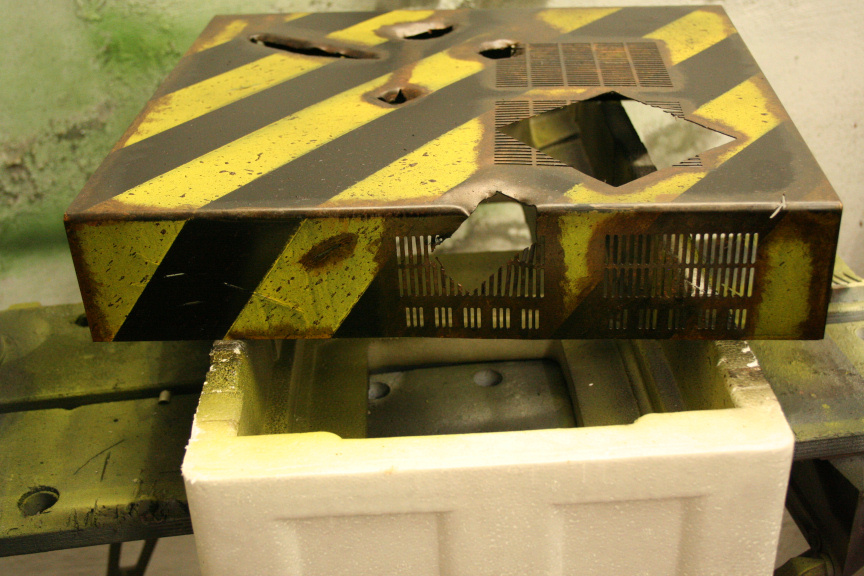
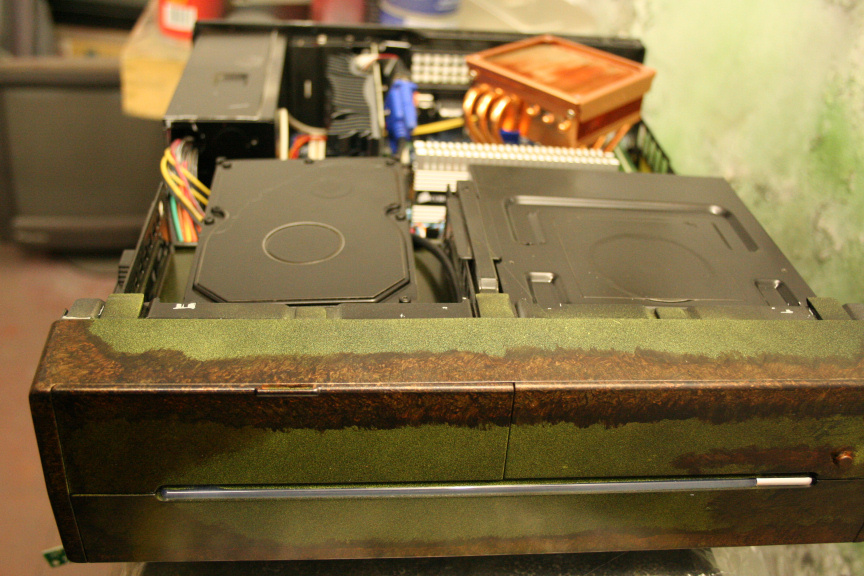
Today is destruction day, I will make all the destroyed sections of the case to give it that fallout rusted out/cannon´d out look. When I get to the painting part I will aid this look by giving a rust look to all the edges and adding epoxy to simulate edges fusing togueter due to rust (i.e. the grills).
First thing however, is to trim that last lip of the memory module heatsink that´s driving me mad due to it being in contact with the cpu cooler, so here we go:

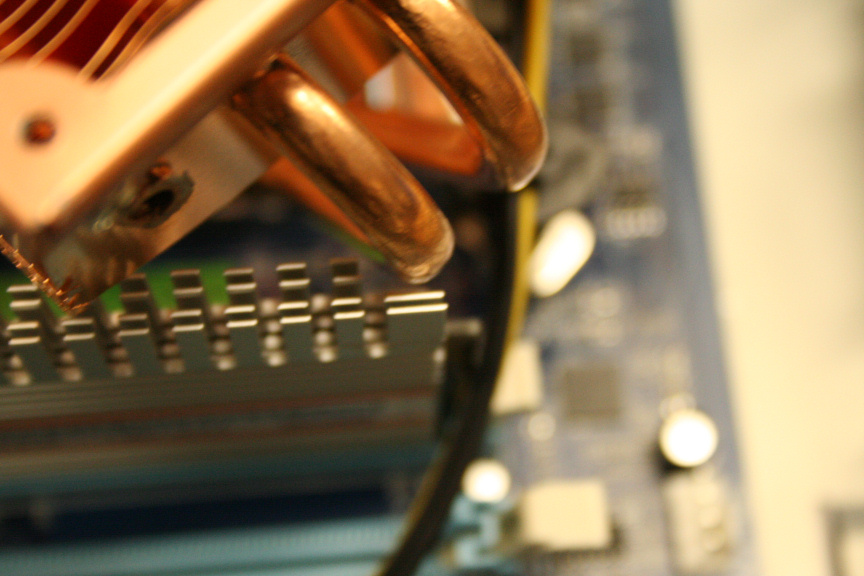
Much better, it´s barely noticeable and it is no longer in contact with the cpu heatsink.
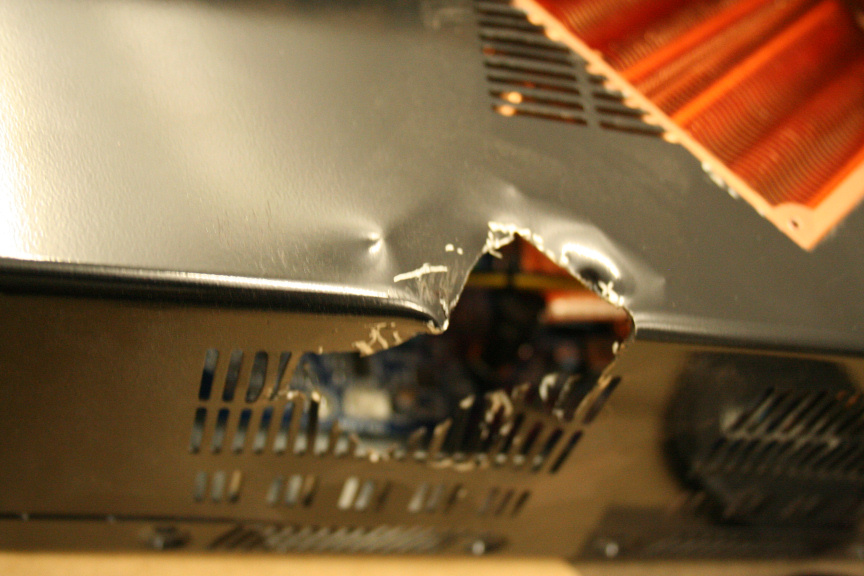
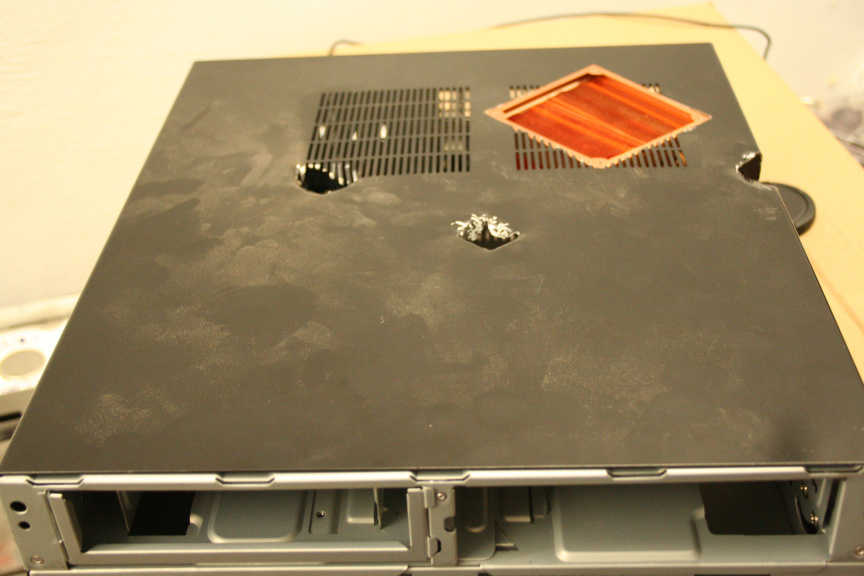
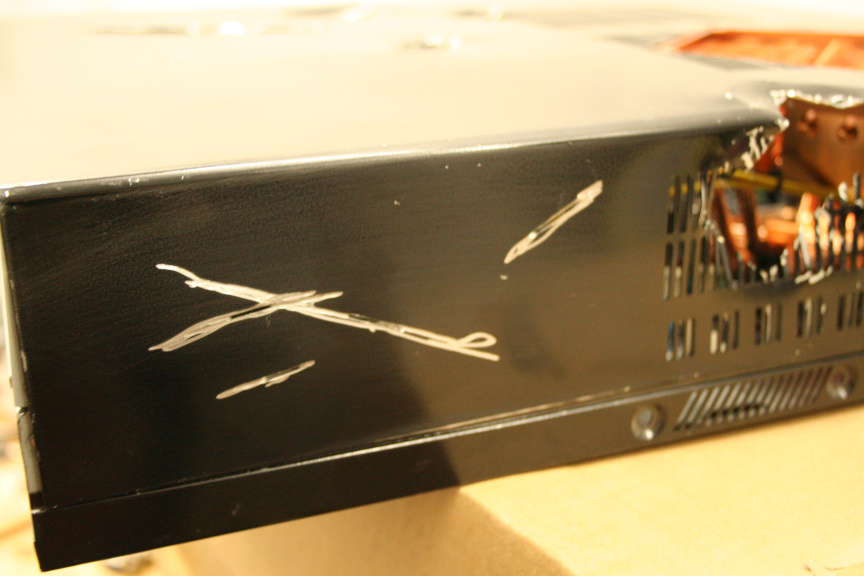
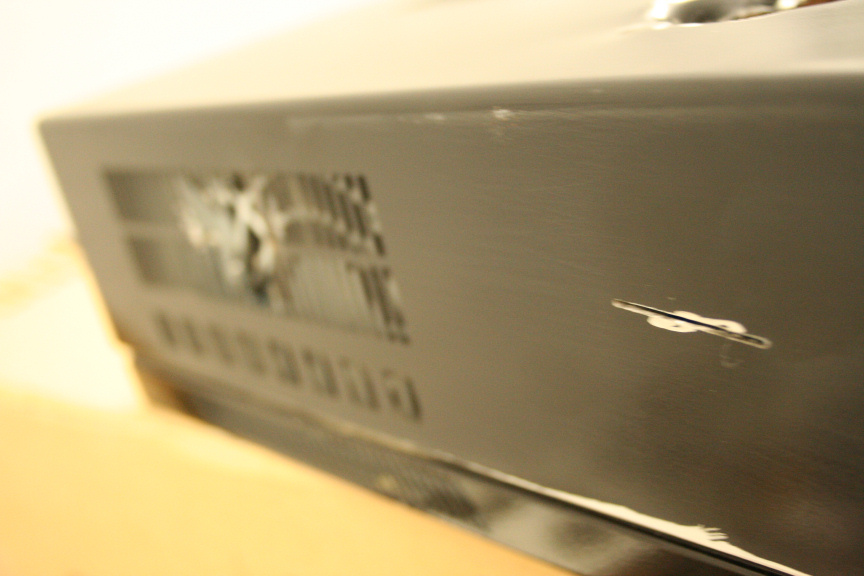
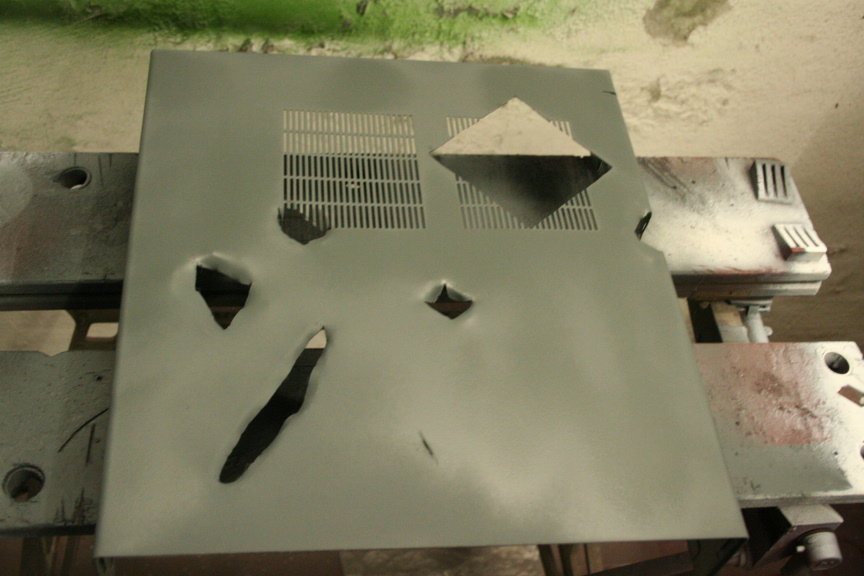
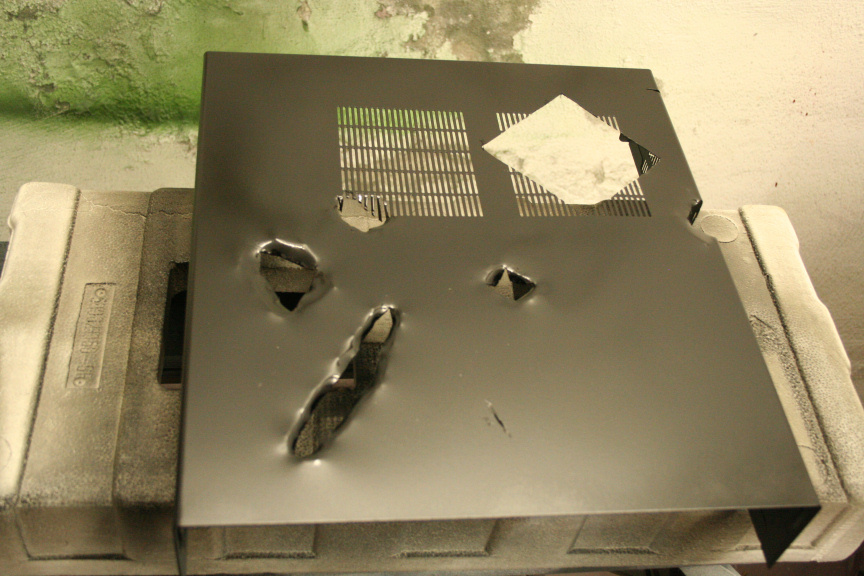
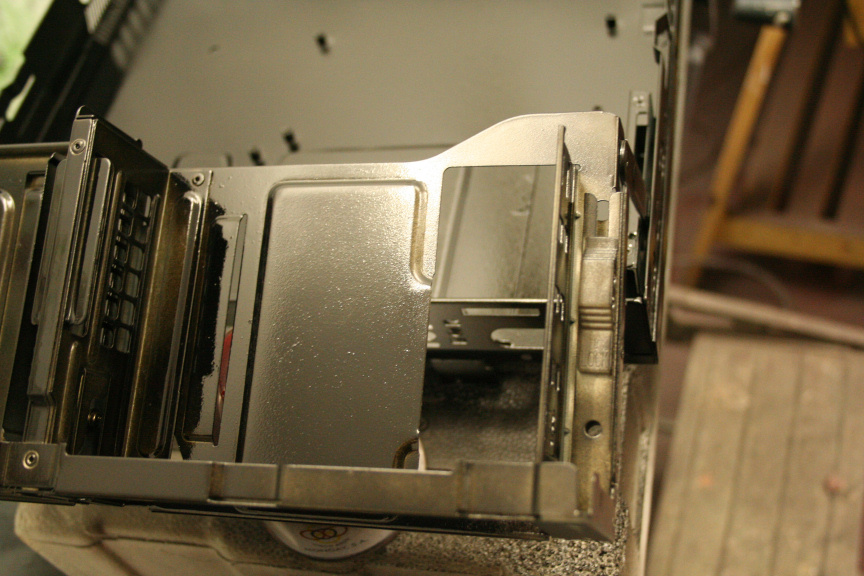
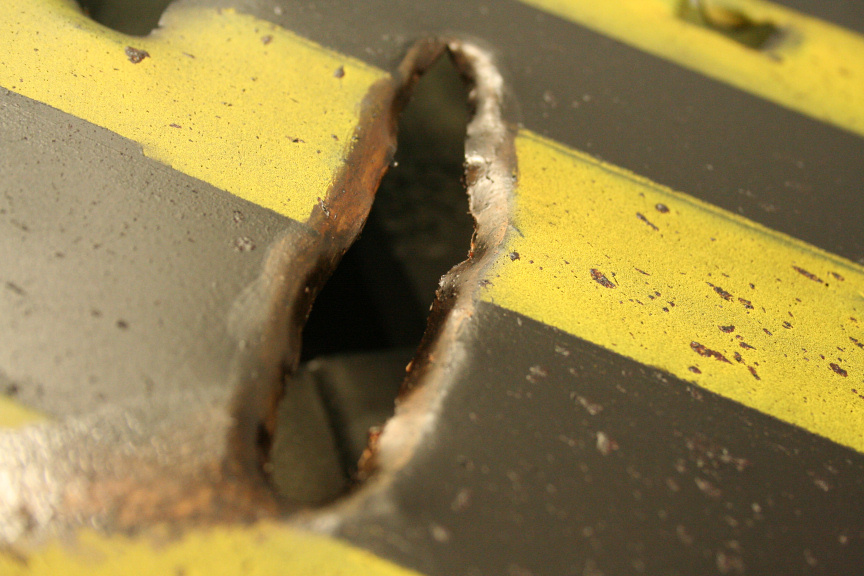
Now it´s dremel time, I have to say I´m surprised at how thick and strong the metal is on this case, specially having in mind it´s a low end case so it´s mostly made out of scrap metal as they tend to do, I went through 2 heavy duty dremel discs in order to complete all the cutting. Once done I plied them backwards for two reasons, first, be it bullets, blunt tools or other, the impact would always be towards the case so it makes sense it´s pushed inwards, the second reason being to prevent sharp edges on the outside.
Here we go:
Neonit Customs
Options
- Mark as New
- Bookmark
- Subscribe
- Mute
- Subscribe to RSS Feed
- Permalink
06-12-2012 03:14 AM
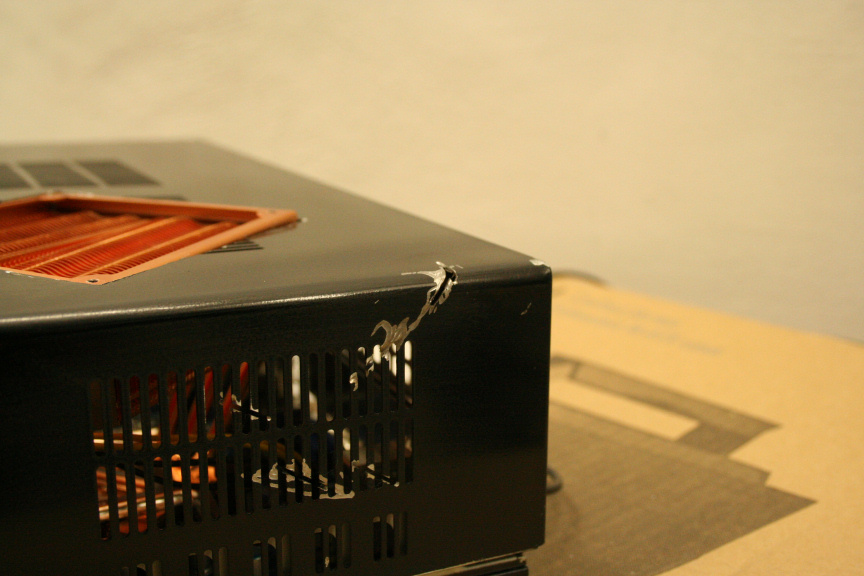

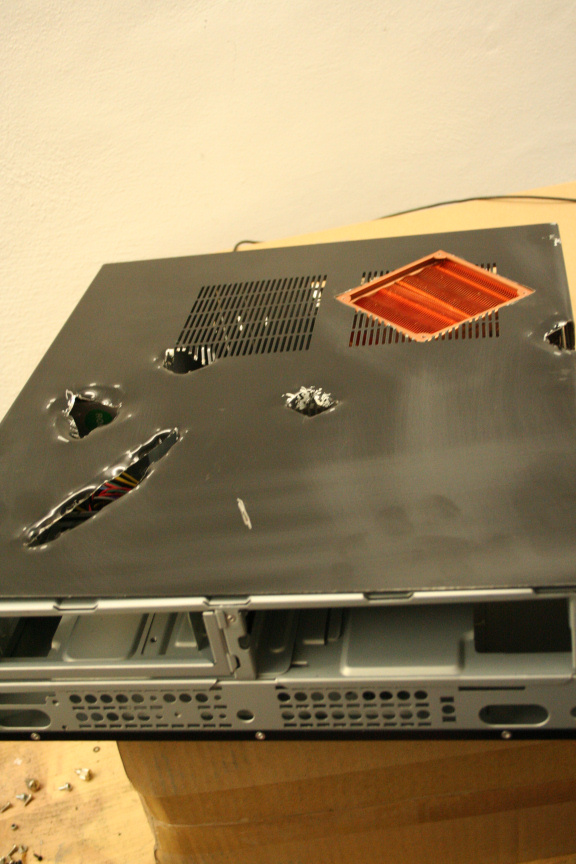
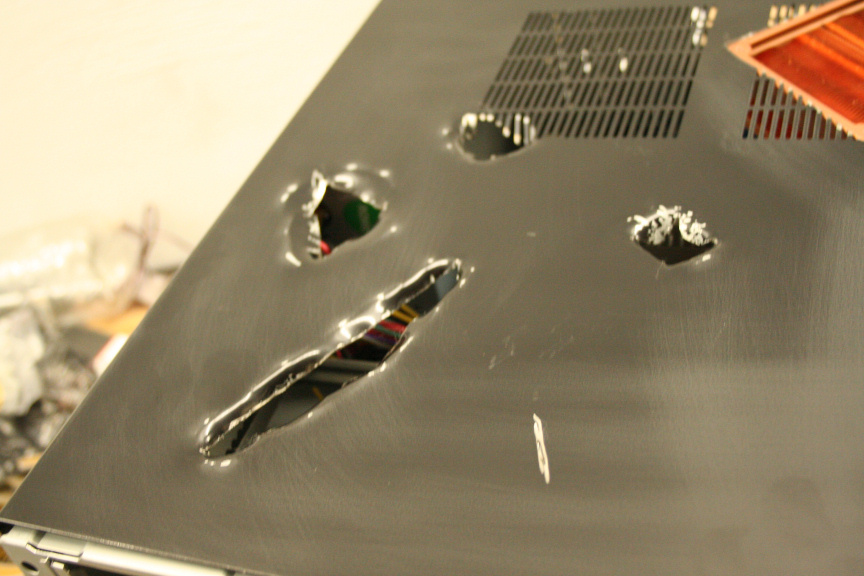
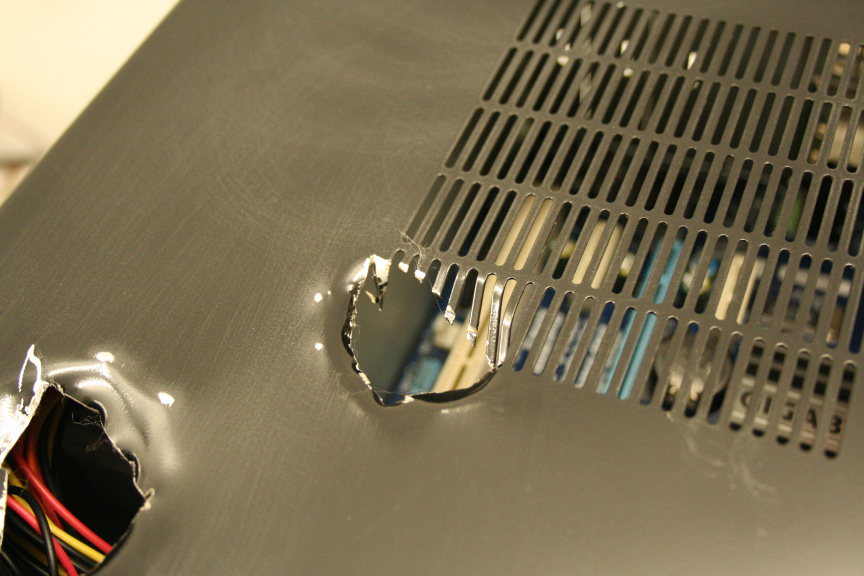
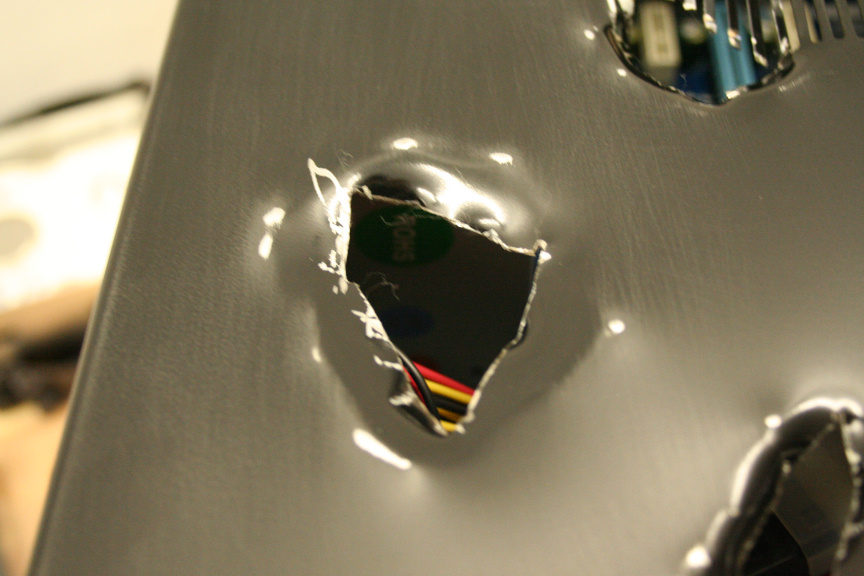
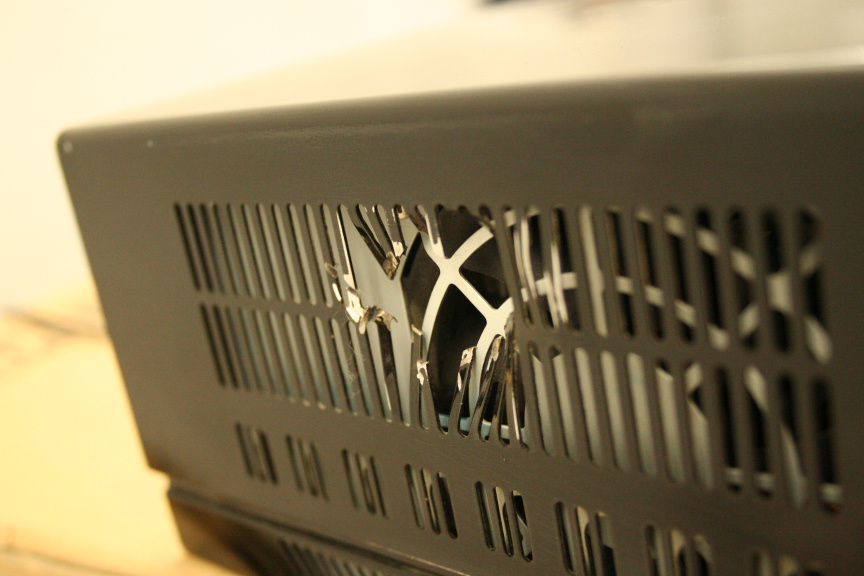
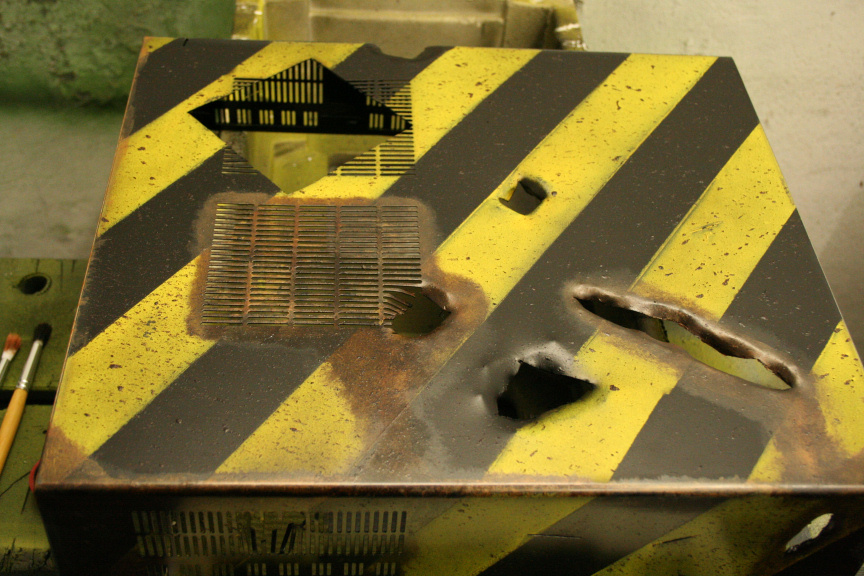
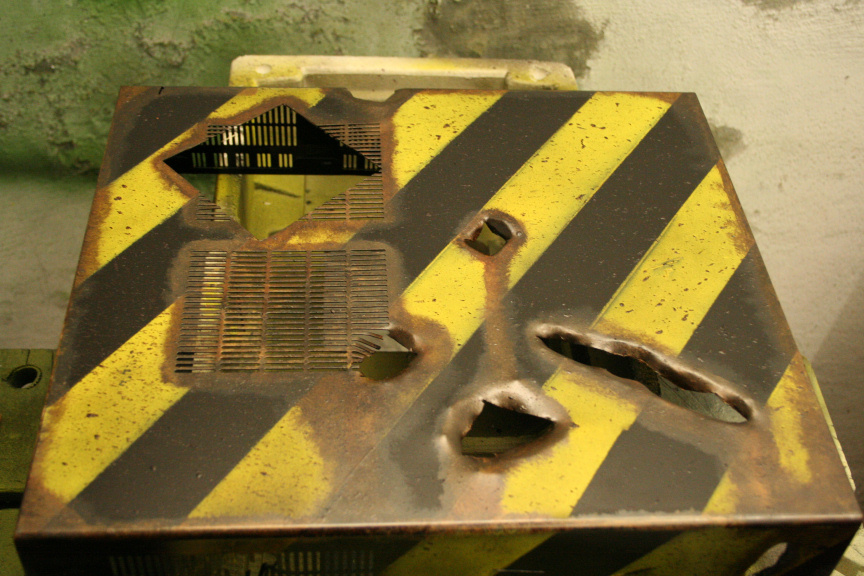
And that about does it, I though of adding more as certain parts of the case looked to "clean" if you know what I mean, but I can always add imperfections and artificial damages when doing the paintjob and it´s effects. I think my fav one is the chunk missing from the side that lets you look right in to the cpu heatsink.
Tomorrow I will add similar effects on a small scale to the front of the case obviously very carefully, don´t want to brake any of the hooks that attach it to the rest of the case.
But for today that´s it. Thank you for reading!
//
3rd Day - Monday 28-11-11 - Update 1
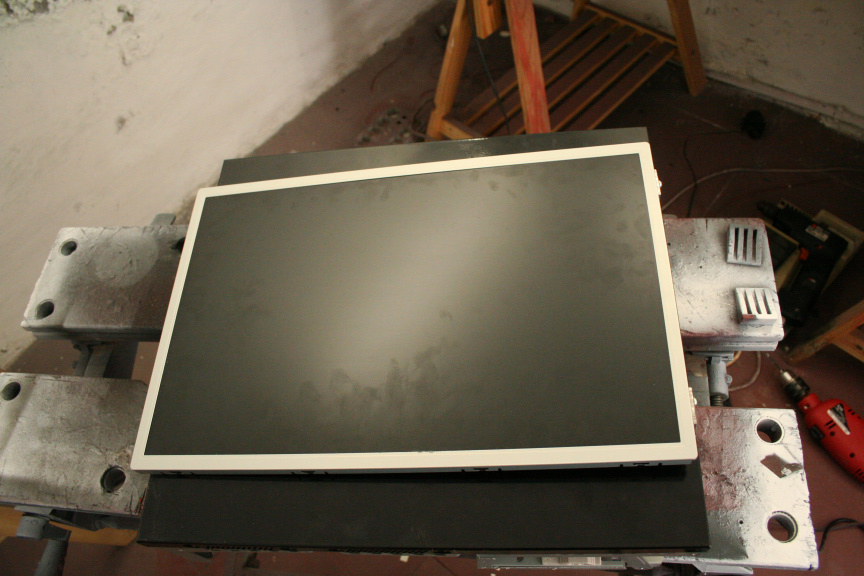
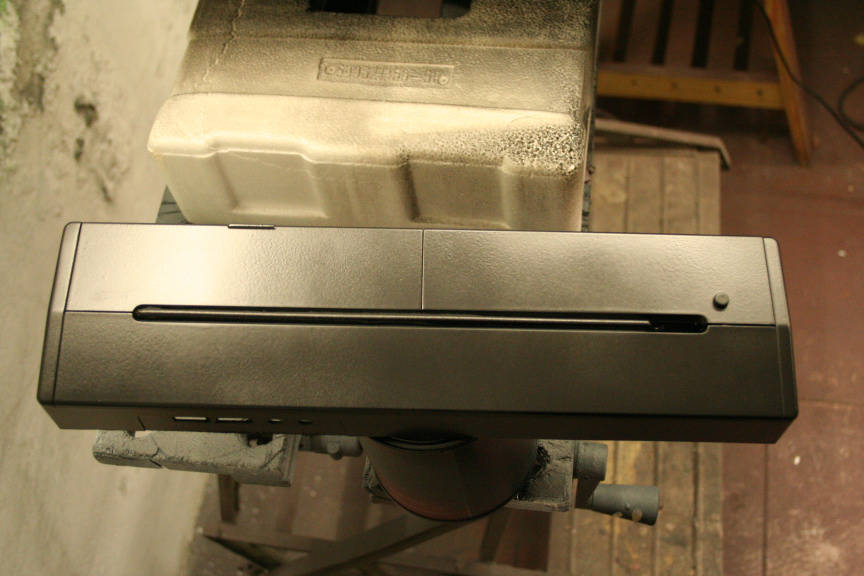
Last night while I was in bed I started thinking about the things I should do today and if I should paint the philips ambx that arrived yesterday evening for the AIO AL project or leave that till I finished this one this saturday. While having the AIO AL project in my mind I though, hmm I wander if I could add a screen to this project, I know I cant integrate it on the side because there´s no extra sheet of metal, pretty much the side is what the mobo is attached too. I know I can´t use fiberglass to attach it to it because while it would look decent, it wouldn´t have air breathing, and it would just overheat, not to mention adding heat to the sheet and therefore to the mobo and cpu, so that was a no go, figured I´d scrap that idea and I went to sleep. This morning however while I was looking at the screen and the case it bothered me because I really liked the concept of adding a screen but couldn´t find a way to do it, but I had some spare time so I figured I´d take the screen apart and see if an idea popped in to my head, as I removed the bezel and platform I clicked, mounts! it´s so obvious, why on earth didn´t I think of that before!
So I took some measurements, did some screen hw mounting within the tower checked cable lenghts, everything checks out. So started to process.
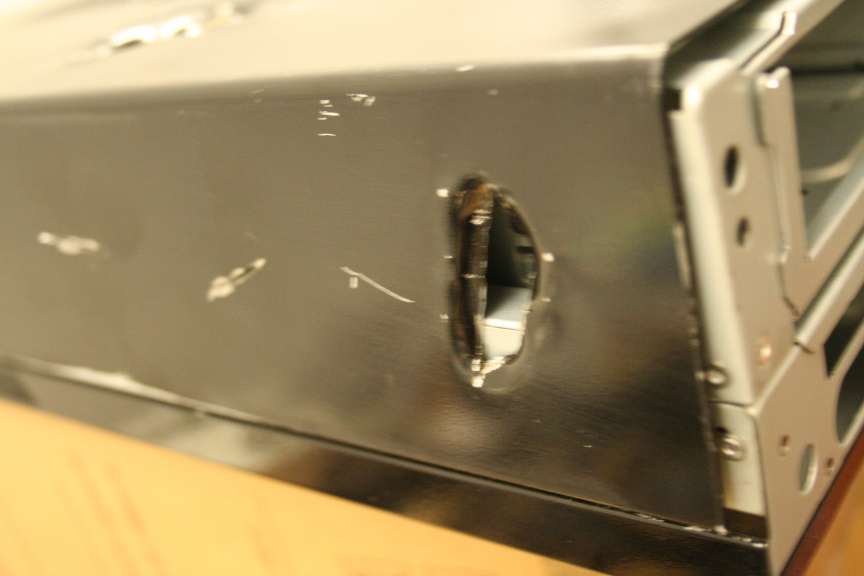
First thing, a straight cut wide enough to pass cables through and use them as a grip for the mounting:
Neonit Customs
Options
- Mark as New
- Bookmark
- Subscribe
- Mute
- Subscribe to RSS Feed
- Permalink
06-12-2012 03:15 AM
Now it was time to make the hole big enough for the bolt to go through, so figured I´d use the dremel to make a small starting hole, took forever to go through that, I hadn´t realised just how thick that sheet of metal was. Once done I took a drill, with the right drillbit on started, took me about 40 minutes to do both holes, mainly because I didn´t want to press to hard so not to go spoil the drillbit, eventually got there and installed the first mount:
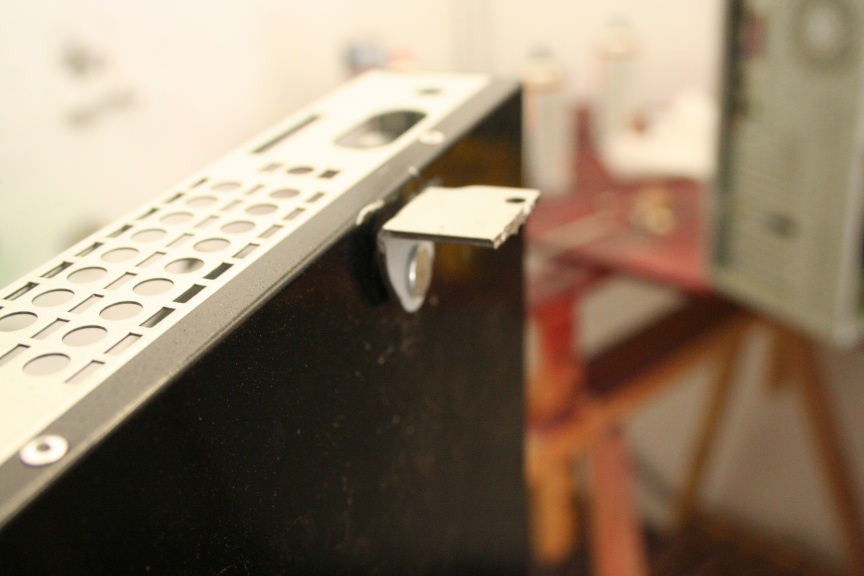
added some washers and tightened it up:
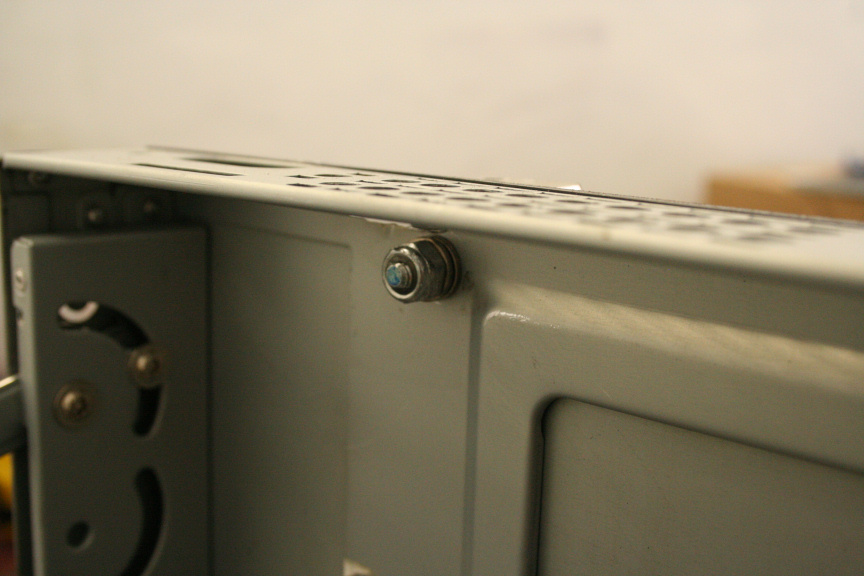
Now the second one and a test mount:
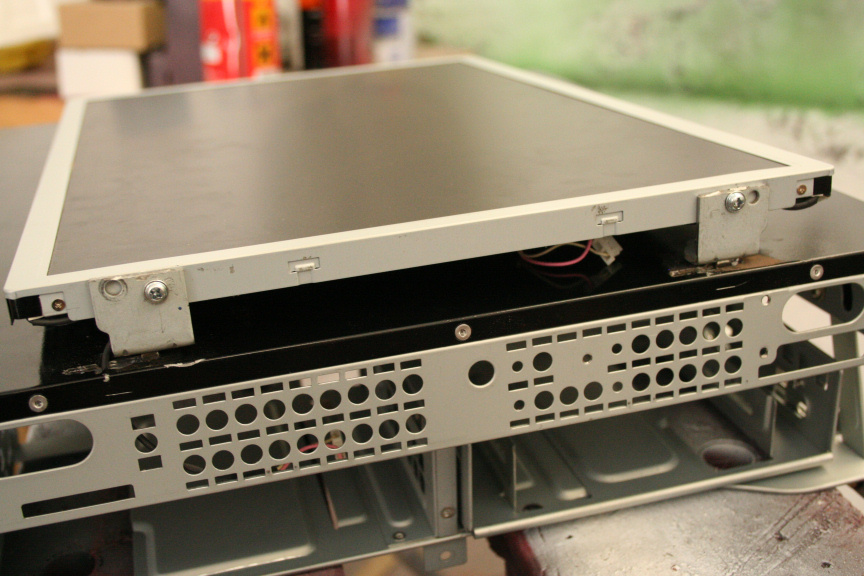
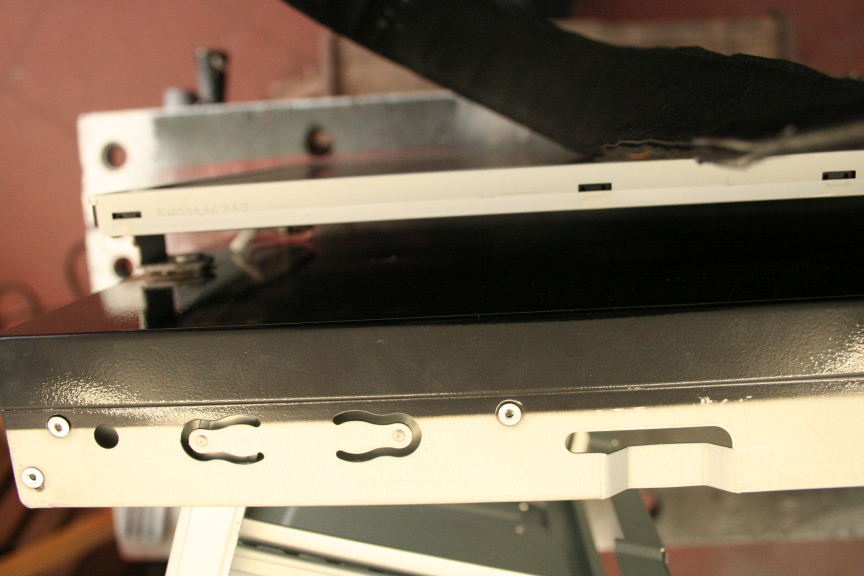
Feels quite solid, I think I will add some feet on the opposite side so no stress is on the screwed in side, so I will look for some later on.
Now for a proper test mount of the screen´s psu and chipset:
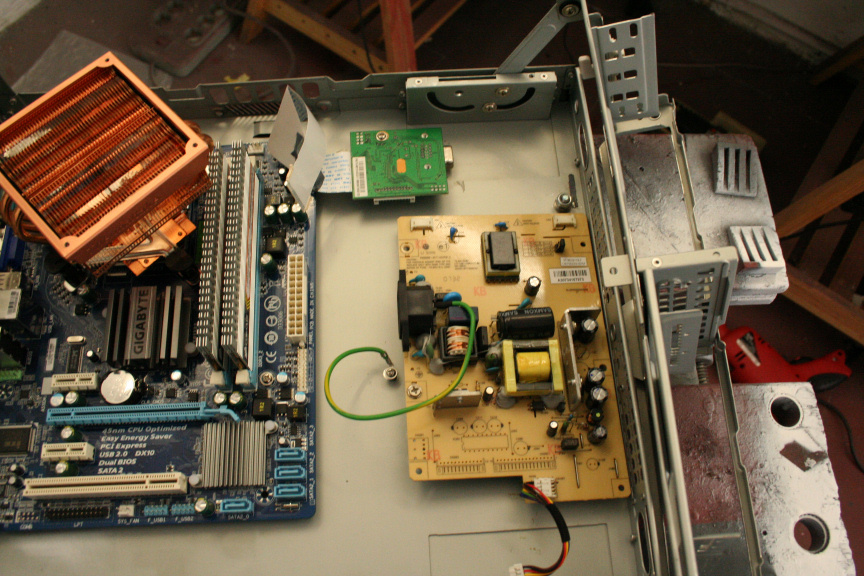
And it fits perfectly:
That´s it for now, I will post a second update later today.
Thanks for reading!
////
3rd Day - Monday 28-11-11 - Update 2
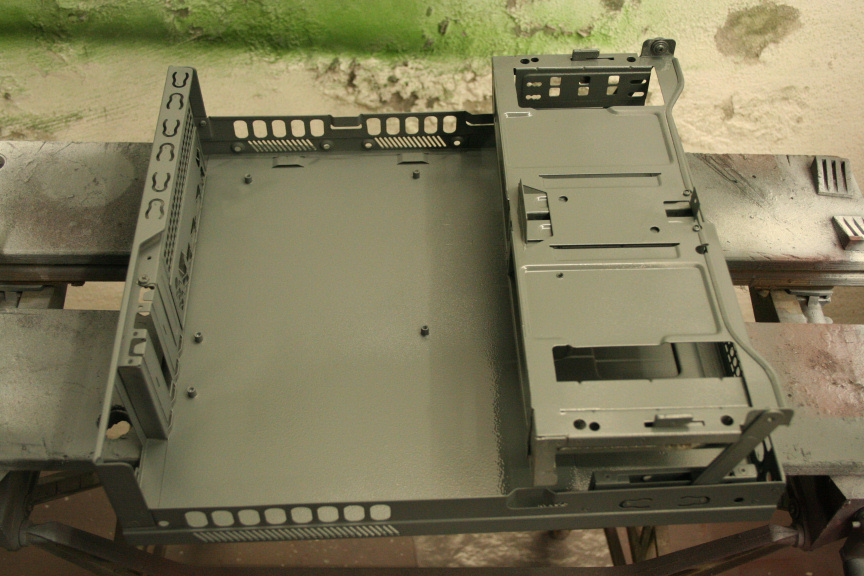
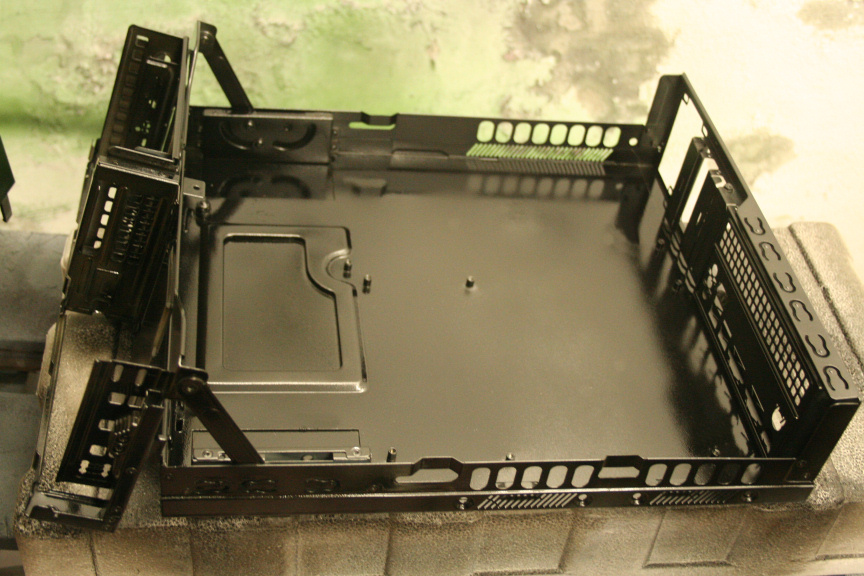
Gave everything a final sand down, cleaned it up and gave it a coat of primer:
Modding Portfolio
Neonit Customs
added some washers and tightened it up:
Now the second one and a test mount:
Feels quite solid, I think I will add some feet on the opposite side so no stress is on the screwed in side, so I will look for some later on.
Now for a proper test mount of the screen´s psu and chipset:
And it fits perfectly:
That´s it for now, I will post a second update later today.
Thanks for reading!
////
3rd Day - Monday 28-11-11 - Update 2
Gave everything a final sand down, cleaned it up and gave it a coat of primer:
Neonit Customs
Options
- Mark as New
- Bookmark
- Subscribe
- Mute
- Subscribe to RSS Feed
- Permalink
06-12-2012 03:16 AM
For some reason the image of the primed front part of the case was corrupted but eh, nothing important.
After waiting drying time I applied 2 coats of glossy black, now I have matt black but I used glossy in order to be able to sand it down so fragments will remain a bit shiny which will add further to that used and thrown about look.
For the devices mounting point since some will be seen through grills or holes I decided to try something new, I watered the paint down more than usual (added an extra part of water) in order to prevent it from being a solid color and included an acrilic brown compound normally used for plastic and metal surfaces that imitate wood (I guess you could call it an artificial wood barnish), I ended up quite liking it!

That´s it for today, tomorrow I will be going down to my local paint supplies shop to acquire the colors that I´ll be using and the rust effect compound.
Thanks for reading!
//
4th Day - Tuesday 29-11-11
Today has been a bit slow, this is because I went to buy the yellow I wanted to use for this, and they didn´t have the exact one I wanted in the usual paint I use. So I bought the tone in a paint I´ve never used, it´s still acrilic and is completely fine and compatible with the primer and lacquer I use, it´s purely it´s water/paint/density rations that are different, no idea why. It has ups and downs, the up is that it´s much thicker than the paint I normally use, meaning two coats is enough for a solid color. The down is that it takes 4-5 times longer to dry, which is fine if you´re doing a solid colour, you just get it over with and leave it overnight to cure. But when you want to add other tones on top like I will be doing, it´s annoying because you waste a lot of time on it being ready for the next coat. But aniway doesn´t really matter. I covered the sections I dont want yellow and started painting.
First Coat:
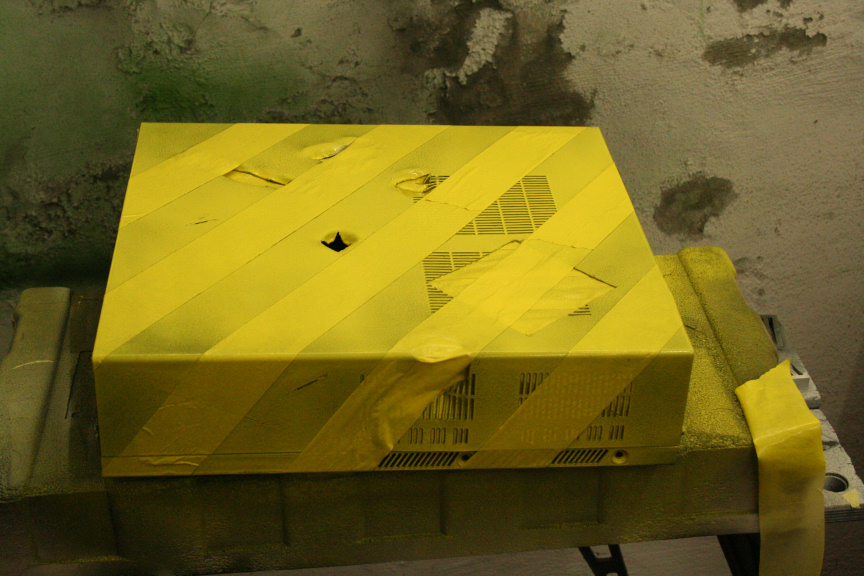
Second and last yellow coat:
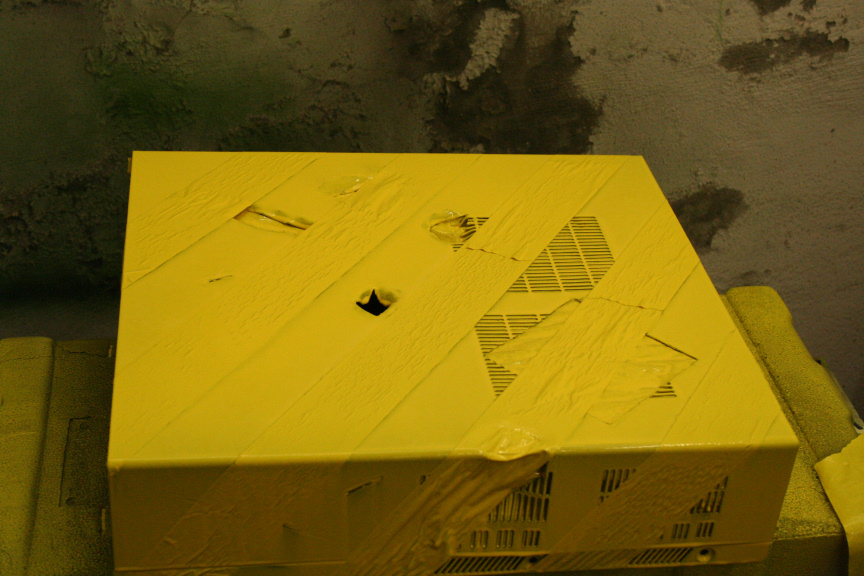
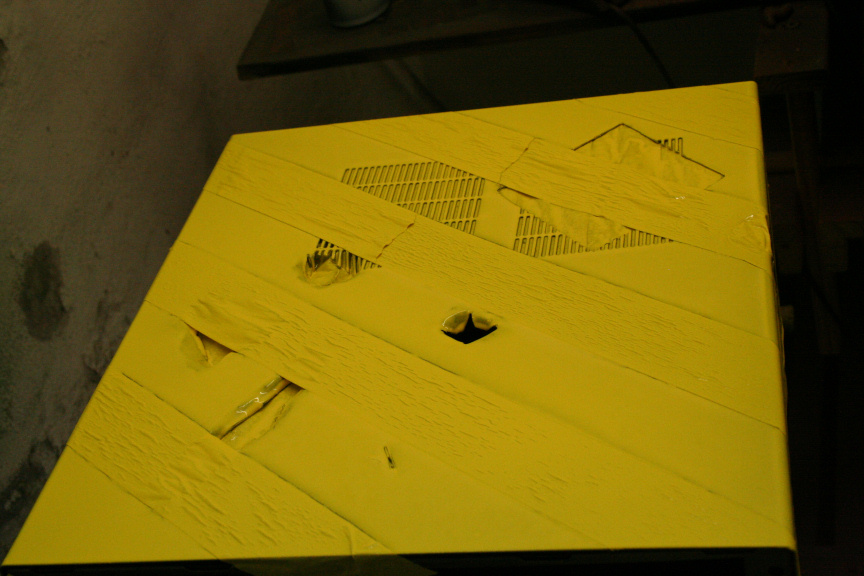
Have to wait till tomorrow but the process will be darkening it with a black paint mist so no area has the same tone, sanding it down first to prep for coating and further down to show usage and deterioration right in to the metal. Once done, rusting effects all over the place, more concentrated obviously where there are openings.
It´s easier to show you than to explain it, but you´ll see tomorrow!
Thanks for reading!
//
5th Day - Wednesday 30-11-11 - Update 1
It´s paint effects day!
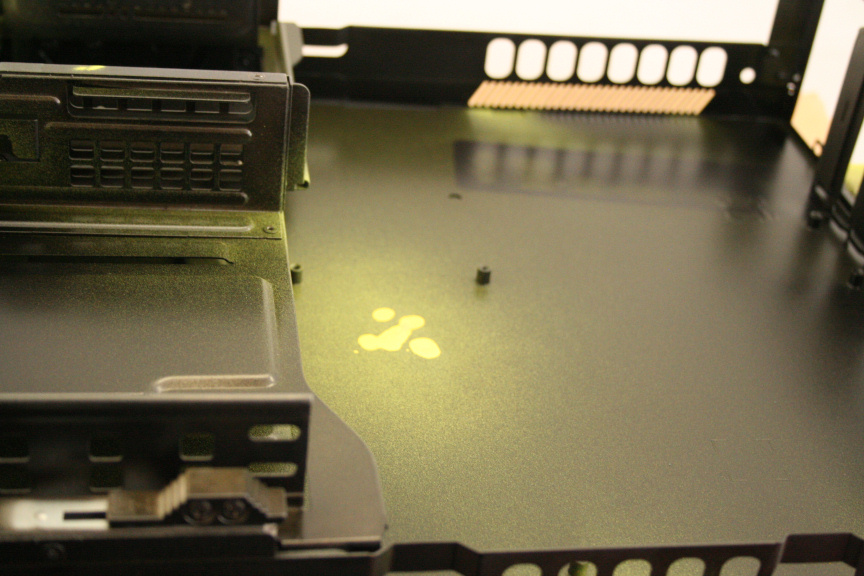
First I took off all the masking tape used to make the lines and I descovered I didn´t totally cover one of the grates so paint leeched through to the inside of the case. At first I was like, easy fix, just repaint the inside, end of that. But as I looked at it further, I kind of like the effect, it gives the inside a bit of a glow, so for now I´m going to keep it:
Neonit Customs
Options
- Mark as New
- Bookmark
- Subscribe
- Mute
- Subscribe to RSS Feed
- Permalink
06-12-2012 03:17 AM
What do you guys think? Keep it? or repaint the inside black as it was originally?
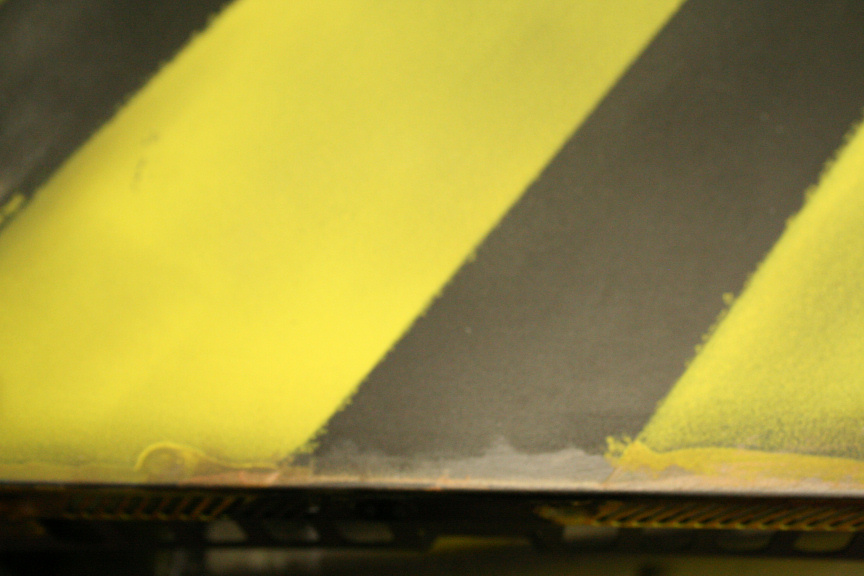
Aniway, now the the important part, here you have the outside with the exterior masking tape removed:
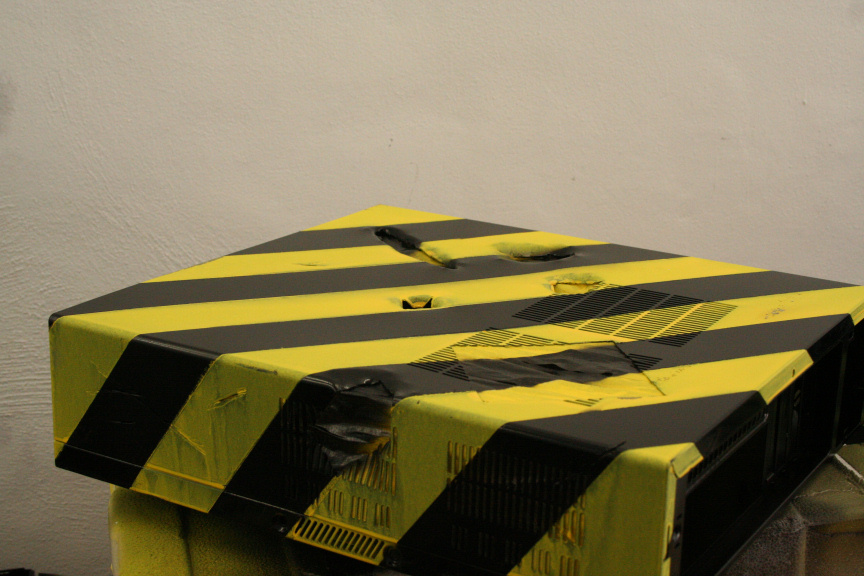
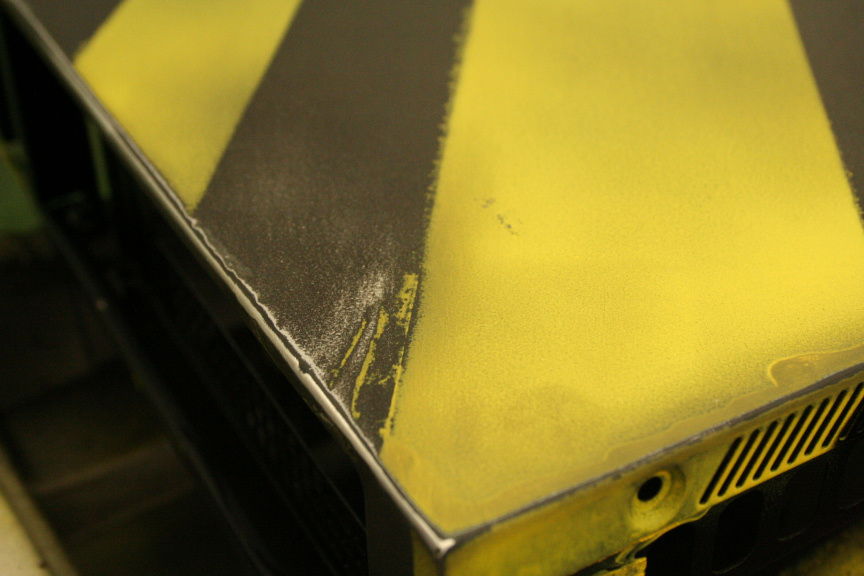
Now with the interior tape removed and the first two effects done, darkening of the colour in an irregular pattern and with copper dark red drops everywhere to simulate dirt and other paint degradation/damage:
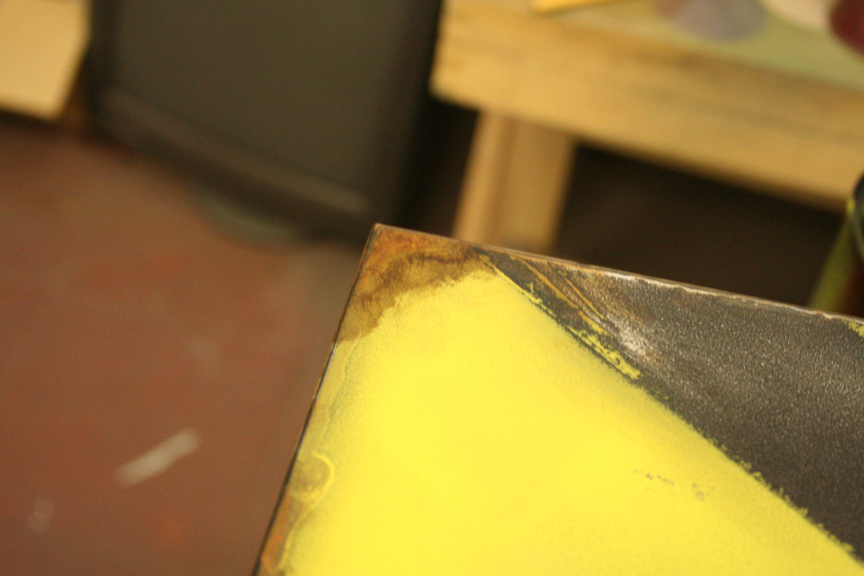
While that is drying I went ahead and started sanding down all corners and curves in the other part of the case to simulate abuse:
and applied the rusting effect:
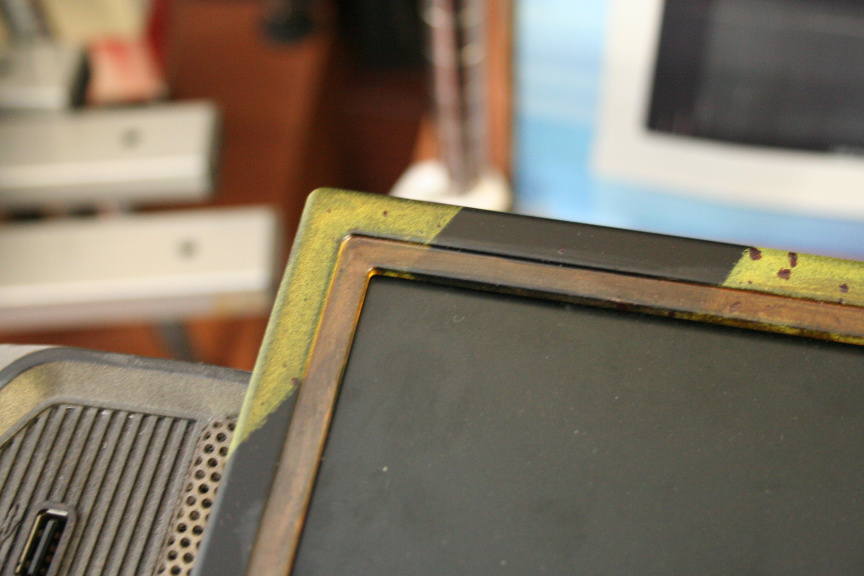
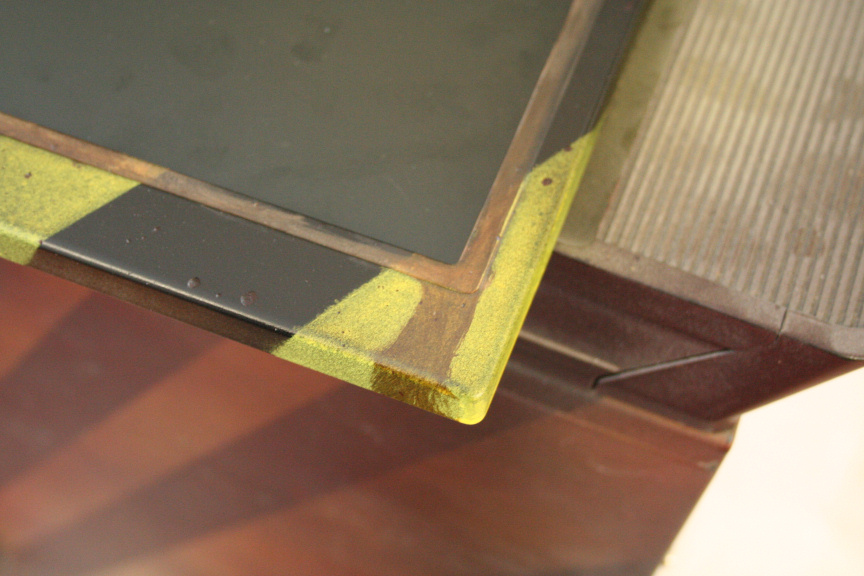
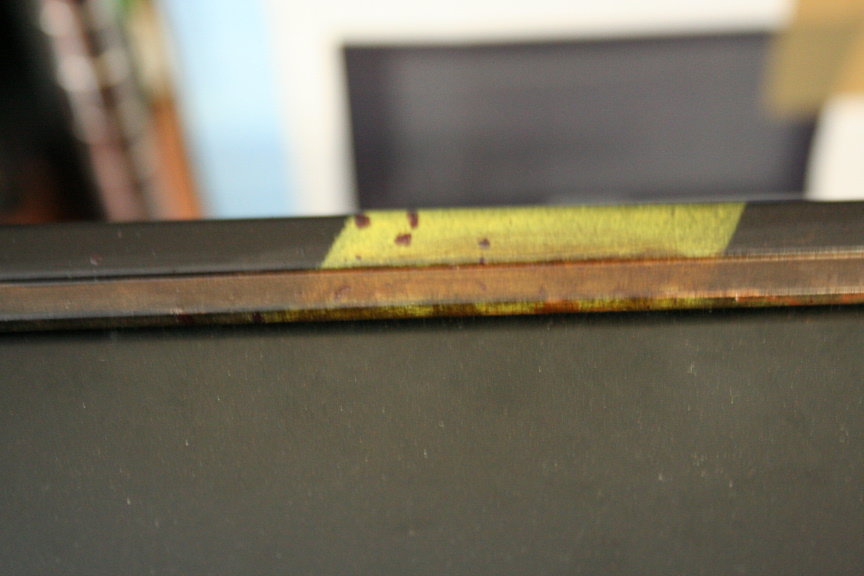
Repeated the process with the lcd panel´s frame:
Modding Portfolio
Neonit Customs
Aniway, now the the important part, here you have the outside with the exterior masking tape removed:
Now with the interior tape removed and the first two effects done, darkening of the colour in an irregular pattern and with copper dark red drops everywhere to simulate dirt and other paint degradation/damage:
While that is drying I went ahead and started sanding down all corners and curves in the other part of the case to simulate abuse:
and applied the rusting effect:
Repeated the process with the lcd panel´s frame:
Neonit Customs
Options
- Mark as New
- Bookmark
- Subscribe
- Mute
- Subscribe to RSS Feed
- Permalink
06-12-2012 03:18 AM
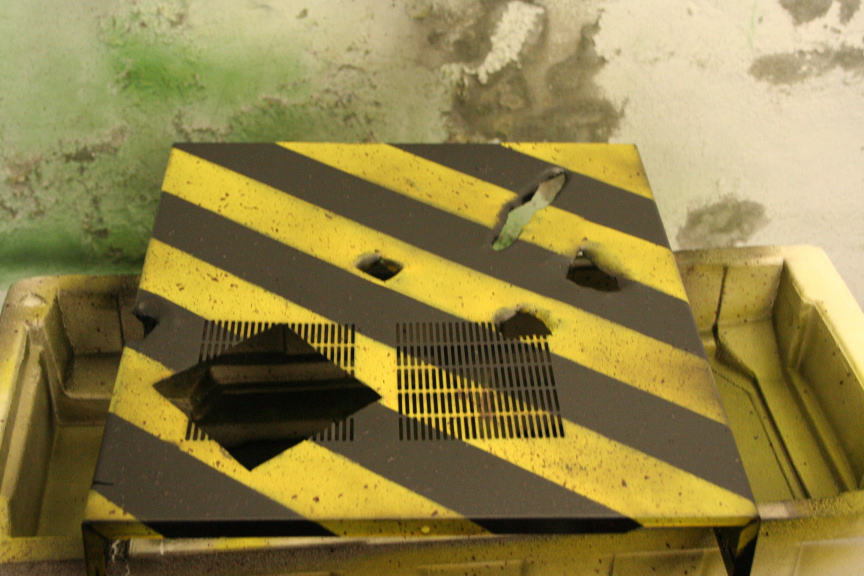
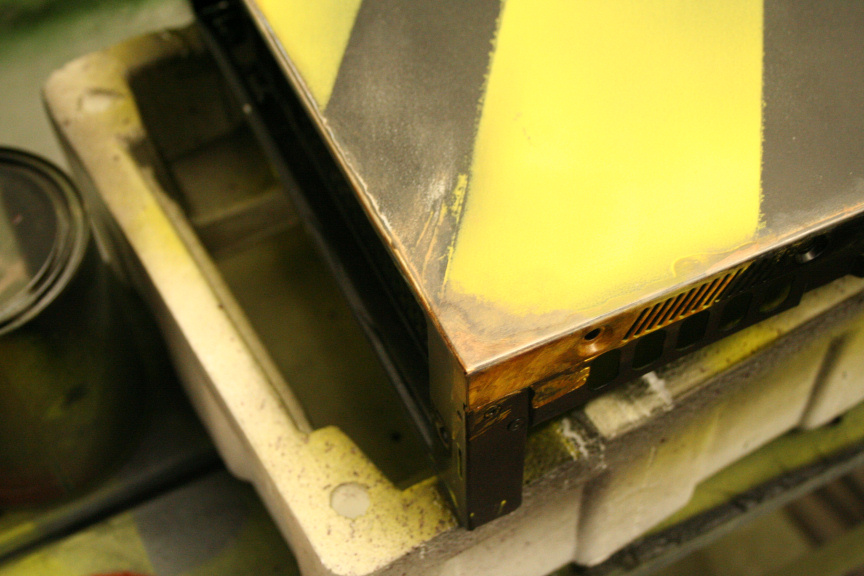
Now that it´s dry, I started doing the rust effect to one of the openings on the side of the case, here´s the first layer:
And the second irregular layer with the second component, essentially giving the final look to the rust on that opening:
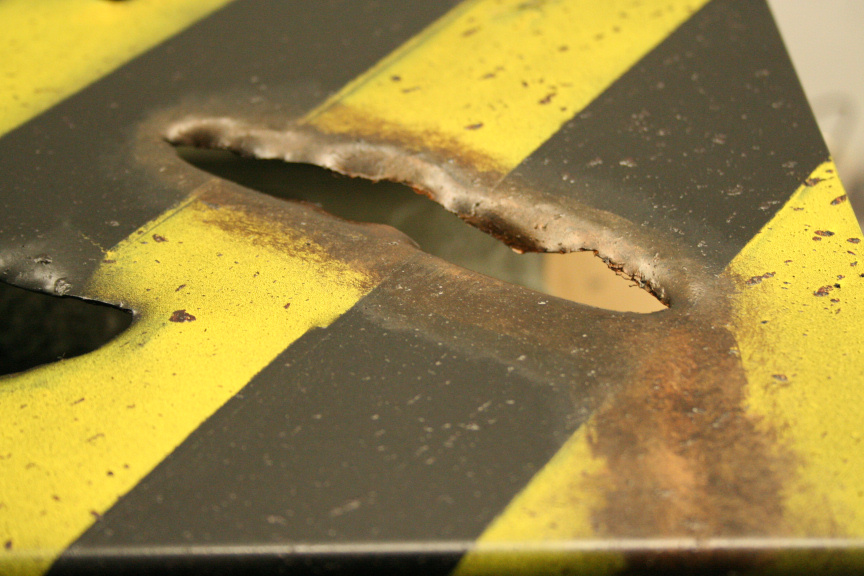
That´s it for now, a second update later today, thanks for reading!
//////
5th Day - Wednesday 30-11-11 - Update 2
Cold cathodes and wirless keyboard/mouse arrived which I´ll be using (and in the case of k+m, modifying it) on this project.
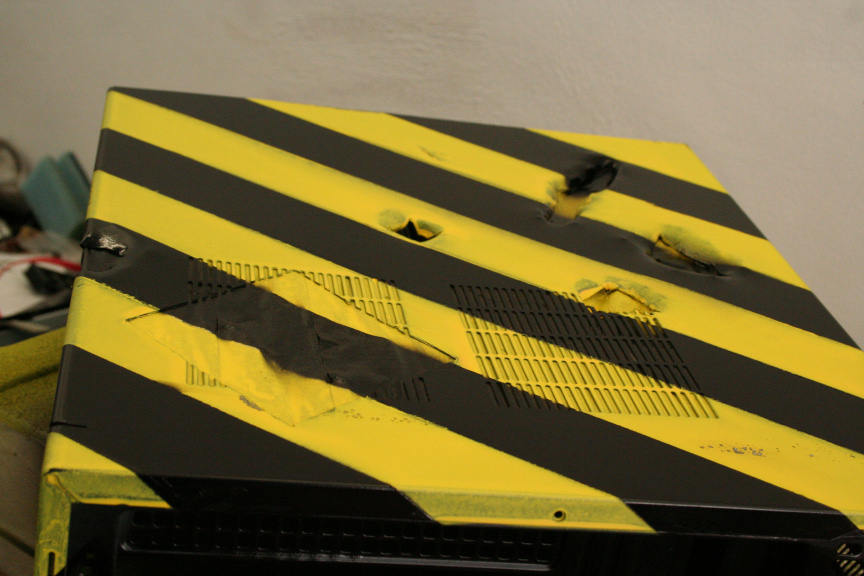
I continued applying usage, abuse and rusting to the borders, openings and imperfections of the case:
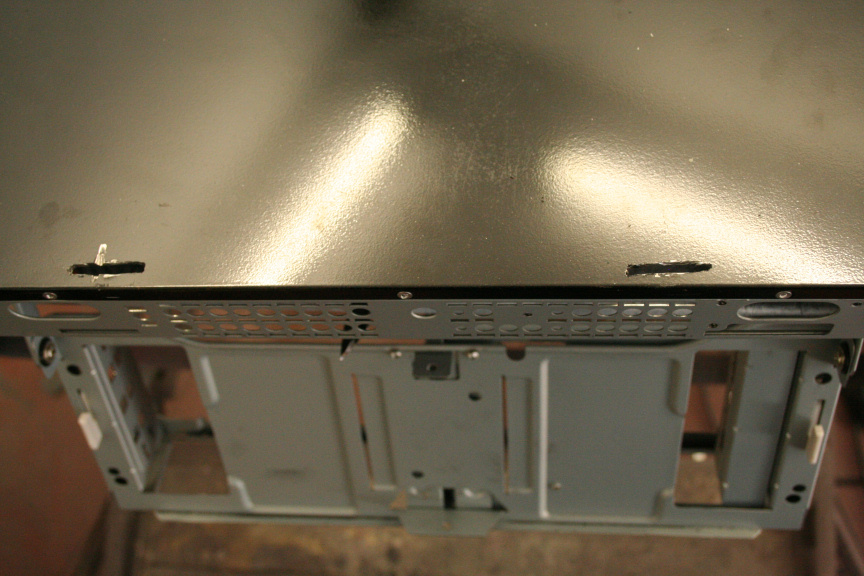
Now the back of the case, which you wont eventually see much off since the screen will be mounted on it but still:
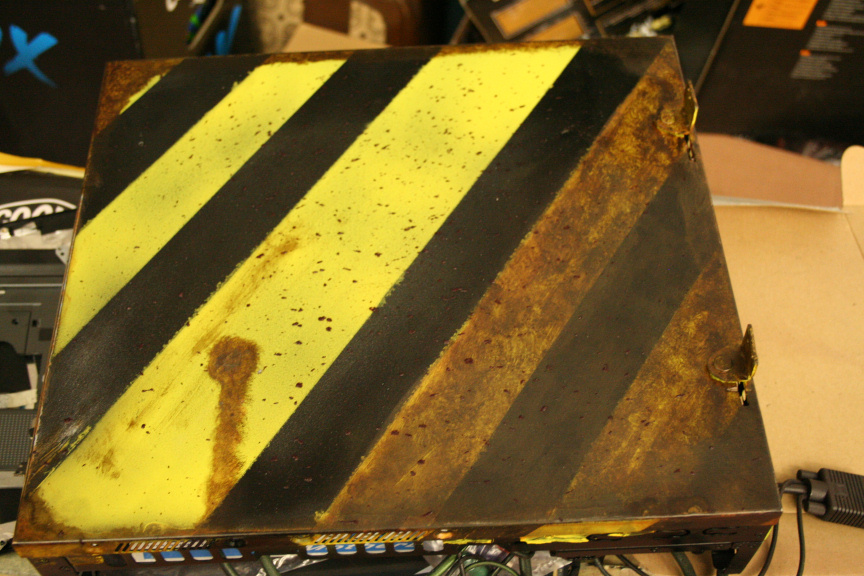
And finished with the front side:
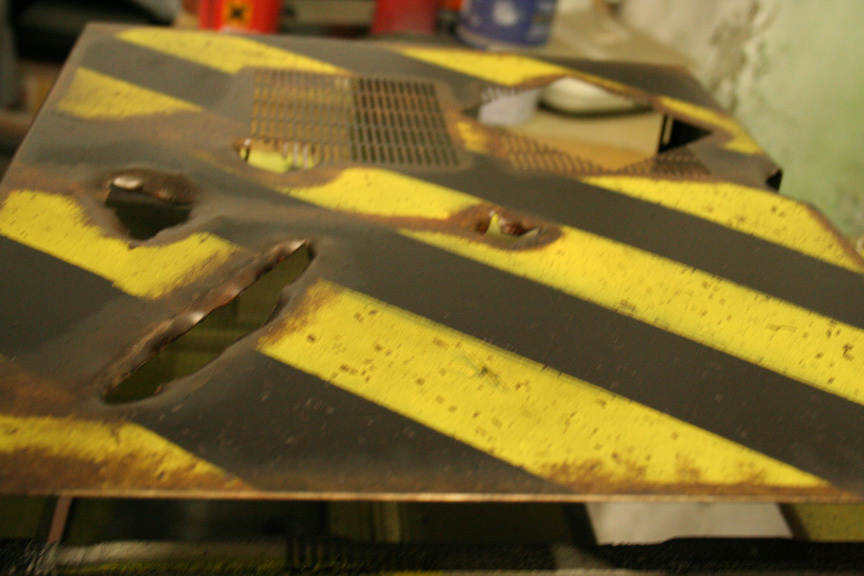
And the top:
Neonit Customs
Options
- Mark as New
- Bookmark
- Subscribe
- Mute
- Subscribe to RSS Feed
- Permalink
06-12-2012 03:20 AM
Tomorrow I will deal with the front:
Still haven´t decided what to do with it.
Once that is out of the way I will assemble the case to have a complete look to it and see if I feel like changing something or if I have to do any touch ups and so on.
I will also get started (and hopefully finish?) with the keyboard and mouse.
The day after that, which is the final day I will assemble the whole thing and take some final picks.
Thanks for reading!
////
6th Day - Thursday 01-12-11 - Update 1
1st of the month, white rabbits! 😄
cough*cough*ahem... aniway!
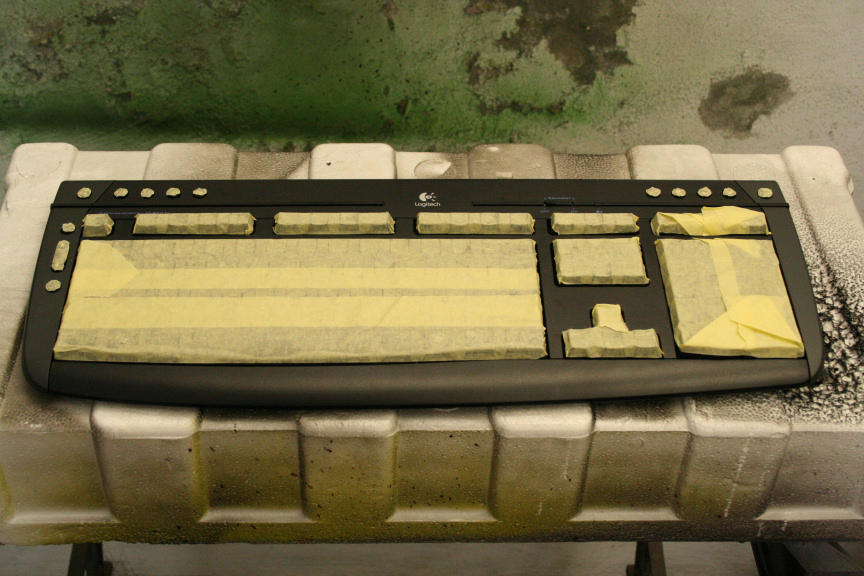
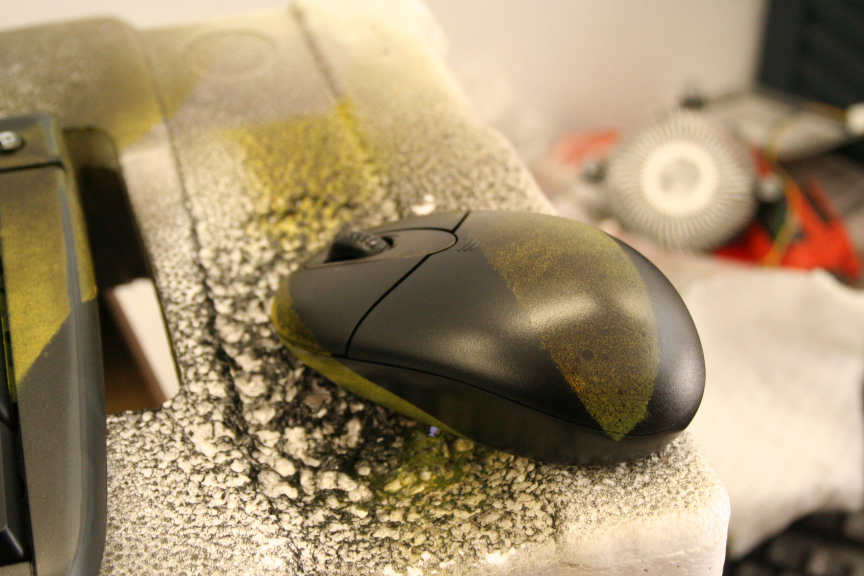
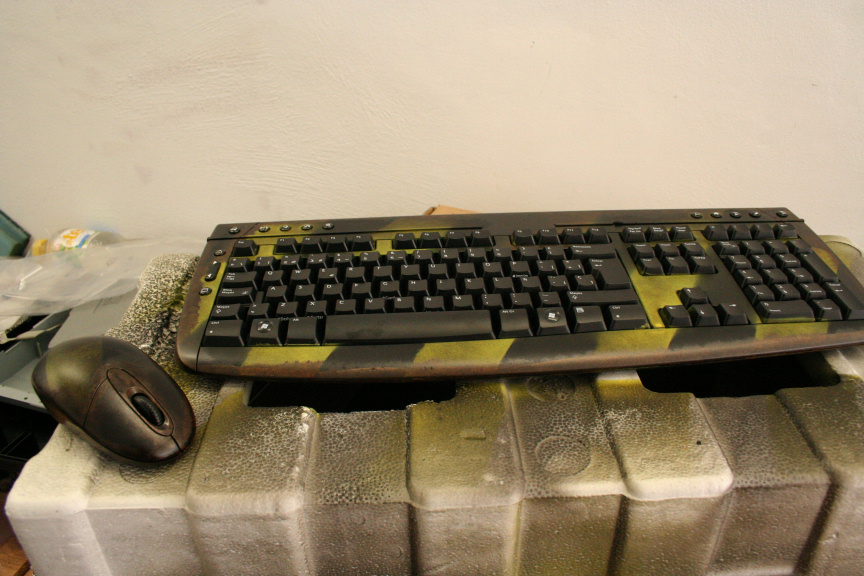
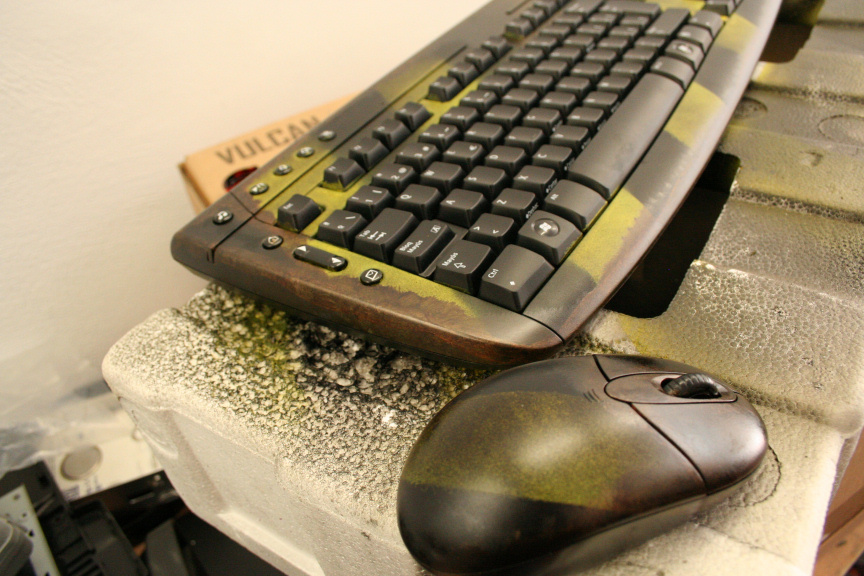
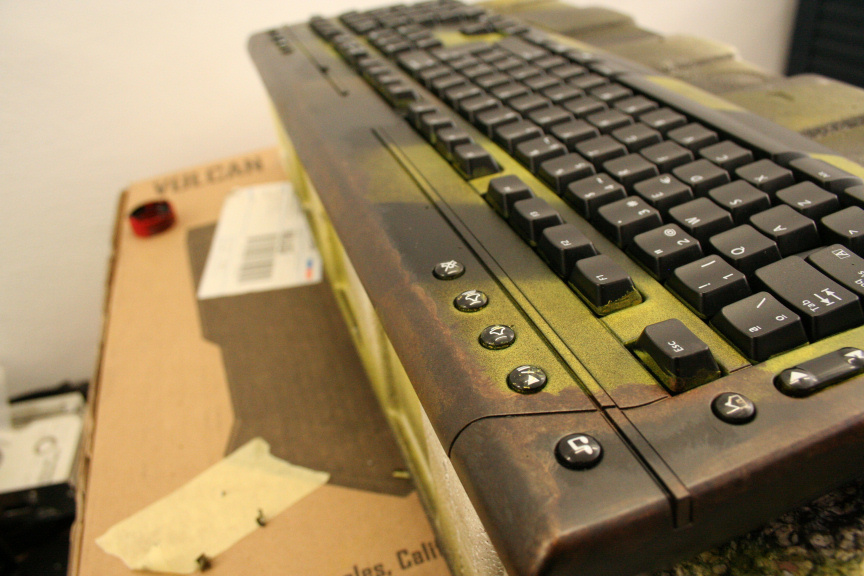
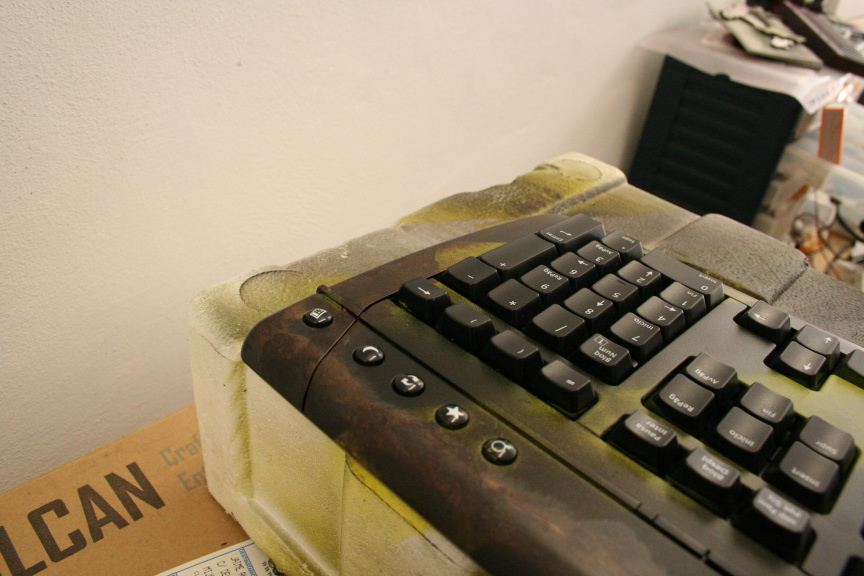
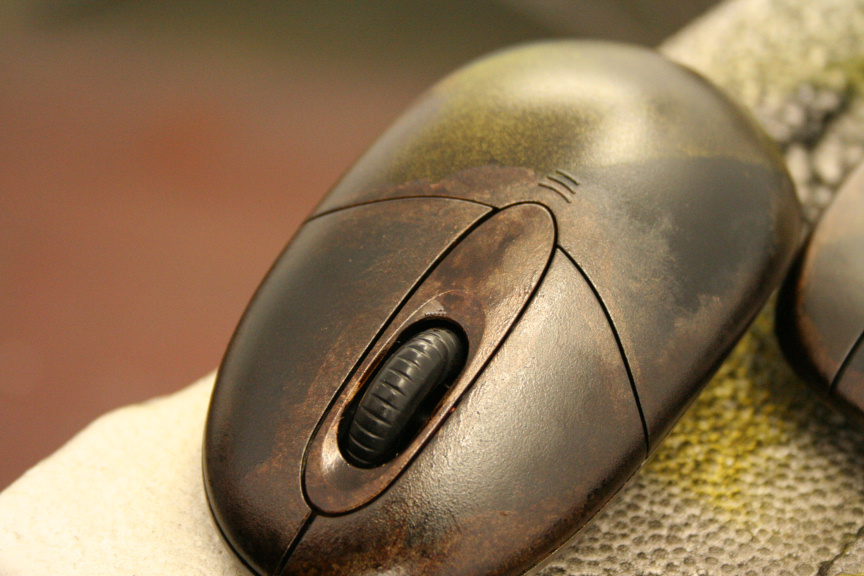
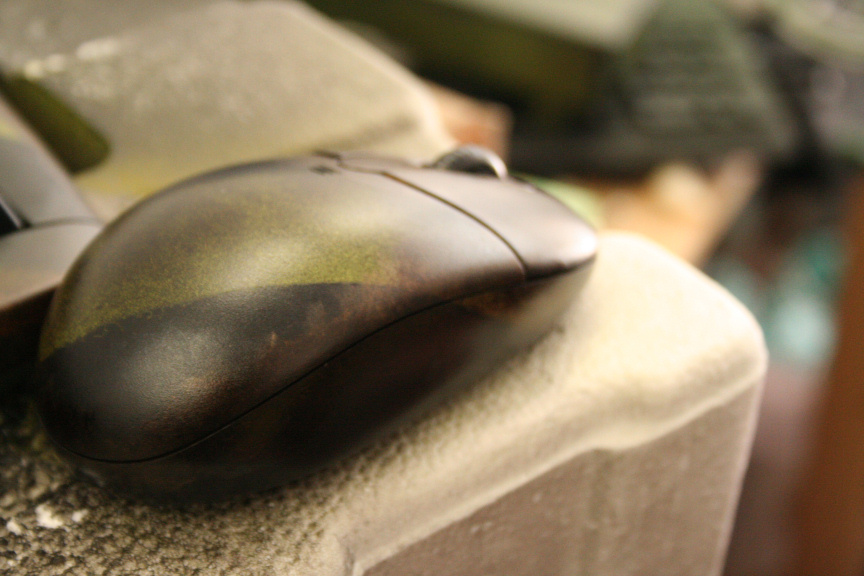
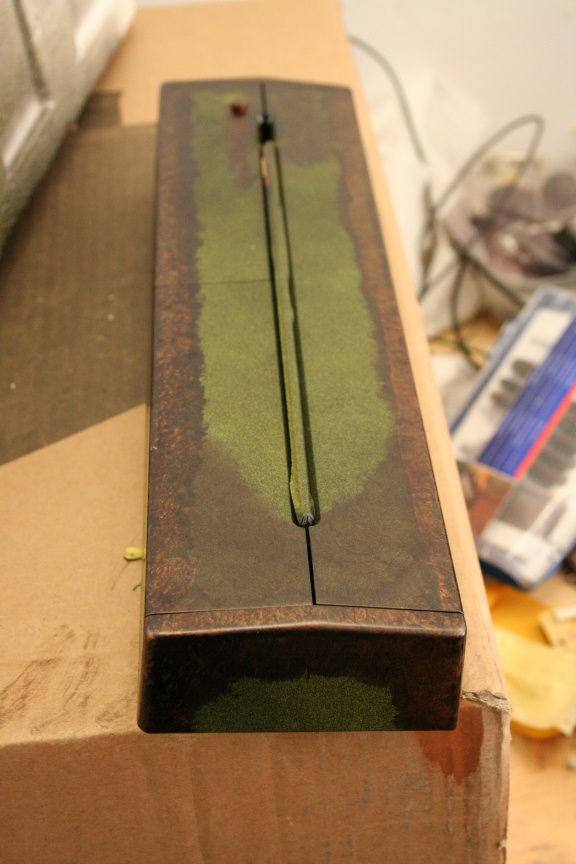
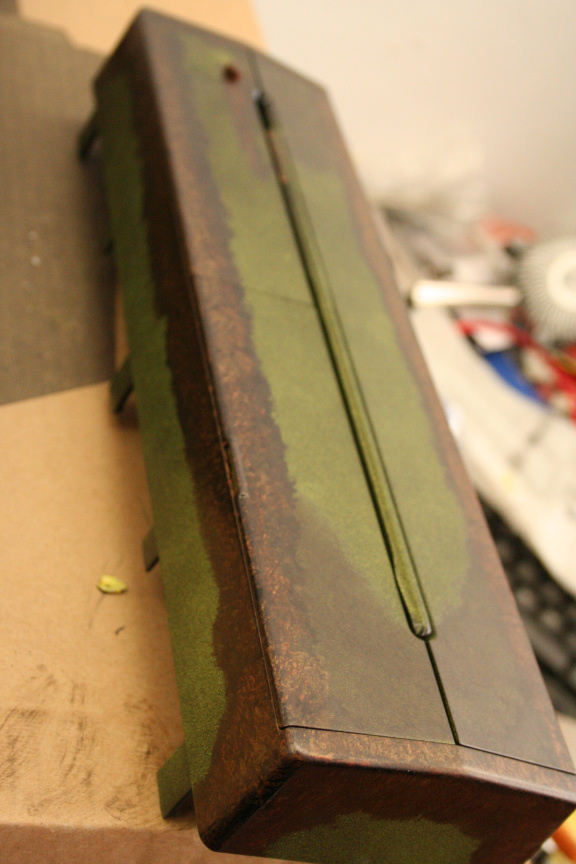
As I mentioned yesterday, the wireless keyboard and mouse arrived. I could´ve gone for something fancier but to be honest I really like the standard logitech oem combo, it´s cheap, great quality, sturdy and lasts just about forever. So here we go, keyboard sanded down, masked and ready for painting:
First layer done:
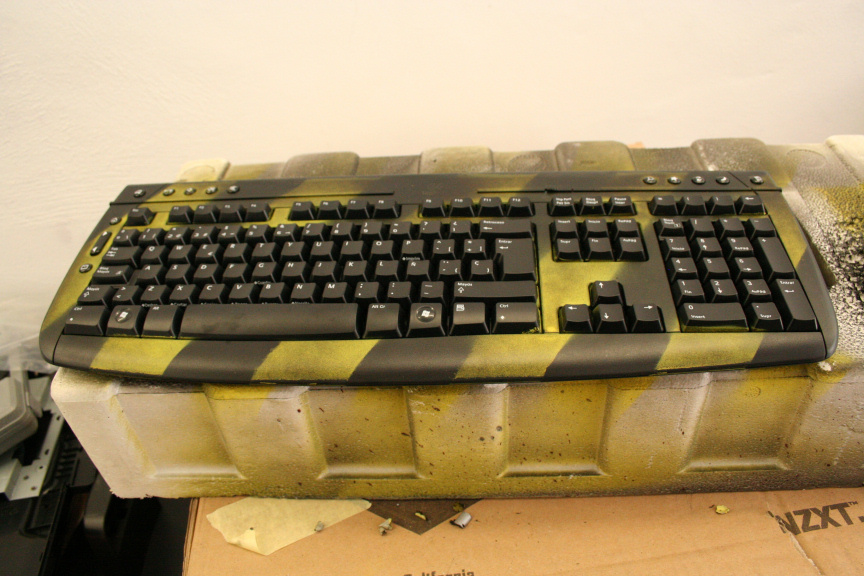
And the same process as with the rest, darkening, particles, and... rust! I´d never though I´d say this, but, I really really really like the whole rusty look it´s turning out to have (originally I planned for only a bit).
Modding Portfolio
Neonit Customs
Still haven´t decided what to do with it.
Once that is out of the way I will assemble the case to have a complete look to it and see if I feel like changing something or if I have to do any touch ups and so on.
I will also get started (and hopefully finish?) with the keyboard and mouse.
The day after that, which is the final day I will assemble the whole thing and take some final picks.
Thanks for reading!
////
6th Day - Thursday 01-12-11 - Update 1
1st of the month, white rabbits! 😄
cough*cough*ahem... aniway!
As I mentioned yesterday, the wireless keyboard and mouse arrived. I could´ve gone for something fancier but to be honest I really like the standard logitech oem combo, it´s cheap, great quality, sturdy and lasts just about forever. So here we go, keyboard sanded down, masked and ready for painting:
First layer done:
And the same process as with the rest, darkening, particles, and... rust! I´d never though I´d say this, but, I really really really like the whole rusty look it´s turning out to have (originally I planned for only a bit).
Neonit Customs
Options
- Mark as New
- Bookmark
- Subscribe
- Mute
- Subscribe to RSS Feed
- Permalink
06-12-2012 03:20 AM
And now I´d like to thank everyone on every forum this is posted who helped me out with suggestions for the front of the case.
I ended up mixing two suggestions, one was rusted out front and the other one was olive green light coat with a light coat of the yellow I used on the rest of the case on top, so here you have the result:
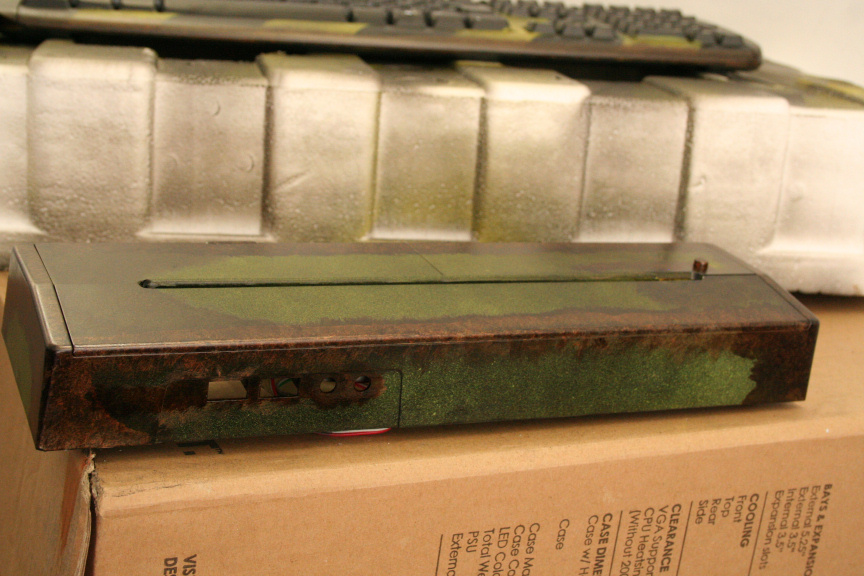
More later today, thanks for reading!
//
6th Day - Thursday 01-12-11 - Update 2
This for me is quite simply, the cherry on top:
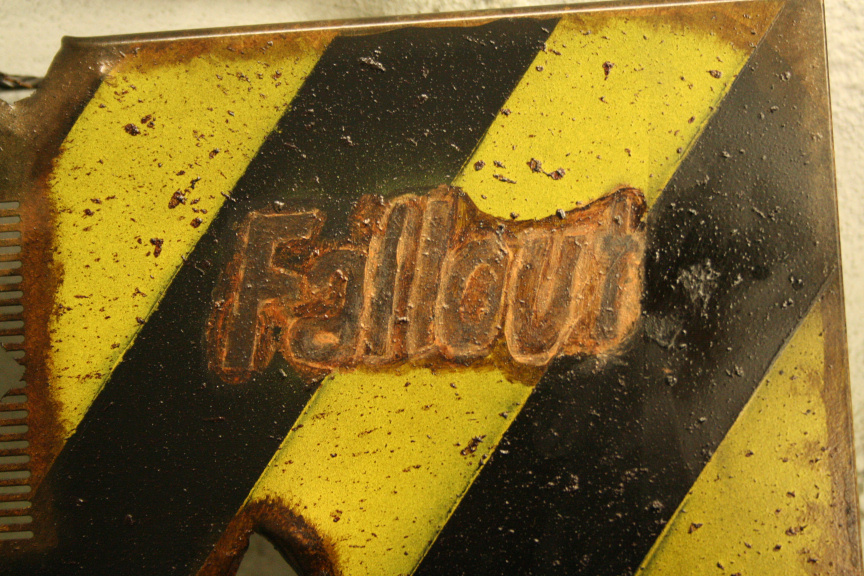
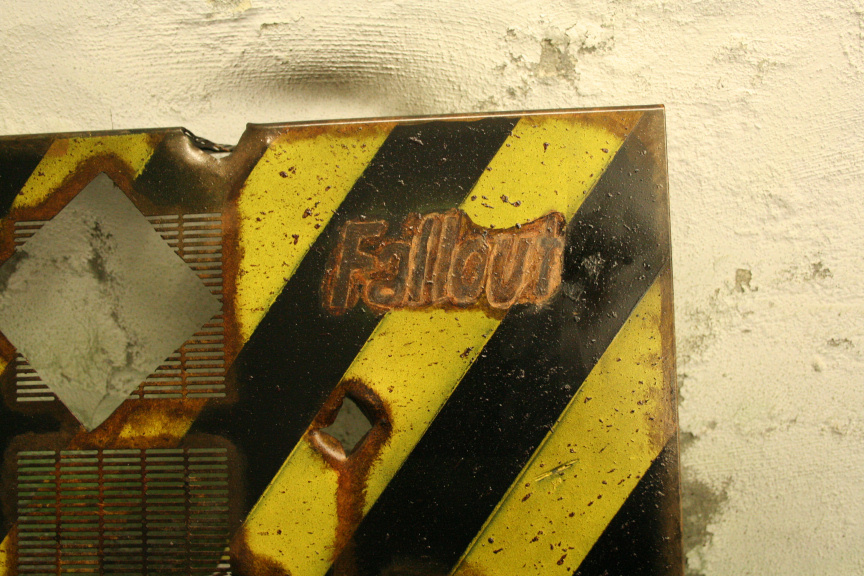
Took me about 2 and half to 3 hours to get it just right, to get that look like it´s been stamped on the case rather than painted (in my oppinion aniway), hope you guys like it!
Tomorrow starts the final day (ends mid-day saturday), and as of now, all the modifying and painting is finished so tomorrow I will be assembling it all togueter (ps: didn´t take pictures but the psu, dvd rw and hd have been painted black, it´s almost my signature thing to paint all possible components so... nothing fancy, just mainly so no ugly grey bits to see through the openings) and taking loads of pictures of the final look which will conclude succesfully the "Mod in a Week" challenge.
Thanks for reading : )
/////////
7th Day - Friday 02-12-11
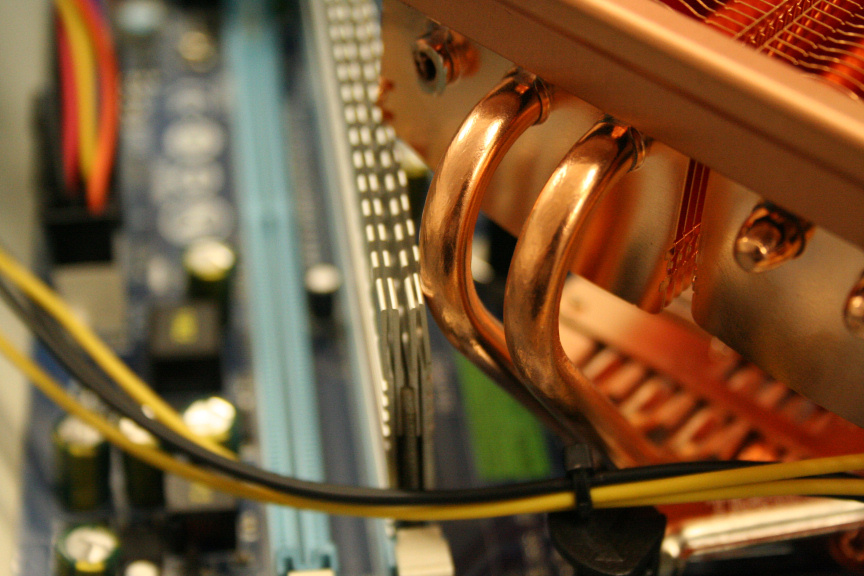
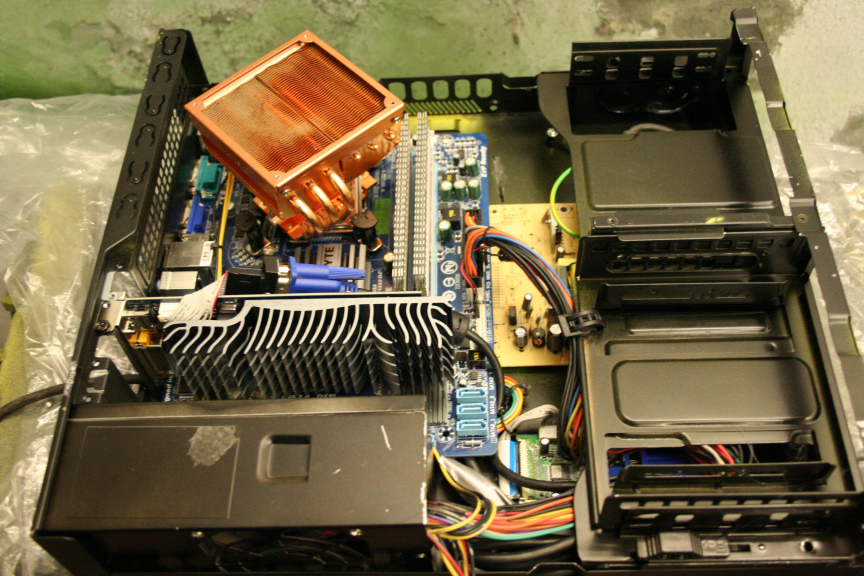
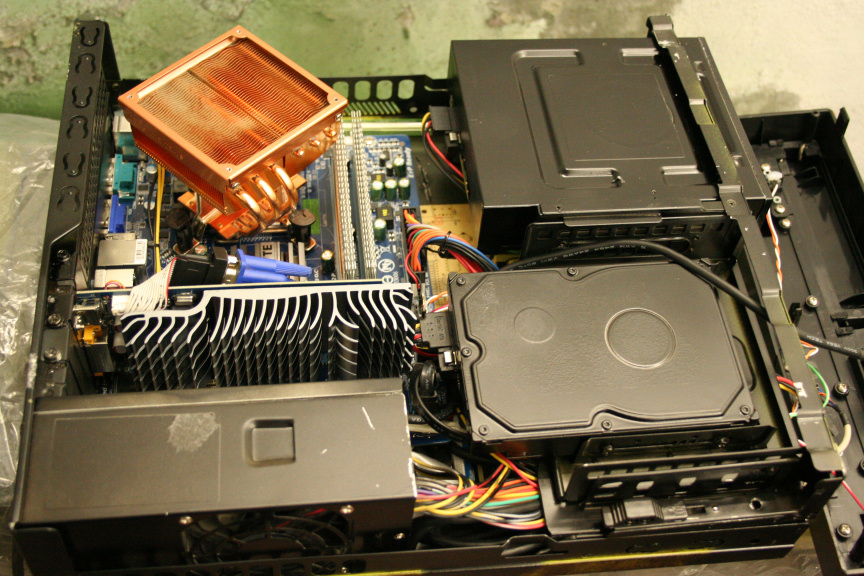
Assembly took longer than I thought it would but almost there, the following pictures are the process, because I had to remove the HDD cage from bellow to install the monitor´s hardware and hide cables I had to dismantle the memory card reader to take out the pcb and cut the frontal plastic part that goes with it. Once done and used silicone glue to put them togueter and again to attach it to the case (as you will see in one of the pictures), this allowed me to install the hdd where that would normally go (i.e. enough space to do so now). The cathodes are barely visible but are at the top and on the right side. Also due to popular demand, I replaced the cpu cooler with another exactly the same one, modified the 775 adaptor so I could shift it half a centimetre to right so I´d be able to rotate the cooler to a possition where the heatpipes are pointing up and down as opposed to the side so it doesn´t prevent me from installing both modules of ram:

Modding Portfolio
Neonit Customs
I ended up mixing two suggestions, one was rusted out front and the other one was olive green light coat with a light coat of the yellow I used on the rest of the case on top, so here you have the result:
More later today, thanks for reading!
//
6th Day - Thursday 01-12-11 - Update 2
This for me is quite simply, the cherry on top:
Took me about 2 and half to 3 hours to get it just right, to get that look like it´s been stamped on the case rather than painted (in my oppinion aniway), hope you guys like it!
Tomorrow starts the final day (ends mid-day saturday), and as of now, all the modifying and painting is finished so tomorrow I will be assembling it all togueter (ps: didn´t take pictures but the psu, dvd rw and hd have been painted black, it´s almost my signature thing to paint all possible components so... nothing fancy, just mainly so no ugly grey bits to see through the openings) and taking loads of pictures of the final look which will conclude succesfully the "Mod in a Week" challenge.
Thanks for reading : )
/////////
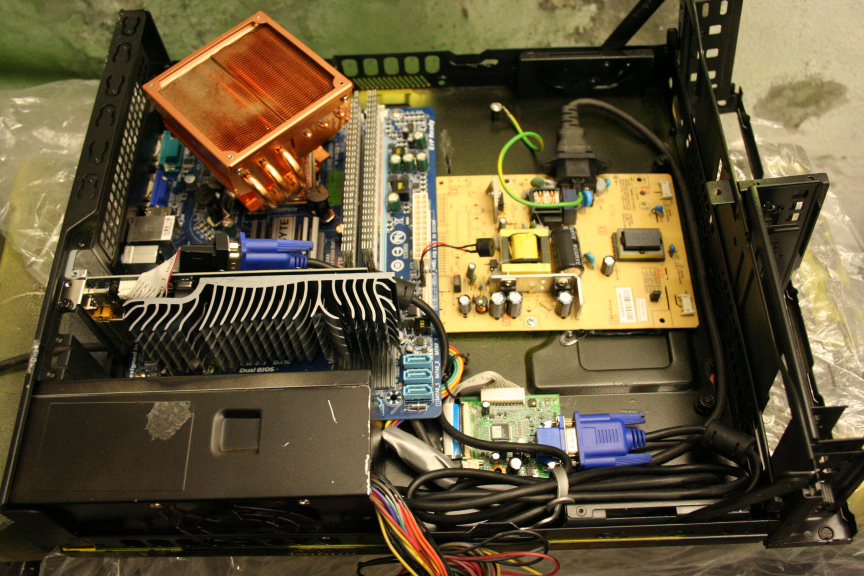
7th Day - Friday 02-12-11
Assembly took longer than I thought it would but almost there, the following pictures are the process, because I had to remove the HDD cage from bellow to install the monitor´s hardware and hide cables I had to dismantle the memory card reader to take out the pcb and cut the frontal plastic part that goes with it. Once done and used silicone glue to put them togueter and again to attach it to the case (as you will see in one of the pictures), this allowed me to install the hdd where that would normally go (i.e. enough space to do so now). The cathodes are barely visible but are at the top and on the right side. Also due to popular demand, I replaced the cpu cooler with another exactly the same one, modified the 775 adaptor so I could shift it half a centimetre to right so I´d be able to rotate the cooler to a possition where the heatpipes are pointing up and down as opposed to the side so it doesn´t prevent me from installing both modules of ram:
Neonit Customs
Options
- Mark as New
- Bookmark
- Subscribe
- Mute
- Subscribe to RSS Feed
- Permalink
06-12-2012 03:21 AM


Now I just have to mount the screen, make sure it works and I can take some sweet final pictures, all done by tomorrow at around 6-7pm gmt+1 in order to meet the one week challenge.
Thanks for reading!
//////////
Update
Project is now completed however I have ran in to a problem with the mounted screen, it doesn´t seem to be getting power, I´ve checked the usual culprits to no avail and I dont currently own a voltimetre which is unconveniente. Going to dismantle the screen´s hw and test it on a wooden bench, maybe it´s shorting out. Because I want the final picks to show an image I will wait to upload them till I get this fixed between today and monday.
------------------------------------------
Update:
Fixed the screen, one of the cables must´ve cought somewhere and was damaged, severing the link between the screen´s psu and the lcd panel. So I cut that section off and soldered new cable to both ends, works fine now. Took me hours of looking and trying stuff till I saw the small brake in the cable and of course later I had to put it all togueter in the case again.
Aniway, I´m knakered and now I have to go some event to be social which I don´t really feel like but promised I would so... Aniway, I will set it all up for a shoot tomorrow to get a nice gallery of final pictures.
//////////
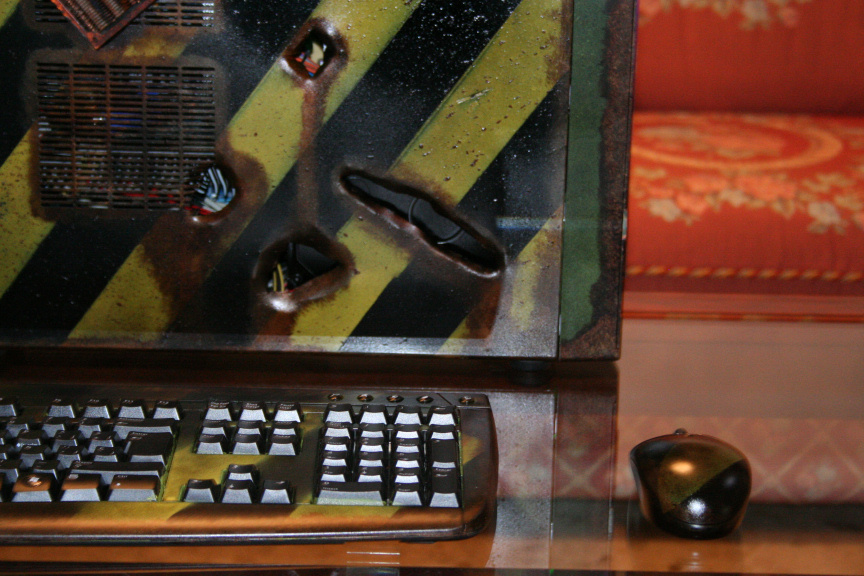
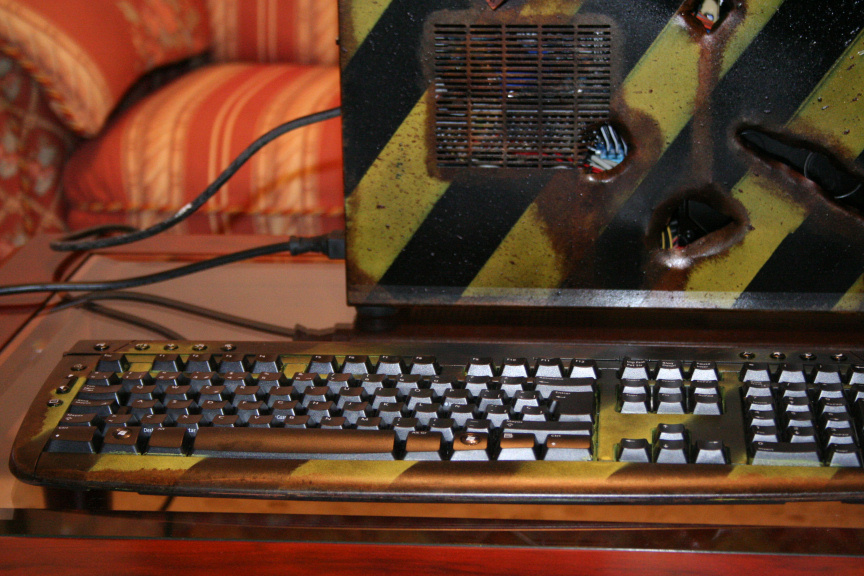
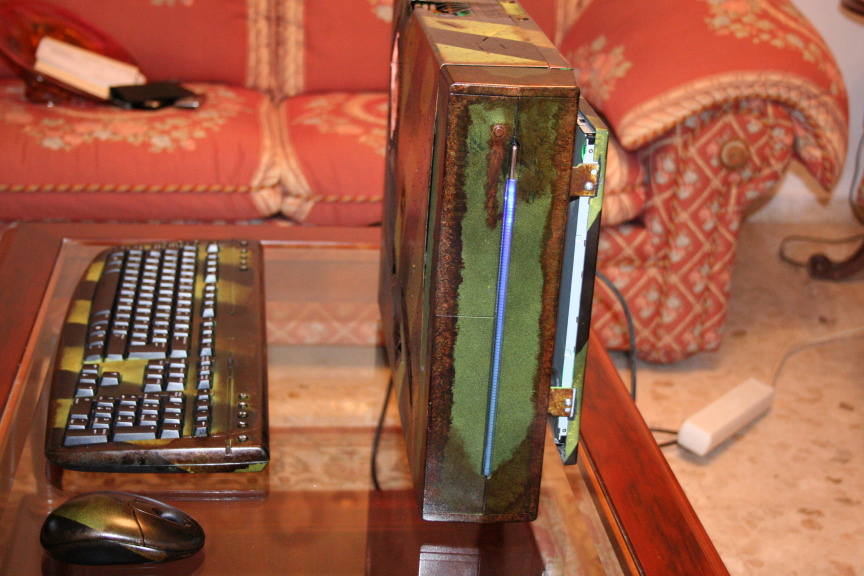
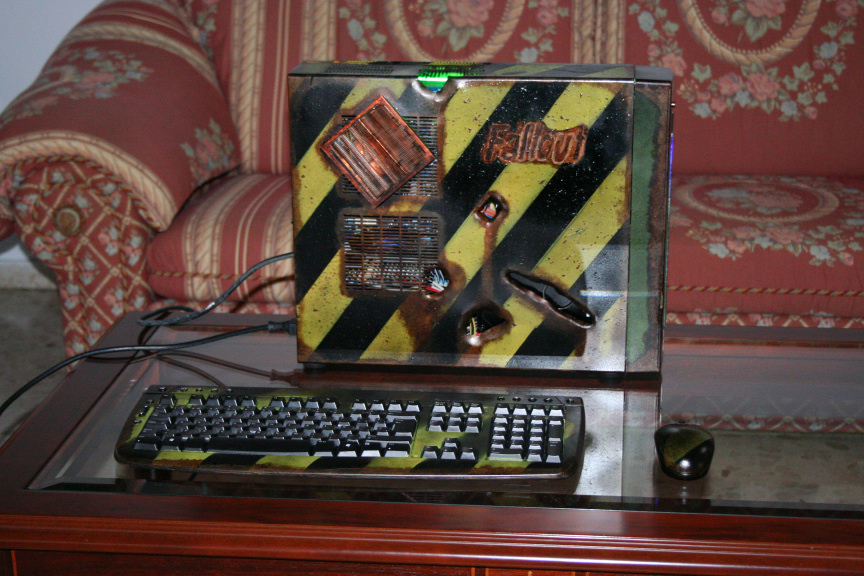
Final Pictures - Set 1
Hi everyone!
Right, as promised, here is a first set of the final pictures. I say first set because I´m not happy with them, light conditions, the need to use flash and reflections on the case by nearby windows, the table (that was a dumb idea) and so on, make the project look different, they make it look shiny (which is not), they distort the colors, you can barely see the green glow, etc
The point is, because I´m out of time right now I give you these just as a preview of some nicer final pictures which I will take at the modding event starting tuesday. Regardless, I hope you enjoy them : )
Neonit Customs
Related Content
- Need ROG STRIX 43 inch Montitor to turn on when Power is applied (XG43UQ) in Hardware & Build Advice
- ROG STRIX B760-F GAMING WIFI - INTEL I5 13600K - XTU - UNDERVOLTING (GRAYED OUT) in Overclocking & Tweaking
- Desktop went crazy (rog z690 maximus extreme) in Hardware & Build Advice
- ROG Elite activities in Promotions & General Discussions
- B500-F Mothrboard wont boot in Hardware & Build Advice
