Turn on suggestions
Auto-suggest helps you quickly narrow down your search results by suggesting possible matches as you type.
Showing results for
- Republic of Gamers Forum
- Discussions
- Case Mods & PC Builds
- [Build Log] Project ARCLIGHT
Options
- Subscribe to RSS Feed
- Mark Topic as New
- Mark Topic as Read
- Float this Topic for Current User
- Bookmark
- Subscribe
- Mute
- Printer Friendly Page
[Build Log] Project ARCLIGHT
Options
- Mark as New
- Bookmark
- Subscribe
- Mute
- Subscribe to RSS Feed
- Permalink
01-10-2013
04:00 AM
- last edited on
03-06-2024
09:10 PM
by
![]() ROGBot
ROGBot

Behold my latest creation to be
Project Arclight will be a huge case built on an Enermax Fulmo GT chassis with some serious power behind it also provided by Enermax in the shape of the mighty Platimax 1200watt psu
Te Arclight will be an all acrylic outer shell with a double action doors and servo actuated fan intakes that will open and close based on fan speeds, the shell will have a double tone look with layered panels of black and flourescent blue to accent every edge even the 100s of vent parts will have glowing edges, the interior will be a partitioned system very much like the custom partition for my other project "Sulaco" but with far more refinement
Much of the details i would like to keep slightly underwraps untill I post them for that extra mystery, heres a little peek at the exterior


several sponsors are already assisting me on this build and there help is as ever massively appreciated i simply would not be able to do this without them
Acrylic and solvent supplied by Hindleys. These guys are amazing, catering for 100s of different types of materials from plastic to metal and everything in between. And allays happy to answer even the craziest of questions a modder like me can ask
Massive thanks to Enermax for supplying a Fulmo GT, Platimax 1200wall and a vast array of case fans from there amazing Vegas range
Thanks also go to Bitfenix for givign me so much on my last project that i have enough spare to add to Arclight
Stay tuned for a lot more to come........
16,540 Views
30 REPLIES 30
Options
- Mark as New
- Bookmark
- Subscribe
- Mute
- Subscribe to RSS Feed
- Permalink
01-10-2013 04:00 AM
Arclight was origionialy designed for the Enermax fulmo GT a huge and brillicnt case, but time has marched on and Azza have offered me the chance to use there superb Genesis 9000, so a little redesigning was called for,
Concepts for the intakes have been redesigned to better fit the new chassis and all the electronics have been brouht in and in some cases teaching myself arduino voodoo
Heres the first batch of parts going in to the chassis
the origional blade design and array have changed slightly from this

to this


The array control mechanism of a pull rod attached to a servo will remain much thesame as the origional
Some parts will need to be scrapped or completely changed to fit the new body shell such as the origional concept for the sides
the new version will be a wait and see but they look great in the planning
Well this project will need a huge number of mechanical and electronic parts in top of your typical PC set up
This arduiuno kit courtesy of Phenoptix is a great start to the project and will be controlling several of my lighting systems including a rather clever hack of a LOL shield

LOL shields and old school bar graphs will be making quite an appearance as accenting lights, and yes there will be larson scanners

Servos and actuators will be making a big appearance including several mechanized fan intakes and a large front panel "shield"


And to wrap up this update and REBOOT, Kingston have graciously given there support and provided some of there swesome products
the amazing HyperX 120gig SSD

and a quad kit of DDR3 2400MHZ RAM


Stay tuned
Concepts for the intakes have been redesigned to better fit the new chassis and all the electronics have been brouht in and in some cases teaching myself arduino voodoo
Heres the first batch of parts going in to the chassis
to this
The array control mechanism of a pull rod attached to a servo will remain much thesame as the origional
Some parts will need to be scrapped or completely changed to fit the new body shell such as the origional concept for the sides
the new version will be a wait and see but they look great in the planning
Well this project will need a huge number of mechanical and electronic parts in top of your typical PC set up
LOL shields and old school bar graphs will be making quite an appearance as accenting lights, and yes there will be larson scanners
Servos and actuators will be making a big appearance including several mechanized fan intakes and a large front panel "shield"
And to wrap up this update and REBOOT, Kingston have graciously given there support and provided some of there swesome products
and a quad kit of DDR3 2400MHZ RAM
Stay tuned
Options
- Mark as New
- Bookmark
- Subscribe
- Mute
- Subscribe to RSS Feed
- Permalink
01-10-2013 04:01 AM
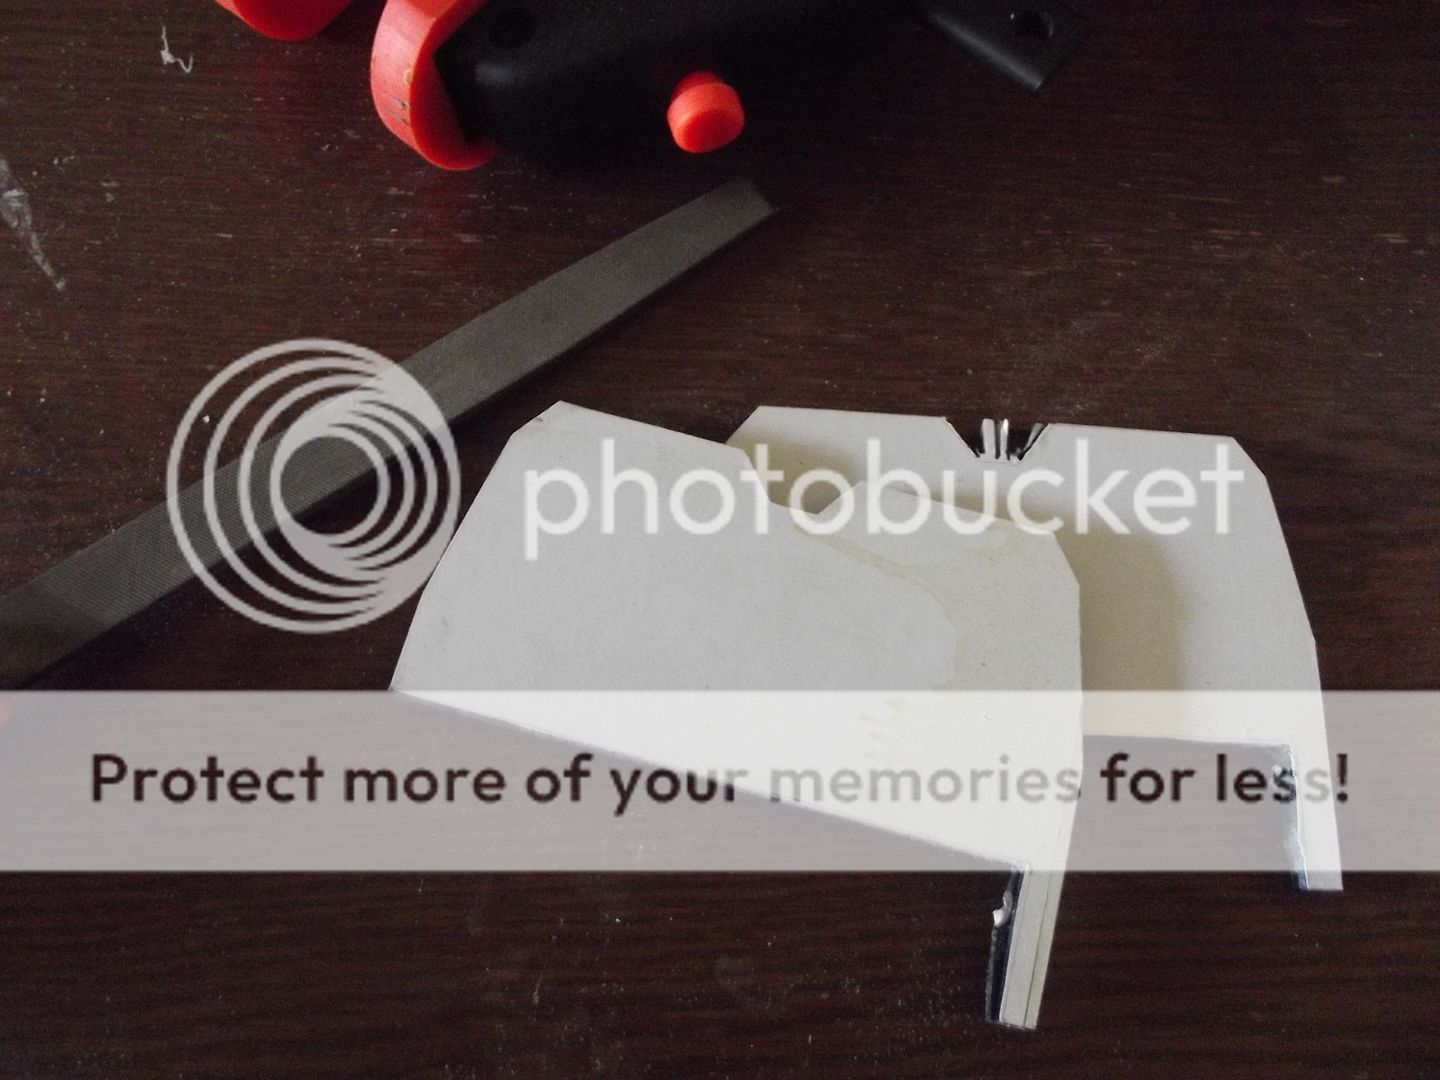
Although ive had a long break from posting my work has continued, i finally have time to sit and type
So i shall pick up where i left off
The rough cuts were plastic welded in to pairs of one blue one black each with liquid dichloromethana injected in to edges to form 12 completed pairs
After coming off the sander for the first time the edges are still as rough as a badgers behind but the biggest thing to address is the notch in the top that neither the belt or disc sander can get in to
So out come the hand files
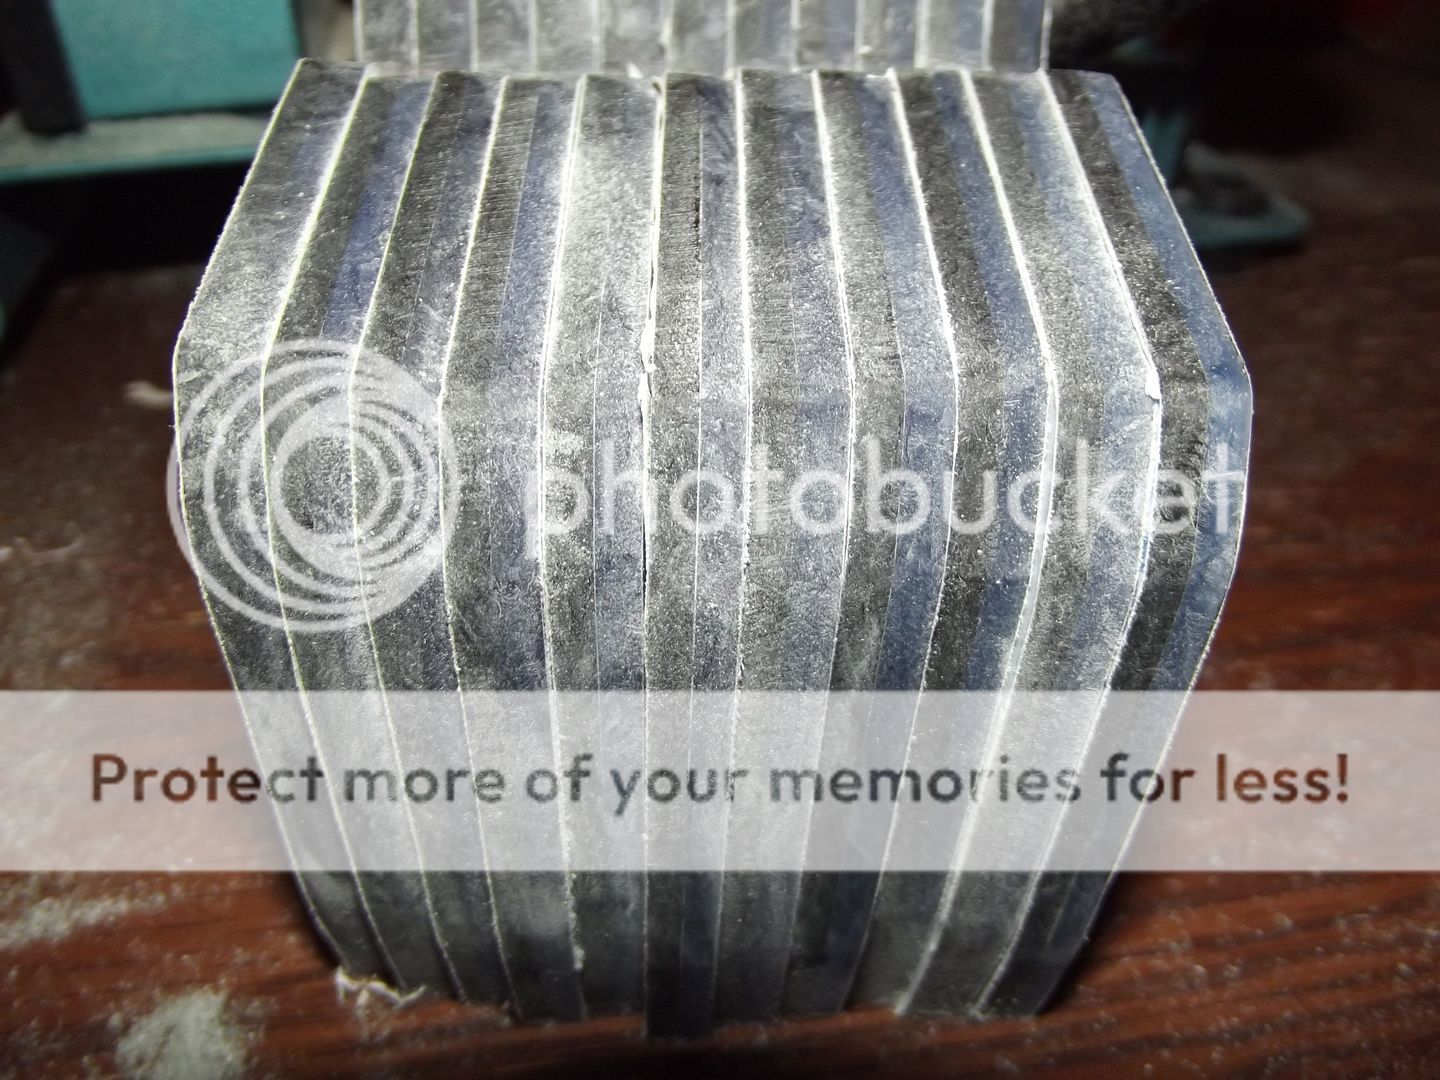
4 hours later and the stack is complete

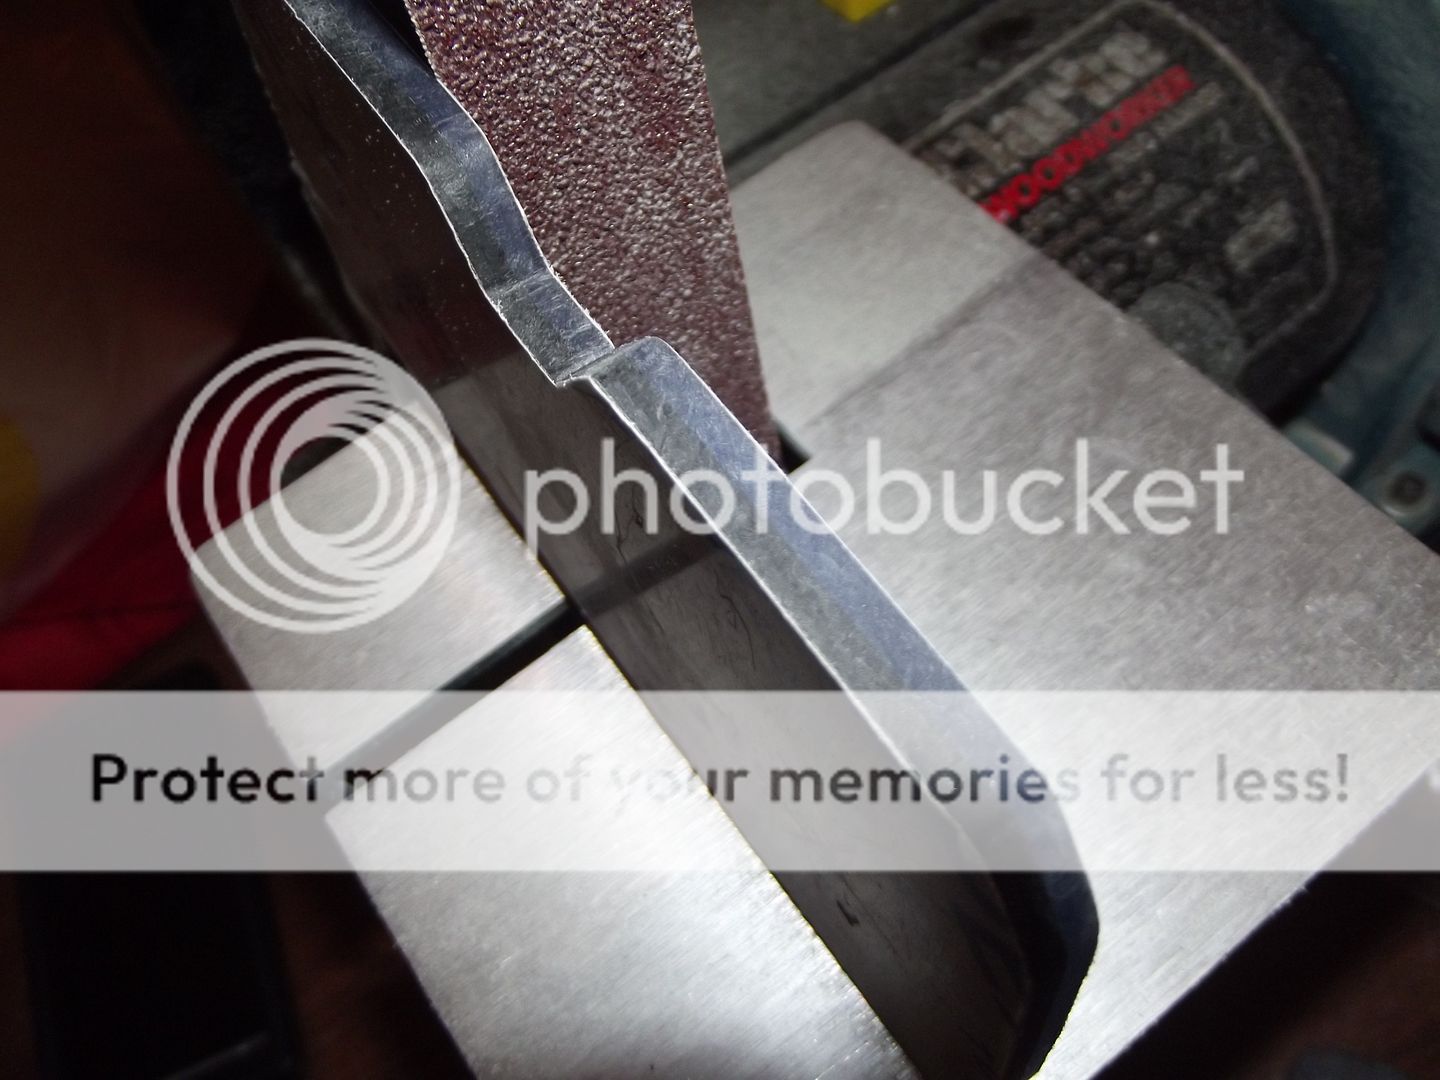
The edges still needed quite a lot of refining so on to the hand sander
.... I broke my sender.... just imagine a lot of swearing and a run to the shop....
After sanding...
A little test fit and tease before polishing the edges of each intake
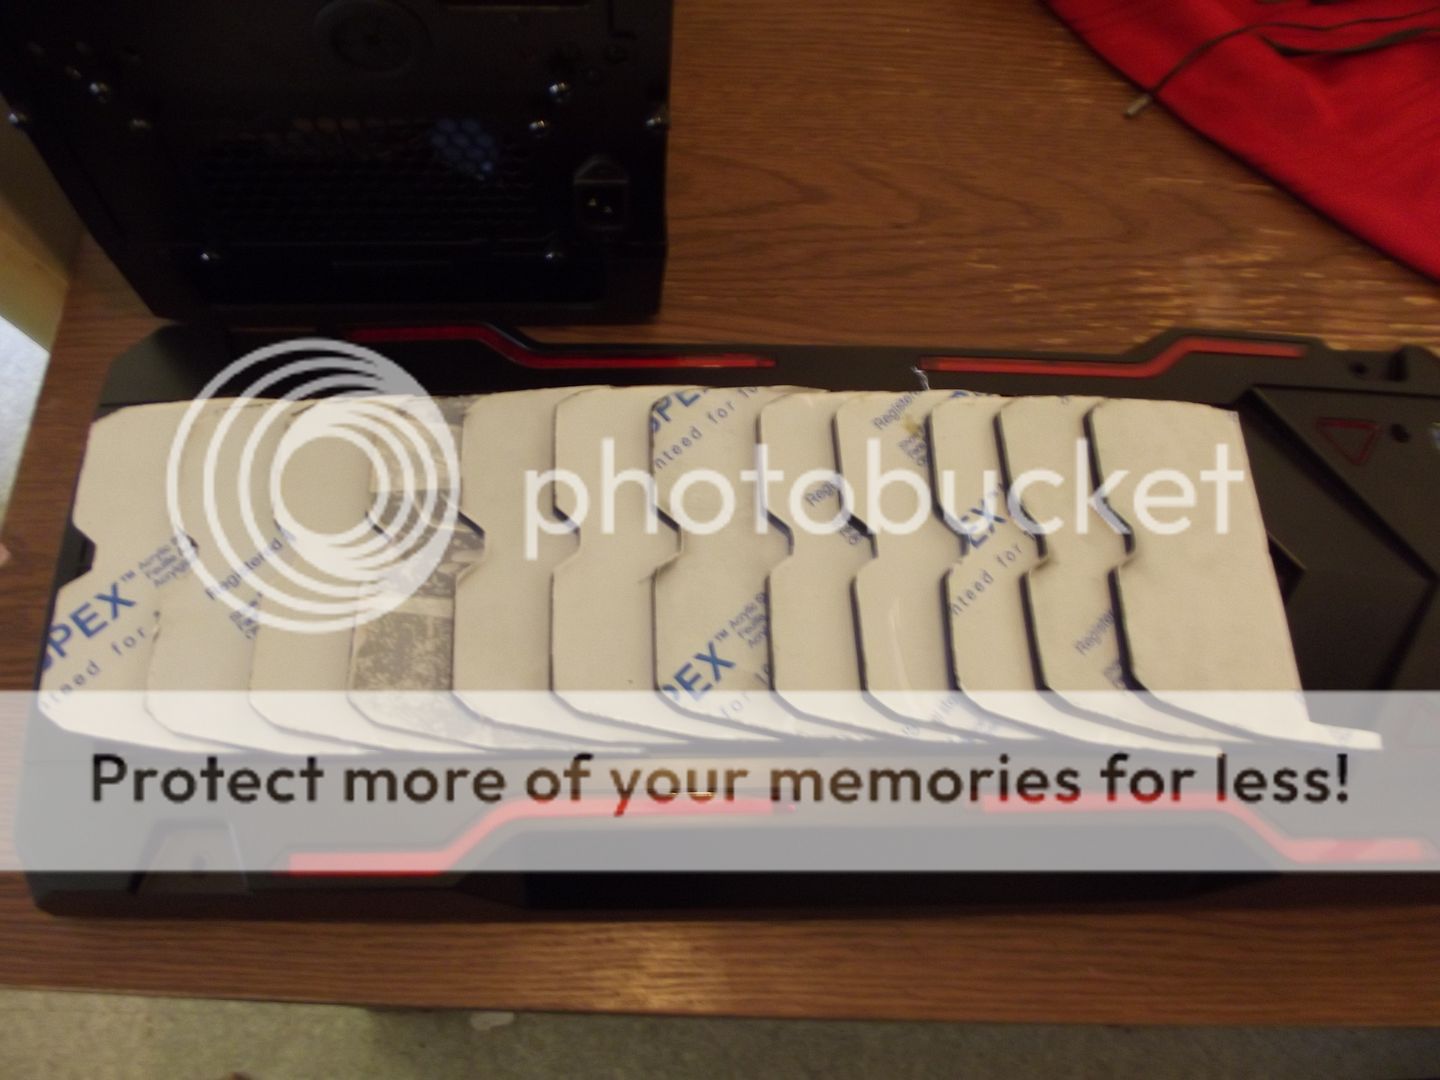
Three hours of polishing with a drill press slightly modified to server as a bench grinder/buffer and we have....
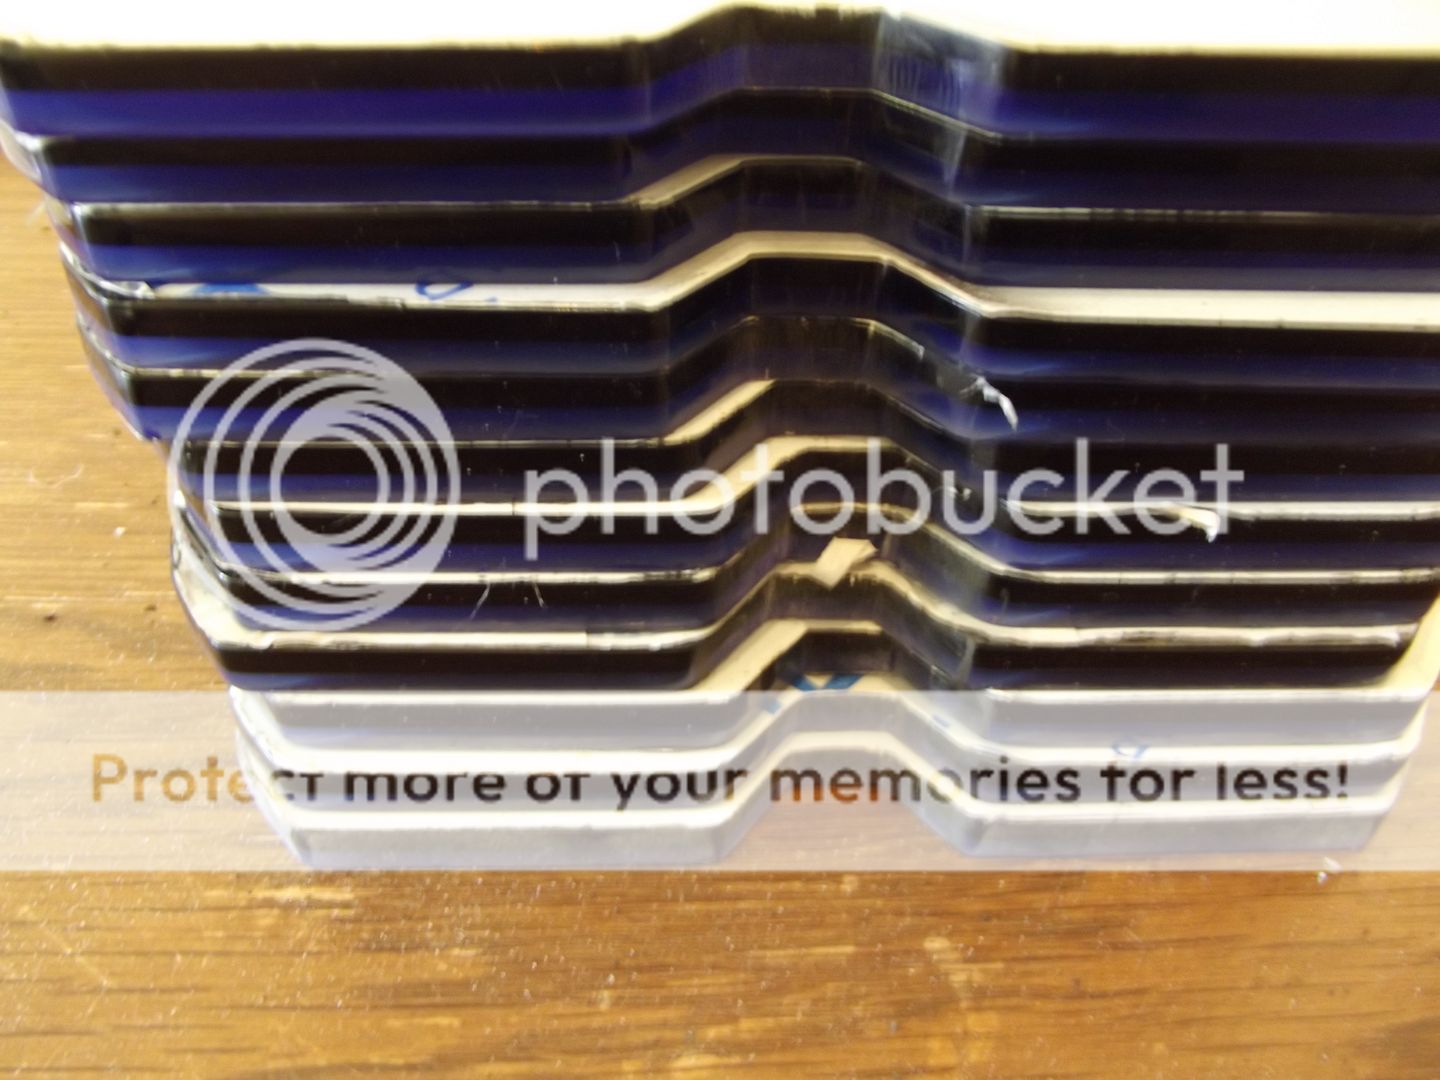
another 2 hours and we have a result

A long time to finish from rough cut to finished intakes but they do look damn good if i do say so my self
Next up, modding the roof and base plastics
So i shall pick up where i left off
The rough cuts were plastic welded in to pairs of one blue one black each with liquid dichloromethana injected in to edges to form 12 completed pairs
After coming off the sander for the first time the edges are still as rough as a badgers behind but the biggest thing to address is the notch in the top that neither the belt or disc sander can get in to
4 hours later and the stack is complete
The edges still needed quite a lot of refining so on to the hand sander
.... I broke my sender.... just imagine a lot of swearing and a run to the shop....
A little test fit and tease before polishing the edges of each intake
Three hours of polishing with a drill press slightly modified to server as a bench grinder/buffer and we have....
another 2 hours and we have a result
A long time to finish from rough cut to finished intakes but they do look damn good if i do say so my self
Next up, modding the roof and base plastics
Options
- Mark as New
- Bookmark
- Subscribe
- Mute
- Subscribe to RSS Feed
- Permalink
01-10-2013 04:02 AM
All good mods start with a plan.... well thats me out of the window
But at least i got some penile work done measuring up the plastics for the enclosures

Overkill 120 grills make handy stencils of.. erm... overkill 120mm grills
Acrylics cut to size and welded with Hindleys Dichloromethane
Ahhhh all snug fitting
The psu, most of the tubing and a very thick 60x240mm rad will be housed under this.
This 60x240mm rad to be exact, with a pair of Enermax TB silence 120mm fans on pull configuration

Sharing the floor will be an Enermax Maxrevo 1200Watt fully modular PSU... it is MASSIVE
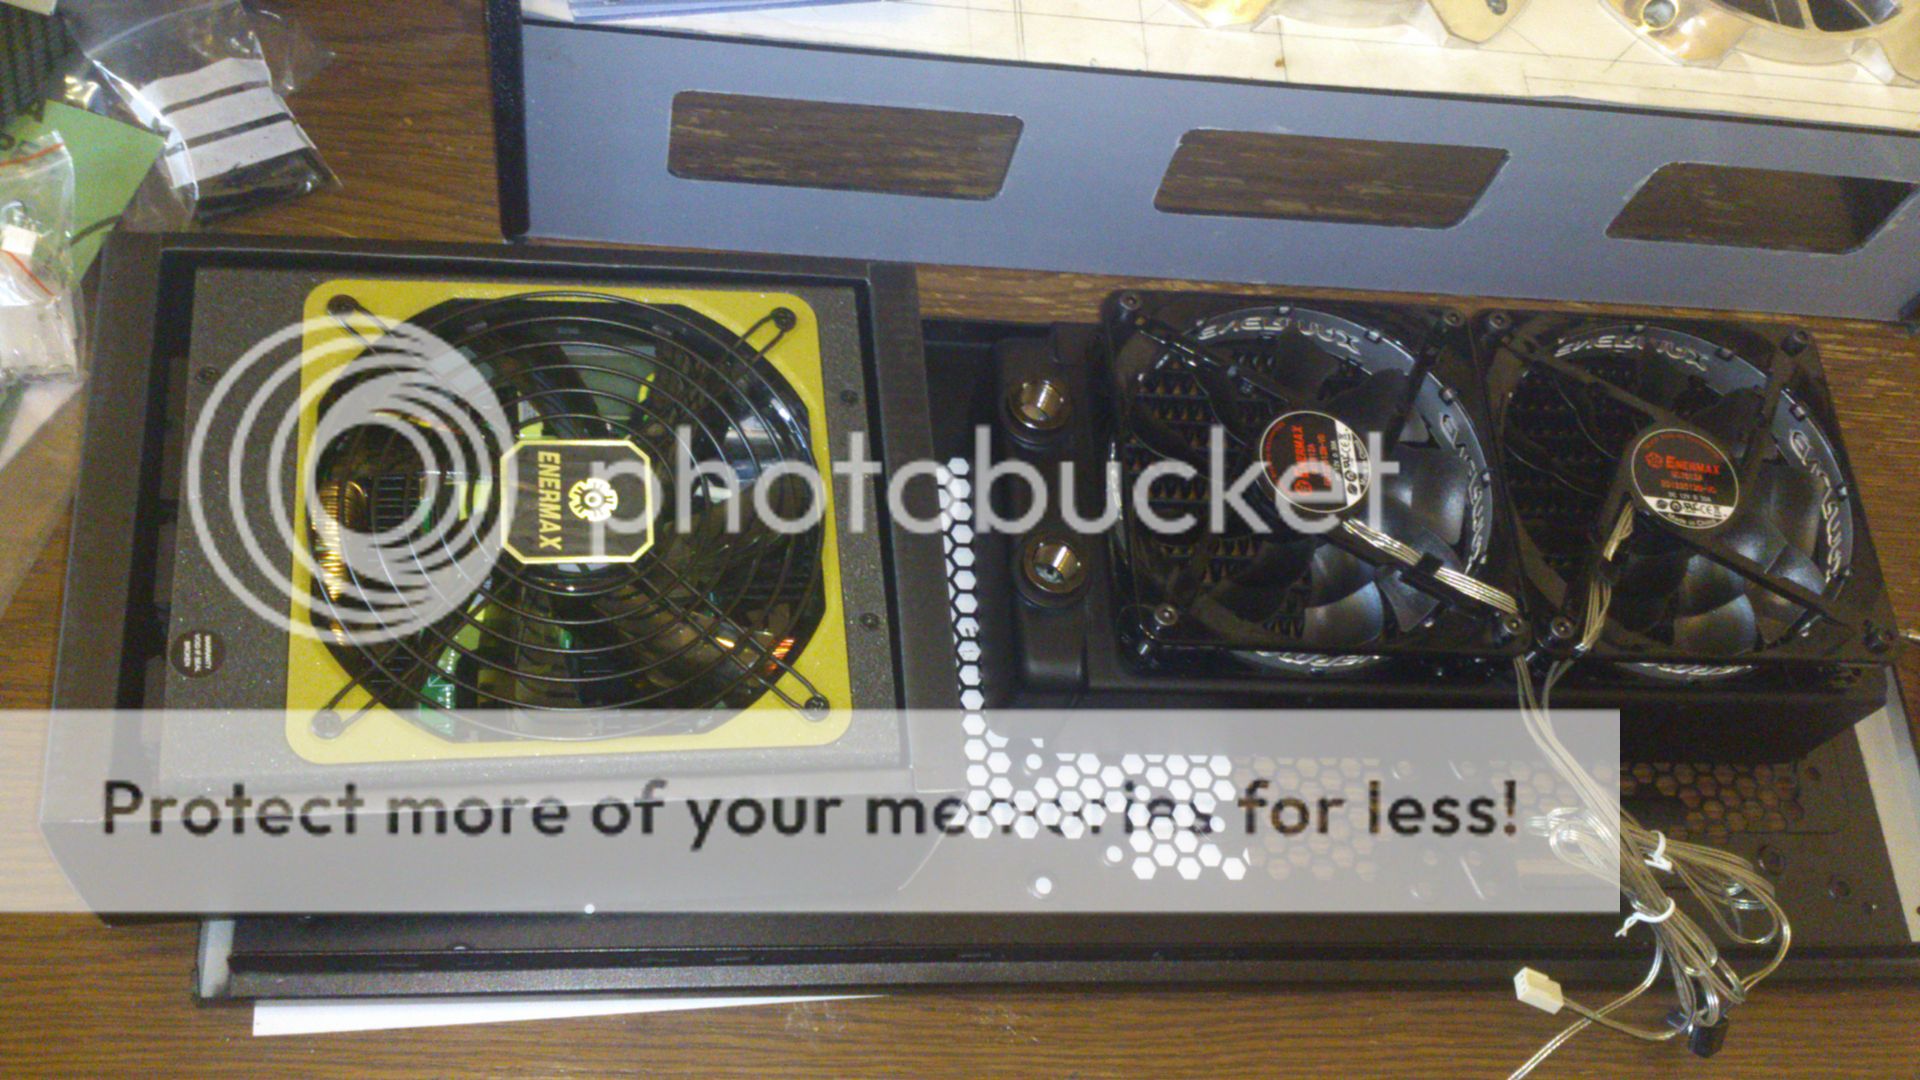
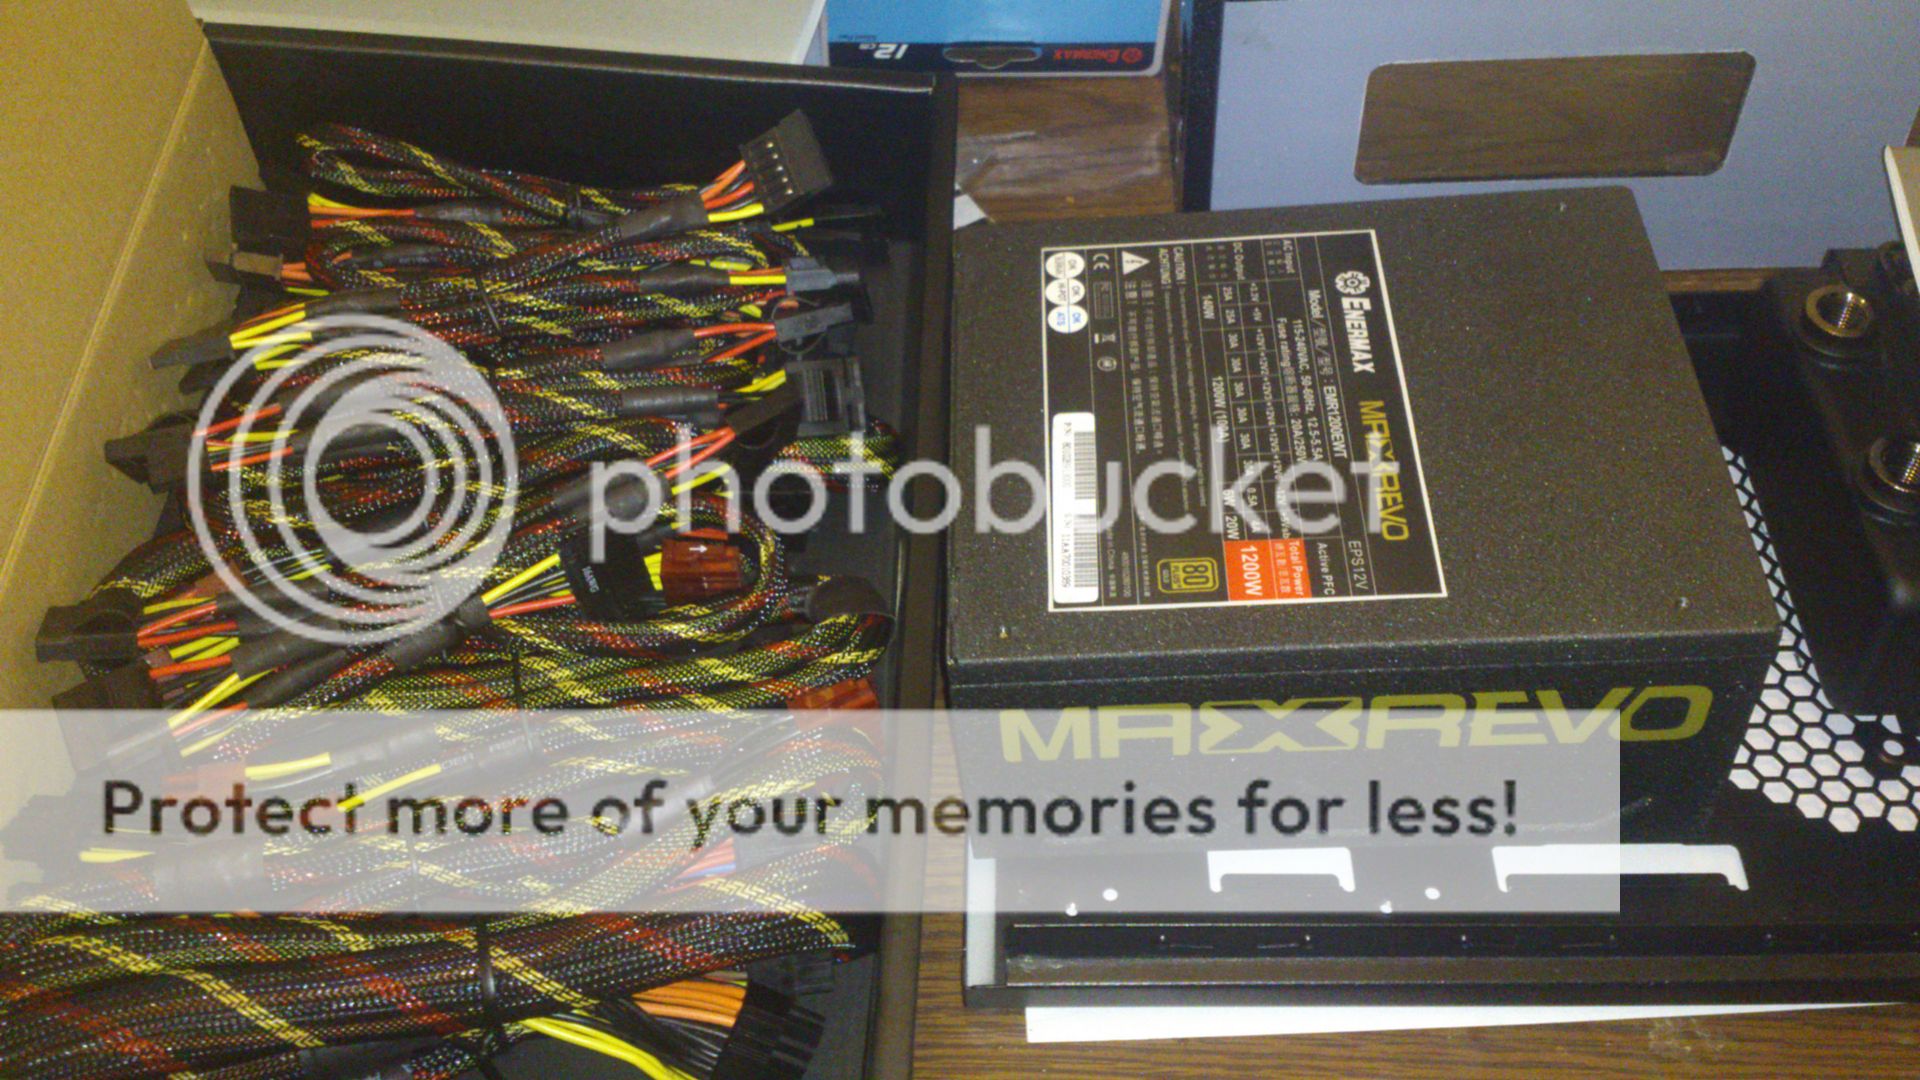
I may have to many spare cables
To kill some time waiting for some parts i partook in another of my favourite basstimes... no prizes for guessing what these 2 SciFi icons are


Plastrics cut and marked up for the optical bay covers, the optical and hdd bay area will house both pumps as well as most of the tubing of the twin loops and access hatched have been cut in to the floor compartment to get to rad fittings and install cables and tubes

But at least i got some penile work done measuring up the plastics for the enclosures
Overkill 120 grills make handy stencils of.. erm... overkill 120mm grills
Acrylics cut to size and welded with Hindleys Dichloromethane
Ahhhh all snug fitting
The psu, most of the tubing and a very thick 60x240mm rad will be housed under this.
This 60x240mm rad to be exact, with a pair of Enermax TB silence 120mm fans on pull configuration
Sharing the floor will be an Enermax Maxrevo 1200Watt fully modular PSU... it is MASSIVE
I may have to many spare cables
To kill some time waiting for some parts i partook in another of my favourite basstimes... no prizes for guessing what these 2 SciFi icons are
Plastrics cut and marked up for the optical bay covers, the optical and hdd bay area will house both pumps as well as most of the tubing of the twin loops and access hatched have been cut in to the floor compartment to get to rad fittings and install cables and tubes
Options
- Mark as New
- Bookmark
- Subscribe
- Mute
- Subscribe to RSS Feed
- Permalink
01-10-2013 04:03 AM
All good mods start with a plan.... well thats me out of the window
But at least i got some penile work done measuring up the plastics for the enclosures
Overkill 120 grills make handy stencils of.. erm... overkill 120mm grills
Acrylics cut to size and welded with Hindleys Dichloromethane
Ahhhh all snug fitting
The psu, most of the tubing and a very thick 60x240mm rad will be housed under this.
This 60x240mm rad to be exact, with a pair of Enermax TB silence 120mm fans on pull configuration
Sharing the floor will be an Enermax Maxrevo 1200Watt fully modular PSU... it is MASSIVE
I may have to many spare cables
To kill some time waiting for some parts i partook in another of my favourite basstimes... no prizes for guessing what these 2 SciFi icons are
Plastrics cut and marked up for the optical bay covers, the optical and hdd bay area will house both pumps as well as most of the tubing of the twin loops and access hatched have been cut in to the floor compartment to get to rad fittings and install cables and tubes
Options
- Mark as New
- Bookmark
- Subscribe
- Mute
- Subscribe to RSS Feed
- Permalink
01-10-2013 04:01 AM
Just a little update today
An absolute ton of cutting and sanding today
Well i dont have access to a lazer and i need a lot or duplicate pieces to were rocking it old school with a stencil

And what better to cut out my many many parts than a home made table saw, complete with mitre fence

Problem.... no sharpie..... solution... stick paper to plactic cover on acrylic and use engineering pencil... copy template.... move.... repeat.... over, and over

and now its on to cutting
first up divide the sheet up in to manageable blocks

then drill holes for turning the cutting blade in

some more cutting to further separate each component

first half done, all rough cut

bit of refining the shapes to reduce sending

sanding time...... 1 of 24

and yes that is a dyson taped to the extraction port
all done for the day, 24 pieces of the main intake array rough cut and rough sanded

i may never want to see acrylic AGAIN after this build....
An absolute ton of cutting and sanding today
Well i dont have access to a lazer and i need a lot or duplicate pieces to were rocking it old school with a stencil
And what better to cut out my many many parts than a home made table saw, complete with mitre fence
Problem.... no sharpie..... solution... stick paper to plactic cover on acrylic and use engineering pencil... copy template.... move.... repeat.... over, and over
and now its on to cutting
first up divide the sheet up in to manageable blocks
then drill holes for turning the cutting blade in
some more cutting to further separate each component
first half done, all rough cut
bit of refining the shapes to reduce sending
sanding time...... 1 of 24
and yes that is a dyson taped to the extraction port
all done for the day, 24 pieces of the main intake array rough cut and rough sanded
i may never want to see acrylic AGAIN after this build....
Options
- Mark as New
- Bookmark
- Subscribe
- Mute
- Subscribe to RSS Feed
- Permalink
01-10-2013 04:02 AM
Time for the update that has been a long time coming
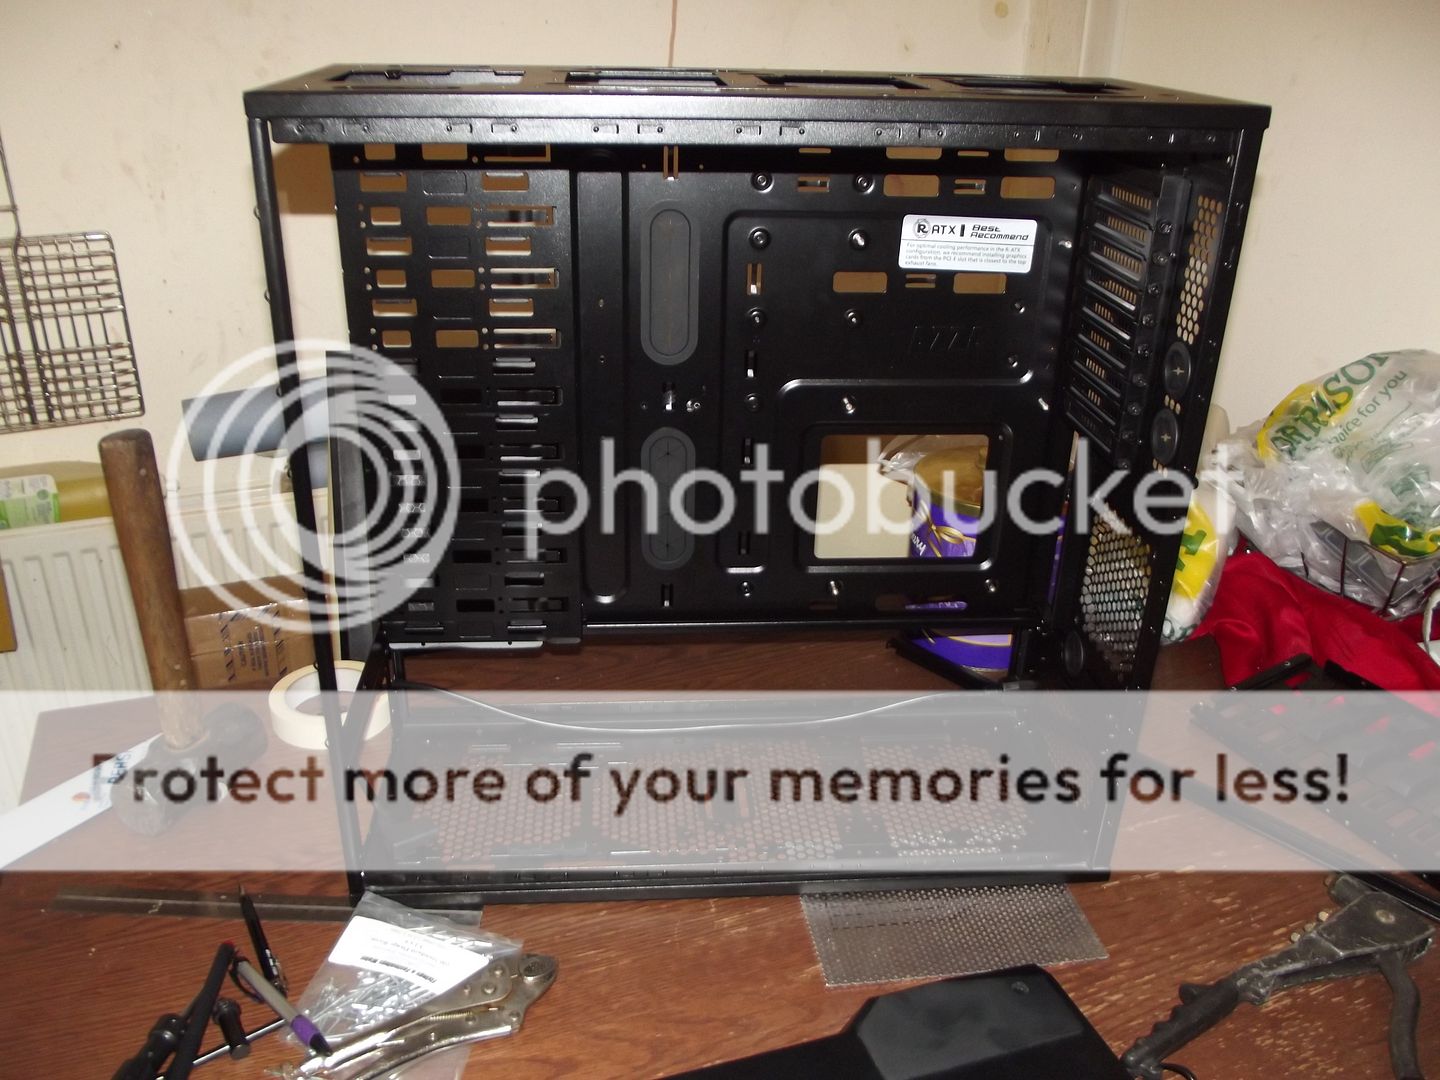
As most of you know the case changed from from an Enermax Fulmo GT to an Azza Genesis 9000 as the Genesis offered a stronger frame and more internal space to work with.... before work started it looked like this...

and the chassis itsself looked like this..

IIt is a brilliant reverse ATX chassis, very well made and strong enough for an 16Stone man to stand on, BUT as is the case with mods some structure needed to be removed so after an hour with a drill we have
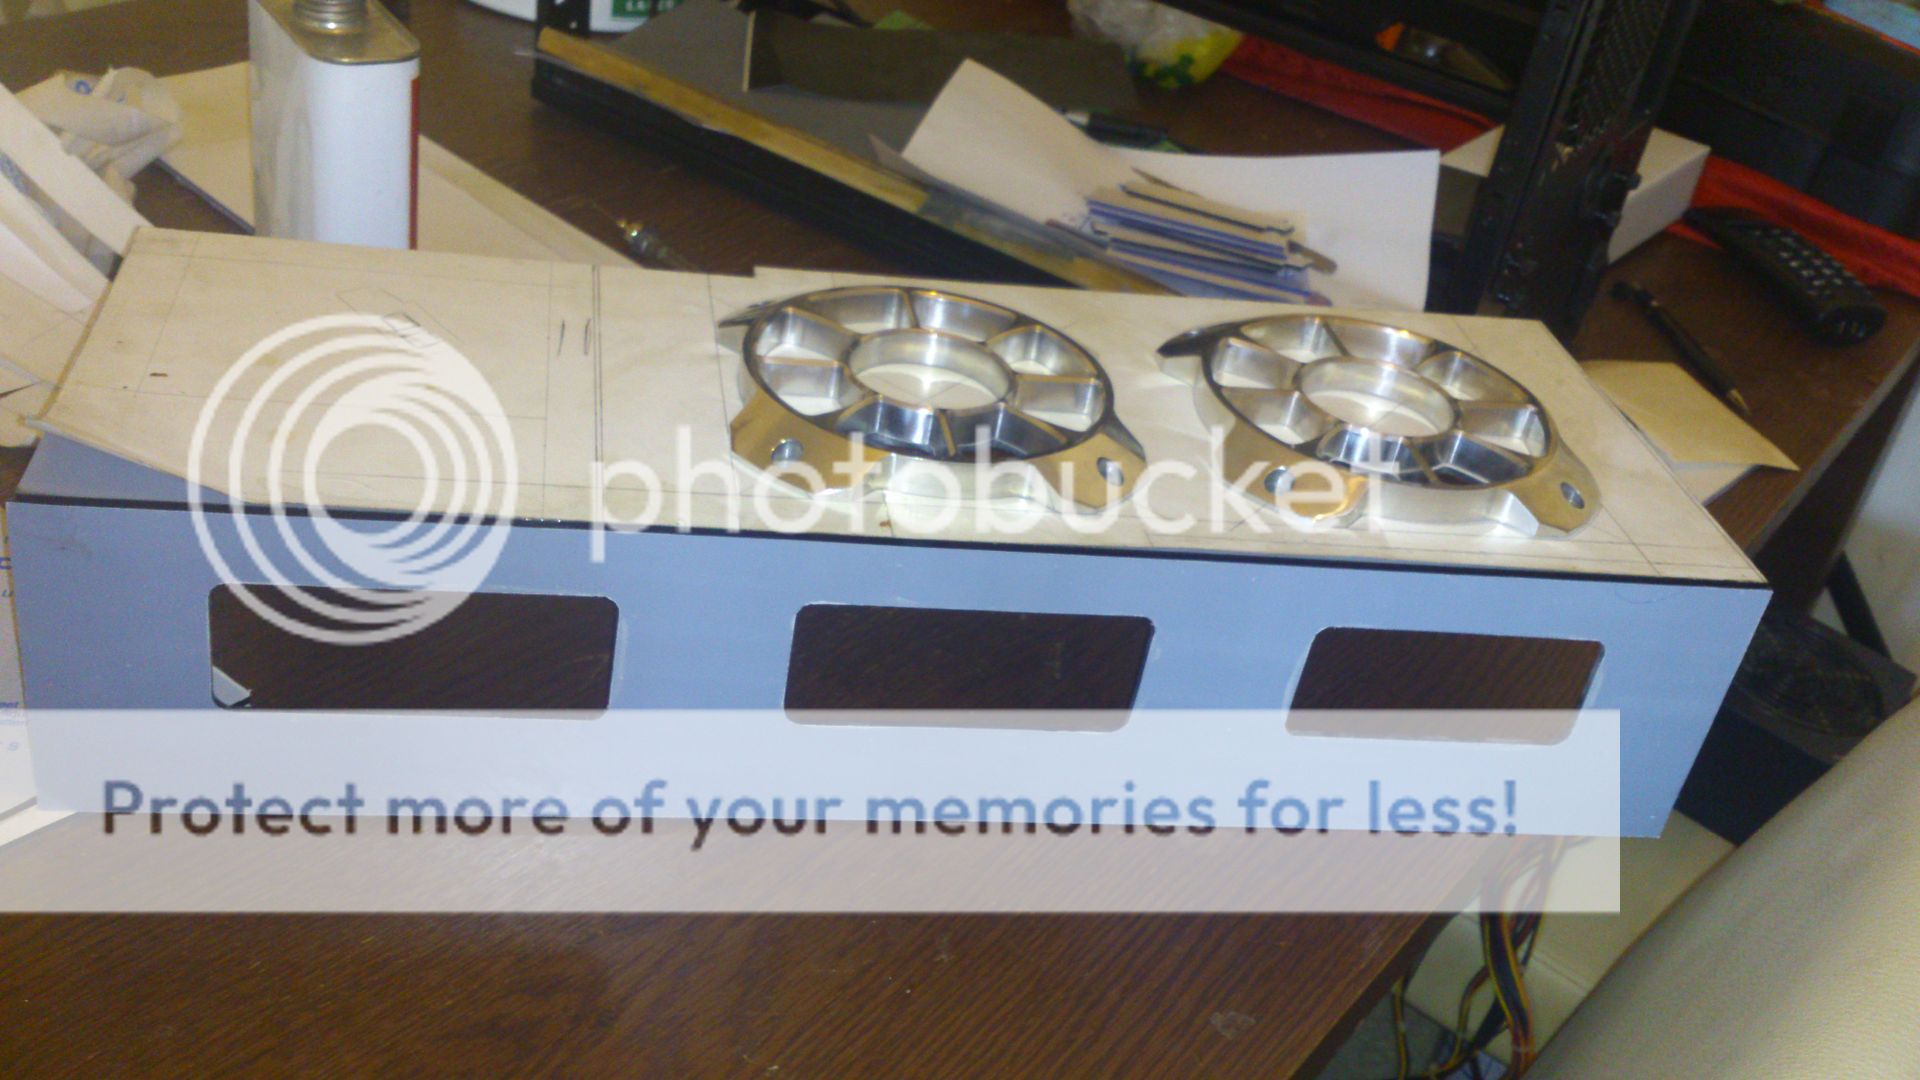
Frame all ready to measure up the floor panels and internal enclosures
As this case is somewhat modular in terms of its plastics i was freed up to mod sections in waves rather then all at once
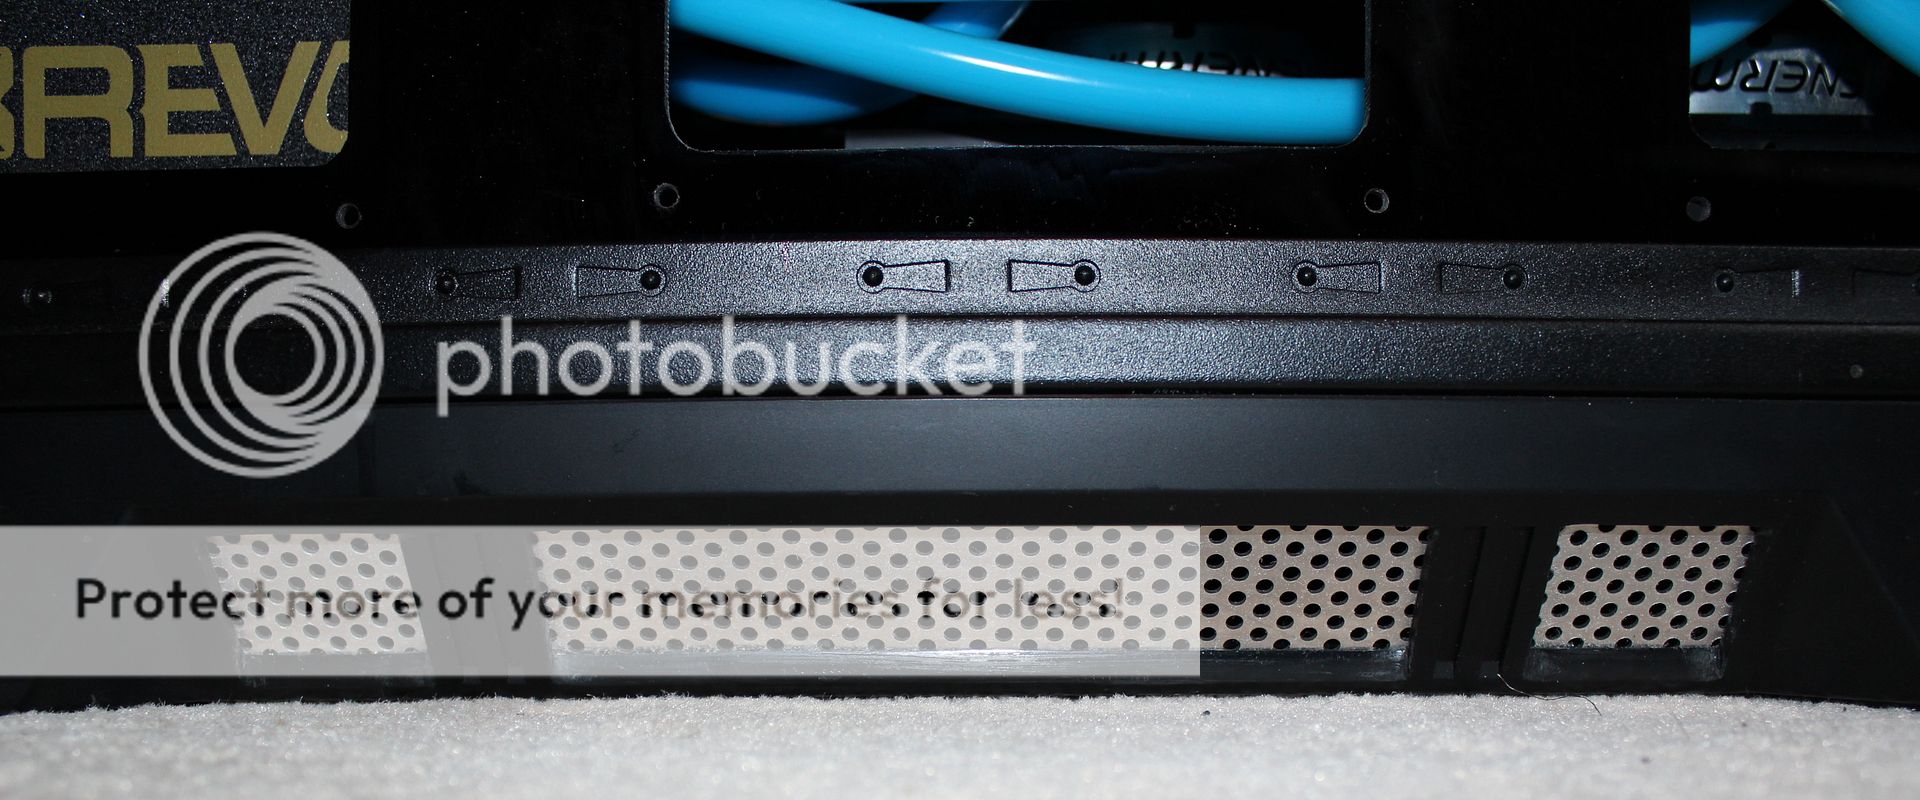
starting with the floor plate, this would also serve as a test run for the metals replacing all the red inserts in the bezels
The base plastics are very heavy built and massive
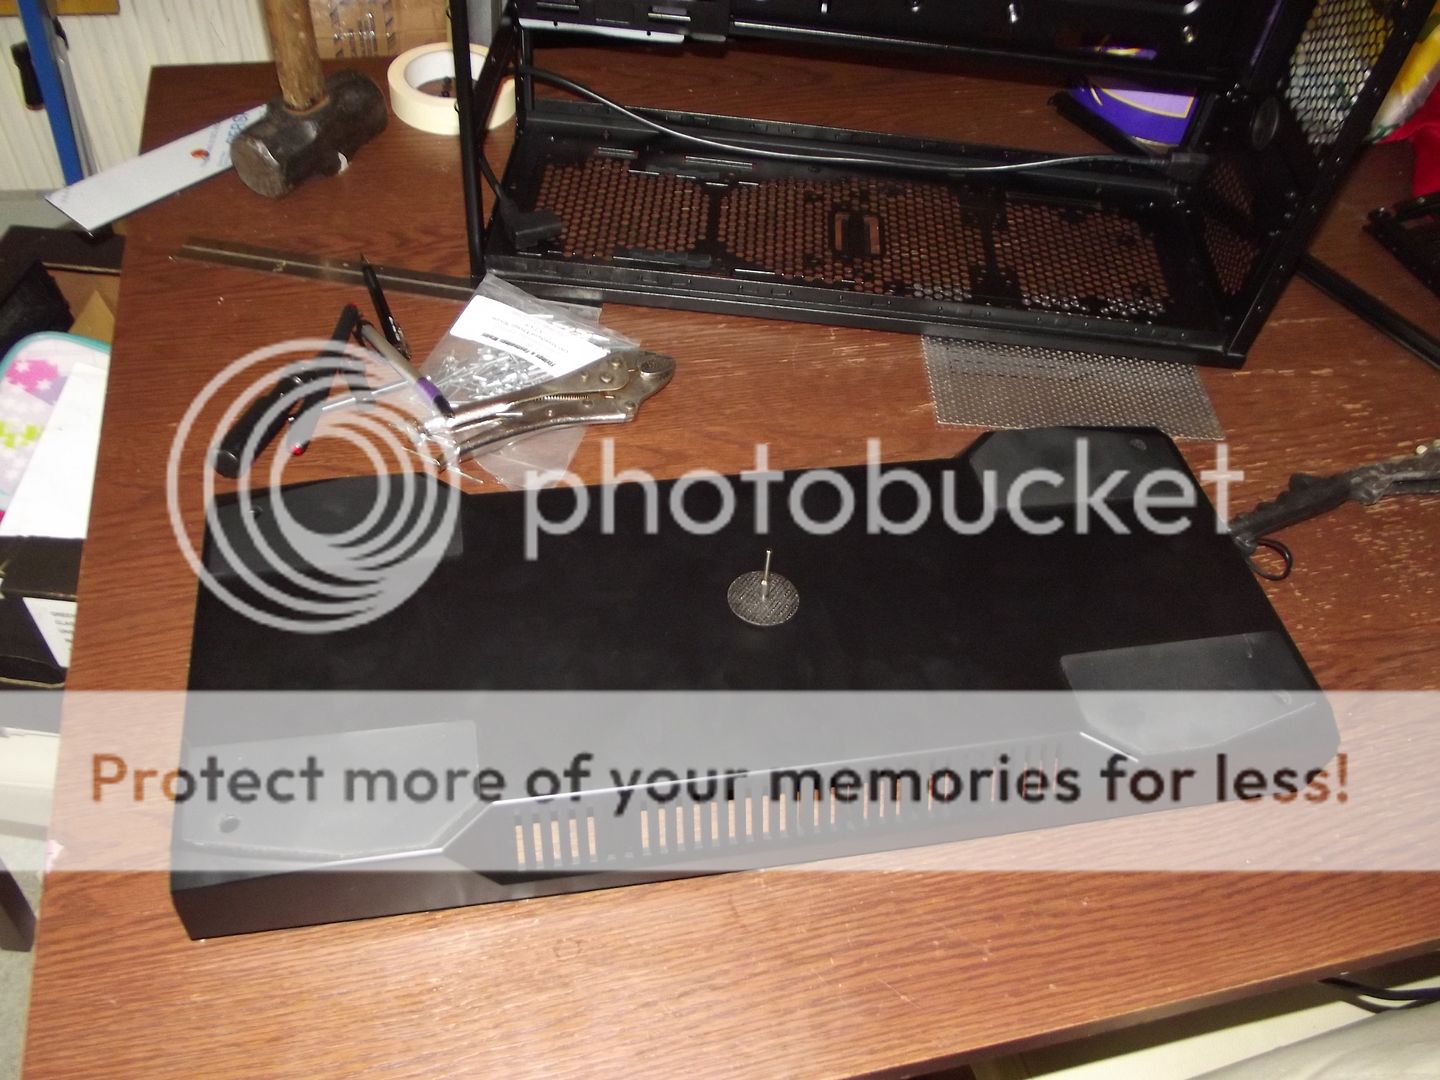
But the vents need to go to make way for metal inserts
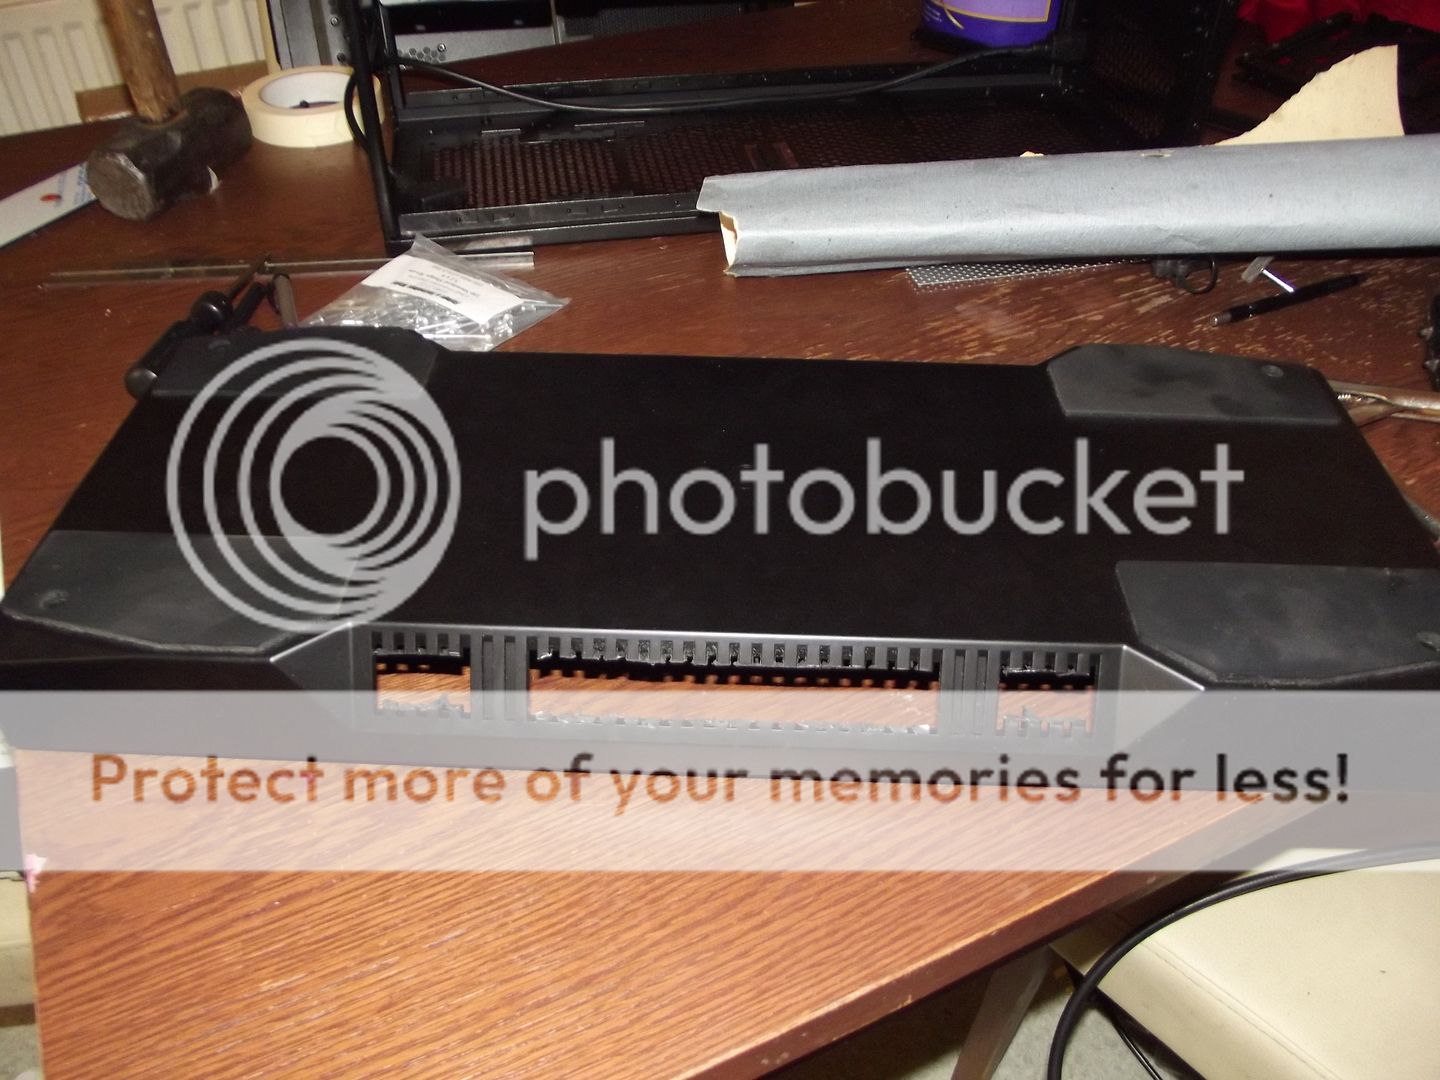

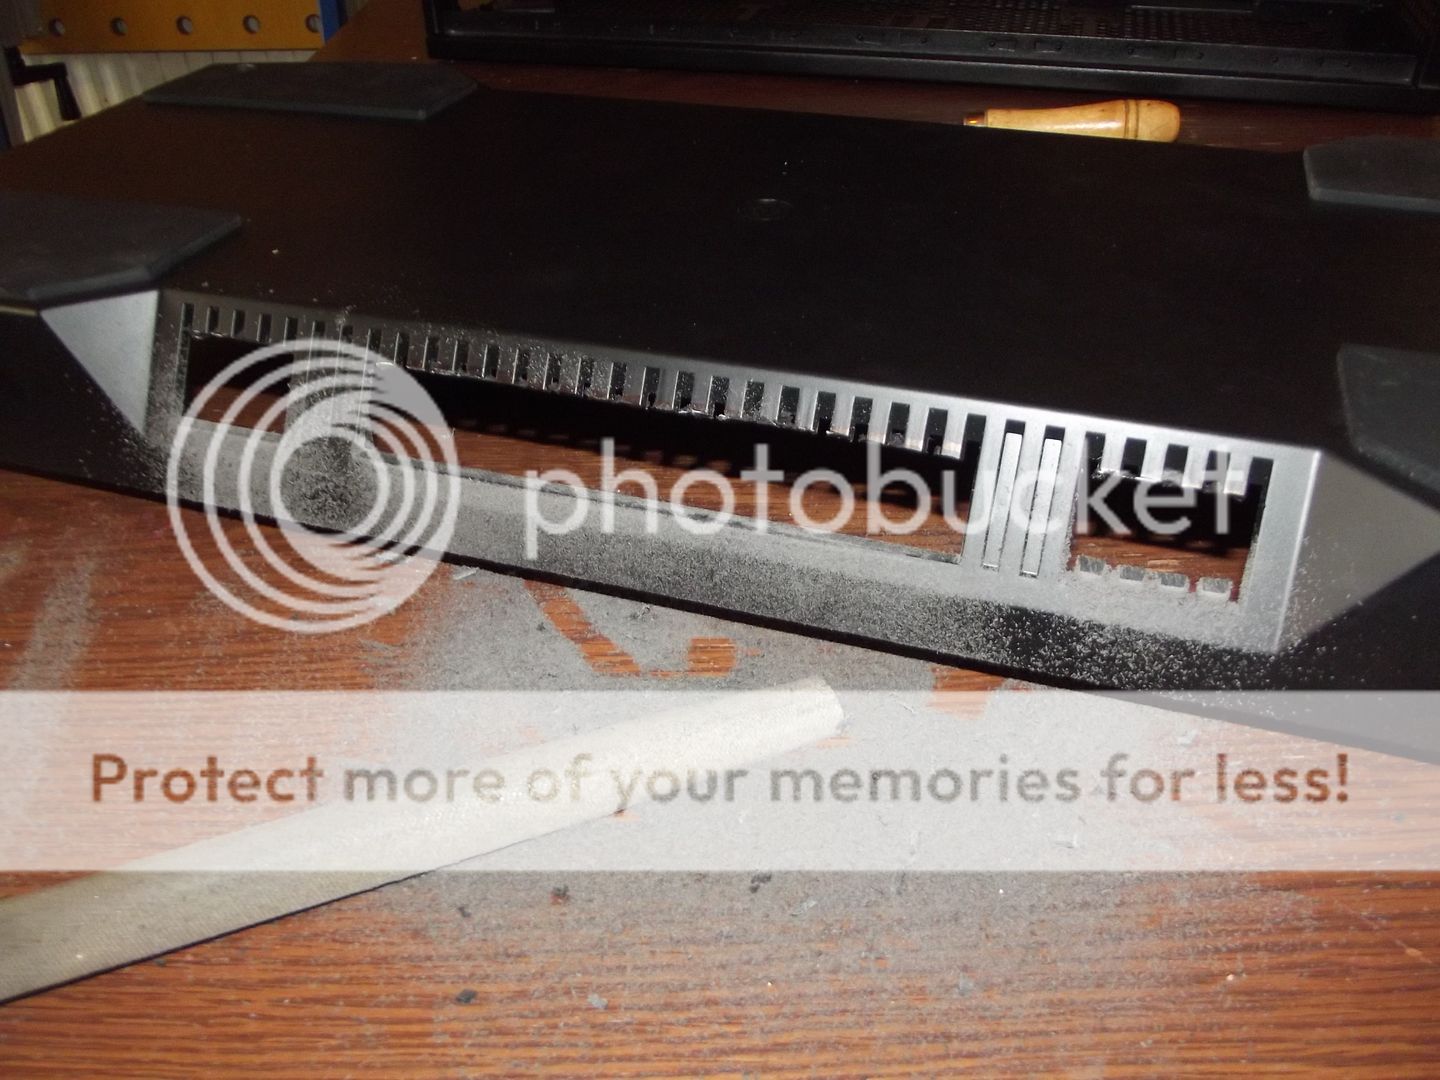
Perforated plate form ebay makes freat replacement vent intakes for the floor
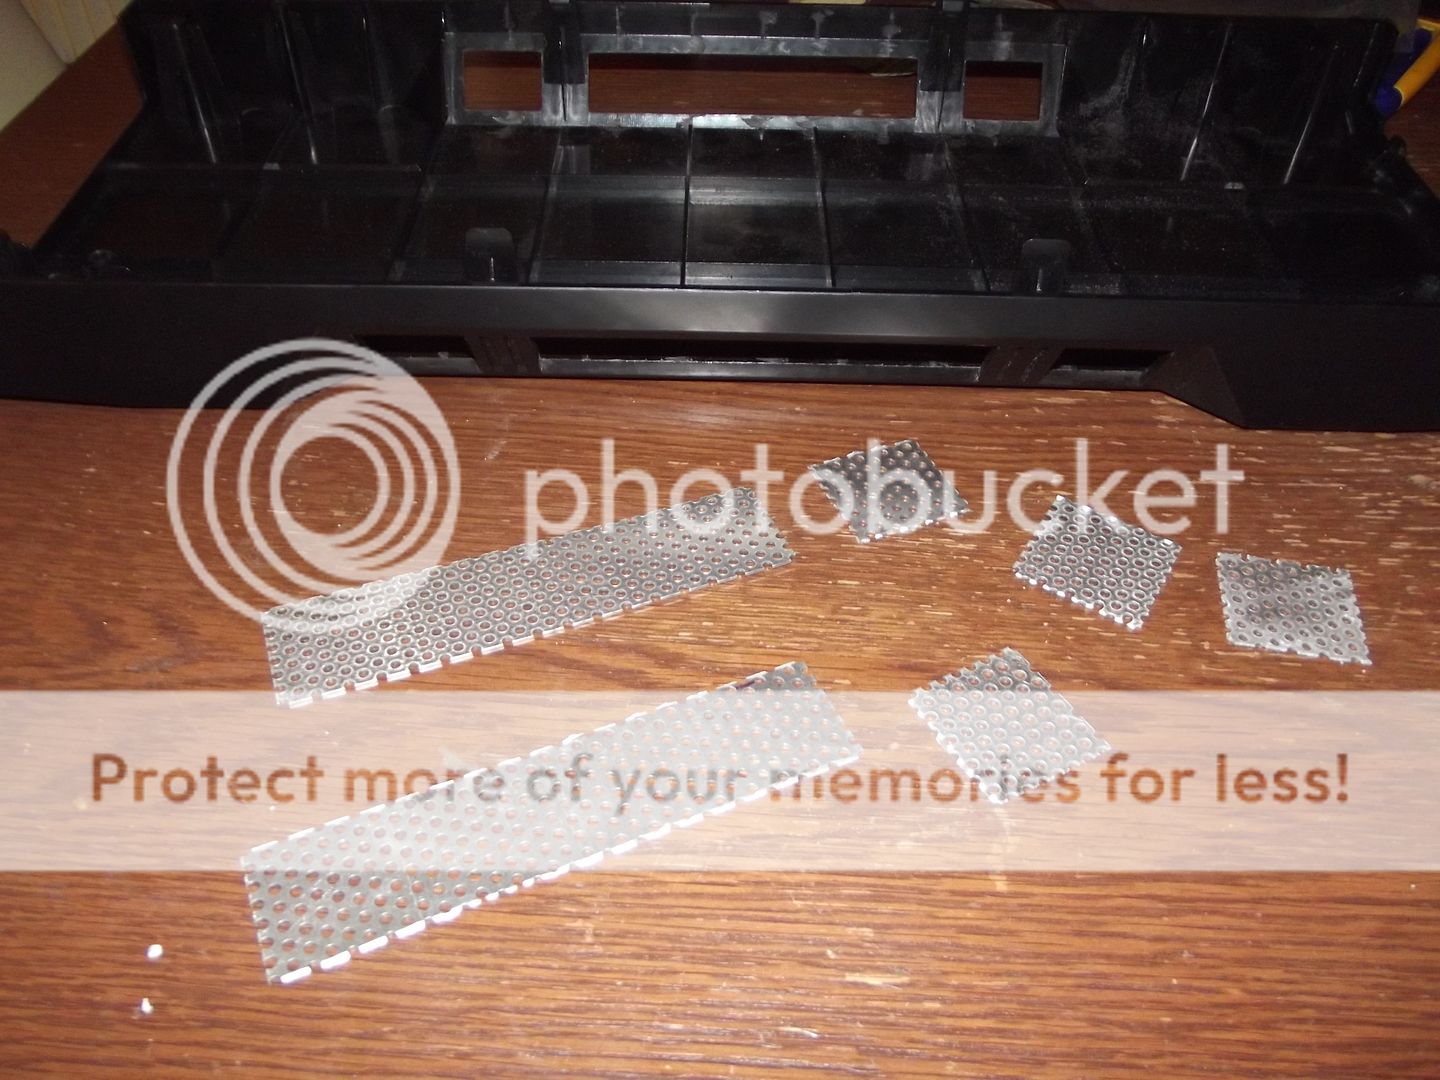

Ahh hot glue what would i do without you....
As most of you know the case changed from from an Enermax Fulmo GT to an Azza Genesis 9000 as the Genesis offered a stronger frame and more internal space to work with.... before work started it looked like this...
and the chassis itsself looked like this..
IIt is a brilliant reverse ATX chassis, very well made and strong enough for an 16Stone man to stand on, BUT as is the case with mods some structure needed to be removed so after an hour with a drill we have
Frame all ready to measure up the floor panels and internal enclosures
As this case is somewhat modular in terms of its plastics i was freed up to mod sections in waves rather then all at once
starting with the floor plate, this would also serve as a test run for the metals replacing all the red inserts in the bezels
The base plastics are very heavy built and massive
But the vents need to go to make way for metal inserts
Perforated plate form ebay makes freat replacement vent intakes for the floor
Ahh hot glue what would i do without you....
Options
- Mark as New
- Bookmark
- Subscribe
- Mute
- Subscribe to RSS Feed
- Permalink
01-10-2013 04:04 AM
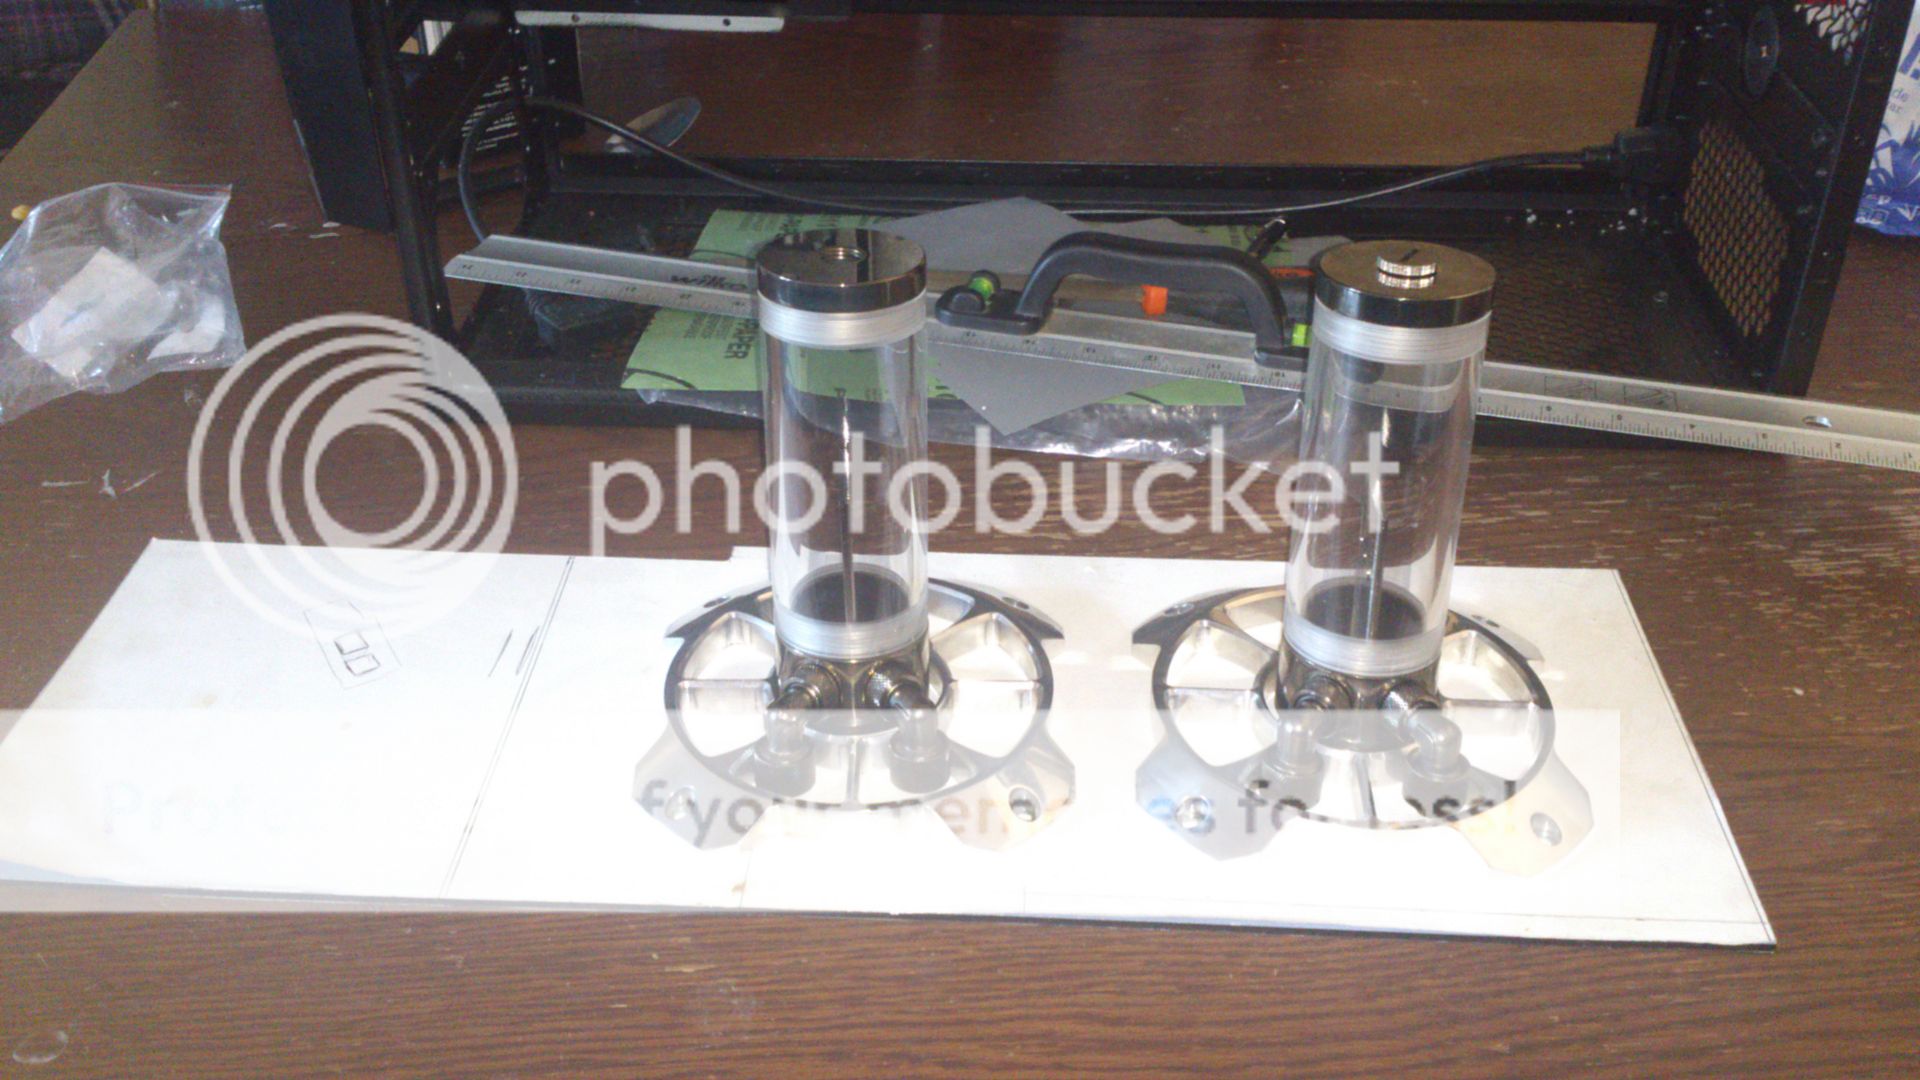
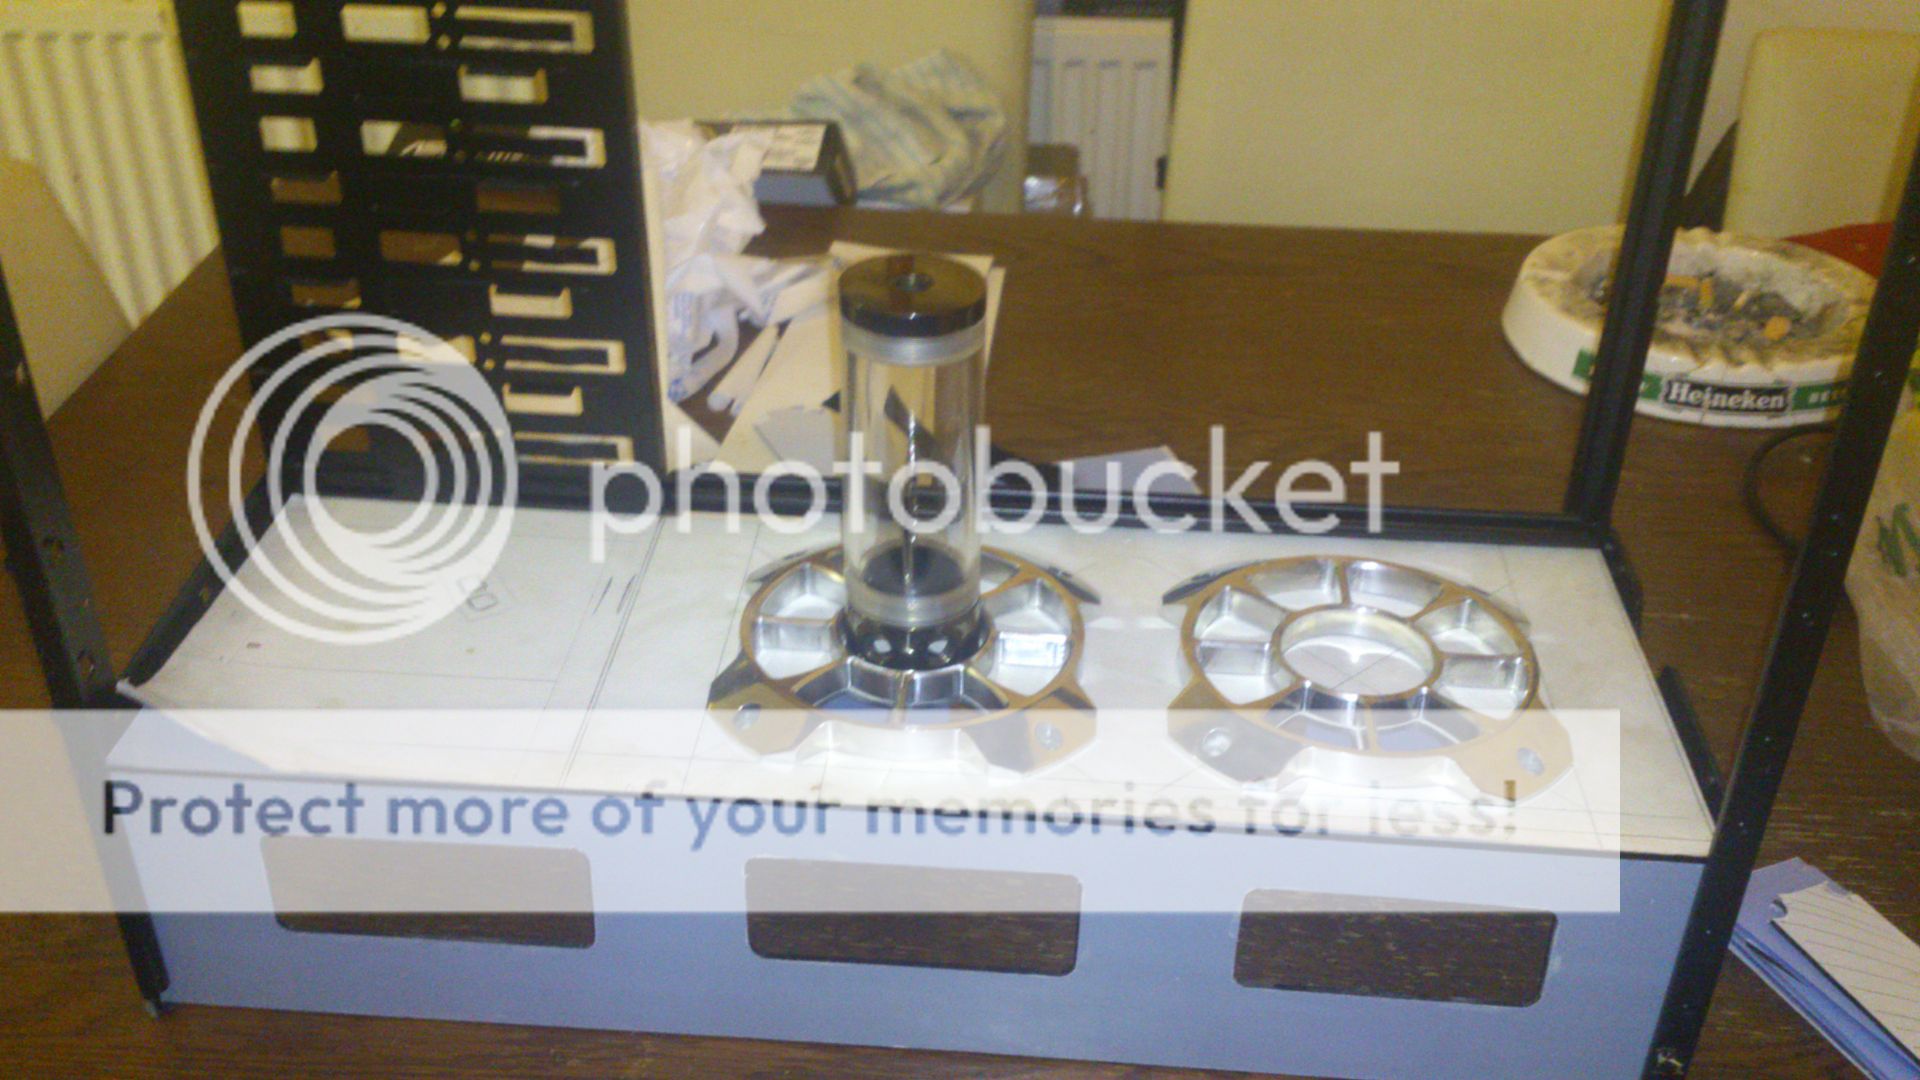
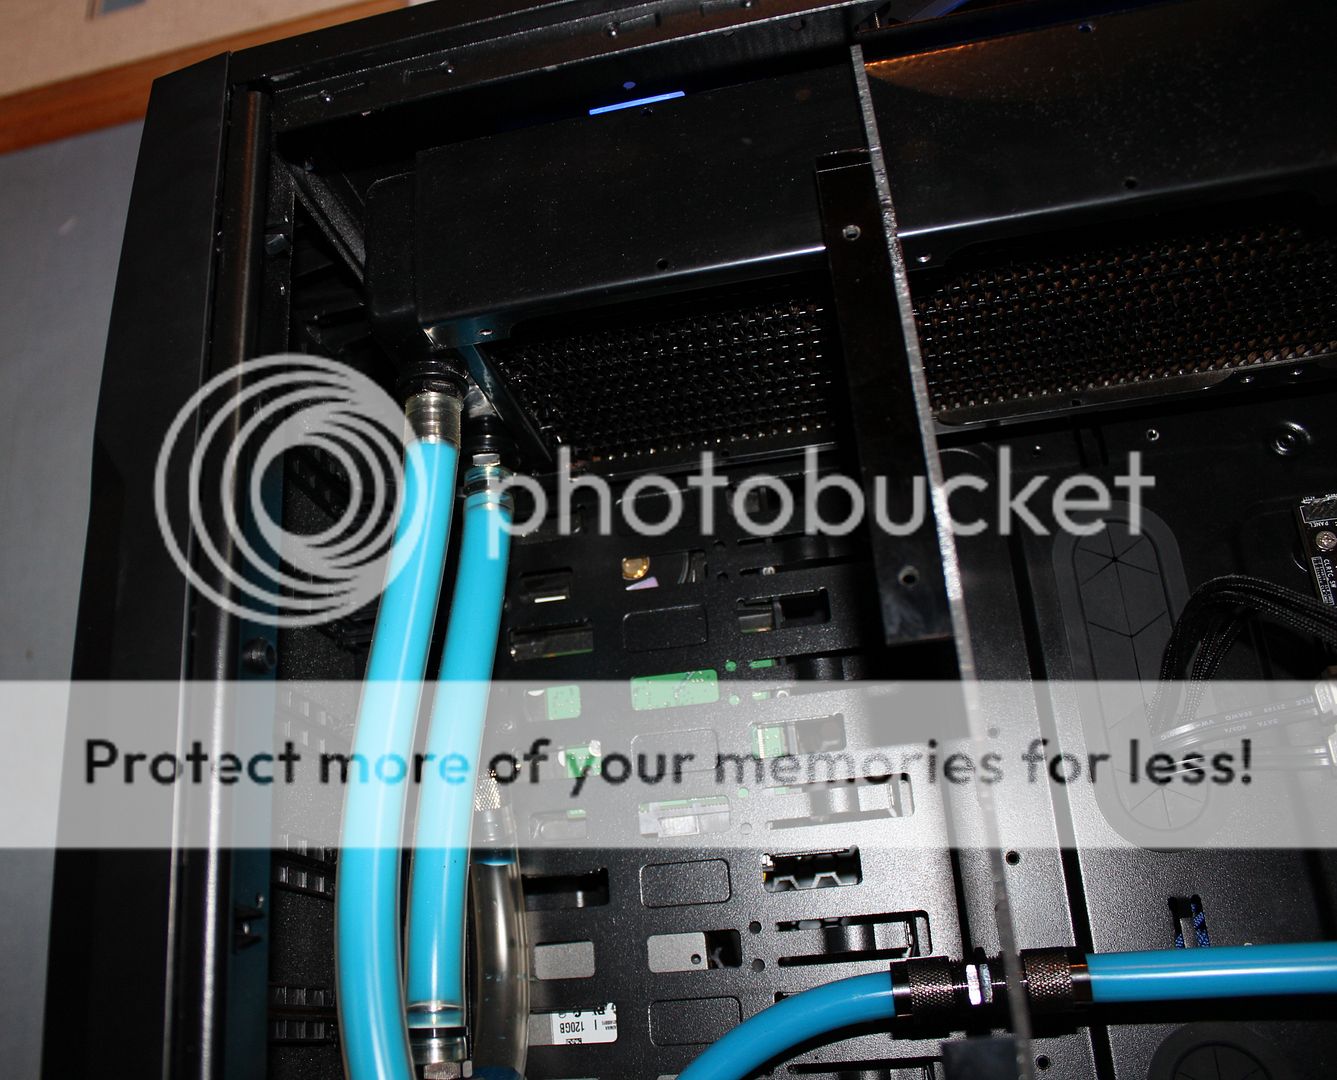
First test fit of all the enclosures plus checking that weight of the res holders will not warp the top of the enclosure
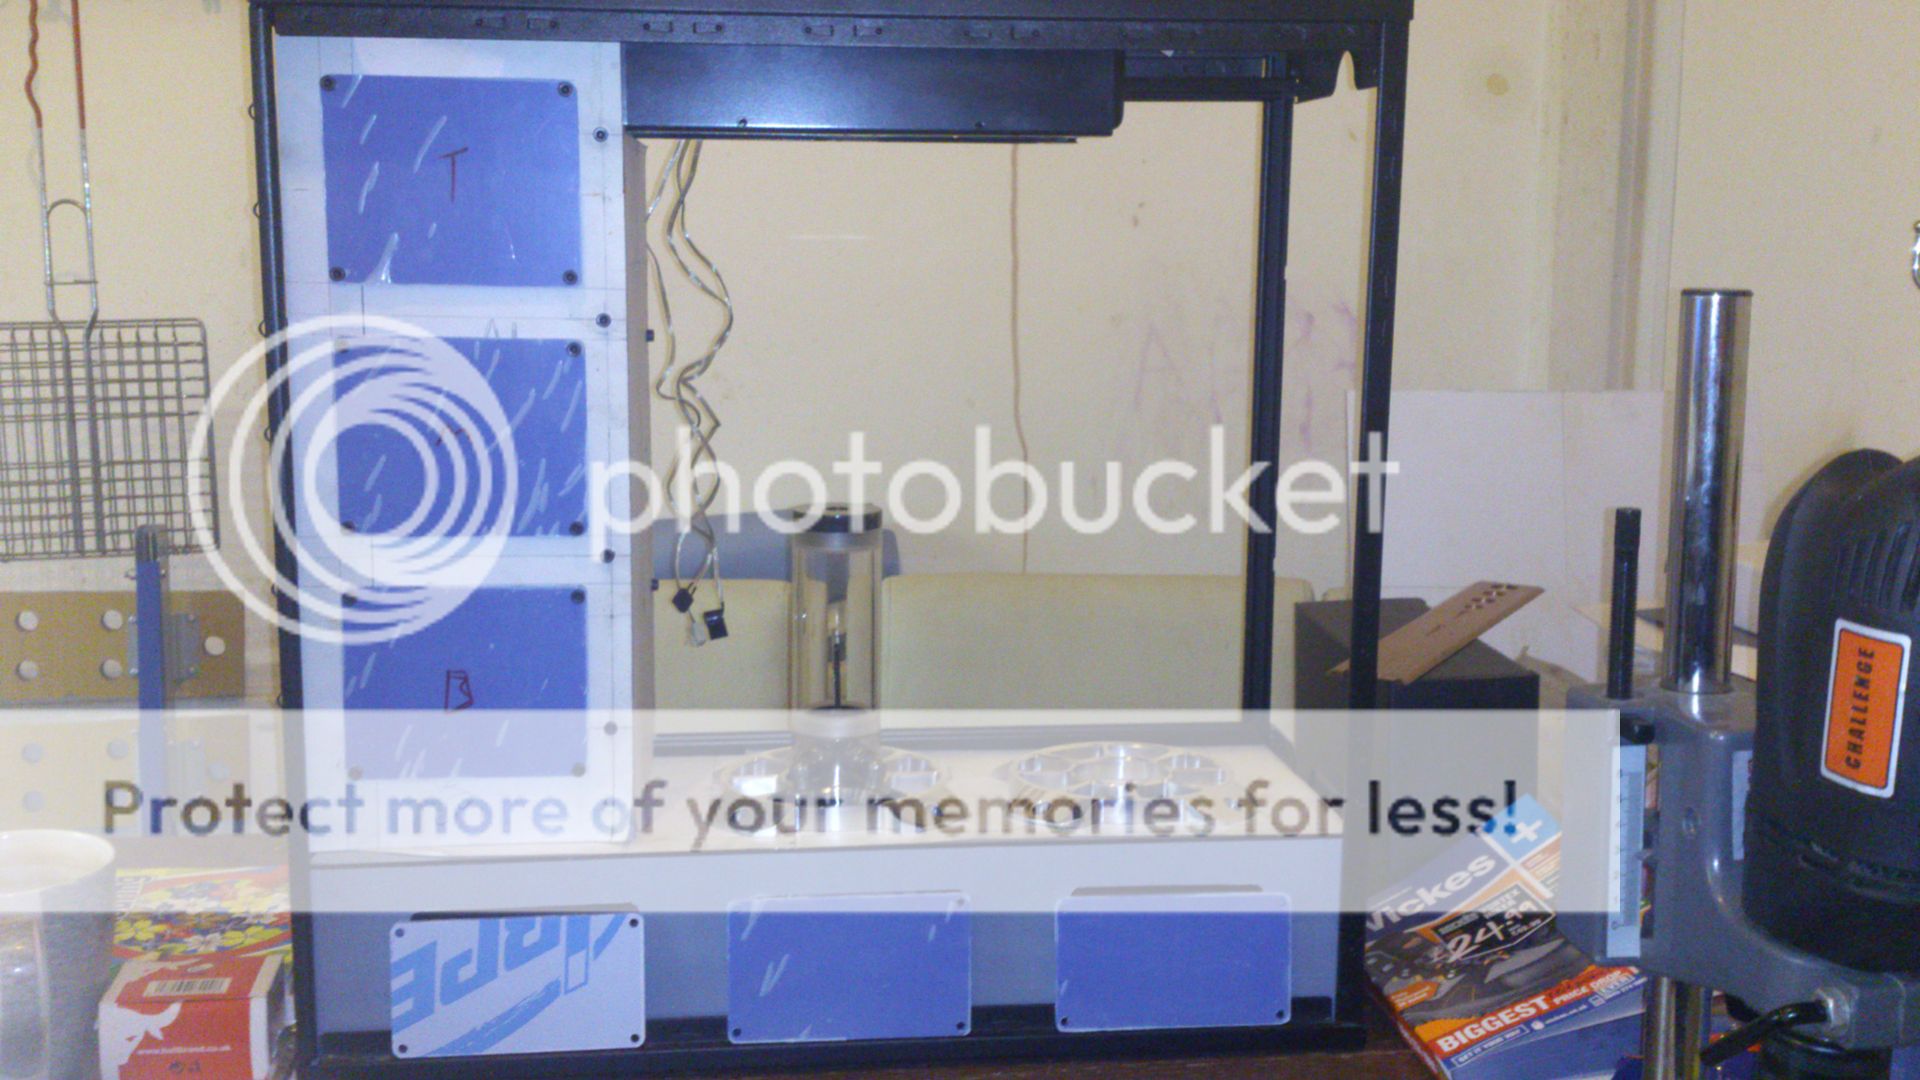
Pass through holes cut for Tubing to and from the twin res, due to access the PSU, bottom Rad and main PSU looms are already installed in the lower enclosure
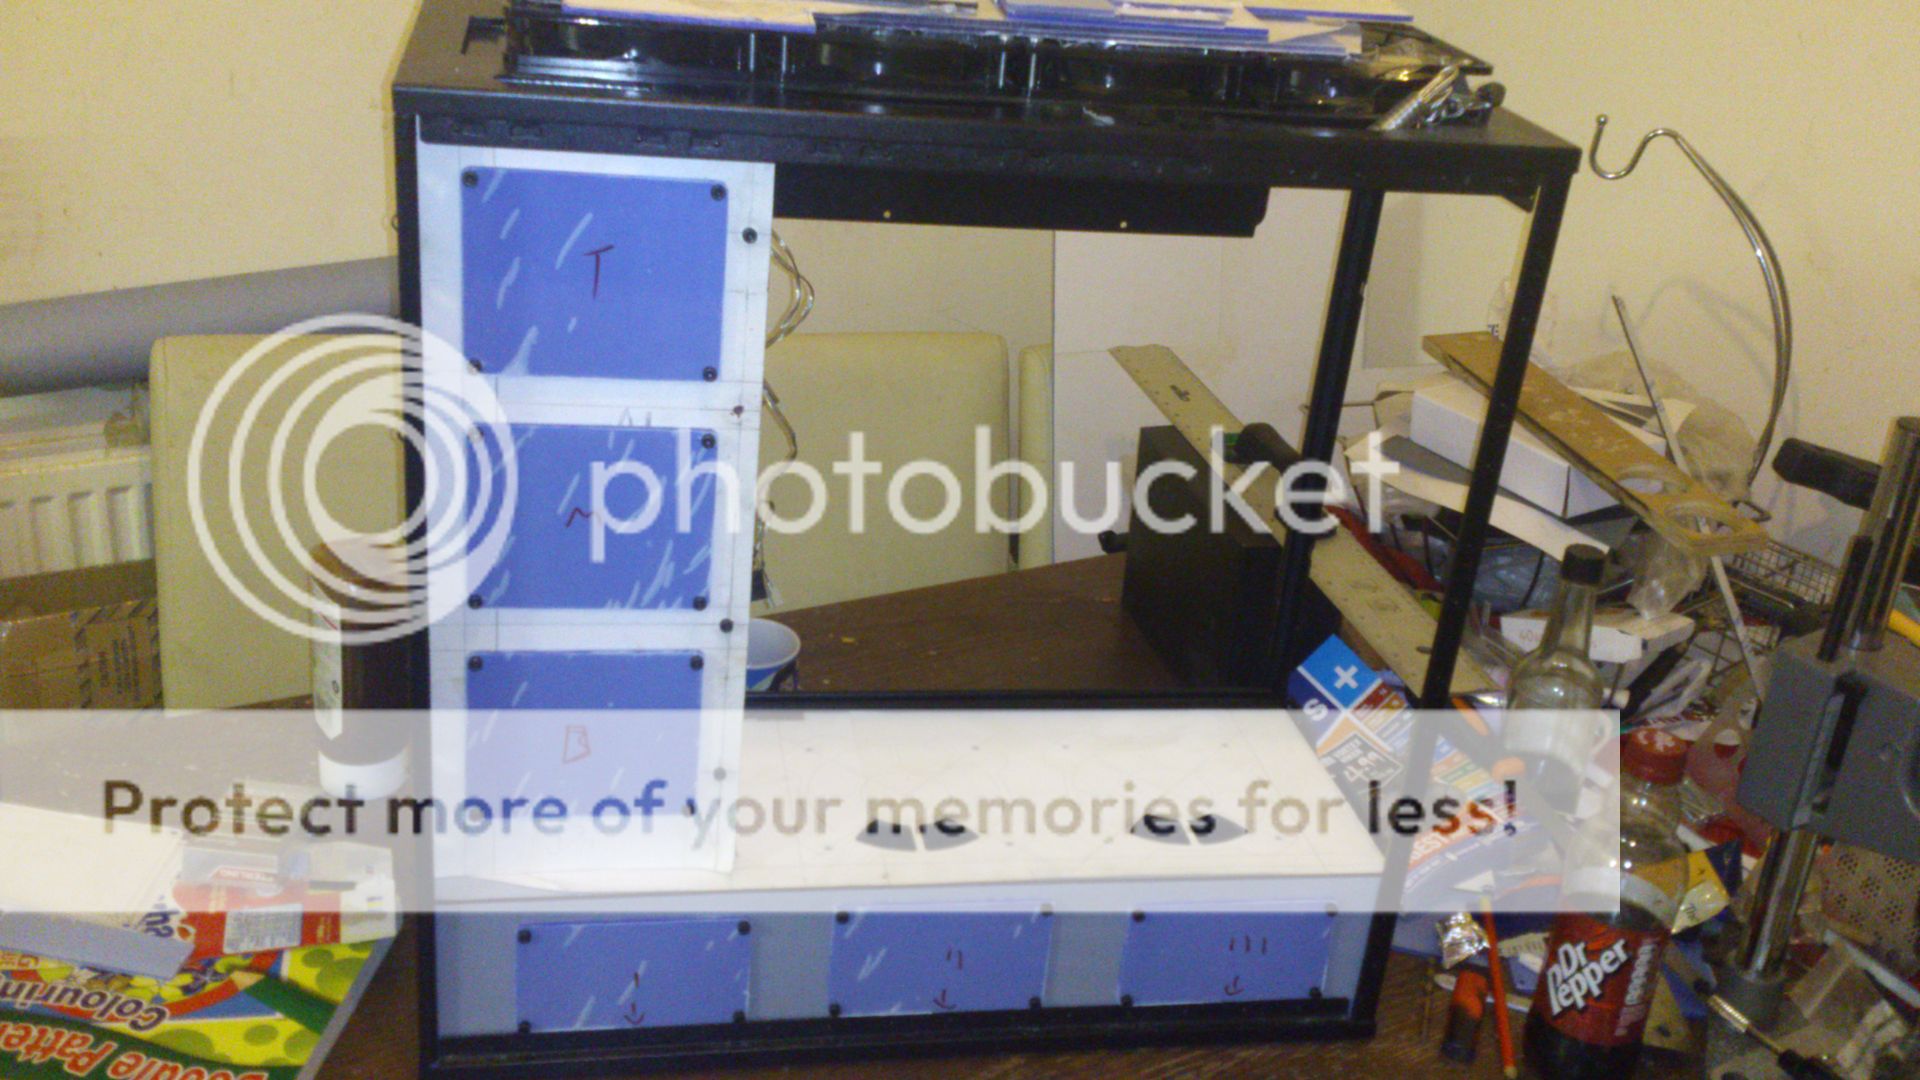
Well that's enough of the enclosures for now on to the roof again
After installing the rails and letting the welds cure in go the 12 vent components in to there sockets, until the retention arm goes in they can move through 140deg


I suspect that Dust is going to be an issue... just a hunch
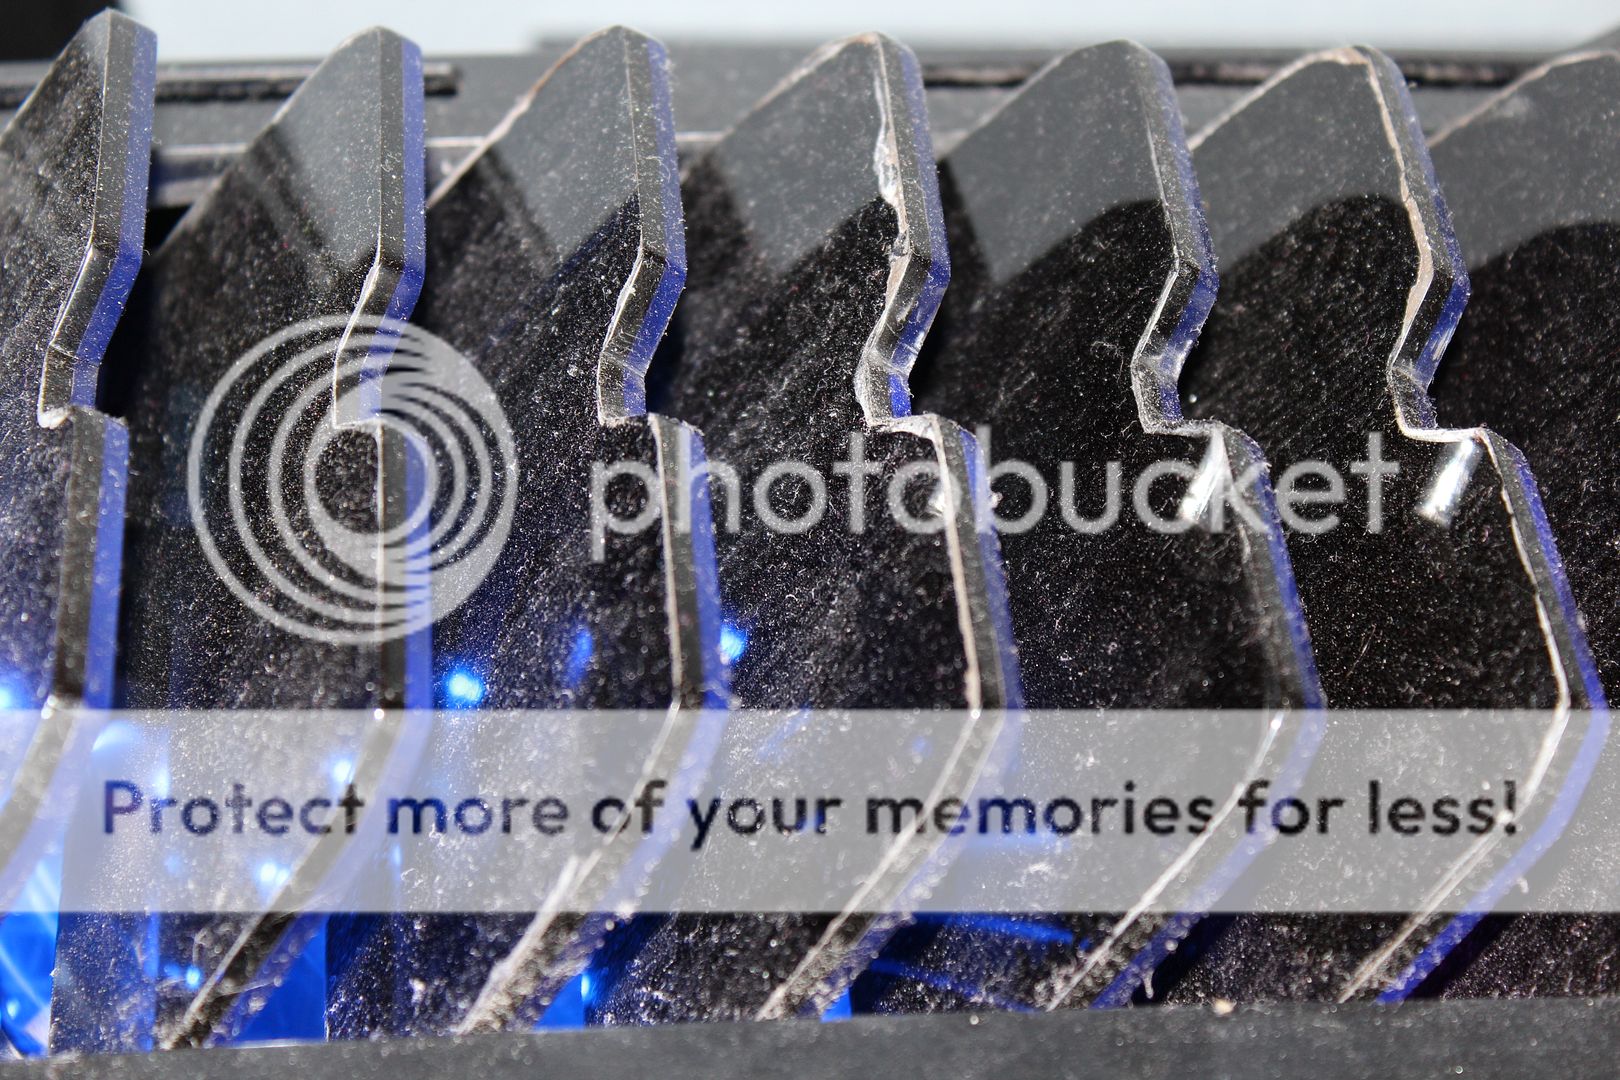
but DAYUM they look good lit

I made a small plate to hold the servo, amazingly a tiny 9g servo can pull the vents, the full array weight close to 3lb

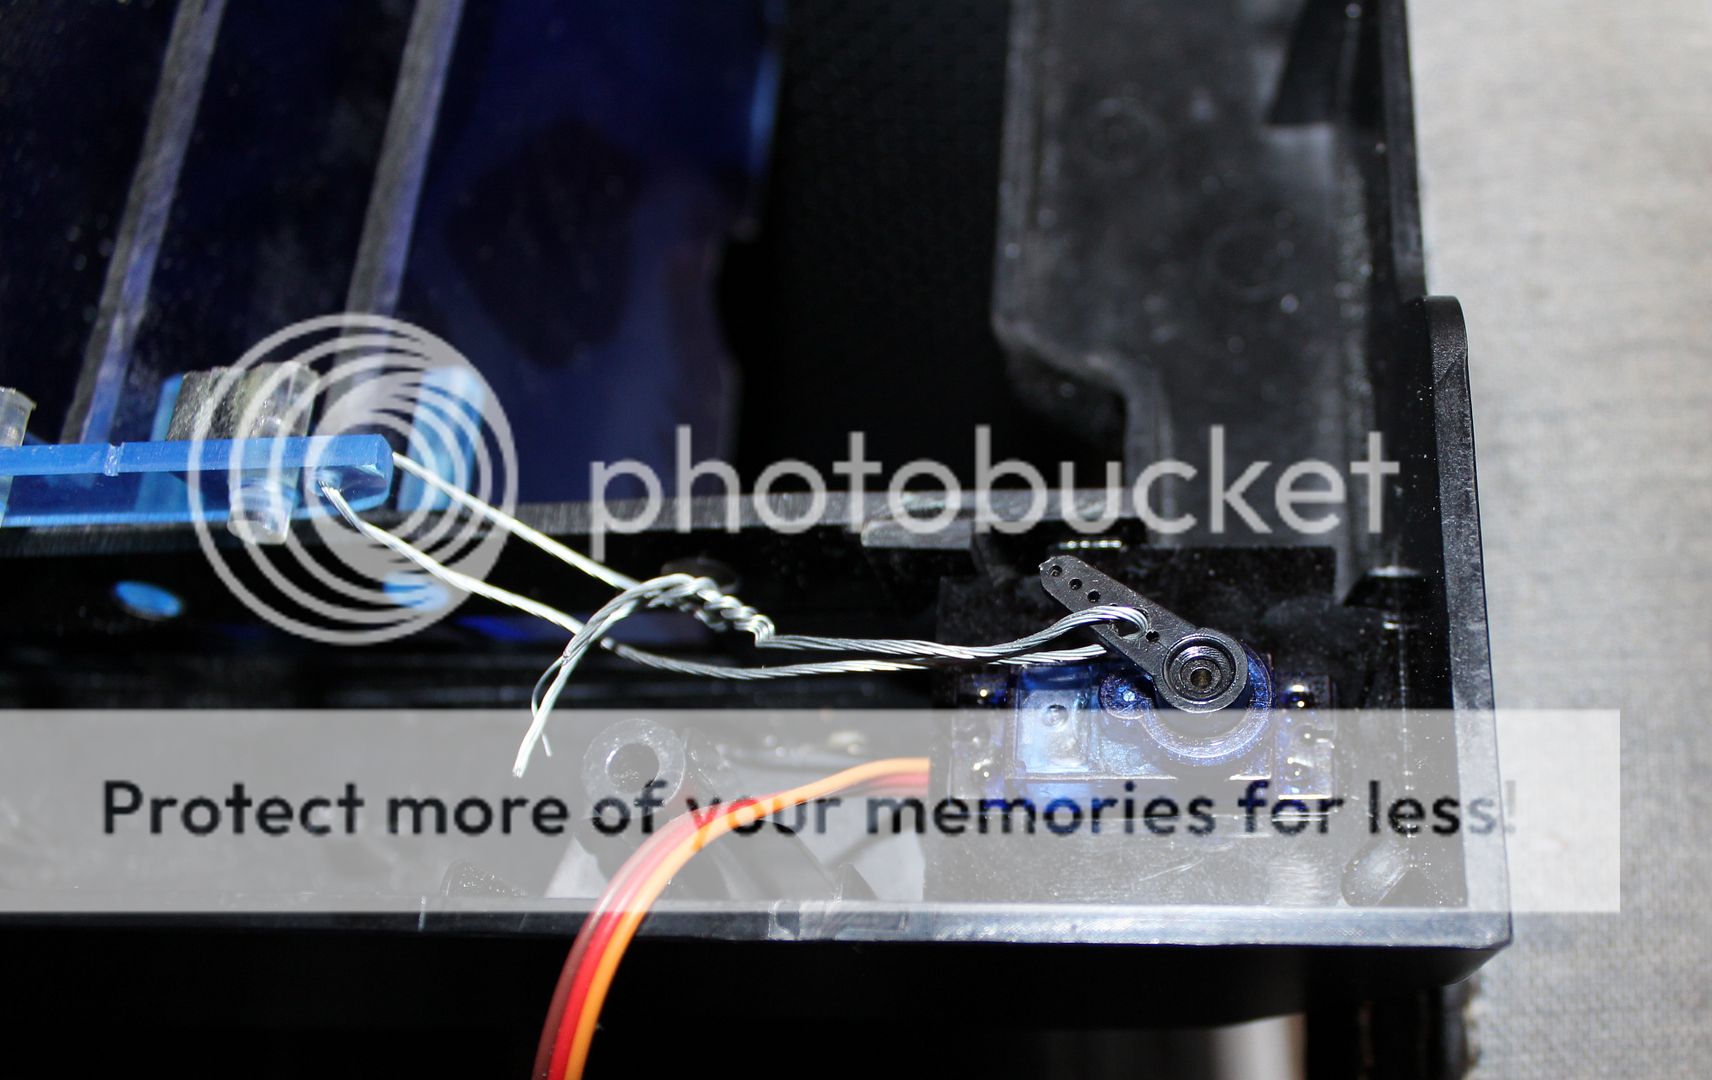
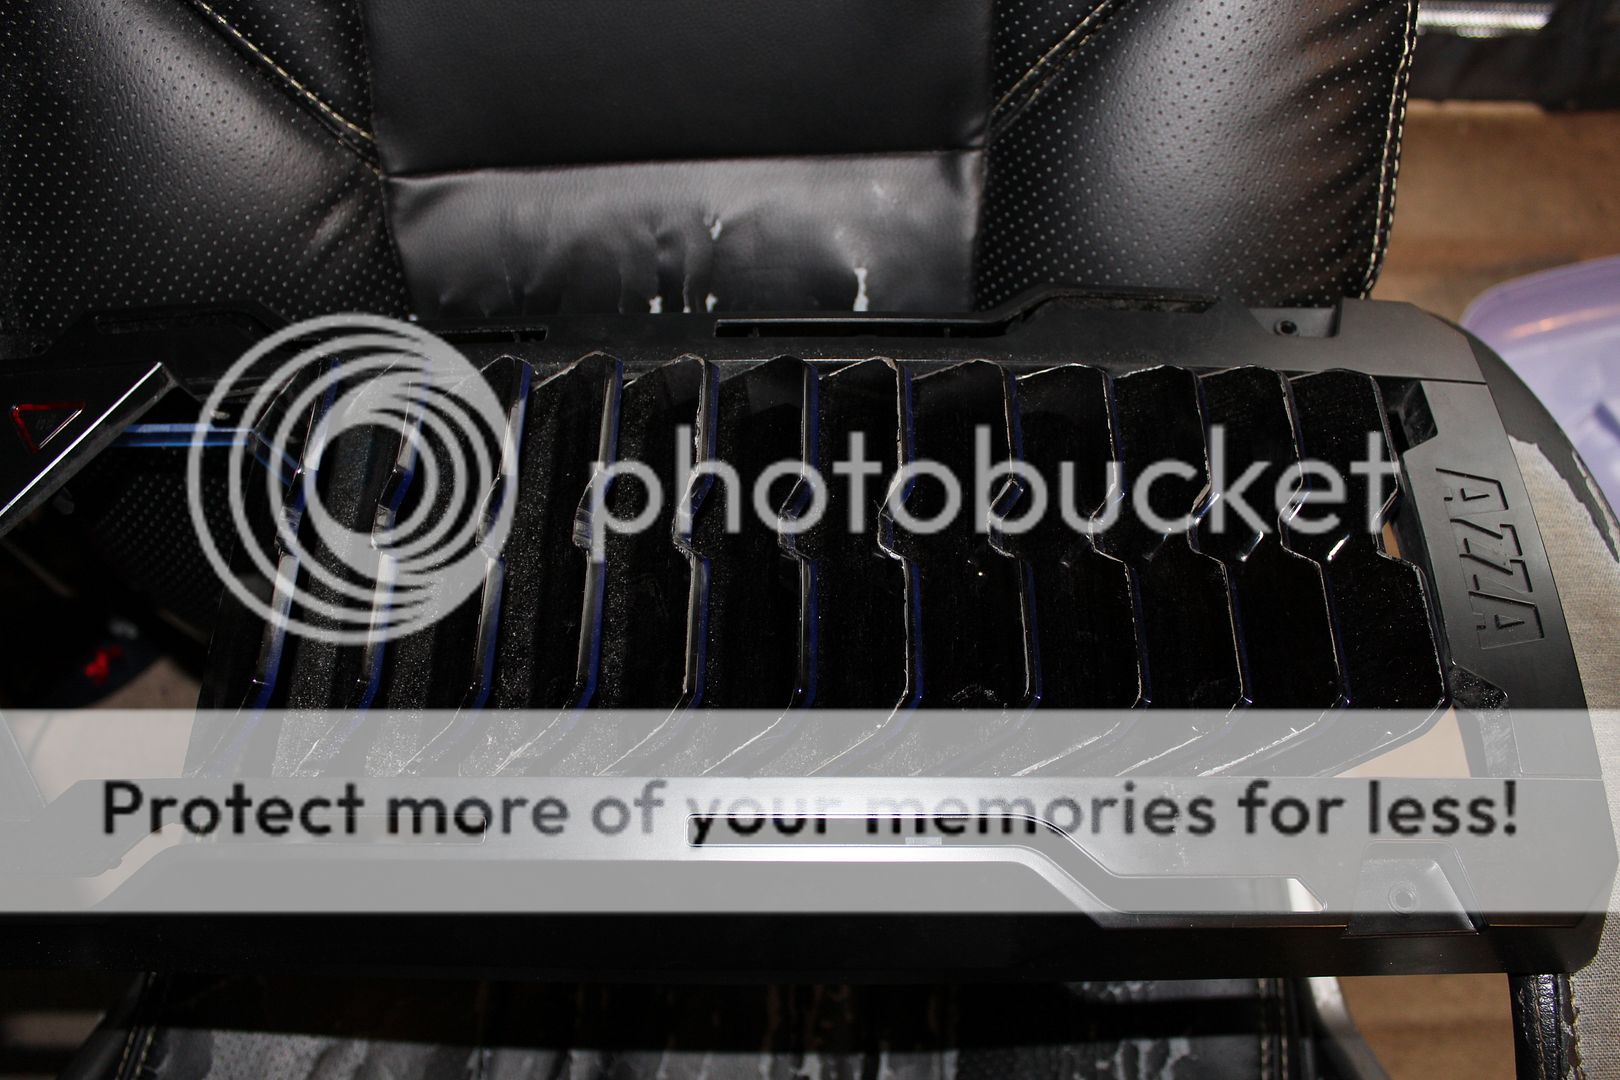

Yes i know the metal wire is a little ghetto but im waiting on an RC pull arm
Pass through holes cut for Tubing to and from the twin res, due to access the PSU, bottom Rad and main PSU looms are already installed in the lower enclosure
Well that's enough of the enclosures for now on to the roof again
After installing the rails and letting the welds cure in go the 12 vent components in to there sockets, until the retention arm goes in they can move through 140deg
I suspect that Dust is going to be an issue... just a hunch
but DAYUM they look good lit
I made a small plate to hold the servo, amazingly a tiny 9g servo can pull the vents, the full array weight close to 3lb
Yes i know the metal wire is a little ghetto but im waiting on an RC pull arm
Options
- Mark as New
- Bookmark
- Subscribe
- Mute
- Subscribe to RSS Feed
- Permalink
01-10-2013 04:05 AM
Construction is 90% complete and its already in service as my main game machine, side door needs a window and massive changes are going to be made to the front of the case
So im going to show off some of the key features so far
modified intakes and bottom deck enclosure
Access ports

Concealed tubing


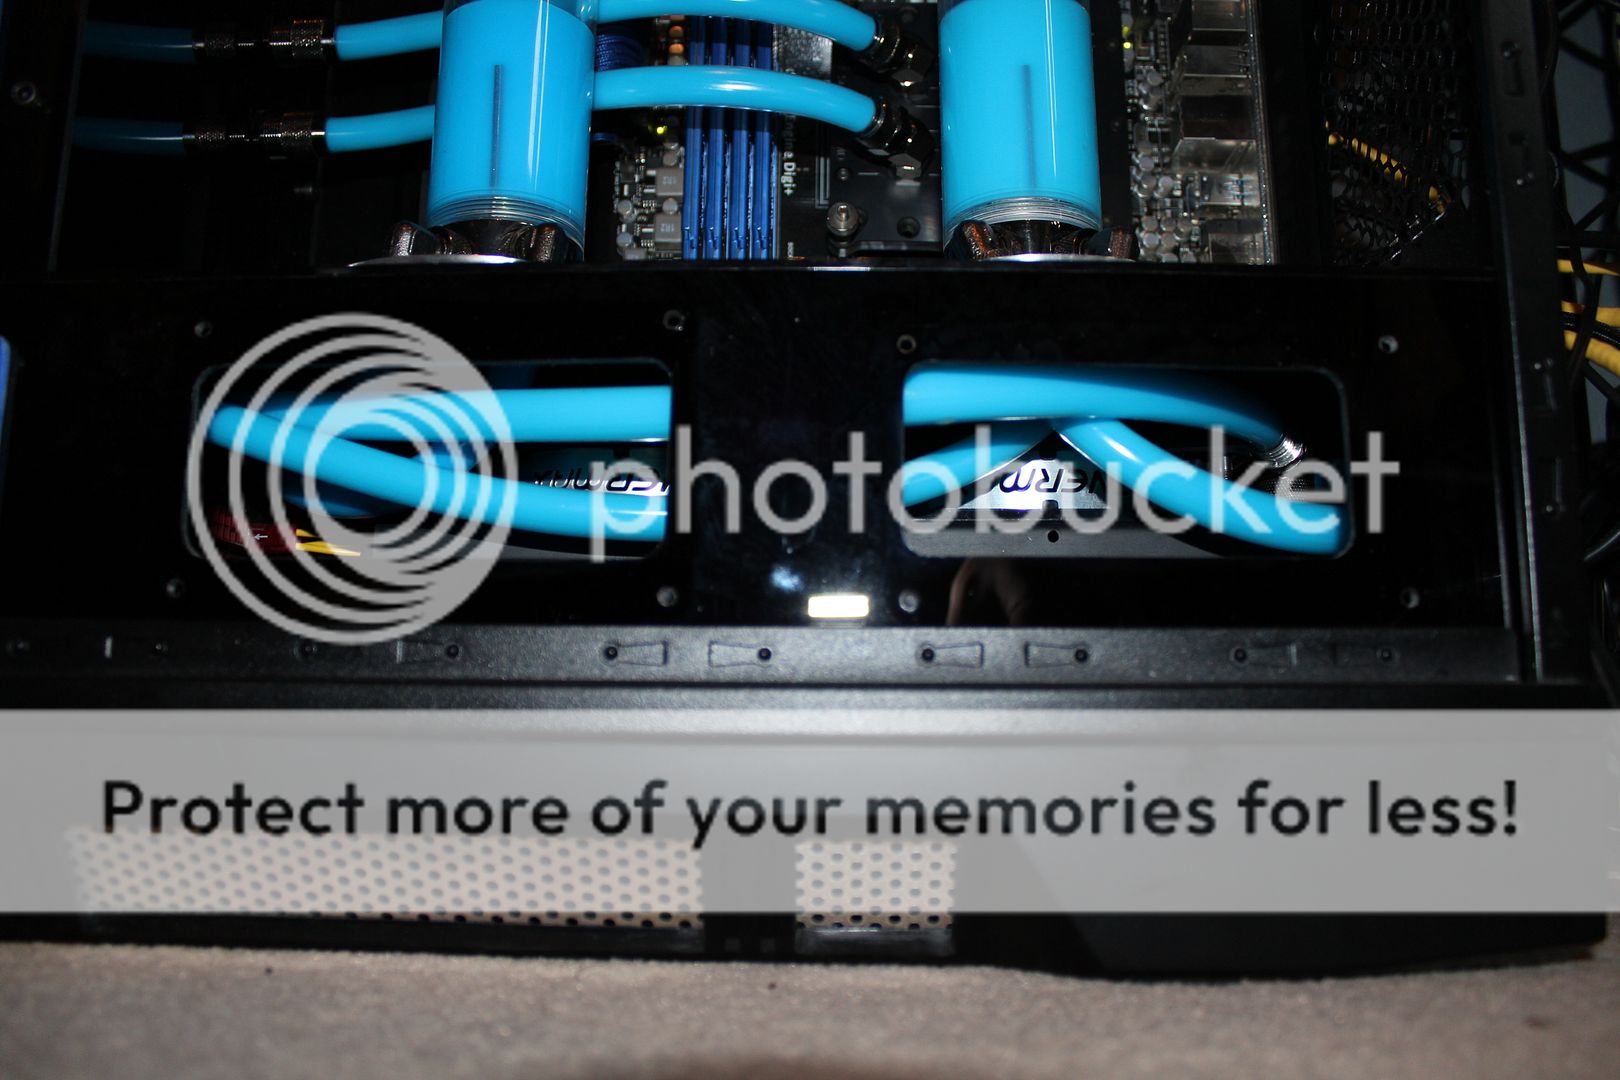
Tidy tubing with bulkheads

Back plate mounted SSD and HDD

Damn good lookin if i do say so myself
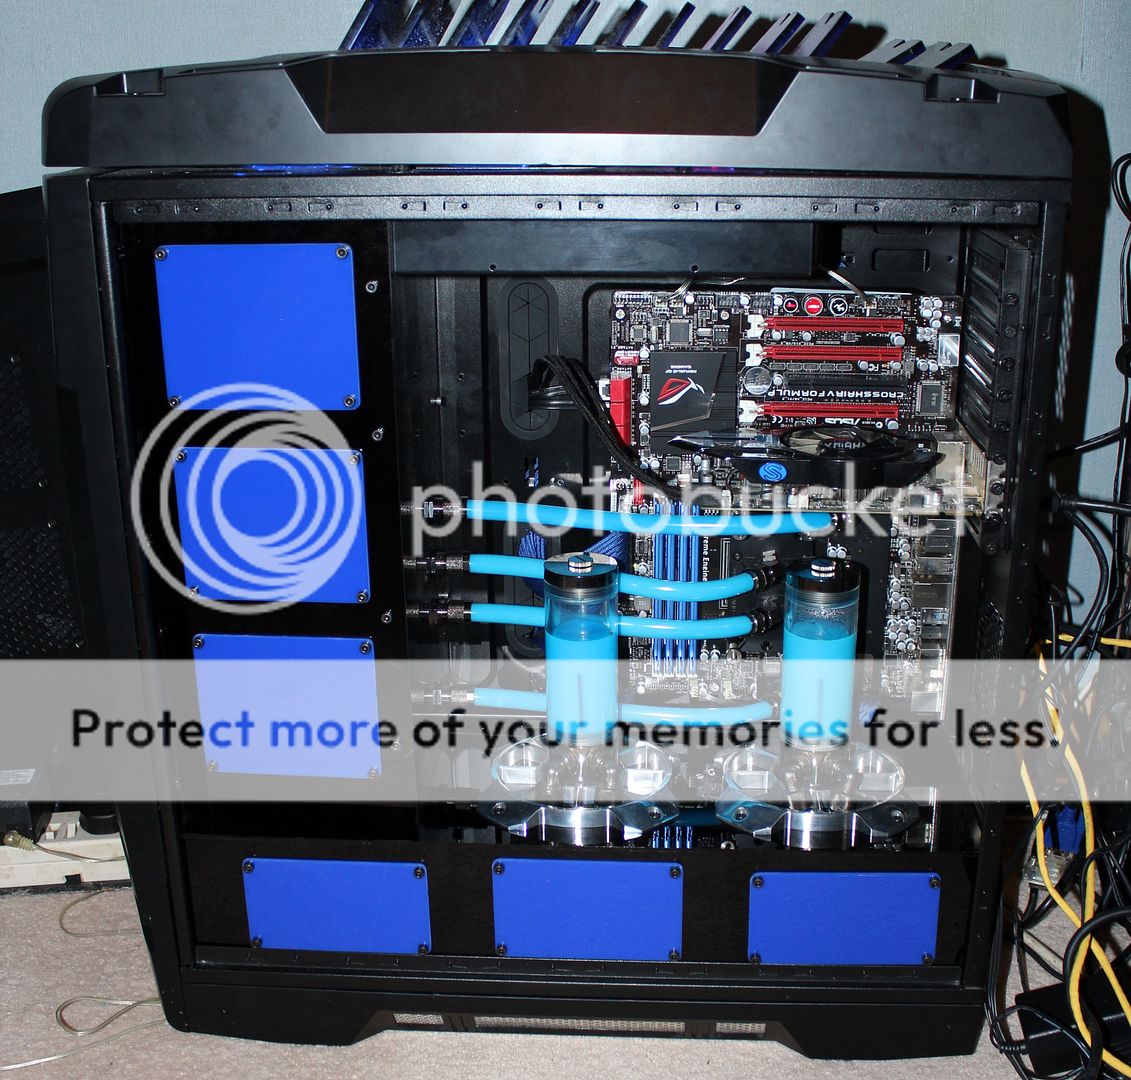
MUCH MORE TO COME
So im going to show off some of the key features so far
modified intakes and bottom deck enclosure
Access ports
Concealed tubing
Tidy tubing with bulkheads
Back plate mounted SSD and HDD
Damn good lookin if i do say so myself
MUCH MORE TO COME
Options
- Mark as New
- Bookmark
- Subscribe
- Mute
- Subscribe to RSS Feed
- Permalink
01-10-2013 04:06 AM
Construction is 90% complete and its already in service as my main game machine, side door needs a window and massive changes are going to be made to the front of the case
So im going to show off some of the key features so far
modified intakes and bottom deck enclosure
Access ports
Concealed tubing
Tidy tubing with bulkheads
Back plate mounted SSD and HDD
Damn good lookin if i do say so myself
MUCH MORE TO COME
So im going to show off some of the key features so far
modified intakes and bottom deck enclosure
Access ports
Concealed tubing
Tidy tubing with bulkheads
Back plate mounted SSD and HDD
Damn good lookin if i do say so myself
MUCH MORE TO COME
Related Content
- [Build Log] Bowser Airship. A suspended (ceiling) 3D printed case mod in Case Mods & PC Builds
- Project: Raptor Lake in Case Mods & PC Builds
- DeepCool impossible mission in Case Mods & PC Builds
- Strix-A D4 Memory Issues? in Overclocking & Tweaking
- PC Desk Dodge Charger 1970 Theme in Case Mods & PC Builds
