Turn on suggestions
Auto-suggest helps you quickly narrow down your search results by suggesting possible matches as you type.
Showing results for
- Republic of Gamers Forum
- Discussions
- Case Mods & PC Builds
- Cold Winter | By C4B
Options
- Subscribe to RSS Feed
- Mark Topic as New
- Mark Topic as Read
- Float this Topic for Current User
- Bookmark
- Subscribe
- Mute
- Printer Friendly Page
Cold Winter | By C4B
Options
- Mark as New
- Bookmark
- Subscribe
- Mute
- Subscribe to RSS Feed
- Permalink
04-11-2013
08:55 AM
- last edited on
03-05-2024
11:32 PM
by
![]() ROGBot
ROGBot
Hello again!
Now that Im finished with CURV3D I can start with my next project. I have been waiting to start working on this. Ive been planning how to make this as good as possible. This is the project I will spend most time on ever. Hope you will enjoy this log, feel free to comment and please give me advice and tips.
Lets start with a little info about this build. You may remember my log of this build I posted around a year ago. I also made a version 2 of it, and now the third and last version is coming.
This is my favorite build of all time, so now I want to make it as goodlooking as possible. What Im going to do is to correct the mistakes Ive made before, add some features to hide cables and things like that. I will also fill it with a little bit newer hardware and this time Im going for some nice watercooling, not an all-in-one like the Antec Kuhler I had in V.2.
List of things to do:
Hardware:
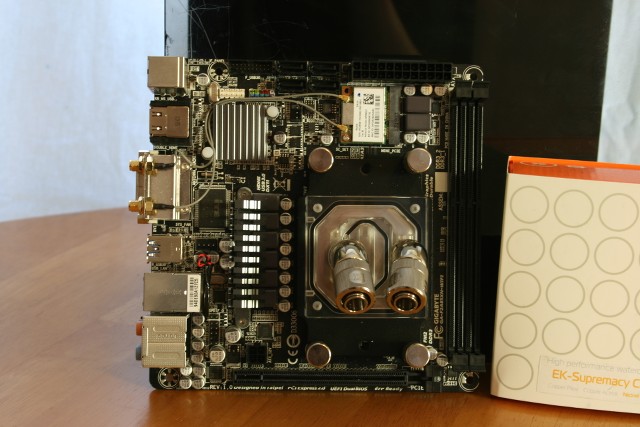
MB: Gigabyte GA-F2A88XN-WIFI
CPU: AMD A10-6800K
RAM: Corsair Dominator Platinum 2x4gb 2133MHz
SSD: Samsung 840 120gb
PSU: Be-Quiet SFX 300W
In V.2 I used AMDs Llano, and I fell in love. Since then I have been waiting for the next generation and now Trinity is here. When I have time for games I either play Starcraft 2 or Dota 2 and those arent really hardware demanding games, but the Trinity still is pretty good. So what I want is a HTPC but with possibilities of some simpler games to be played. So what I want to add for hardware is a m-itx motherboard for Trinity, socket FM2. As APU I want the best possible so Im trying to get a hold of a A10-6800K, and then add 2 sticks of 4GB DDR3 2133MHz ram.
EKWB! Thank you for helping me.

MNPCTech sponsored me with this fan grill to have in the front, should look awesome!
Clear Acrylic 120mm Overkill "Nautilus" PC Fan Grill from Mnpctech.com


EK DCP 2.2 Combo:
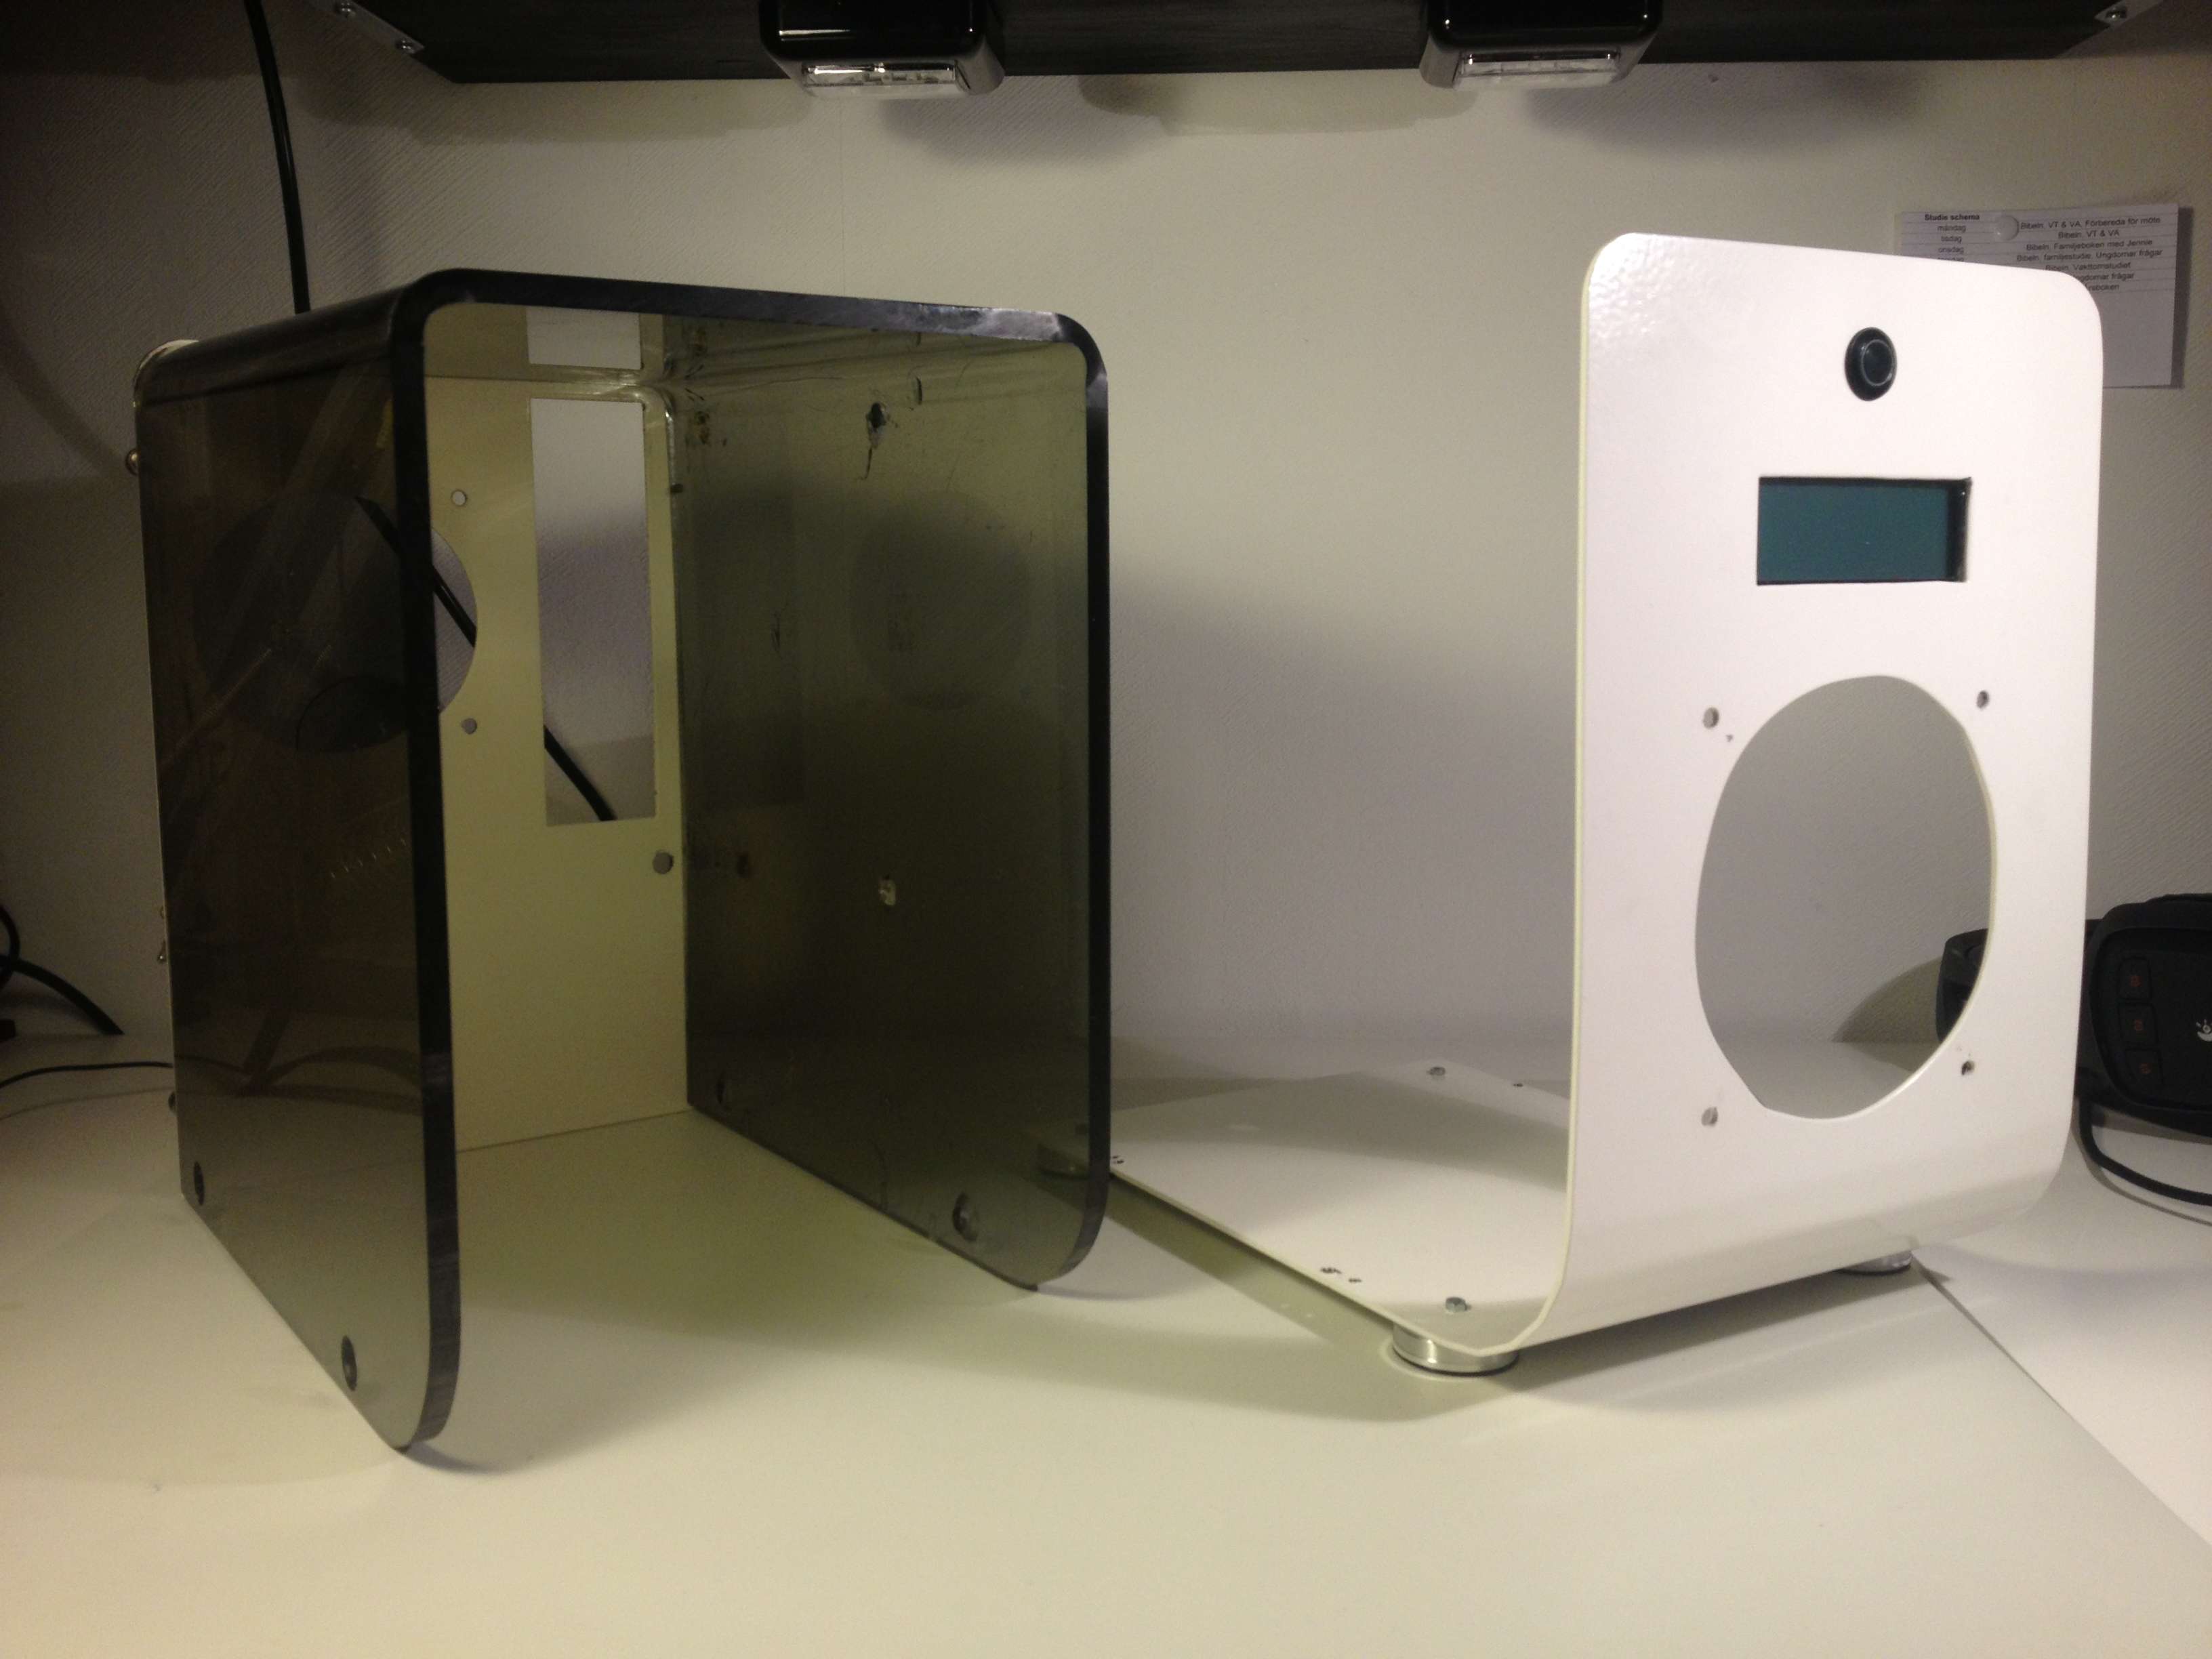
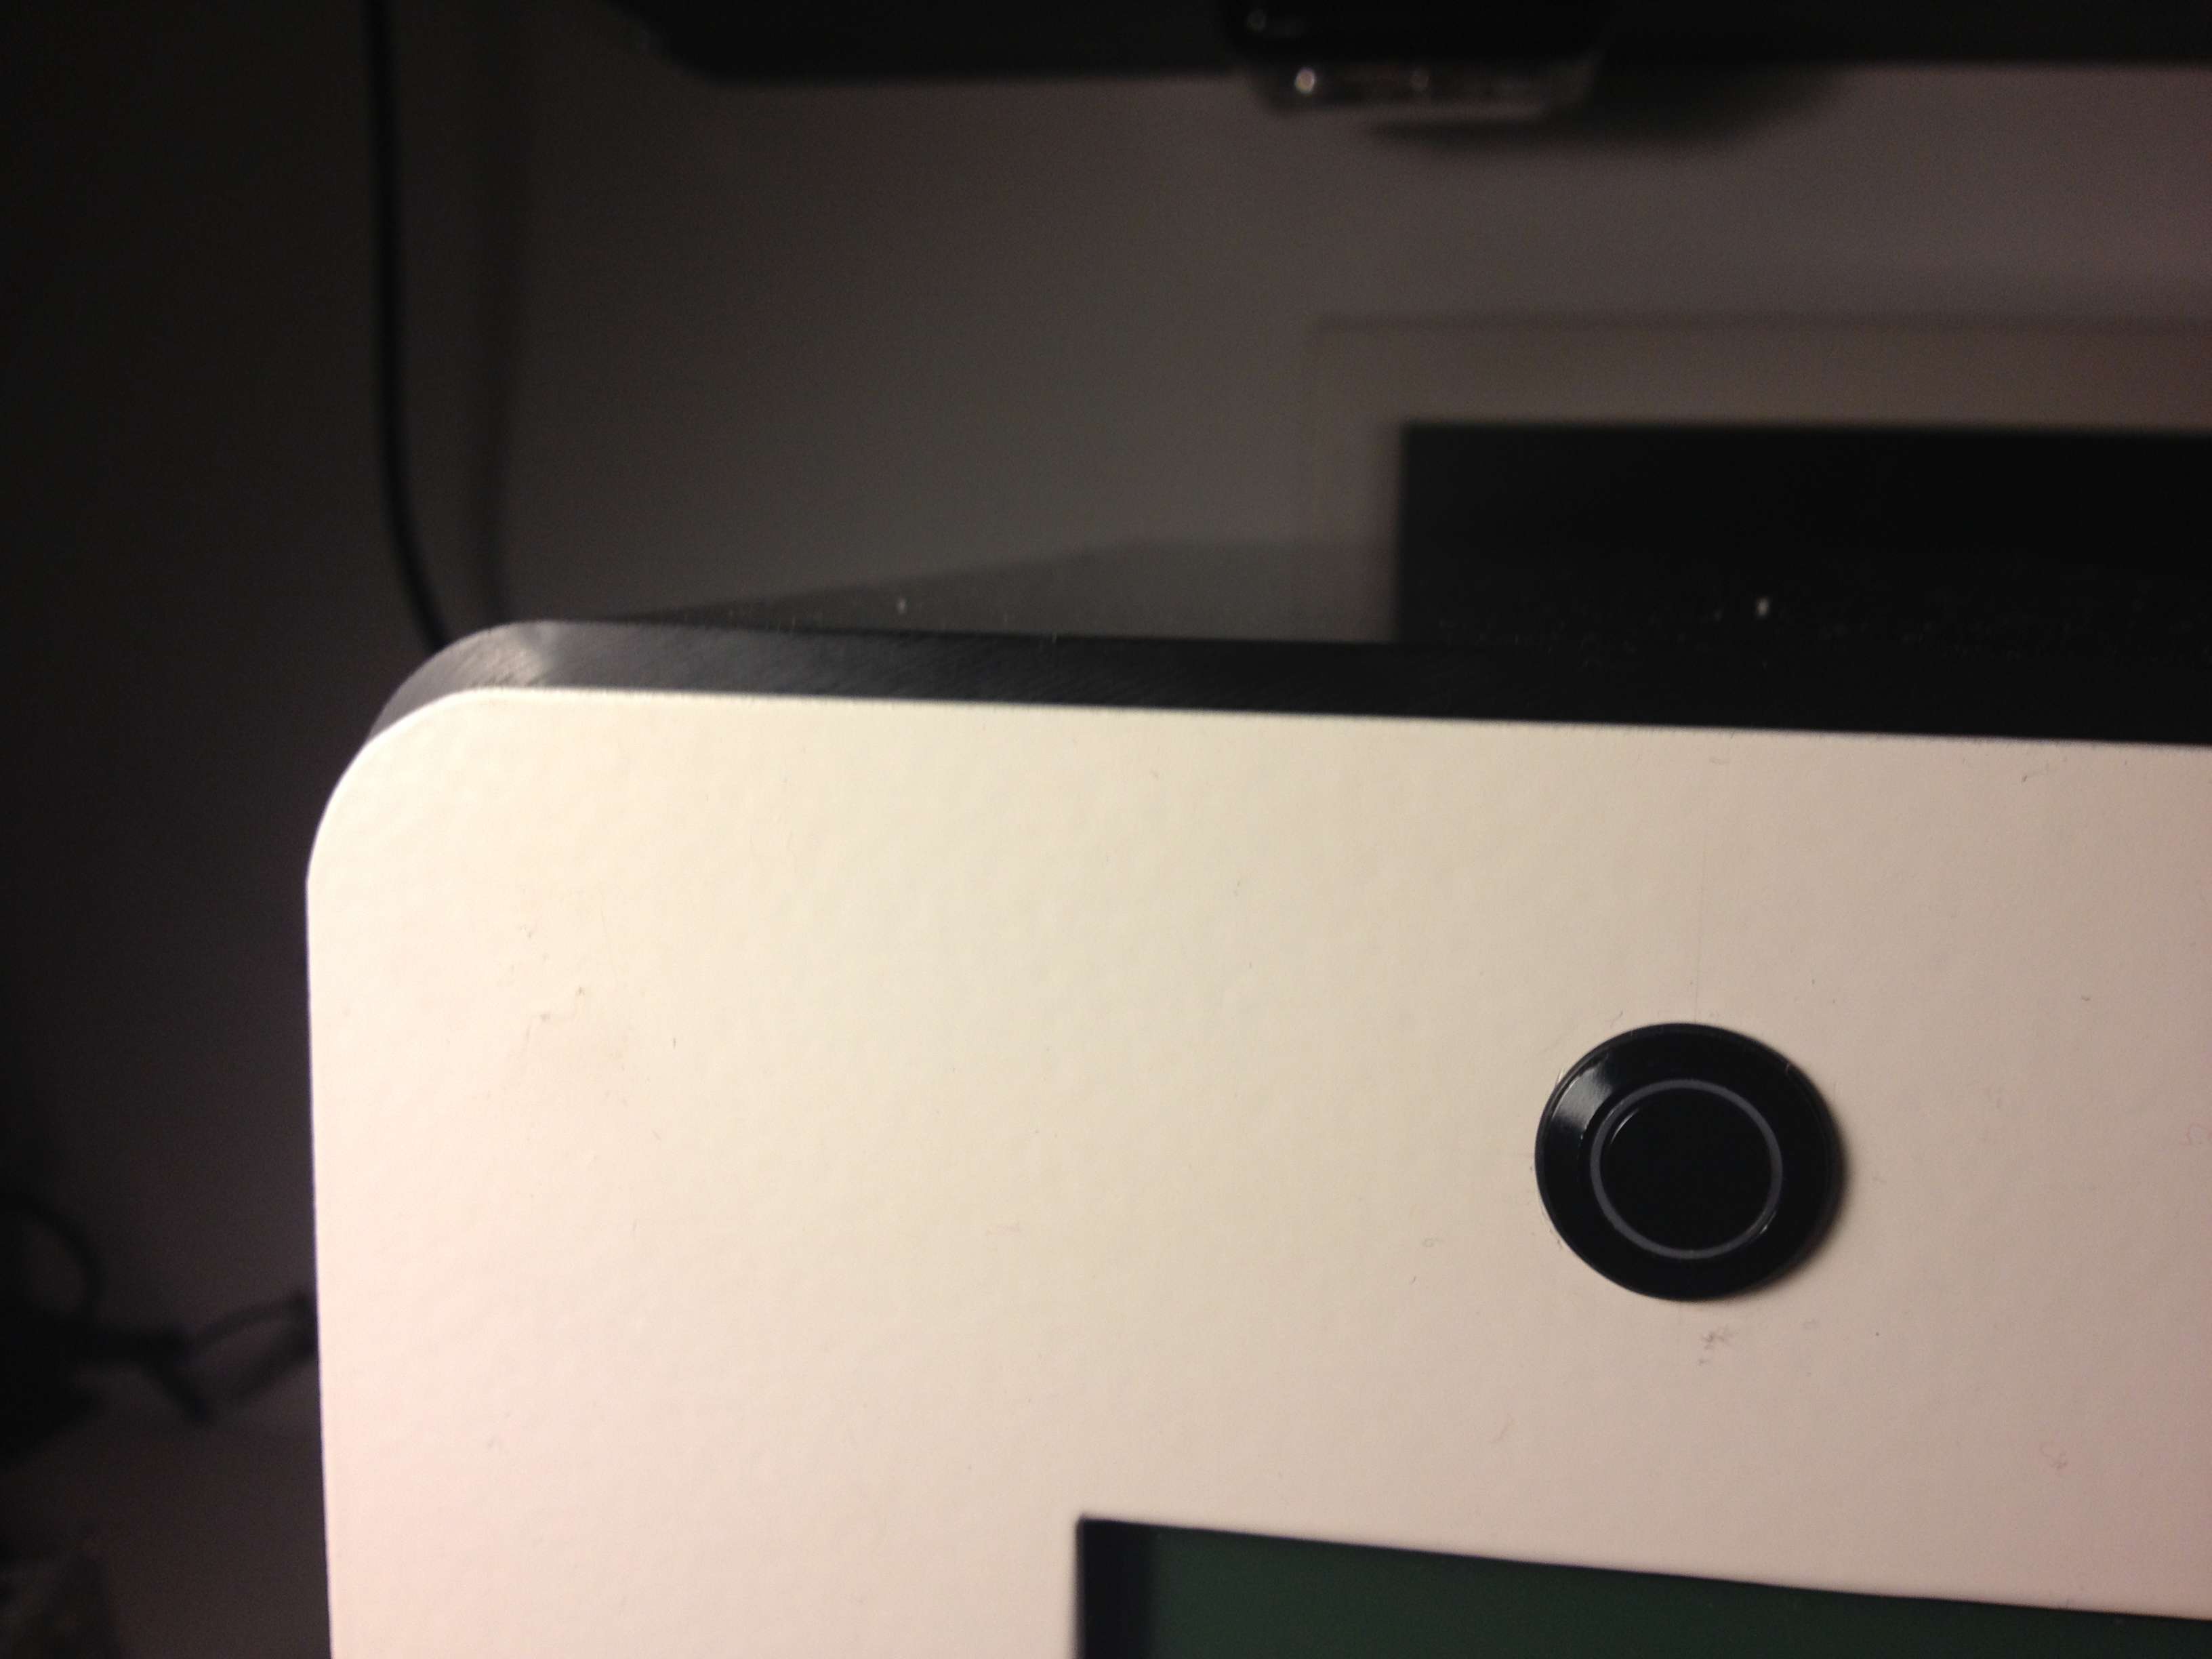
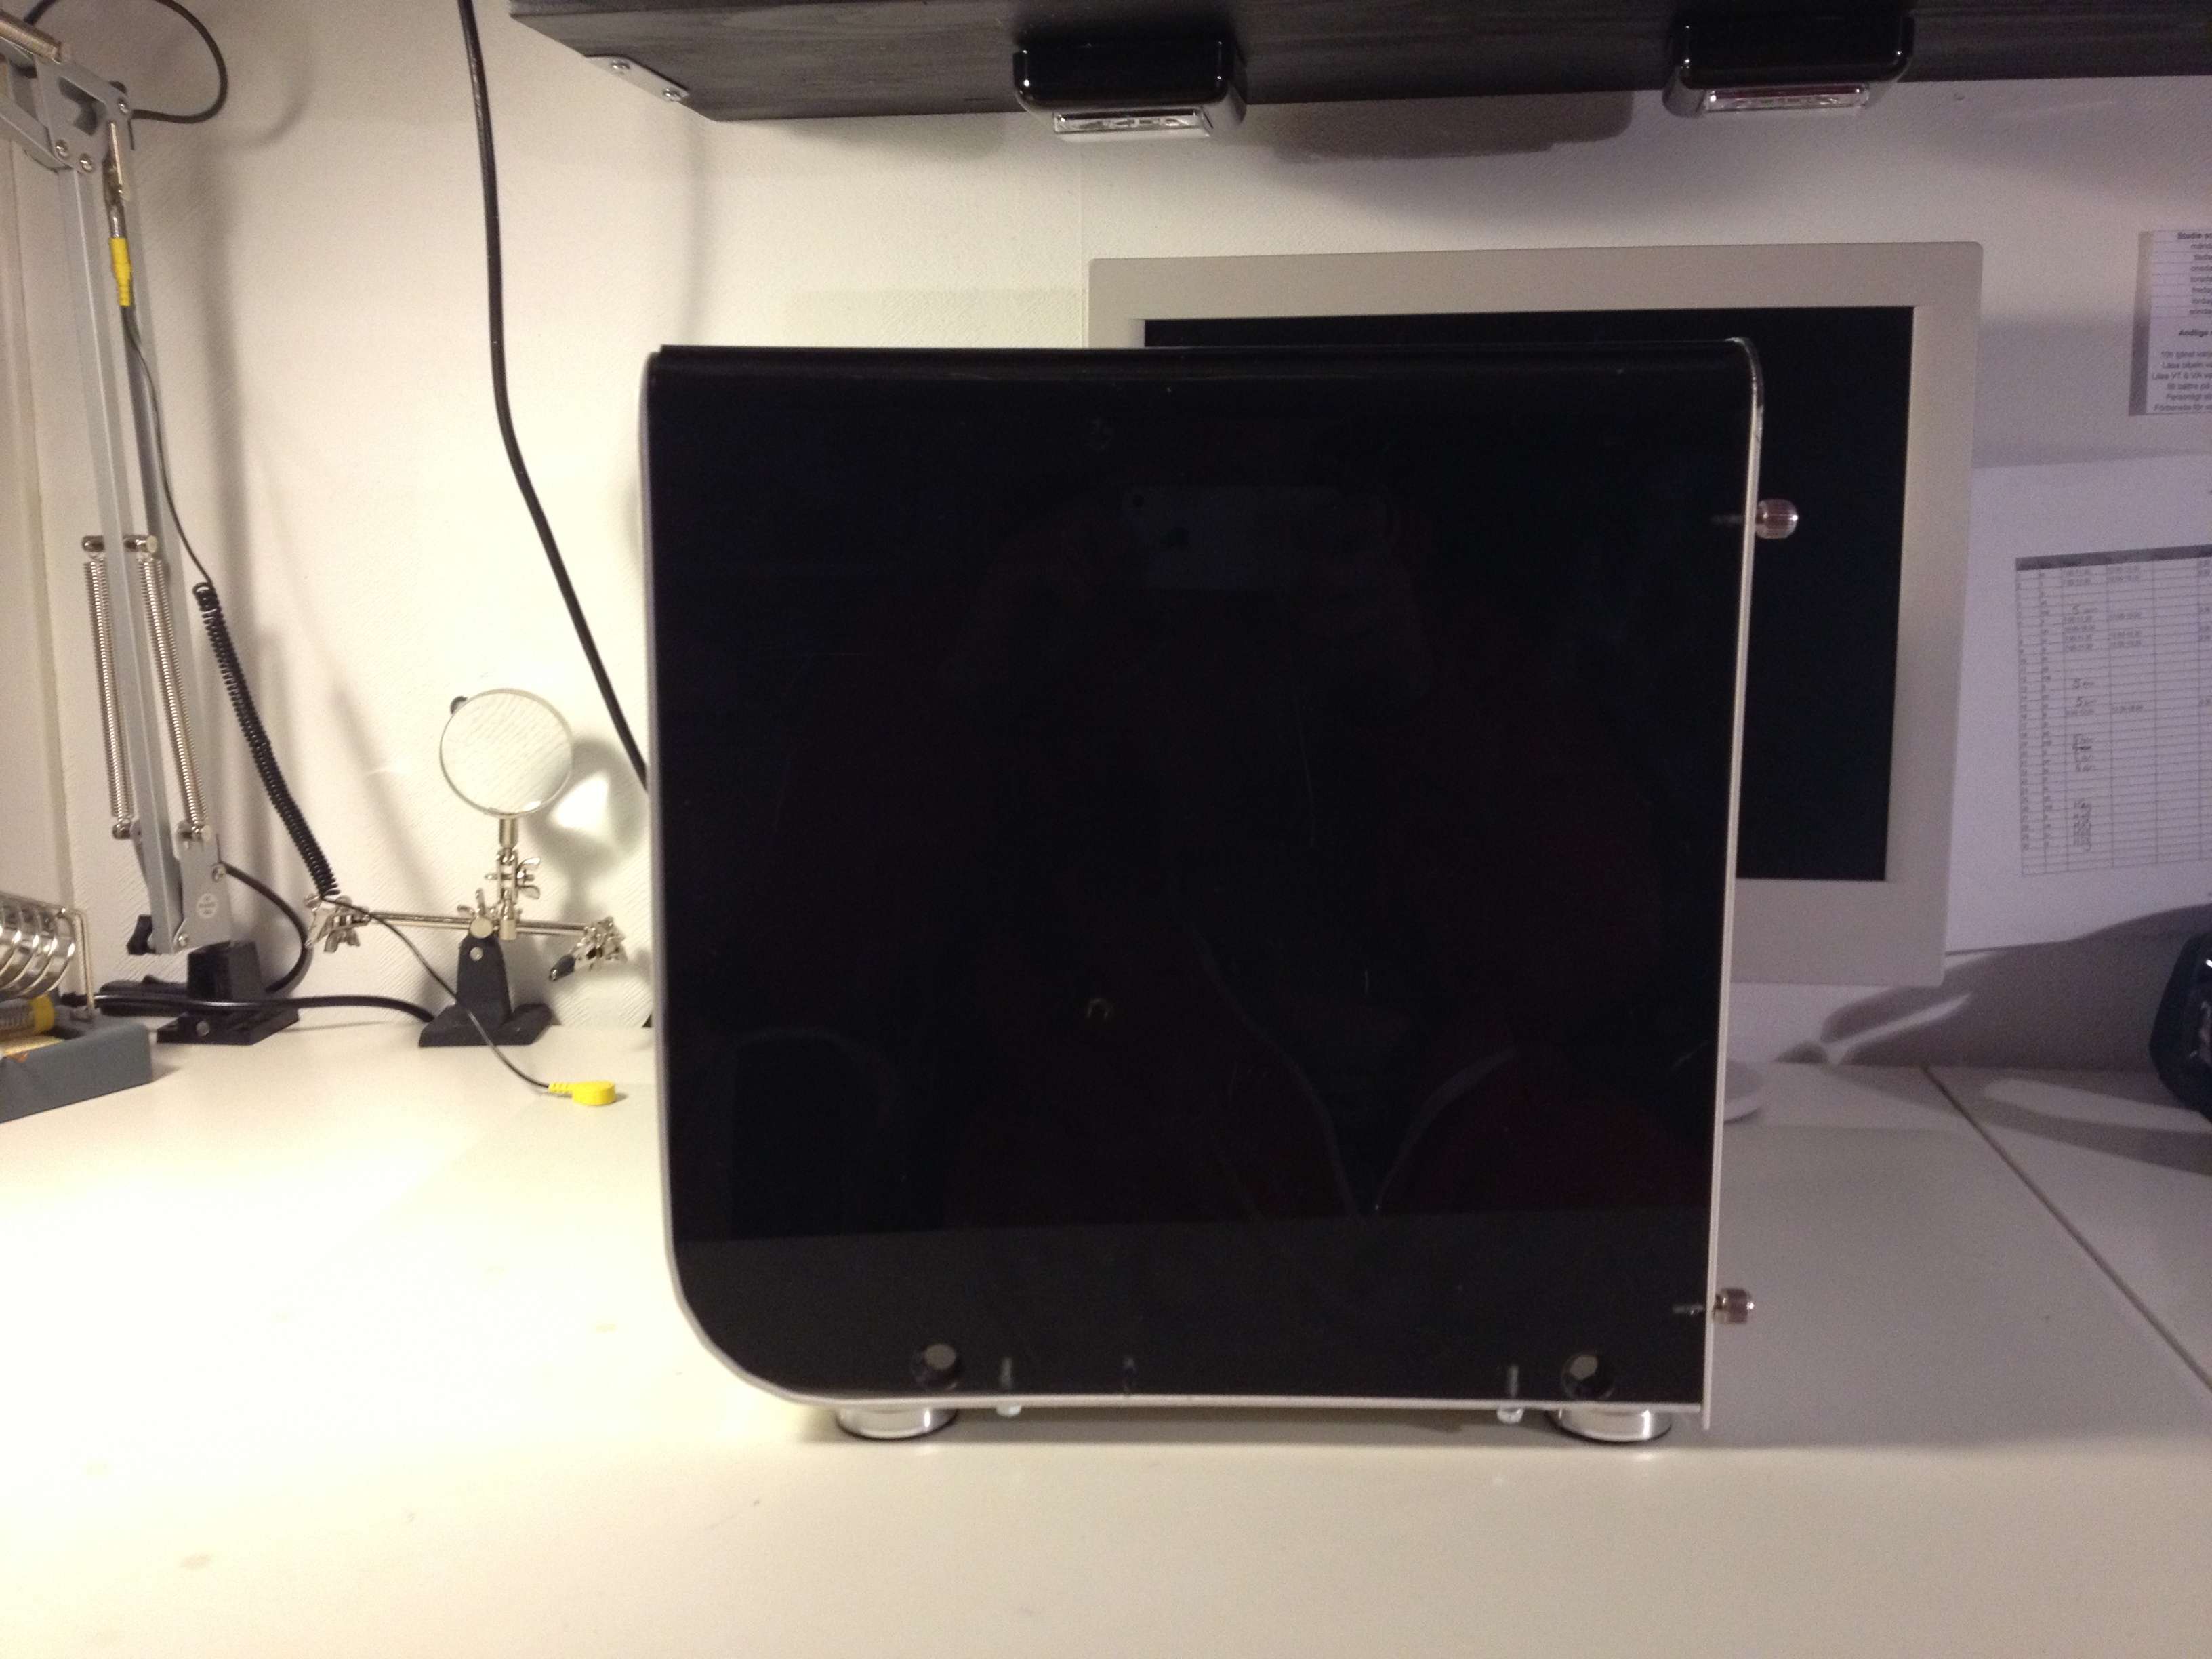
What Ive done so far is to strip the case from almost everything except the LCD and powerswitch.
Front:
Back:
Left side:
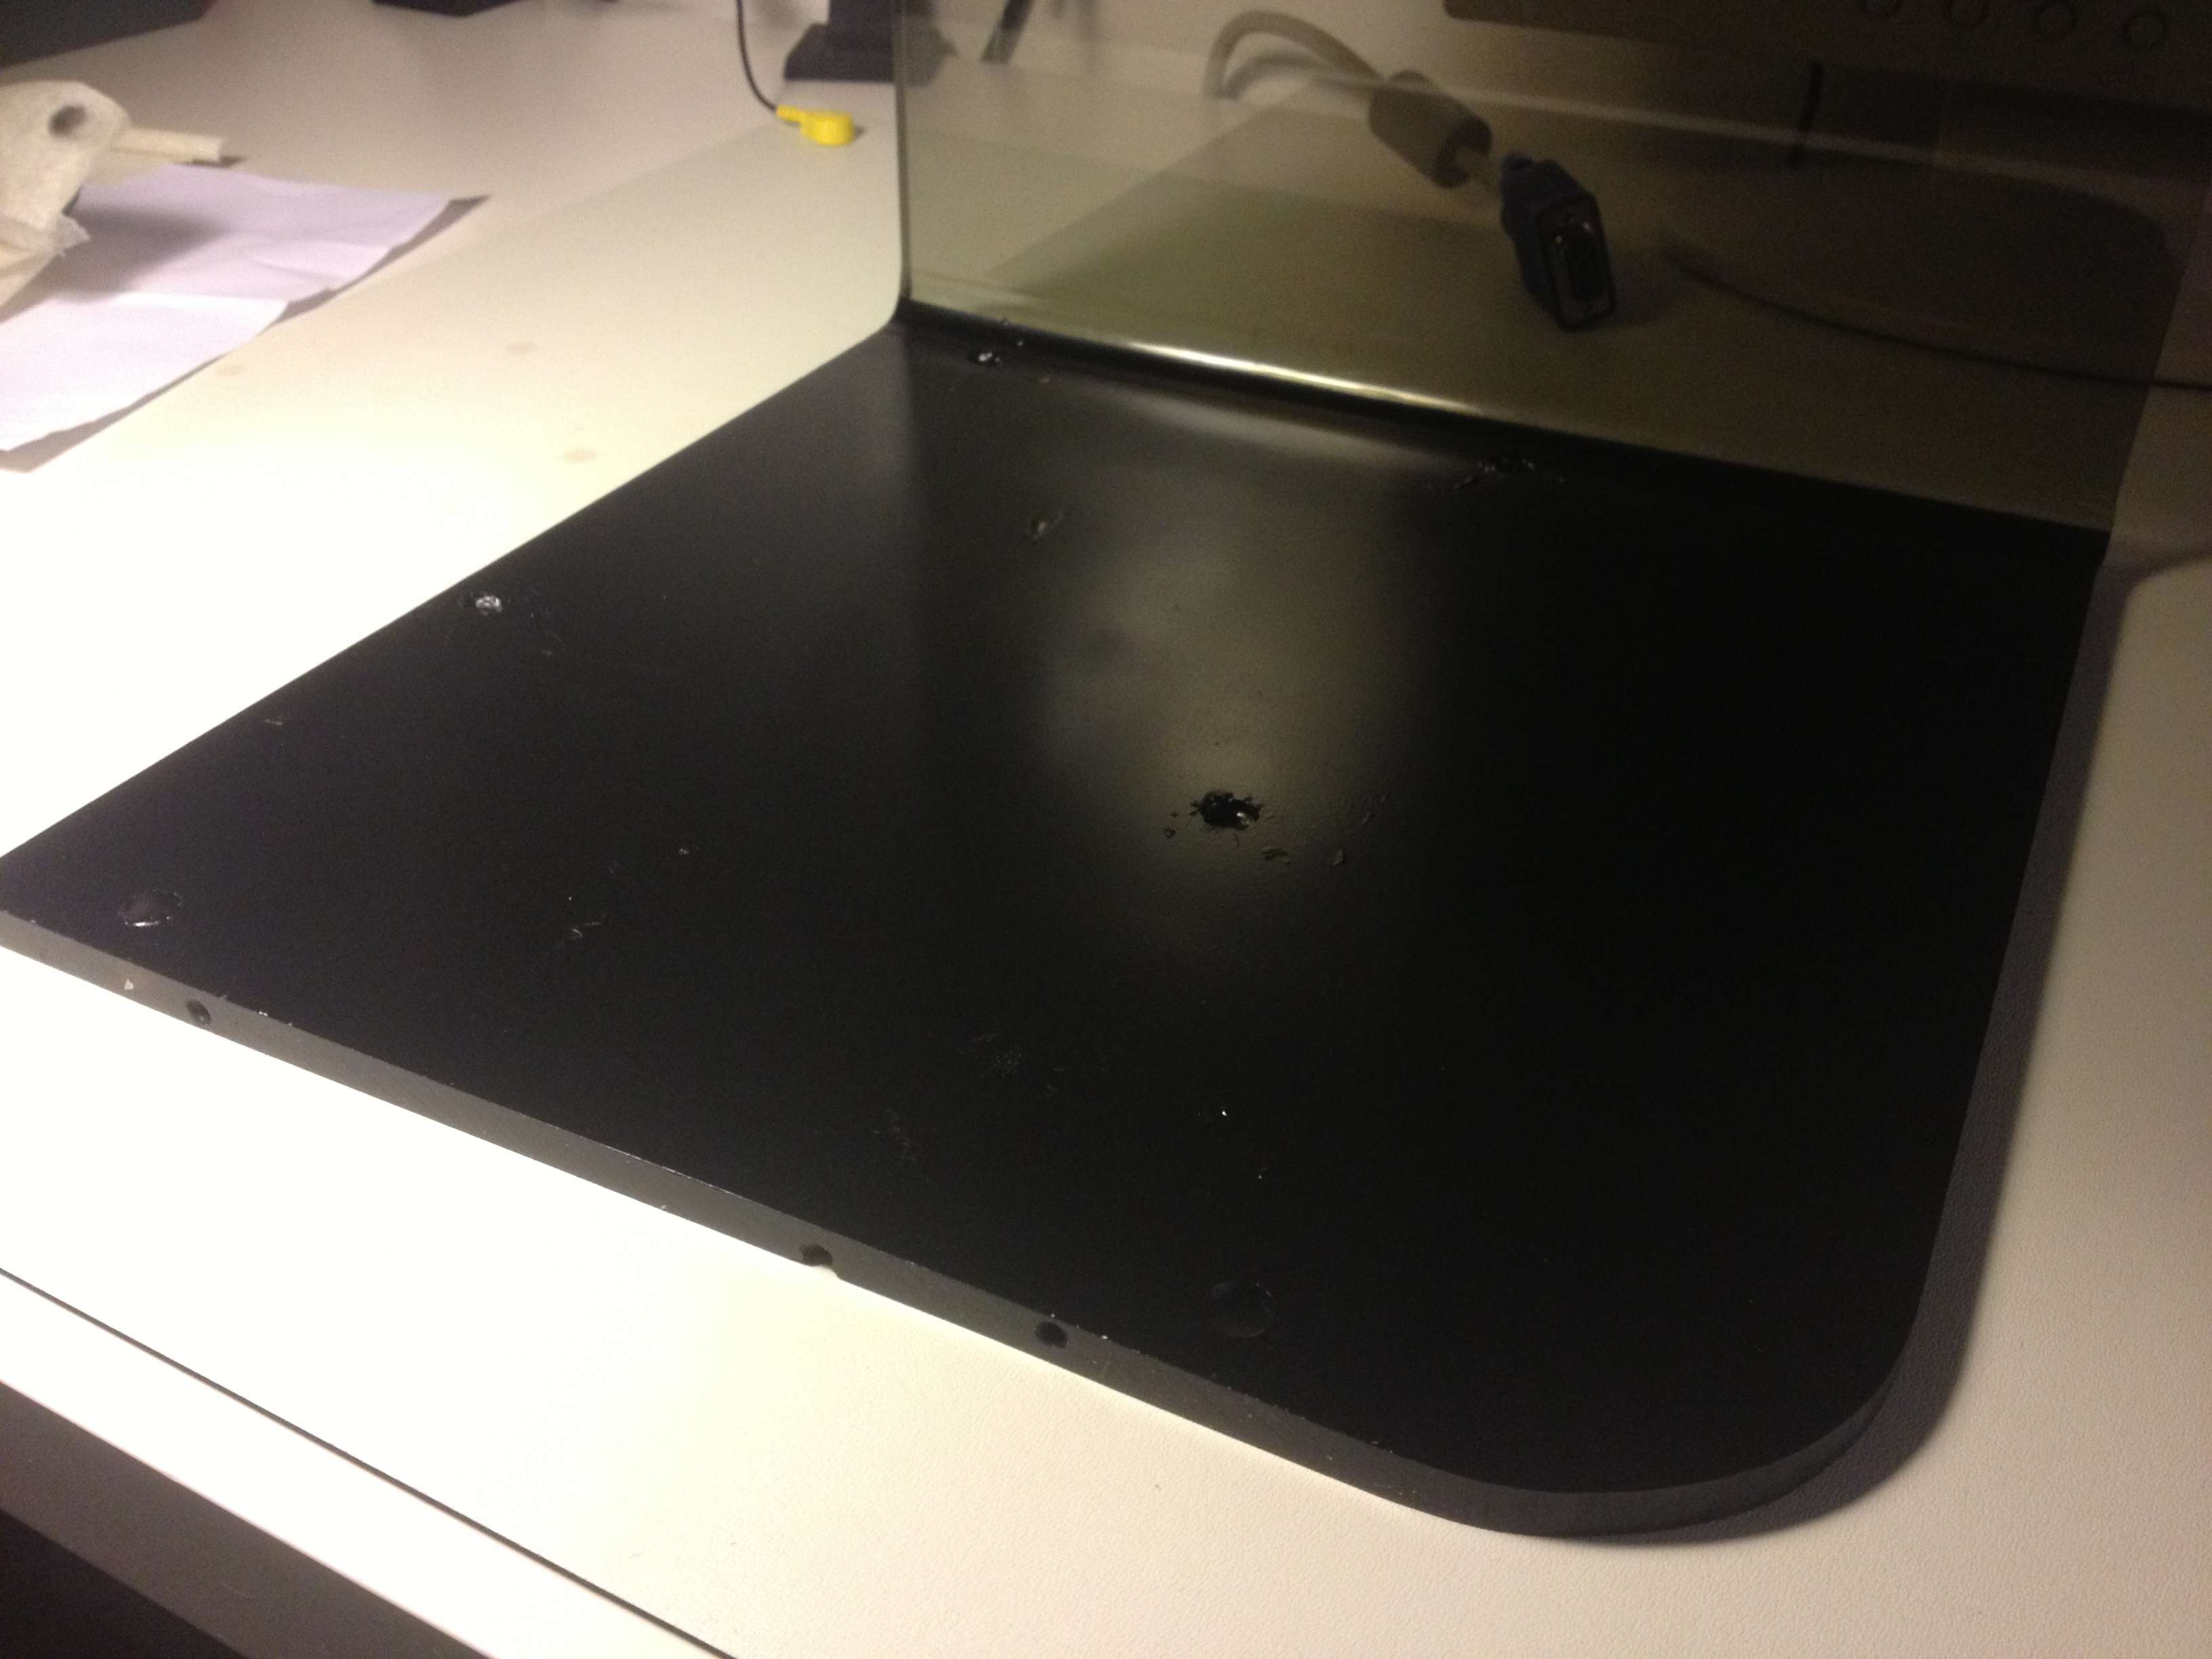
Right side. This is the side I want to paint black on the inside so you cant see into it from here.
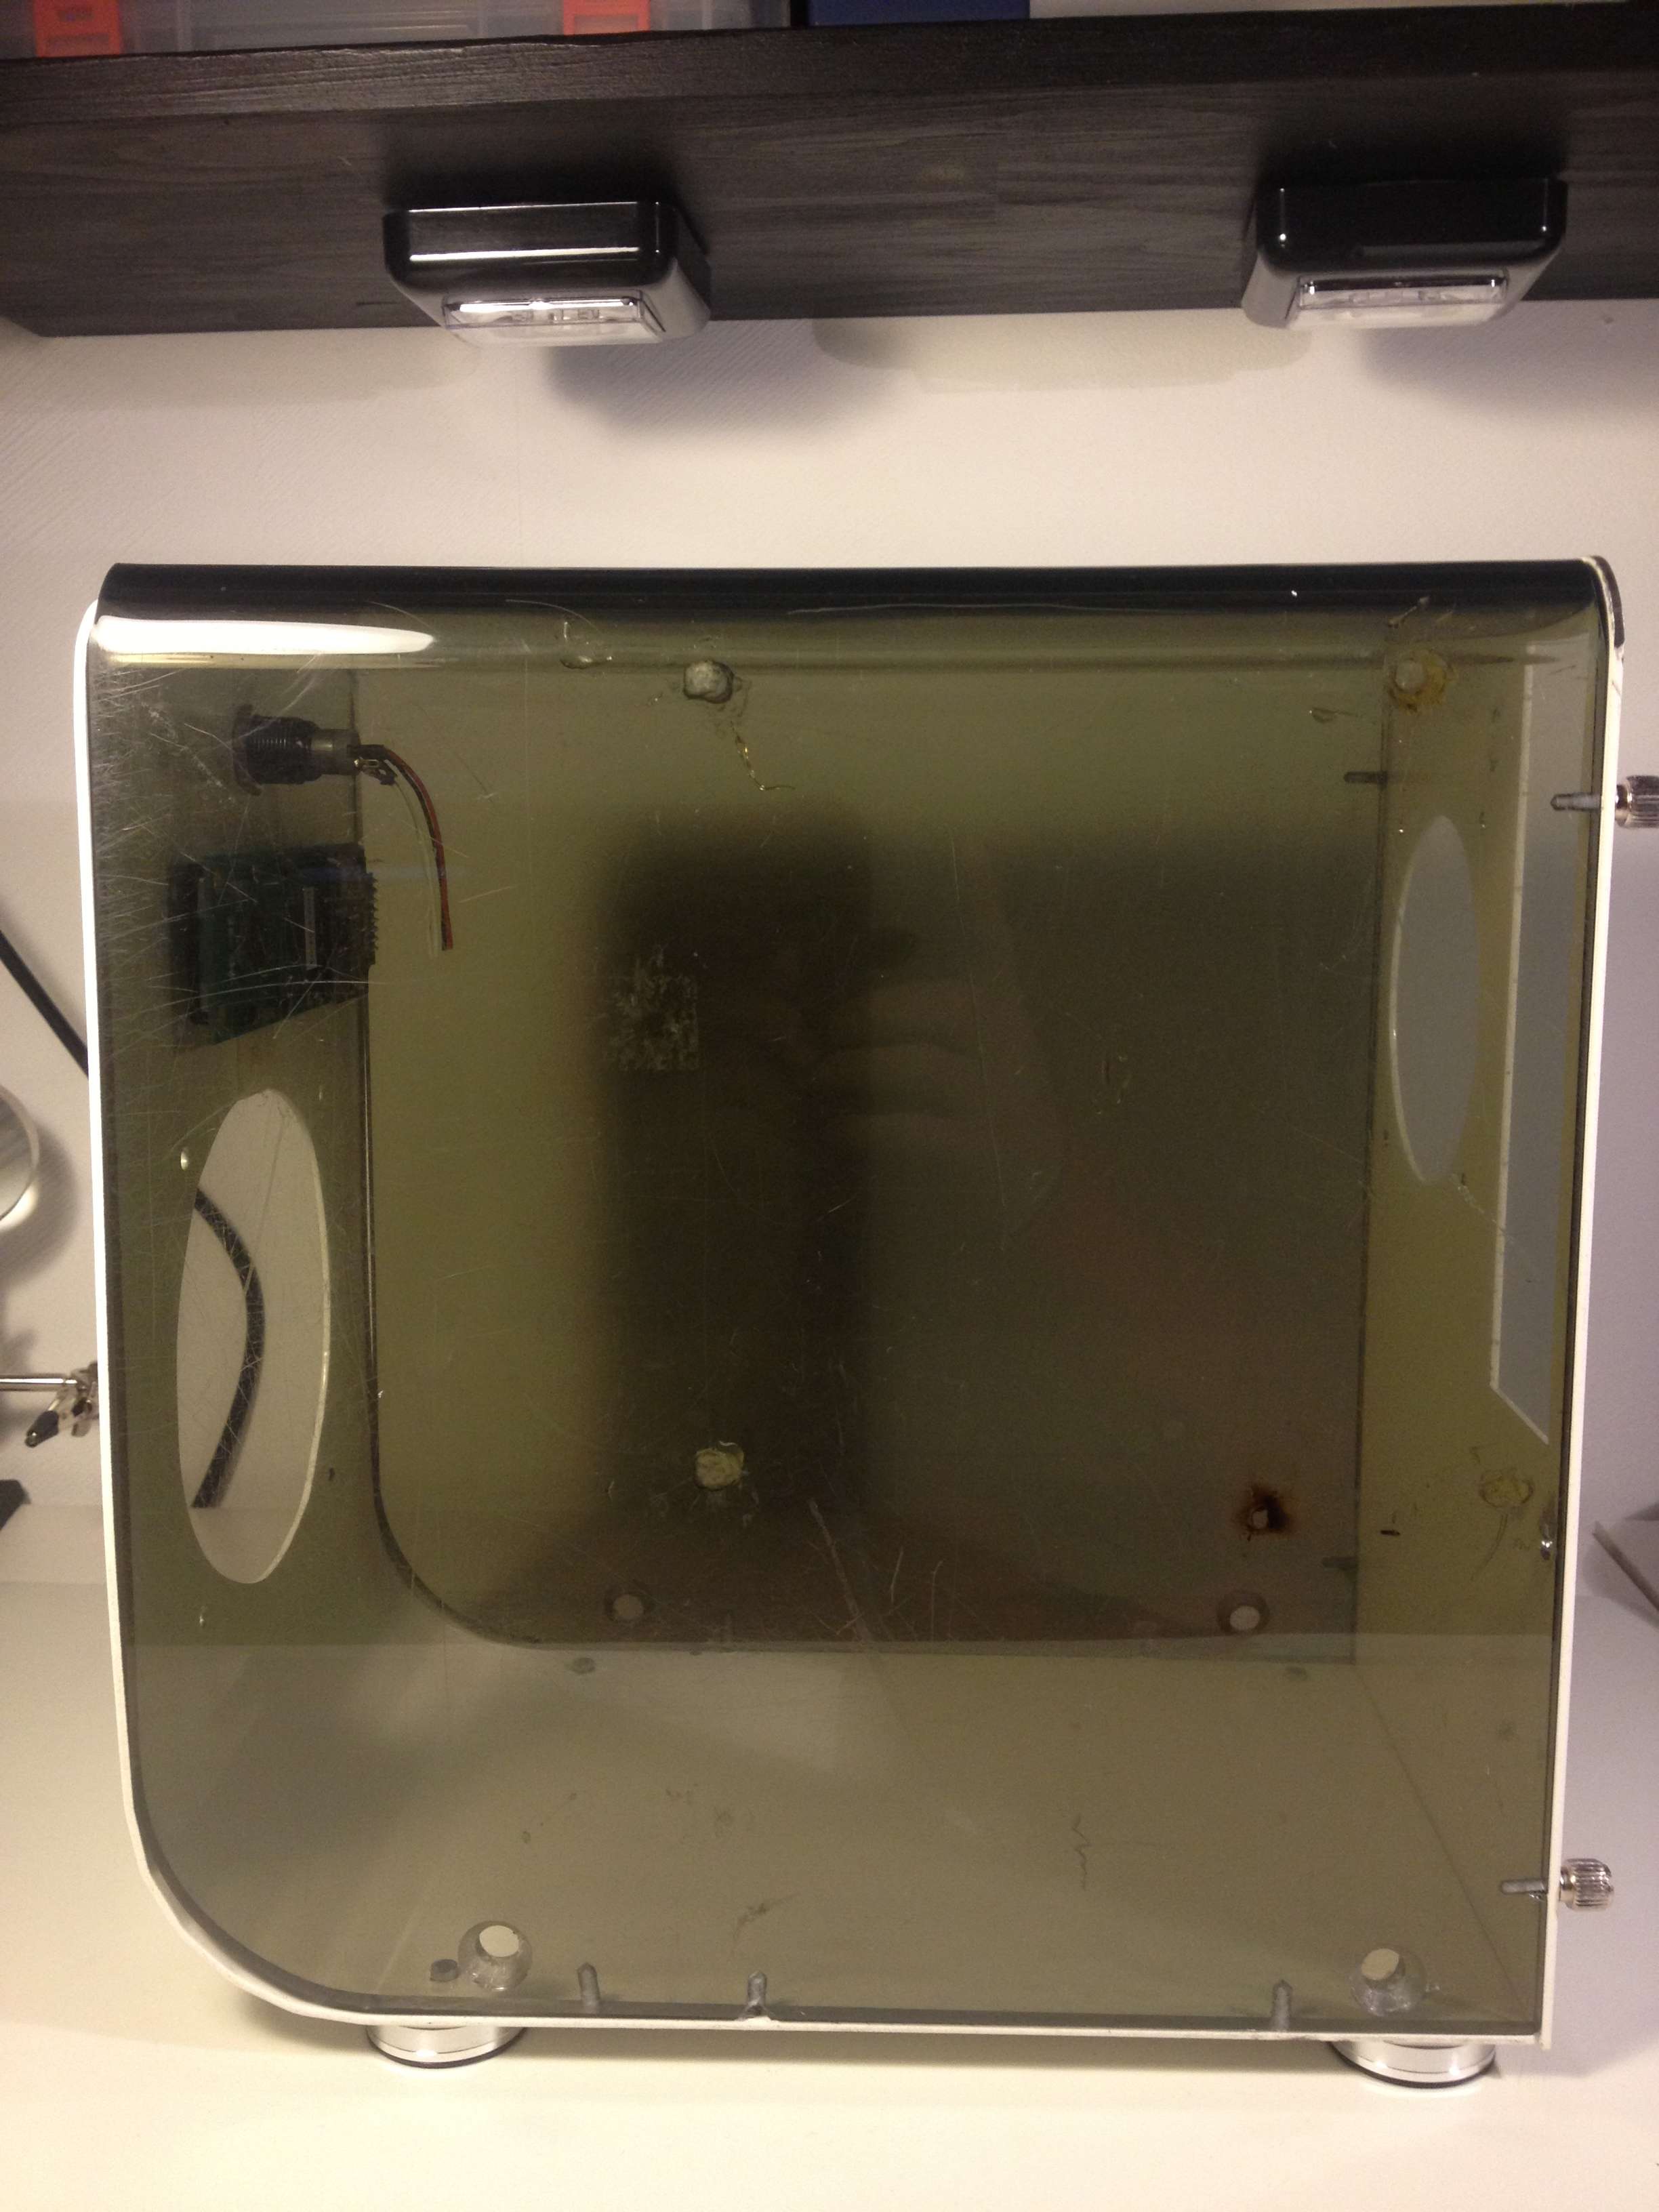
The acrylic is pretty messed up as you can see. It was that from the beginning. Many scratches. But at the same time I feel like it gives the case a kind of vintage look, I still want to make it look a bit nicer though. So I will start by cleaning and polish it as much as possible. Do any of you guys know how to remove scratches from acrylic? Clearcoat it? Use a little blowtorch? Any advice?
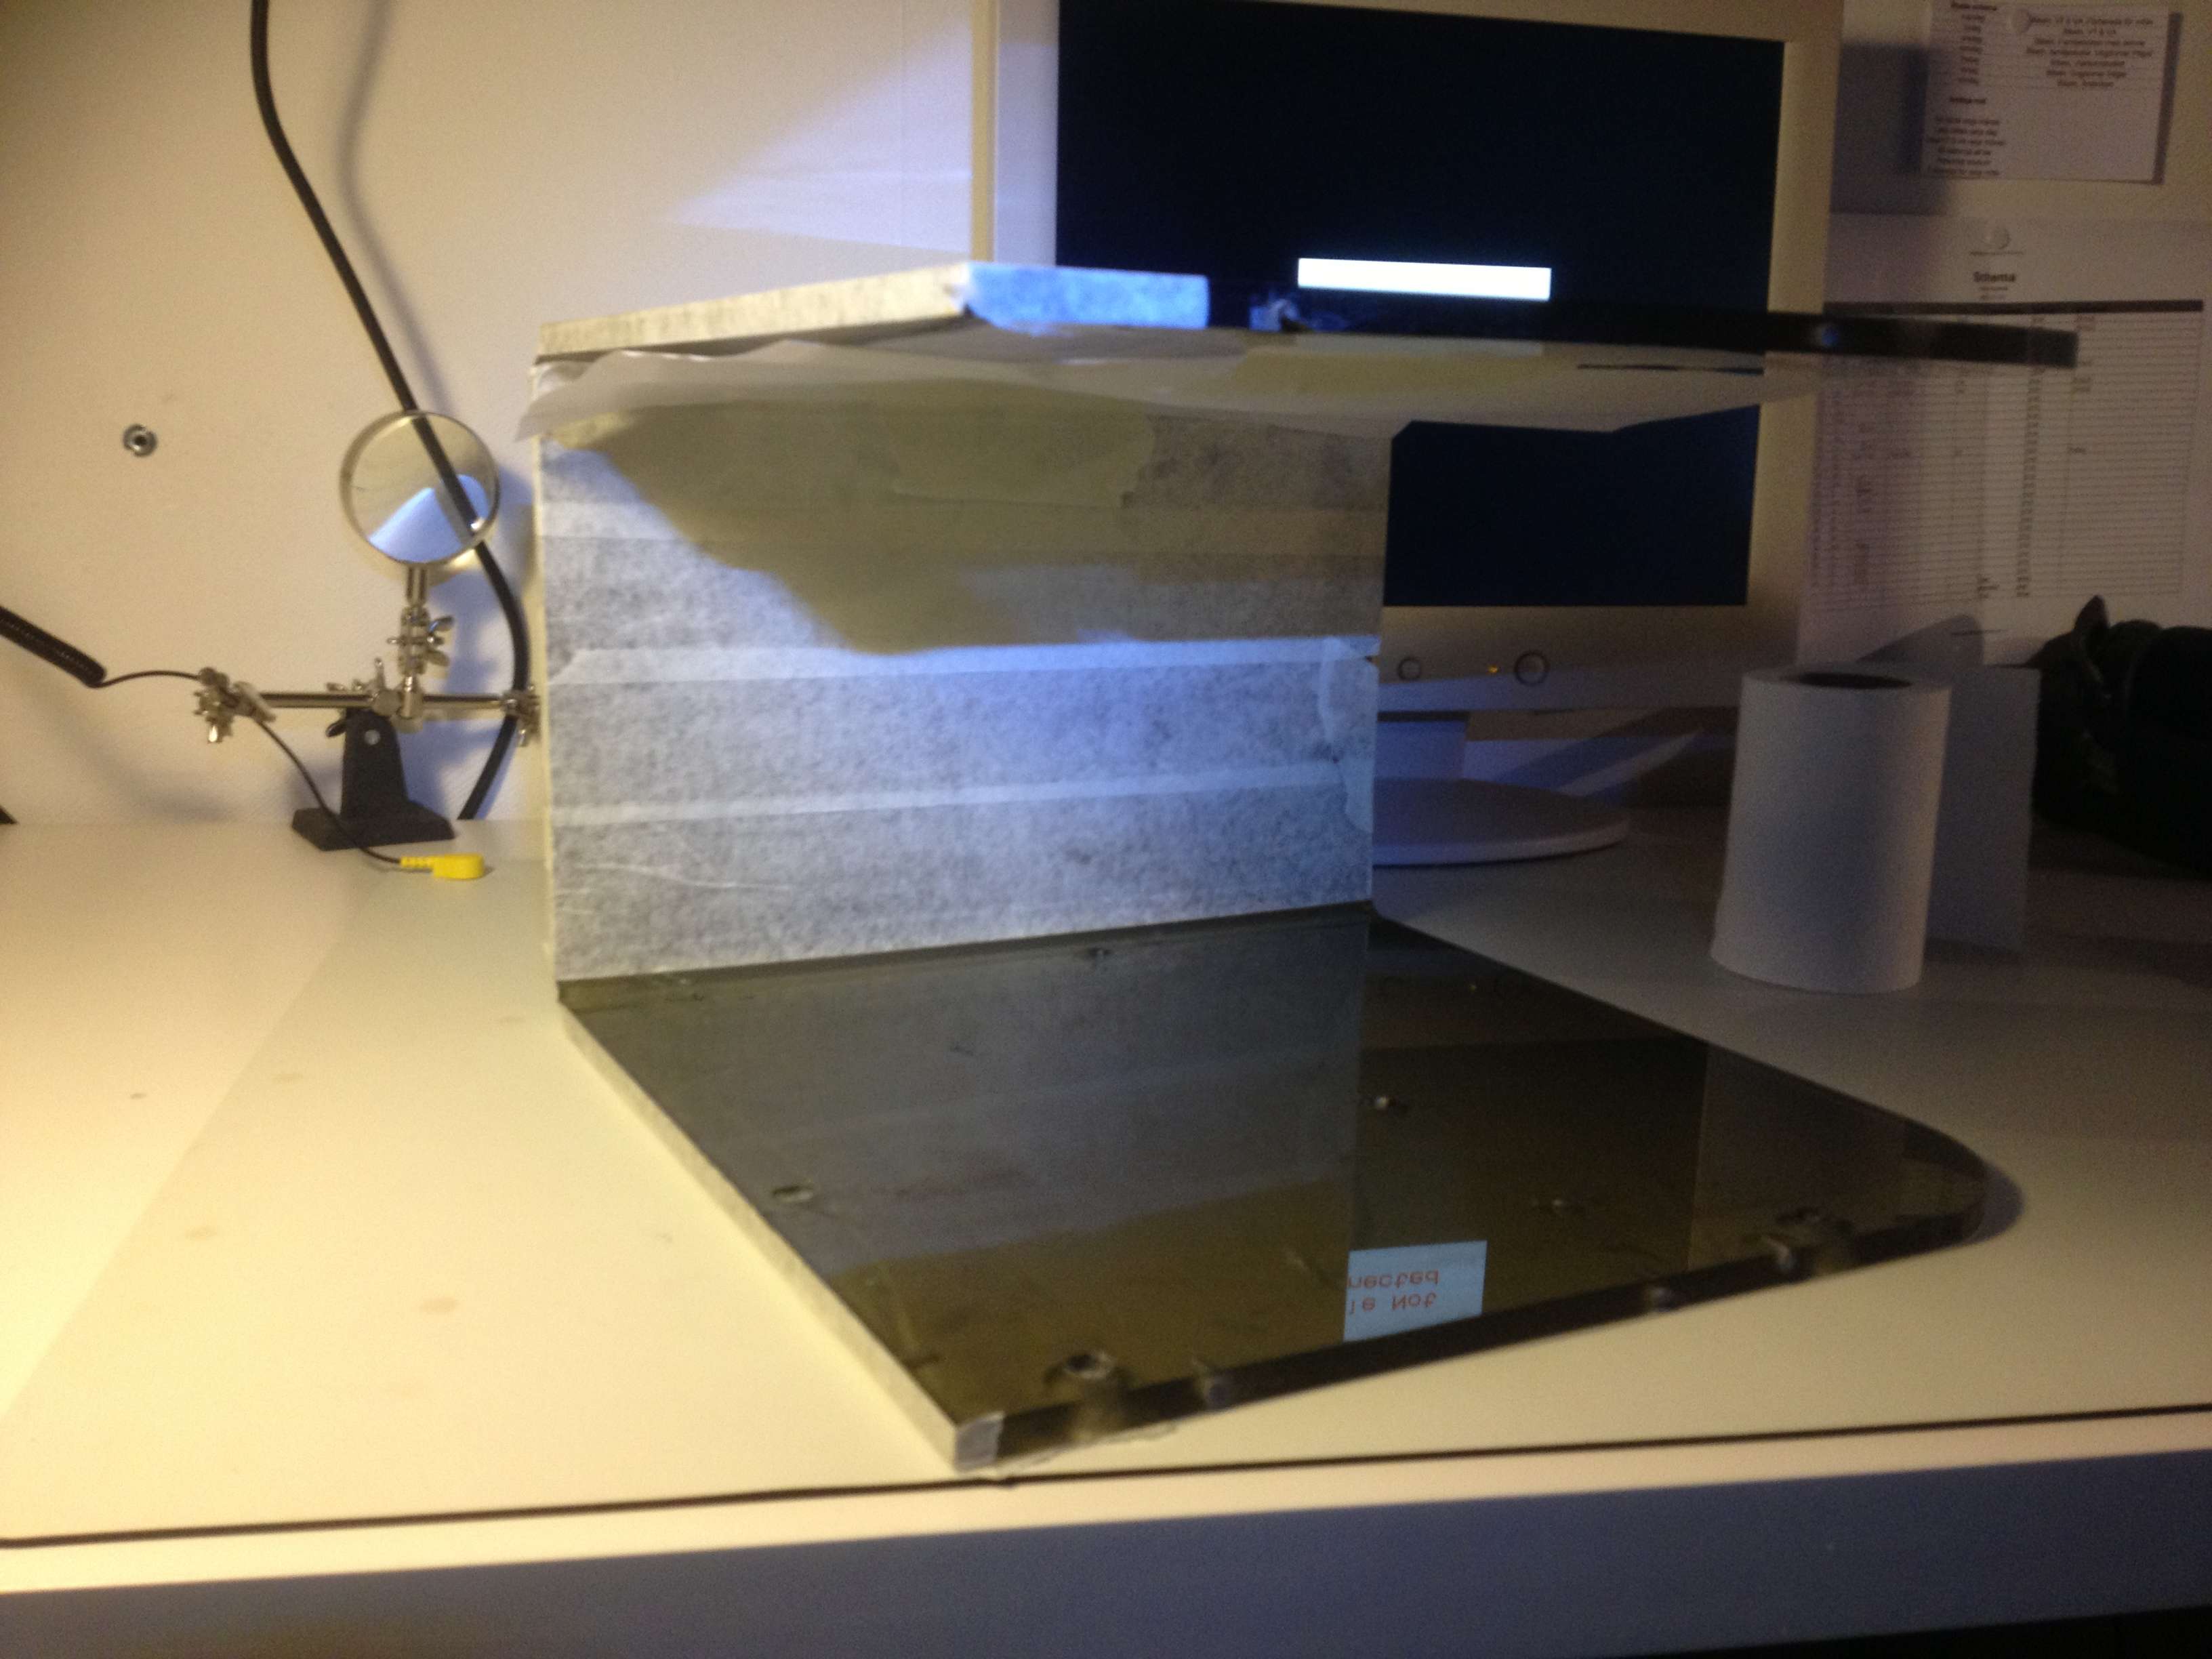
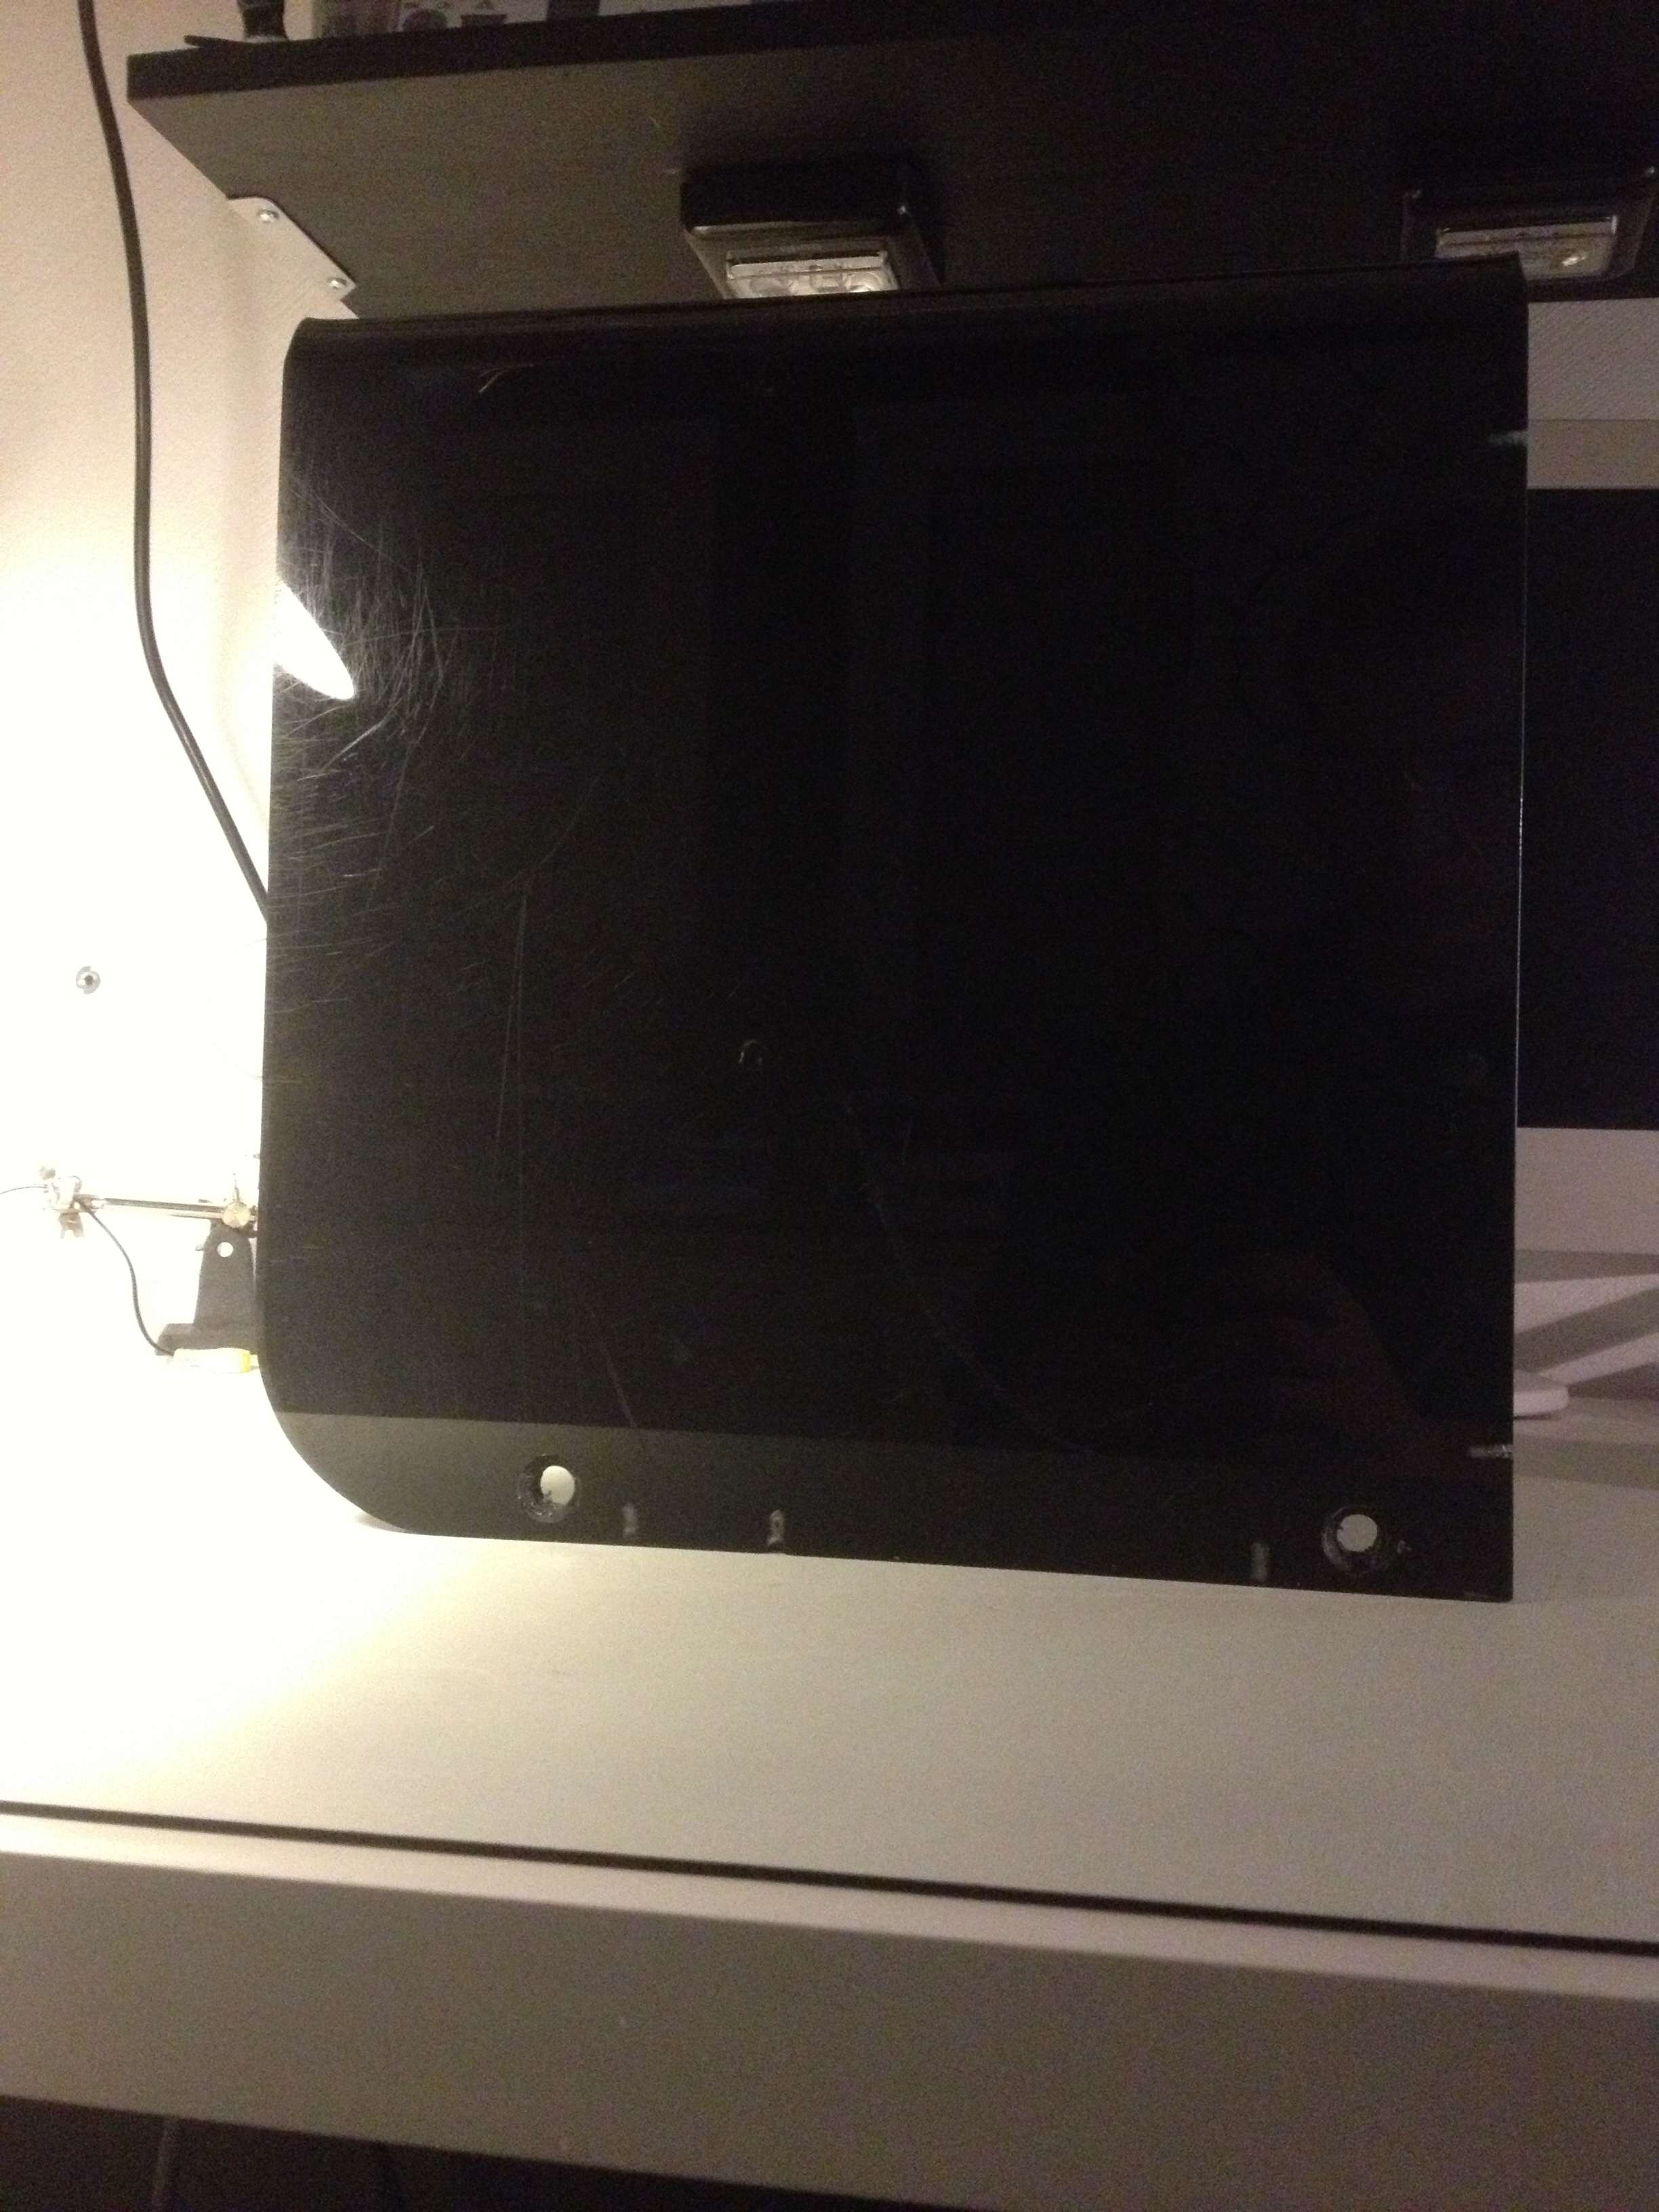
First thing Im going to start with is to cut the acrylic maybe 3-4mm so it fits perfect with the white plate. Then paint the backside of the acrylic black. So this is what I have to work with for a couple of weeks:
I painted the right inner side of the acrylic piece black. Looks pretty good. Now you cant see anything from the other side, just as I wanted.
I started with isolate a little bit.
Then I just painted it, 3 layers.

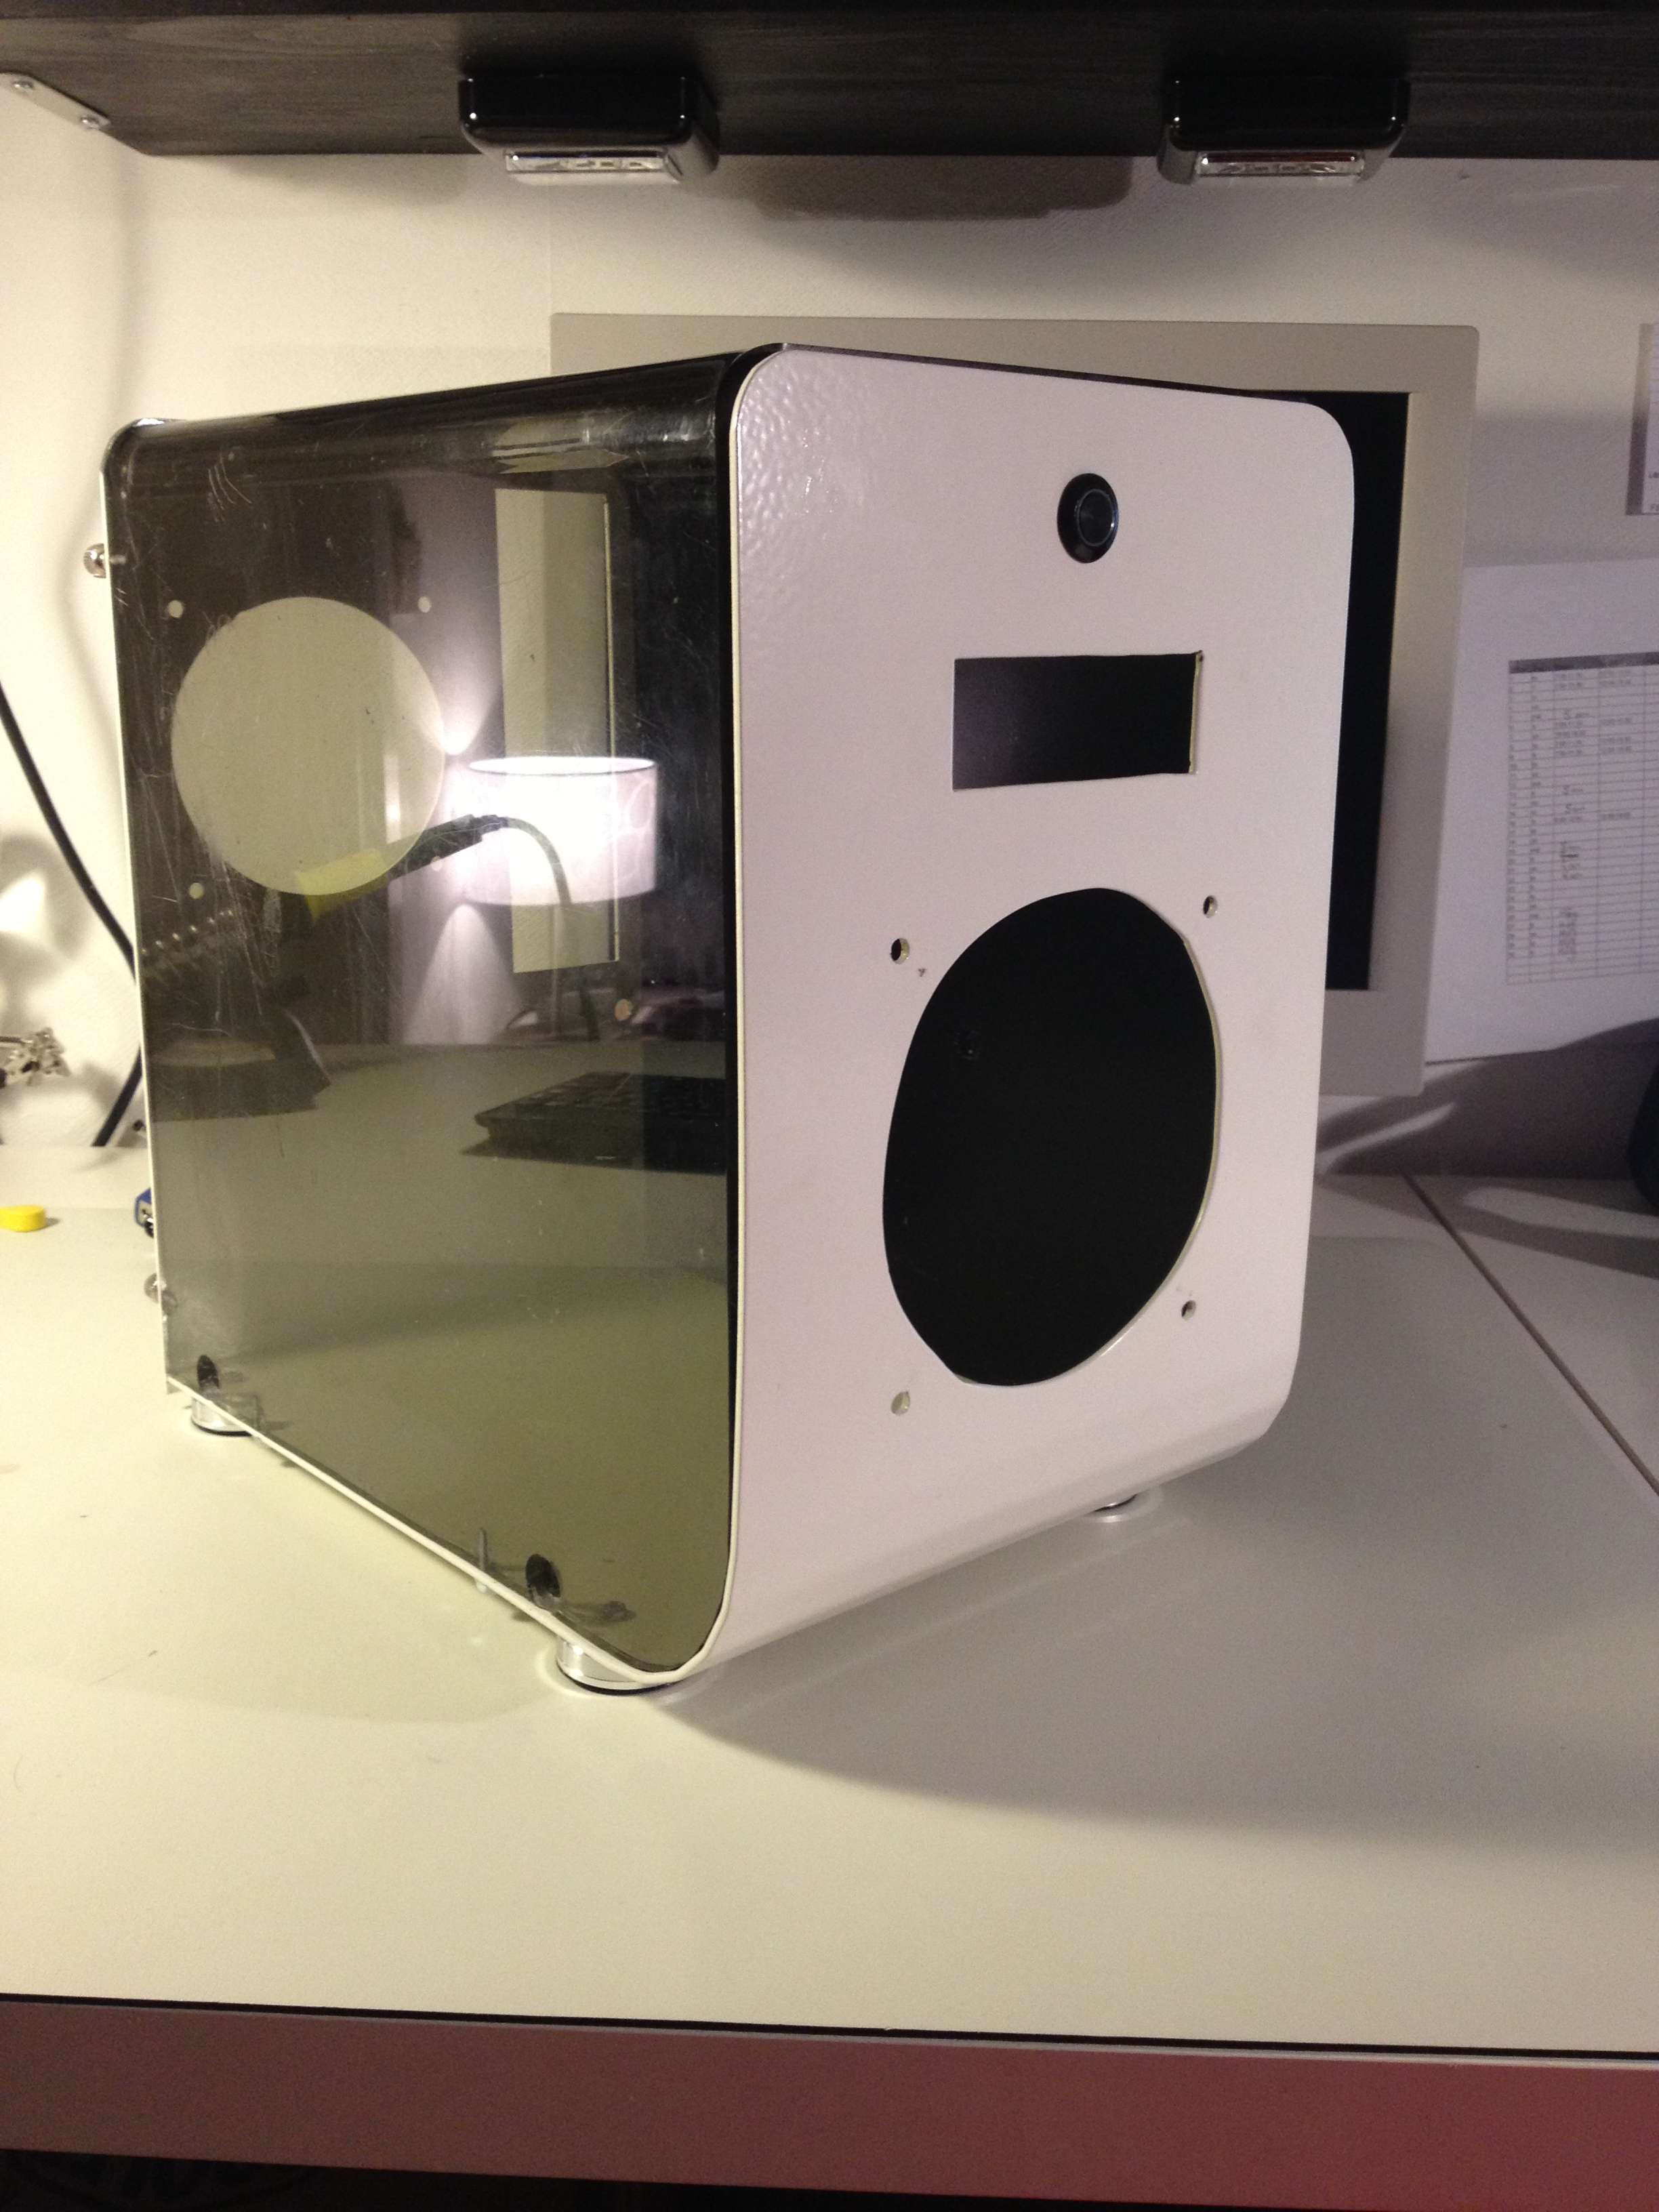
And this is how it looks from the outside.
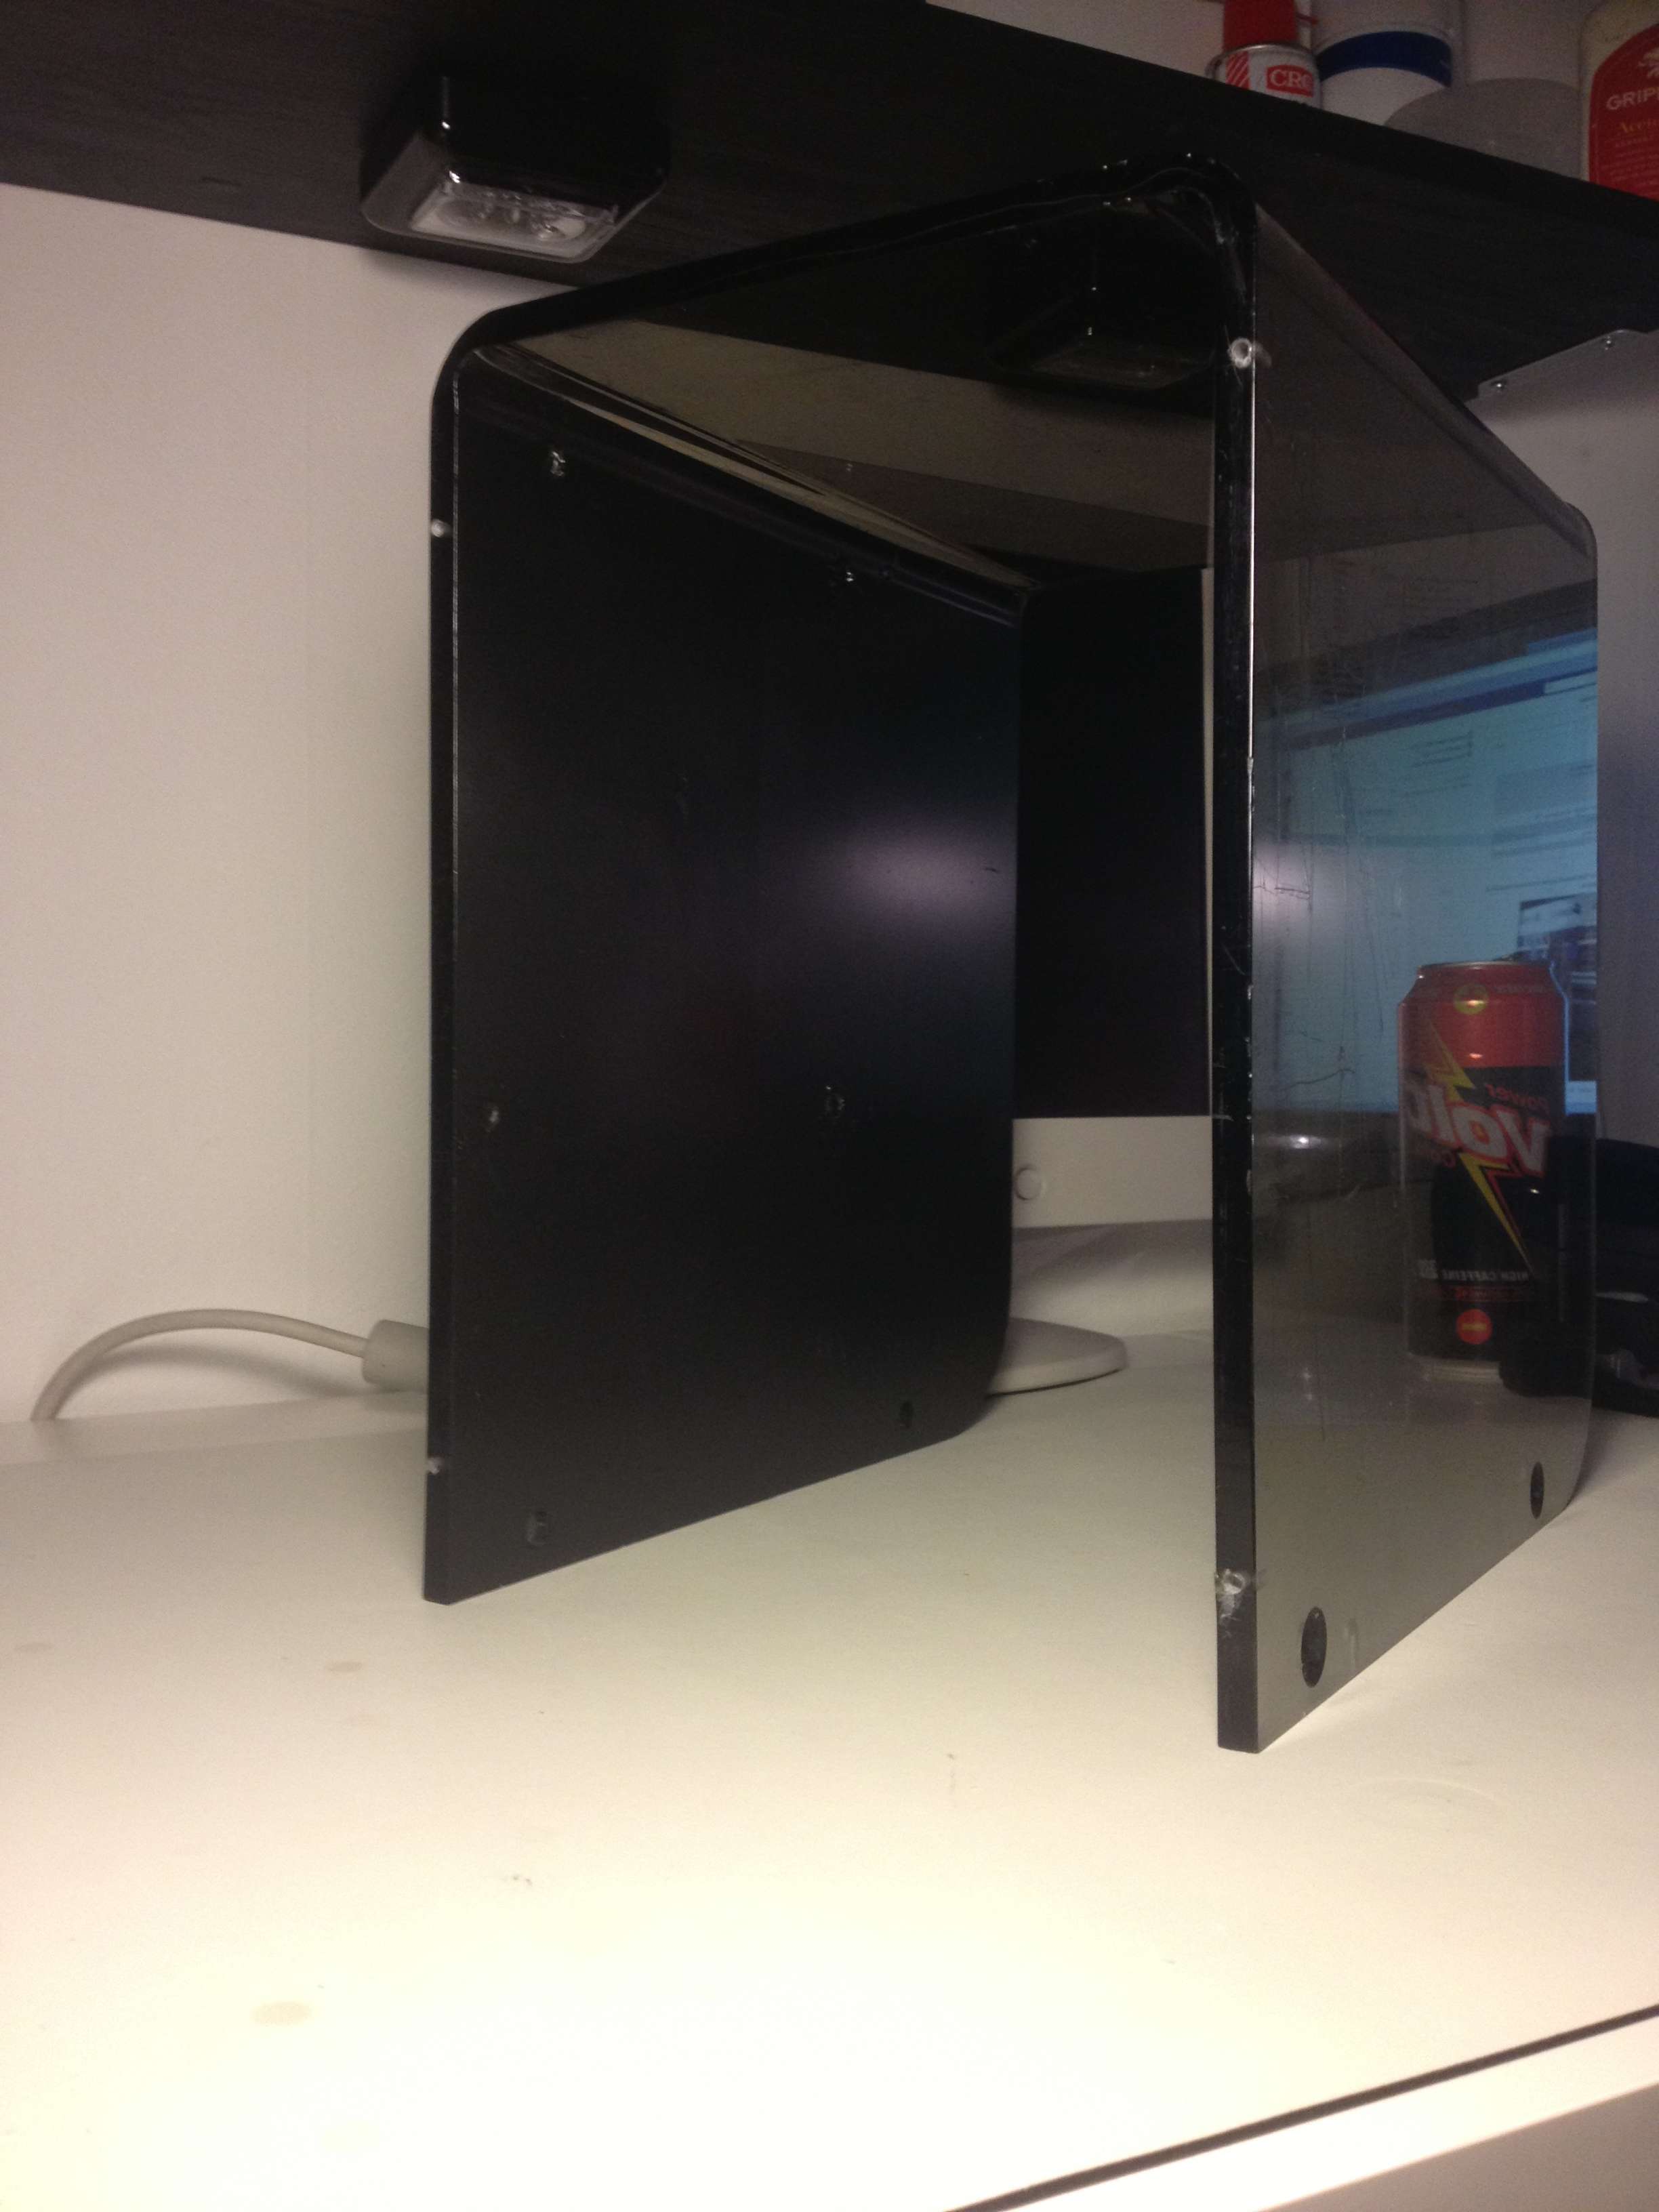
Ive lowered the plexi a few mm to fit better to the white bended plate. I put everything together and took some pictures, I really love the black side.
The edge before. A little bit to high.
Measured how much to cut.

Dada!
Think this looks really good.
Right now Im waiting for the hardware so I can start measuring out how to fit everything, how to make the shroud and so on.
Will be updating as much as possible. Please comment and give me advice and tips. Everything and everyone is welcome.
With kind regards
Johan Nyman
Now that Im finished with CURV3D I can start with my next project. I have been waiting to start working on this. Ive been planning how to make this as good as possible. This is the project I will spend most time on ever. Hope you will enjoy this log, feel free to comment and please give me advice and tips.
Lets start with a little info about this build. You may remember my log of this build I posted around a year ago. I also made a version 2 of it, and now the third and last version is coming.
This is my favorite build of all time, so now I want to make it as goodlooking as possible. What Im going to do is to correct the mistakes Ive made before, add some features to hide cables and things like that. I will also fill it with a little bit newer hardware and this time Im going for some nice watercooling, not an all-in-one like the Antec Kuhler I had in V.2.
List of things to do:
- Paint the right acrylic side of the case (on the inside) black, so you cant see in from the side. Thats the side where the motherboard will be installed. DONE
- Make coverplates out of acrylic to cover cables, psu and waterpump.
- Make a hole in the bottom and in the backpanel for the new psu.
- File down the acrylic so it fits perfectly with the acrylic piece. DONE
- Sleeve everything white, black and aqua.
- Hide as much of the cables as possible
- Install watercooling
- Getting the hardware
Hardware:
MB: Gigabyte GA-F2A88XN-WIFI
CPU: AMD A10-6800K
RAM: Corsair Dominator Platinum 2x4gb 2133MHz
SSD: Samsung 840 120gb
PSU: Be-Quiet SFX 300W
In V.2 I used AMDs Llano, and I fell in love. Since then I have been waiting for the next generation and now Trinity is here. When I have time for games I either play Starcraft 2 or Dota 2 and those arent really hardware demanding games, but the Trinity still is pretty good. So what I want is a HTPC but with possibilities of some simpler games to be played. So what I want to add for hardware is a m-itx motherboard for Trinity, socket FM2. As APU I want the best possible so Im trying to get a hold of a A10-6800K, and then add 2 sticks of 4GB DDR3 2133MHz ram.
EKWB! Thank you for helping me.
MNPCTech sponsored me with this fan grill to have in the front, should look awesome!
Clear Acrylic 120mm Overkill "Nautilus" PC Fan Grill from Mnpctech.com
EK DCP 2.2 Combo:
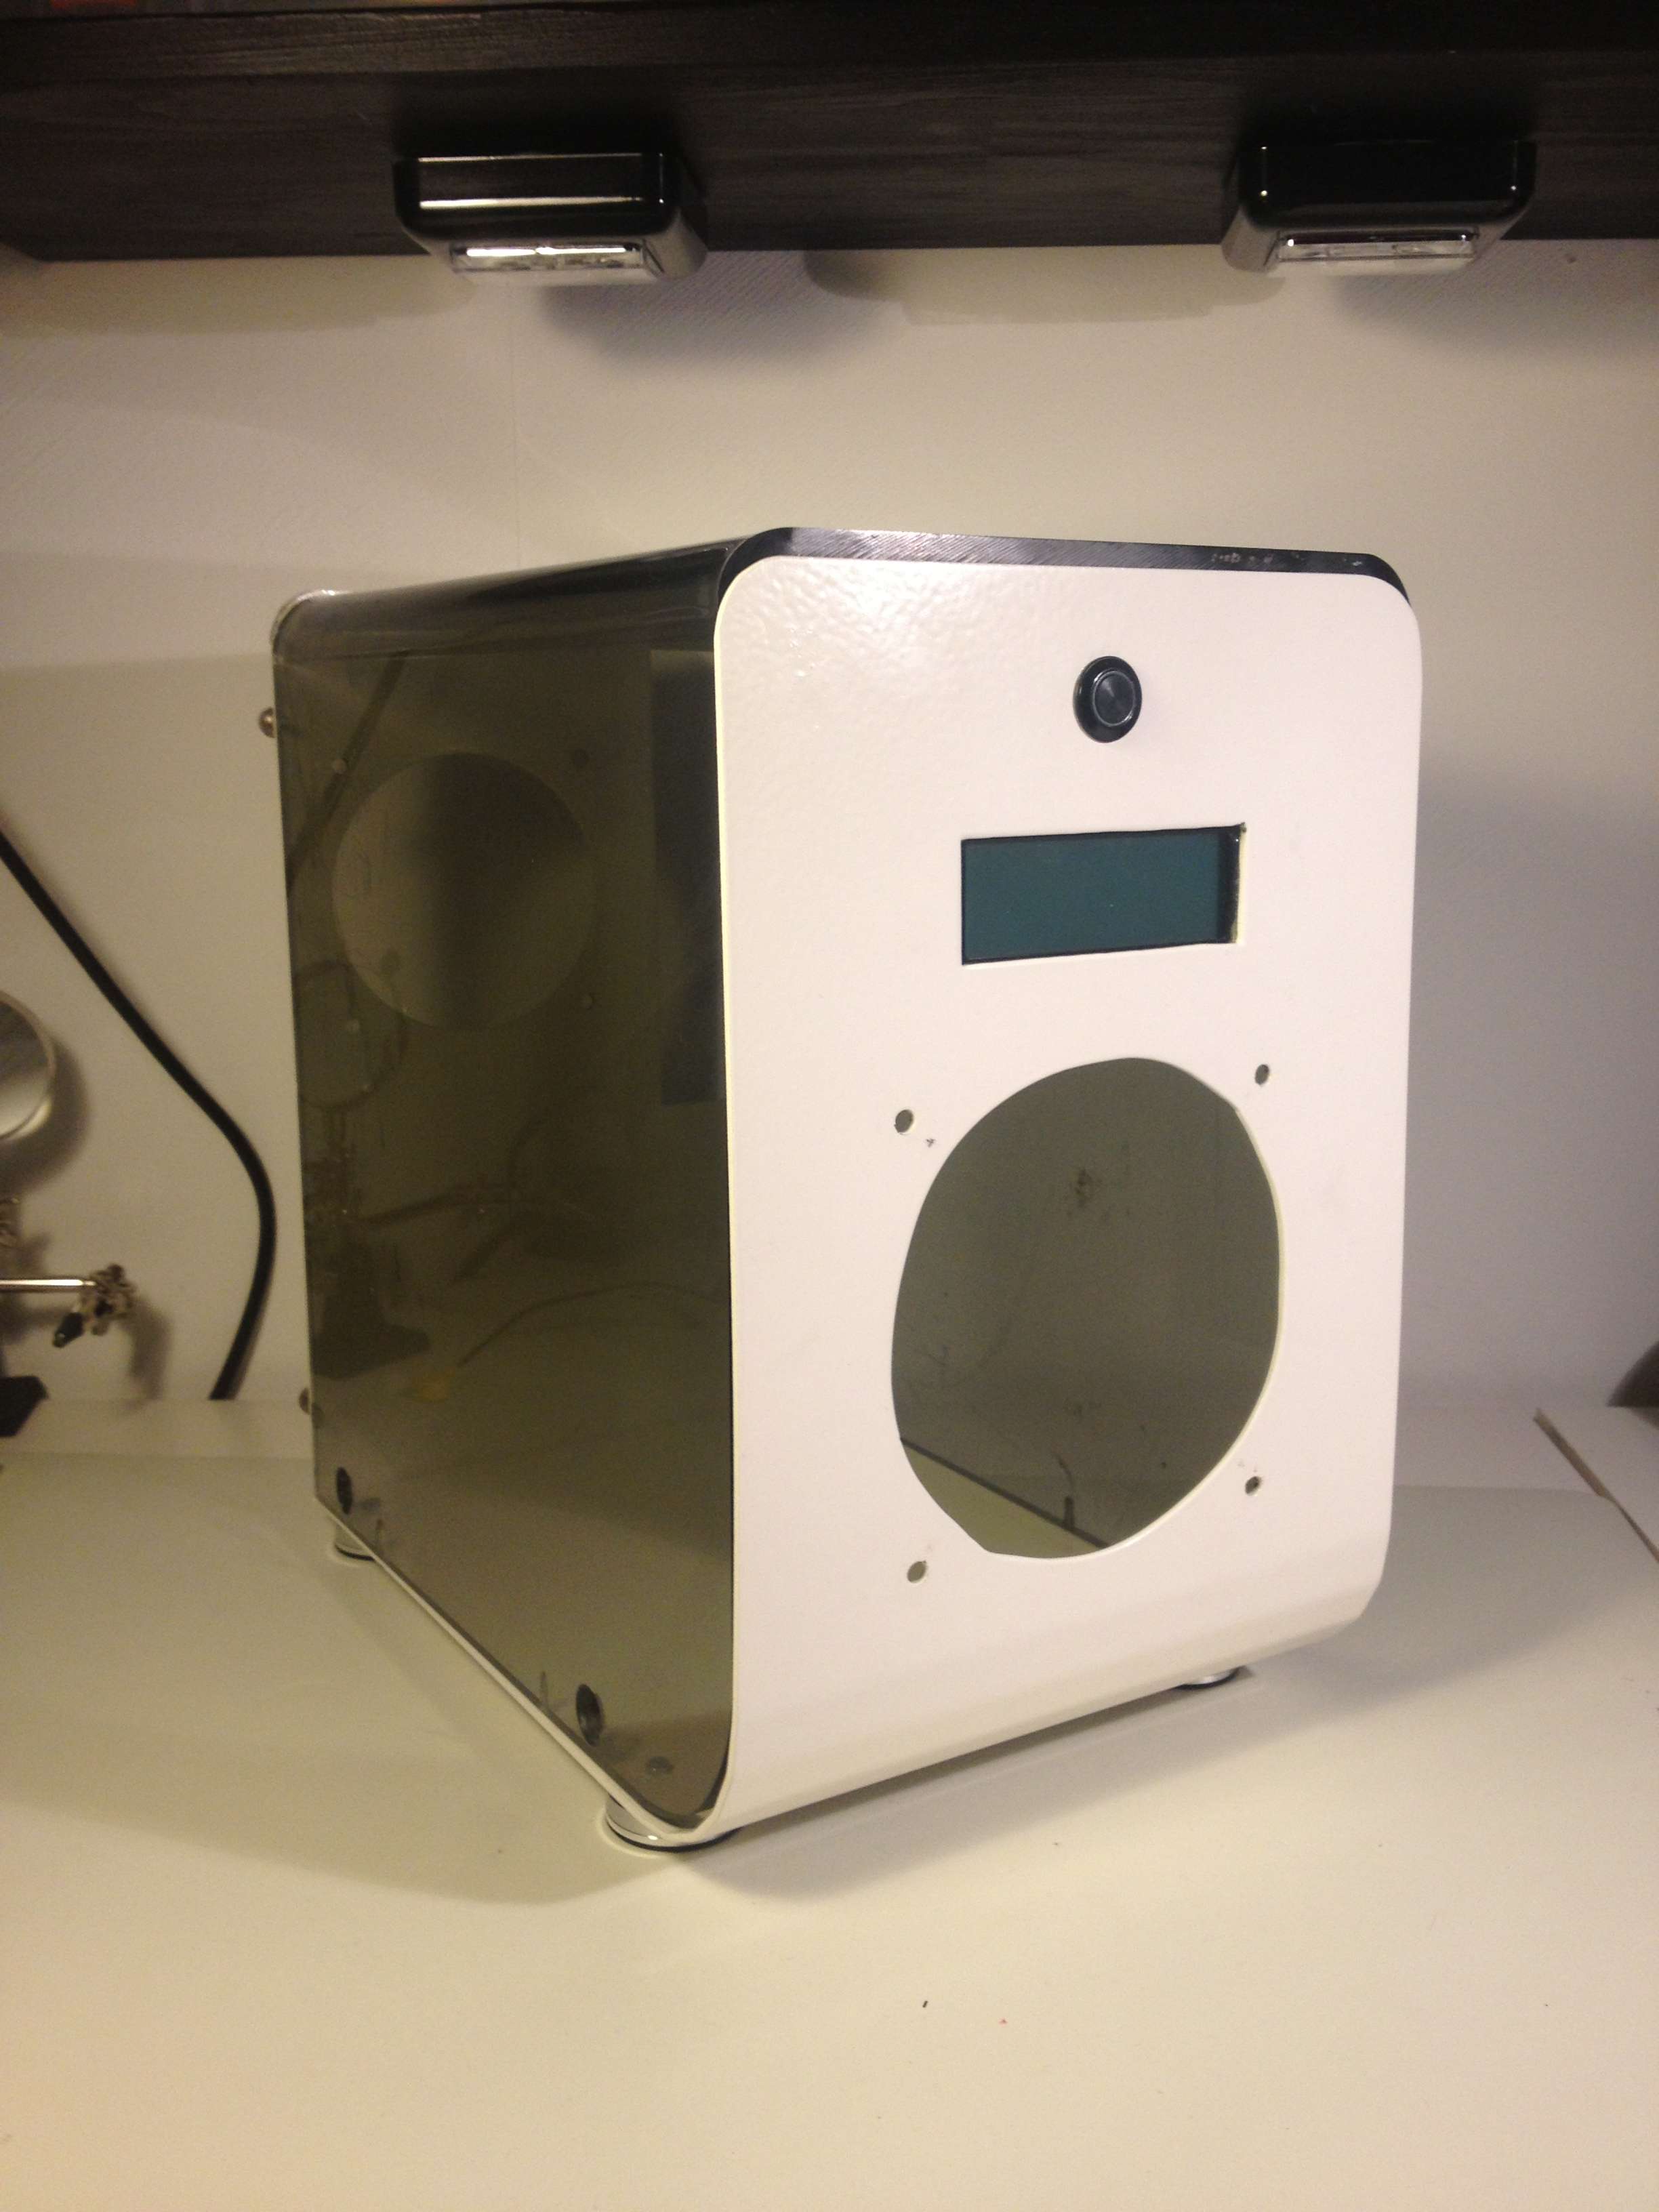
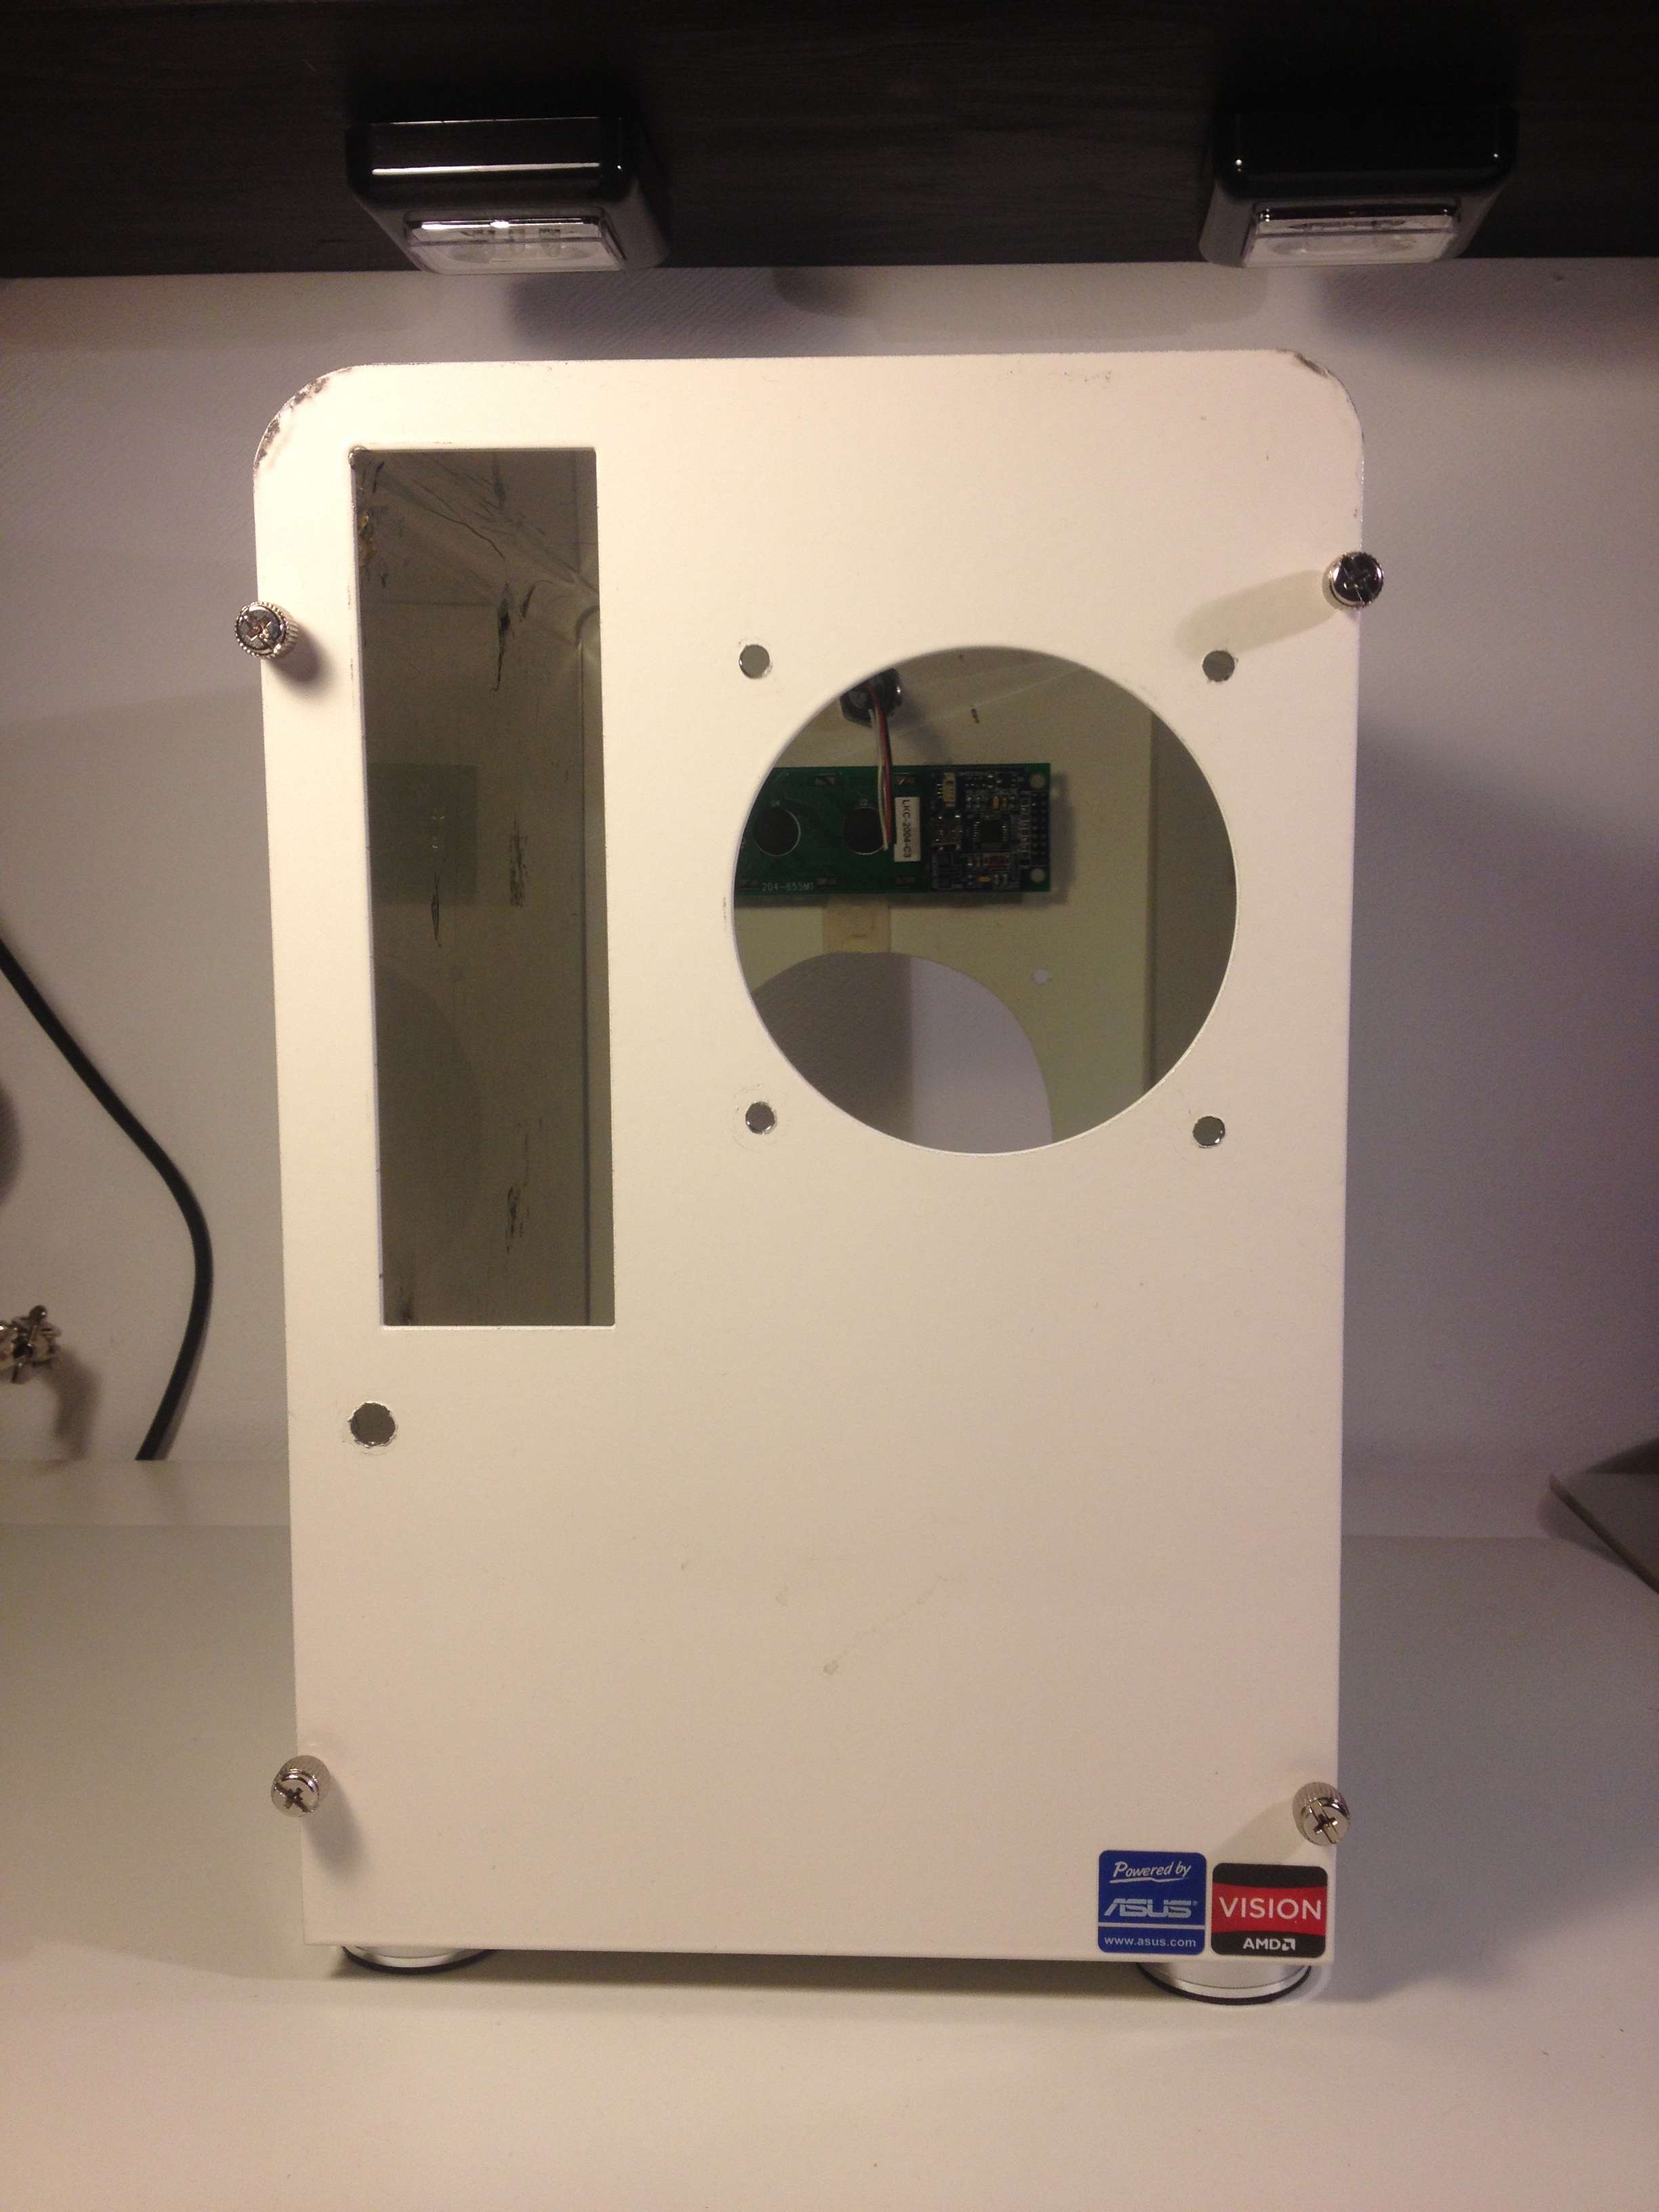
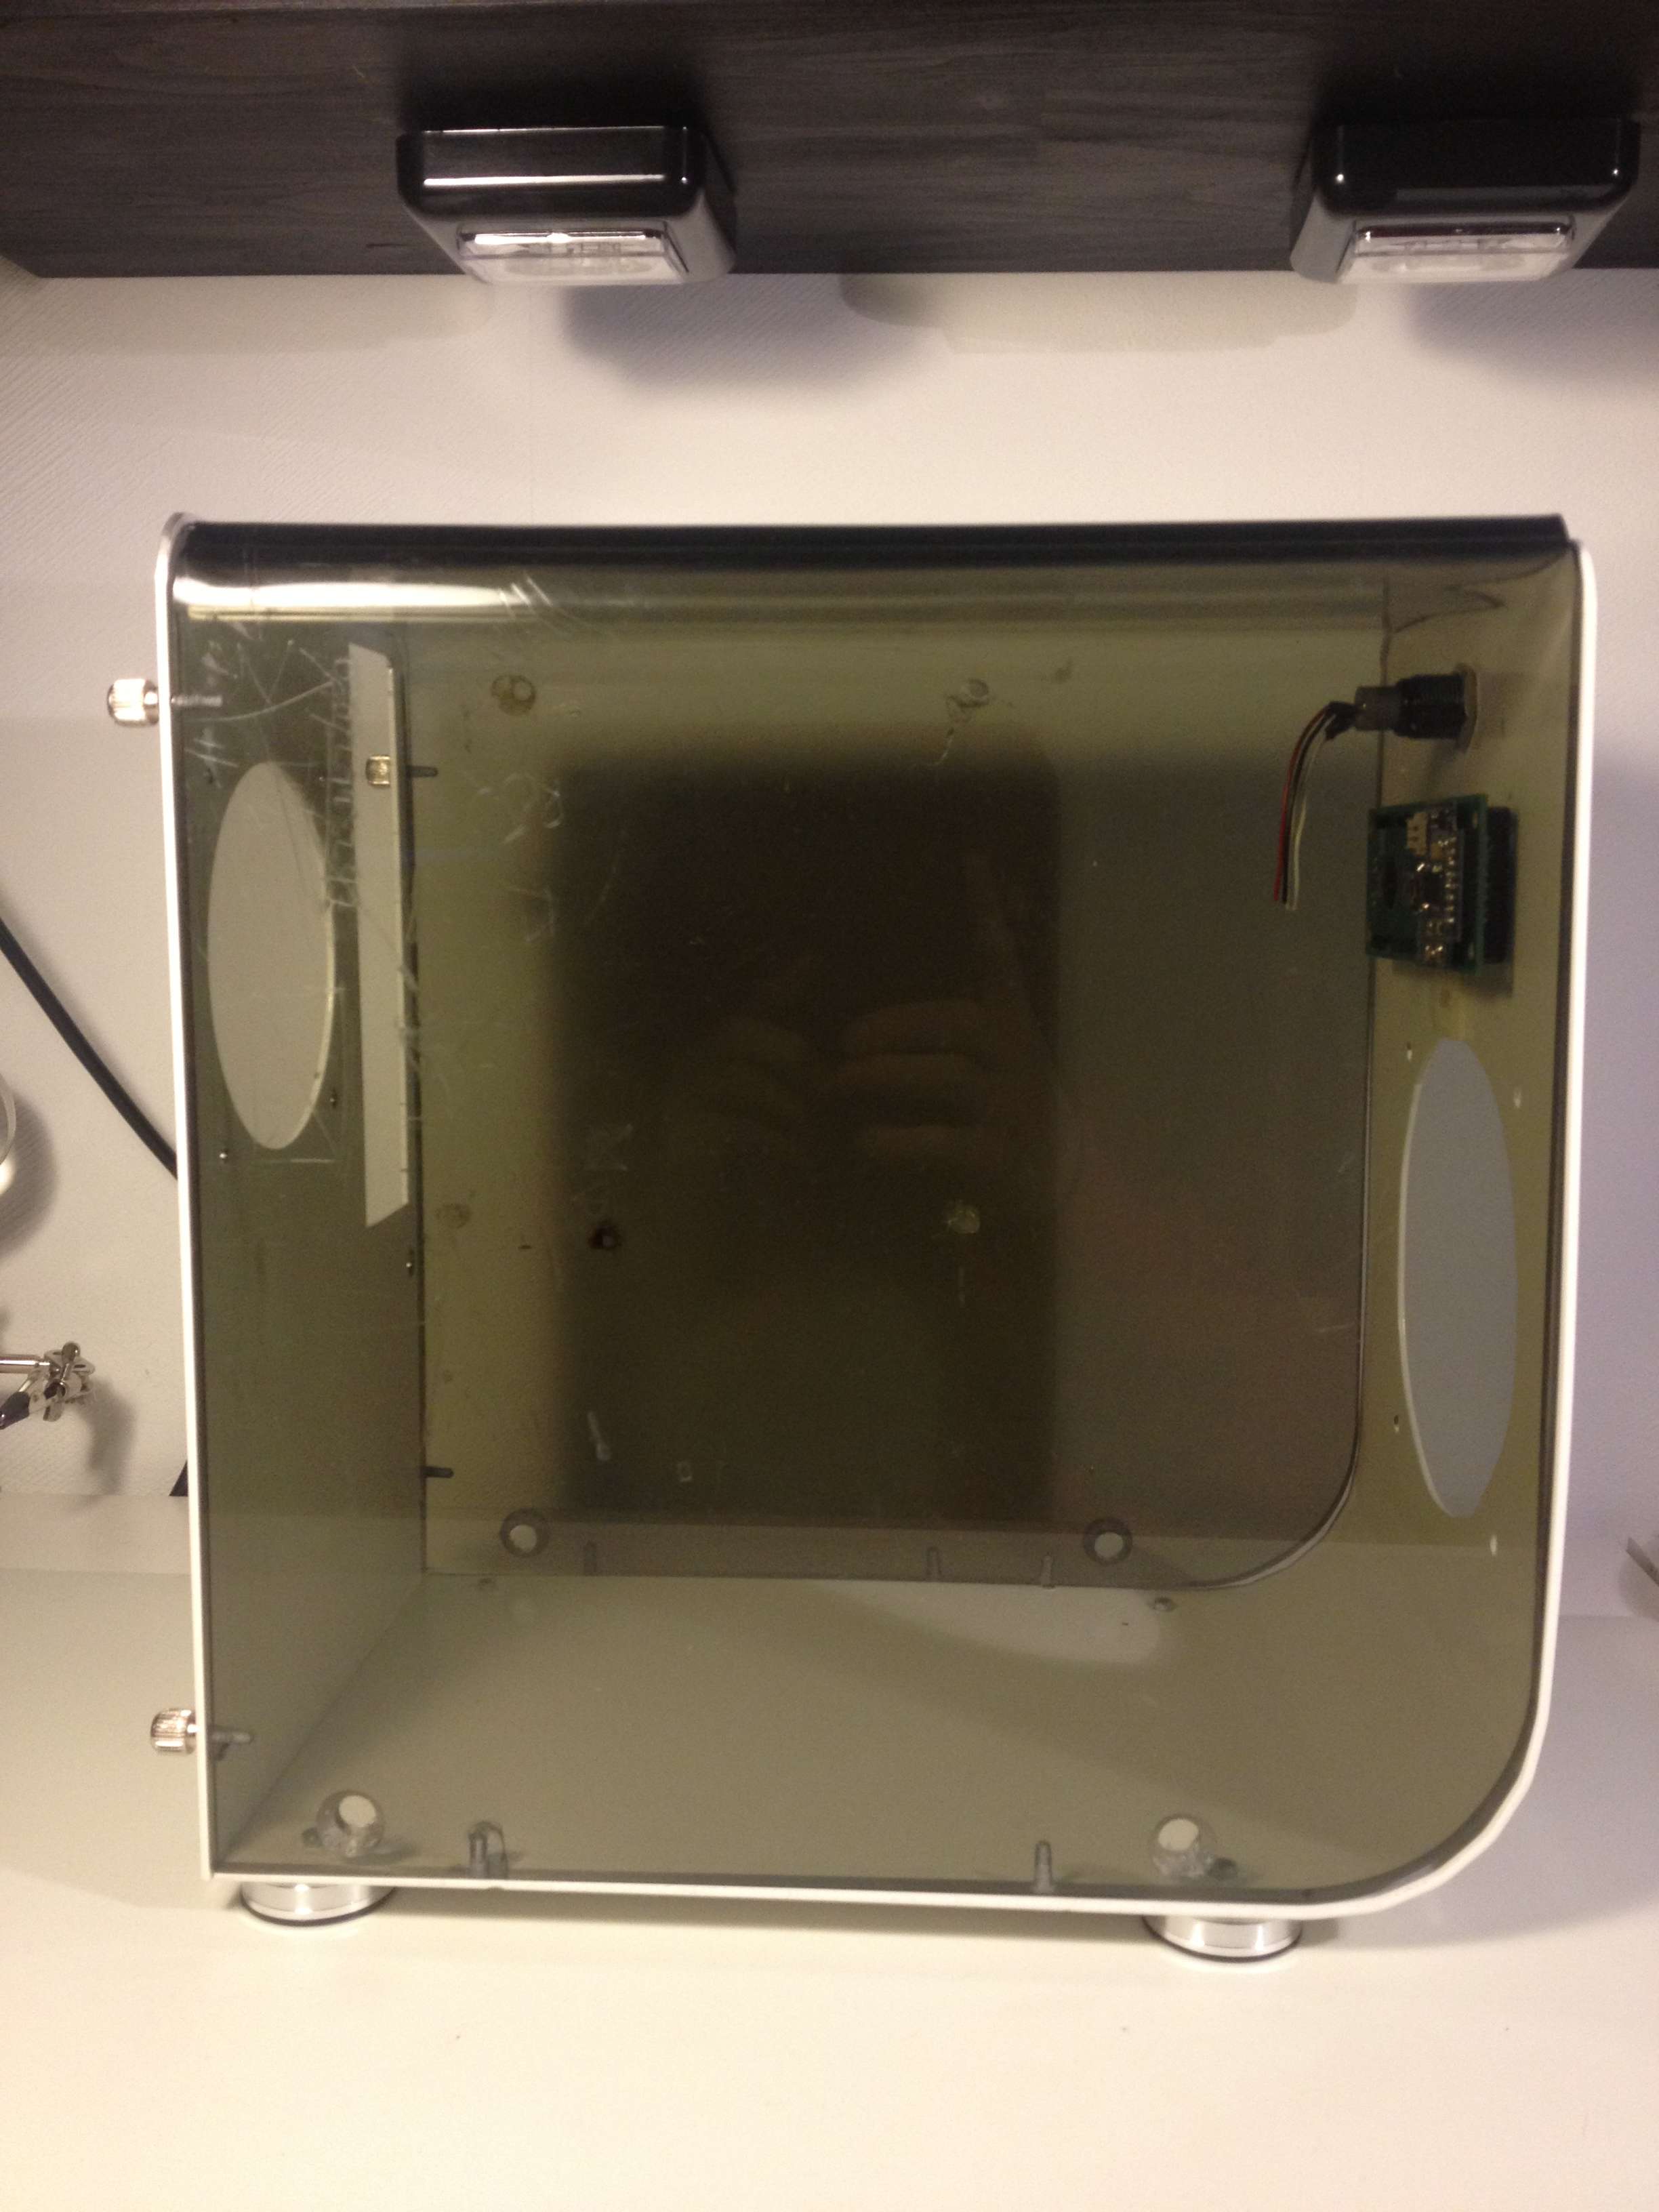
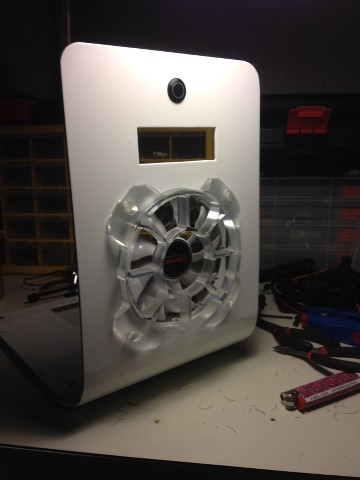
What Ive done so far is to strip the case from almost everything except the LCD and powerswitch.
Front:
Back:
Left side:
Right side. This is the side I want to paint black on the inside so you cant see into it from here.
The acrylic is pretty messed up as you can see. It was that from the beginning. Many scratches. But at the same time I feel like it gives the case a kind of vintage look, I still want to make it look a bit nicer though. So I will start by cleaning and polish it as much as possible. Do any of you guys know how to remove scratches from acrylic? Clearcoat it? Use a little blowtorch? Any advice?
First thing Im going to start with is to cut the acrylic maybe 3-4mm so it fits perfect with the white plate. Then paint the backside of the acrylic black. So this is what I have to work with for a couple of weeks:
I painted the right inner side of the acrylic piece black. Looks pretty good. Now you cant see anything from the other side, just as I wanted.
I started with isolate a little bit.
Then I just painted it, 3 layers.
And this is how it looks from the outside.
Ive lowered the plexi a few mm to fit better to the white bended plate. I put everything together and took some pictures, I really love the black side.
The edge before. A little bit to high.
Measured how much to cut.
Dada!
Think this looks really good.
Right now Im waiting for the hardware so I can start measuring out how to fit everything, how to make the shroud and so on.
Will be updating as much as possible. Please comment and give me advice and tips. Everything and everyone is welcome.
With kind regards
Johan Nyman
Scratchbuilds | CURV3D | Cold Winter |
13,844 Views
17 REPLIES 17
Options
- Mark as New
- Bookmark
- Subscribe
- Mute
- Subscribe to RSS Feed
- Permalink
05-20-2013 08:02 AM
Looks good so far and to get rid of the scratches, try using a buffer, if that fails, fine sandpaper perhaps.
Options
- Mark as New
- Bookmark
- Subscribe
- Mute
- Subscribe to RSS Feed
- Permalink
05-26-2013 03:19 AM
It's amazing!! I will support you
Next Build
- AMD Vishera FX-8350
- AMD Radeon HD 7870
- AMD Vishera FX-8350
- AMD Radeon HD 7870
Options
- Mark as New
- Bookmark
- Subscribe
- Mute
- Subscribe to RSS Feed
- Permalink
11-25-2013 01:13 PM
Im now officially resurrecting this project! I stopped working on this mod a while ago but now when I finished my recent project, F4DE, Im back at it.
I will be rushing to finish a aircooled version for Dreamhack that starts now on thursday, for a Gigabyte contest there. After that I will start the real project with custom loop and other goodies.
But I can tell you one thing right now:
MNPCTech sponsored me with this fan grill to have in the front, should look awesome!
Clear Acrylic 120mm Overkill "Nautilus" PC Fan Grill from Mnpctech.com
Scratchbuilds | CURV3D | Cold Winter |
Options
- Mark as New
- Bookmark
- Subscribe
- Mute
- Subscribe to RSS Feed
- Permalink
12-05-2013 02:49 AM
I rushed to finish a aircooled version for Dreamhack that was this weekend thursday, for a Gigabyte contest there. After that I will start the real project with custom loop and other goodies.
To start off:
Be Quiet sponsored me with a Shadow Rock 2.

Gigabyte sponsored me with a GA-F2A88XN-WIFI.

What I started doing was to fix the 120mm hole in the front and also make the 92mm hole in the back to 120mm.
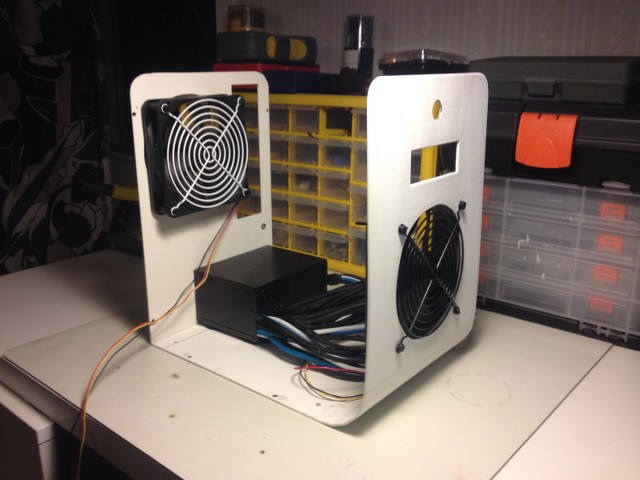
Then I started working on a shroud that would cover the powersupply. Used acrylic that I painted black on one side.
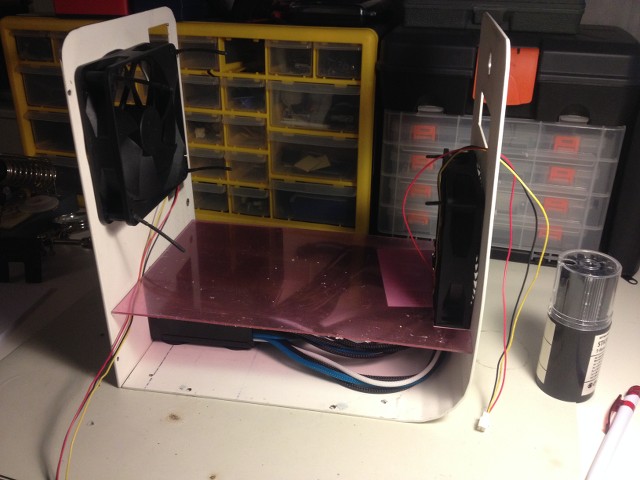
Then I painted the inside of the acrylic black too so it would hide the powersupply and everything else.

Then I added the fan grill I got from Bill. Looks awesome!
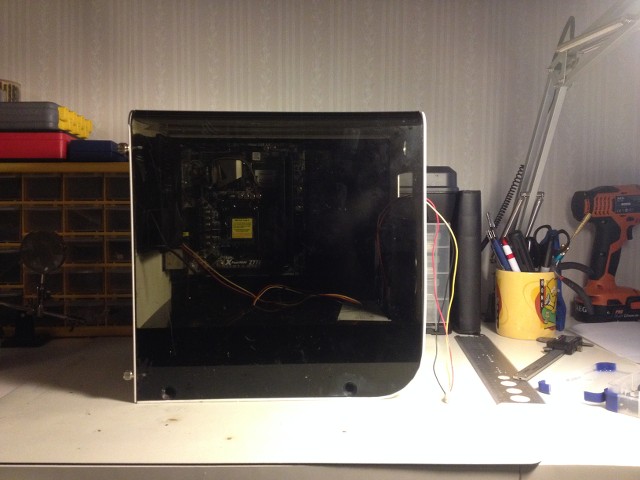
I got the motherboard and cpu down at Jönköping where Dreamhack is, so I installed everything there. It ended up looking like this.
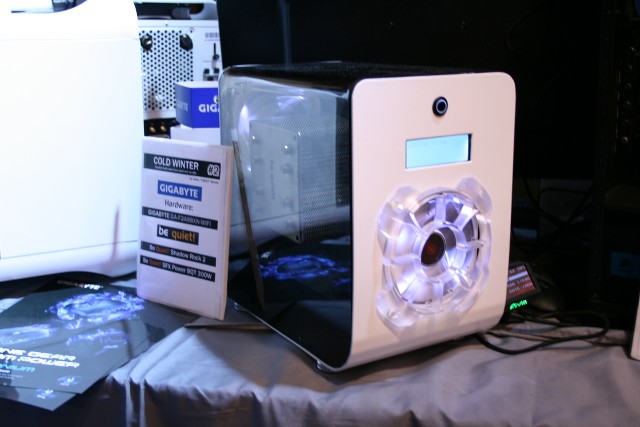
And here it is together with all the other mods, I always ends up with the smallest mods haha.
So next thing to do is to make a watercooled version. I also have to get ahold of a CPU, I think Ill wait for the new AMD A10-7850K, should be released in January, the 14th I think. I was thinking of using a 50-60mm 120mm radiator in the front. Should be enough for the CPU.
So what did you think about the "aircooled Dreamhack" version of this mod?
With kind regards
Johan Nyman
Minimalistic PC's
To start off:
Be Quiet sponsored me with a Shadow Rock 2.
Gigabyte sponsored me with a GA-F2A88XN-WIFI.
What I started doing was to fix the 120mm hole in the front and also make the 92mm hole in the back to 120mm.
Then I started working on a shroud that would cover the powersupply. Used acrylic that I painted black on one side.
Then I painted the inside of the acrylic black too so it would hide the powersupply and everything else.
Then I added the fan grill I got from Bill. Looks awesome!
I got the motherboard and cpu down at Jönköping where Dreamhack is, so I installed everything there. It ended up looking like this.
And here it is together with all the other mods, I always ends up with the smallest mods haha.
So next thing to do is to make a watercooled version. I also have to get ahold of a CPU, I think Ill wait for the new AMD A10-7850K, should be released in January, the 14th I think. I was thinking of using a 50-60mm 120mm radiator in the front. Should be enough for the CPU.
So what did you think about the "aircooled Dreamhack" version of this mod?
With kind regards
Johan Nyman
Minimalistic PC's
Scratchbuilds | CURV3D | Cold Winter |
Options
- Mark as New
- Bookmark
- Subscribe
- Mute
- Subscribe to RSS Feed
- Permalink
12-10-2013 06:22 PM
It's a nice build. I would have gotten a bit of ispropyl alchohol and rounded the edges of the acrylic though.
Say hi to the next generation.
Peace is a lie, there is only Passion
Through passion, I gain strength
Through strength, I gain victory
Through victory, my chains are broken
The Republic of Gamers shall free me
Options
- Mark as New
- Bookmark
- Subscribe
- Mute
- Subscribe to RSS Feed
- Permalink
01-23-2014 04:56 AM
Antronman wrote:
It's a nice build. I would have gotten a bit of ispropyl alchohol and rounded the edges of the acrylic though.
Thank you! Which edges are you talking about? 🙂
Sorry for no updates here, but I have been waiting for the release of AMD A10-7850K, now it is here and I cant wait to start. Im still waiting for watercooling gear from EKWB though, after I got that I can start the casemodding for real. 🙂
Scratchbuilds | CURV3D | Cold Winter |
Options
- Mark as New
- Bookmark
- Subscribe
- Mute
- Subscribe to RSS Feed
- Permalink
02-20-2014 06:57 AM
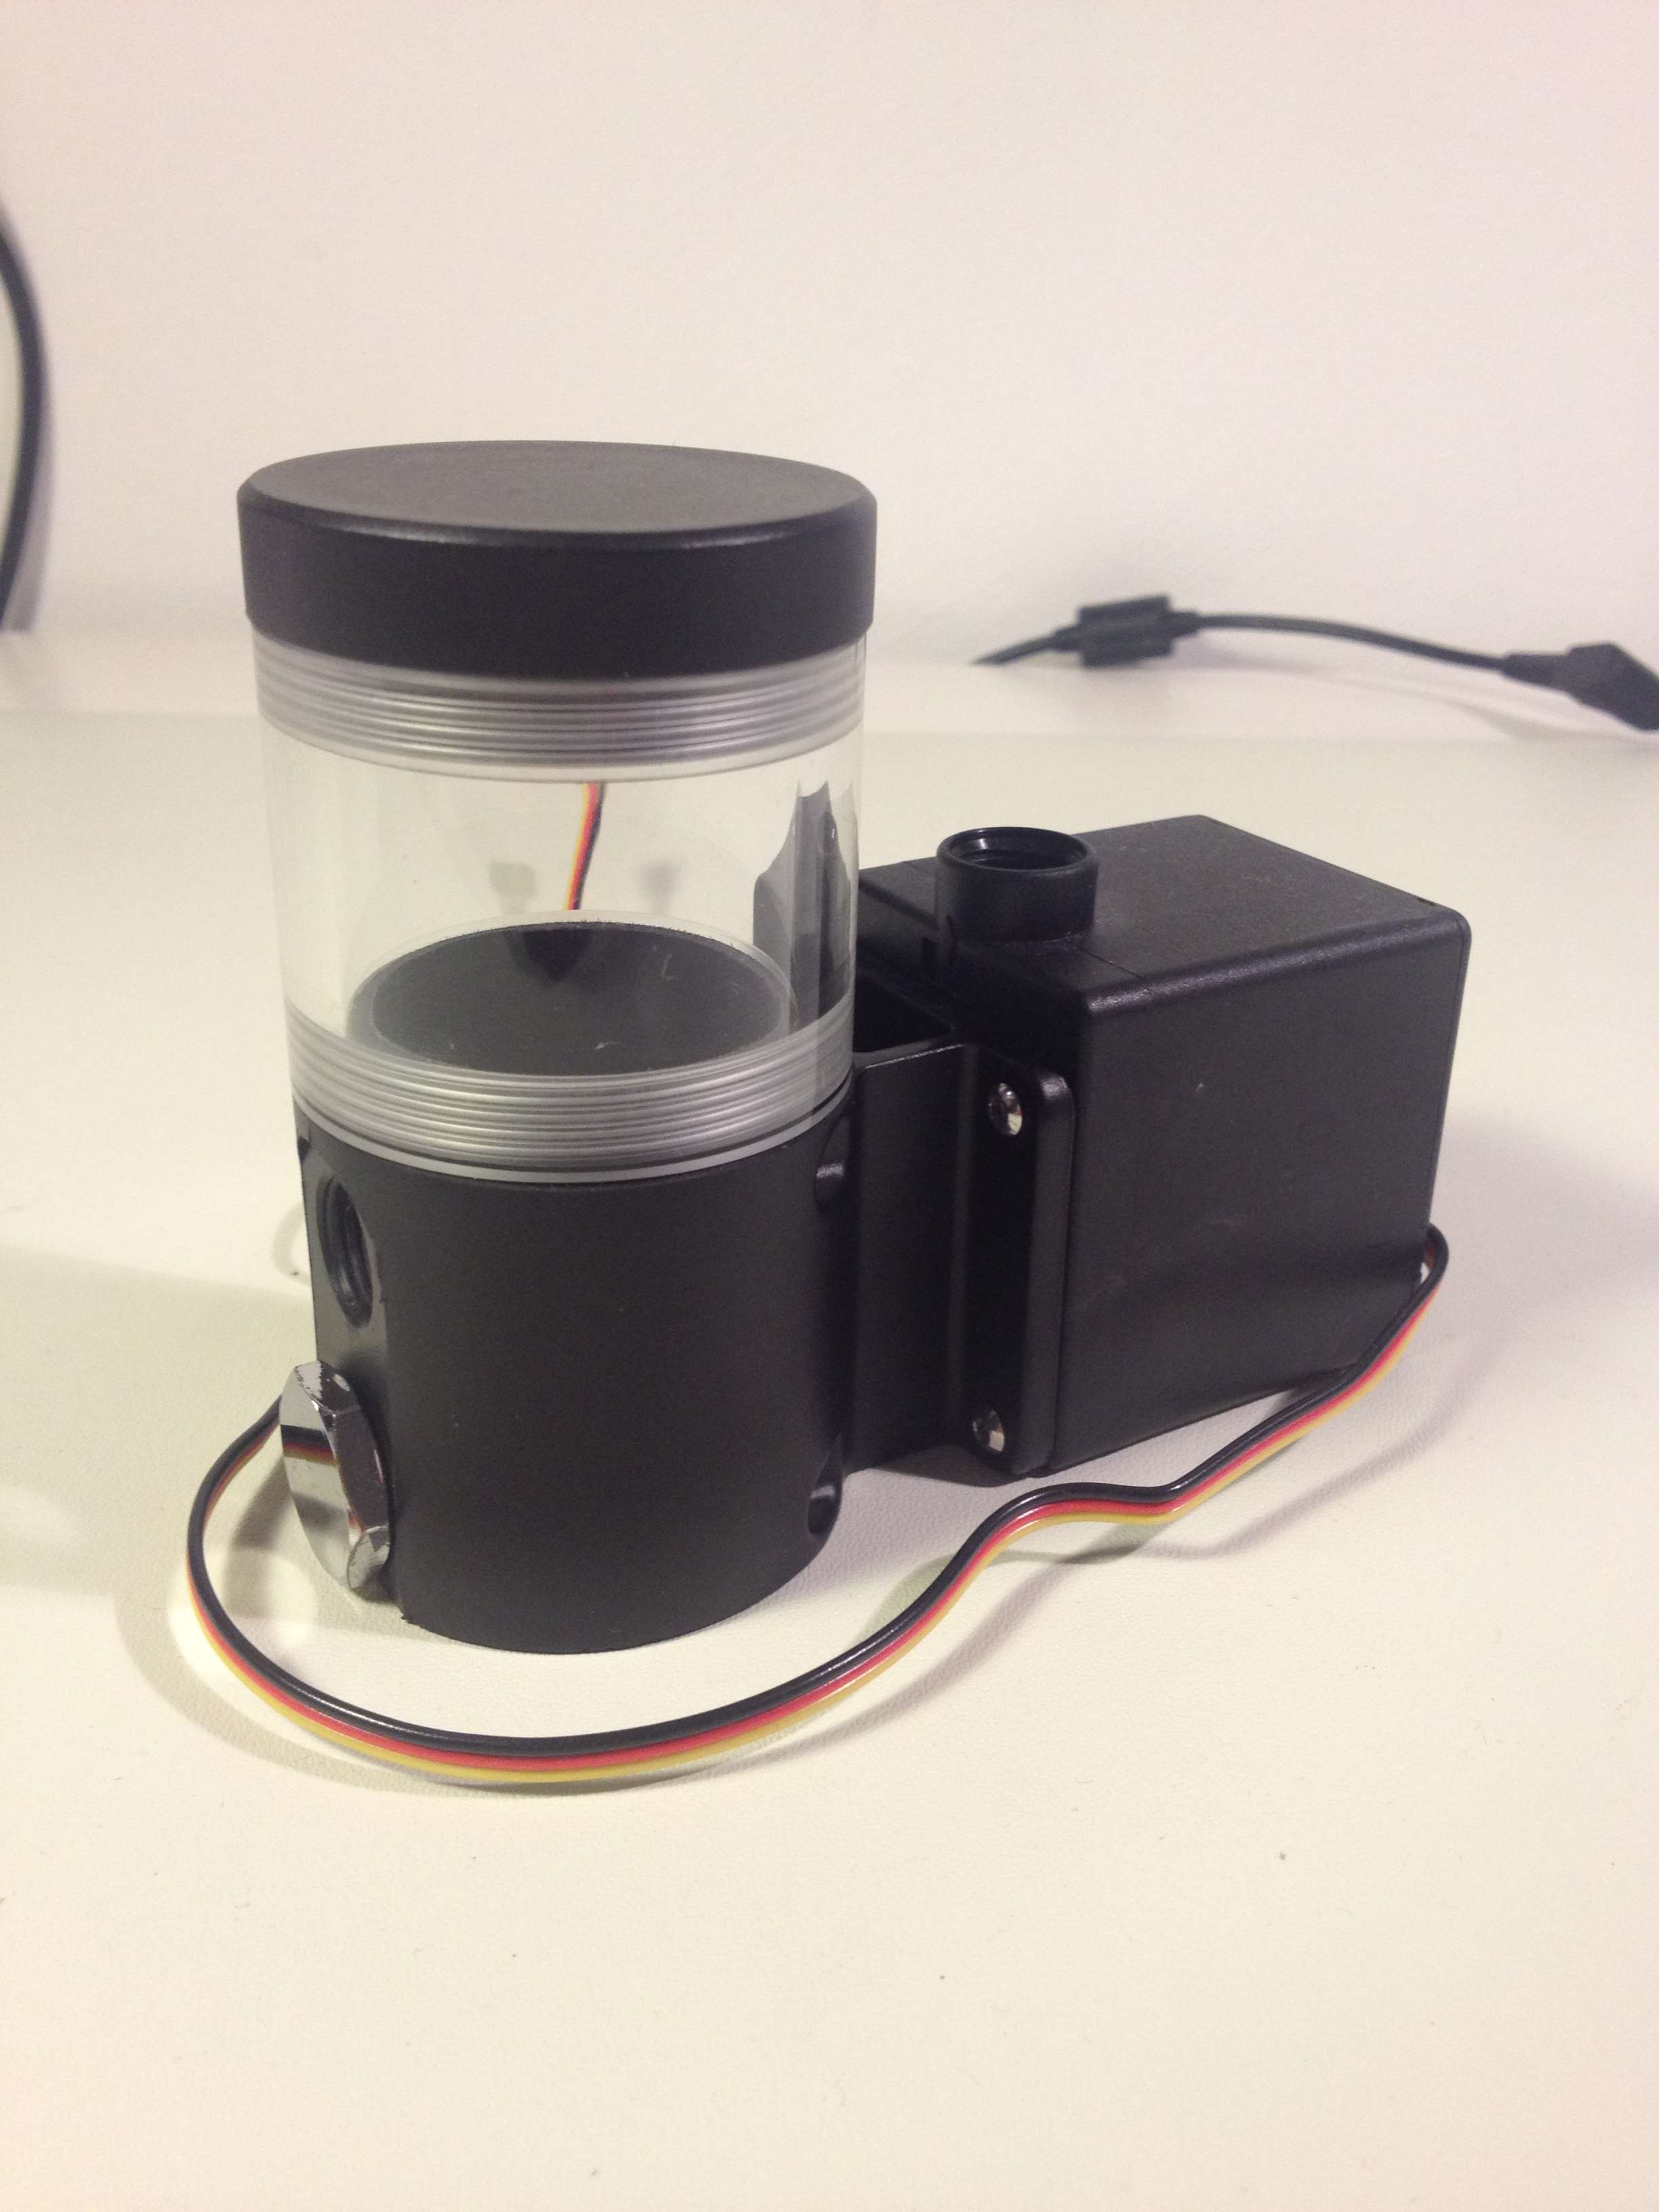
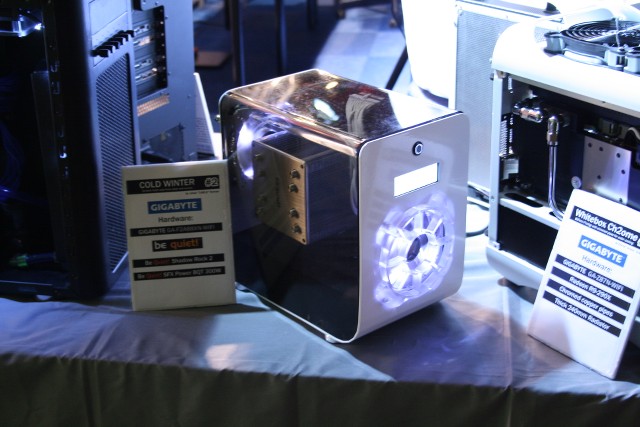
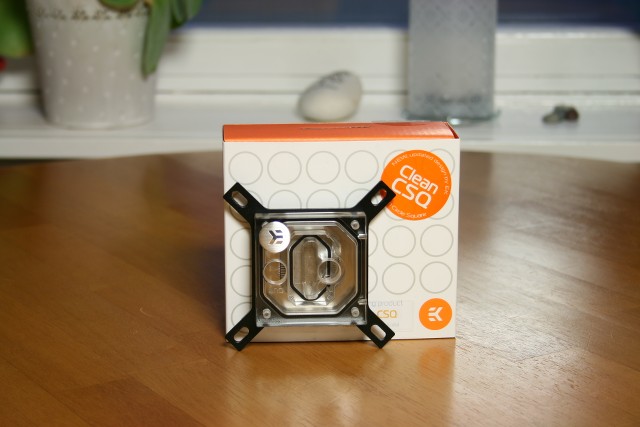
I want to start by announcing a new sponsor and thank them for all their help, EKWB! Thank you for helping me and sending me:

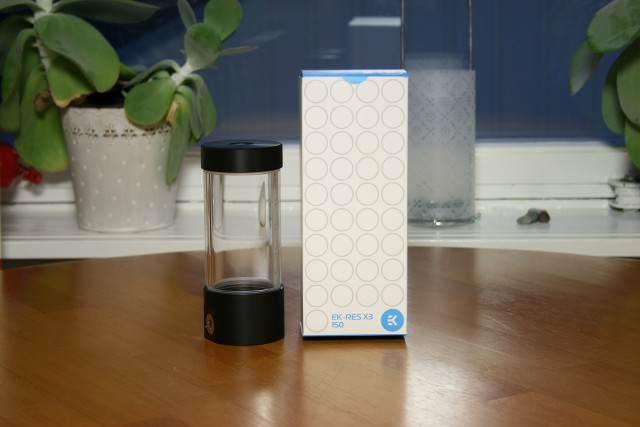
I started out installing the loop to see how I wanted everything, the RES is installed in the top like this.
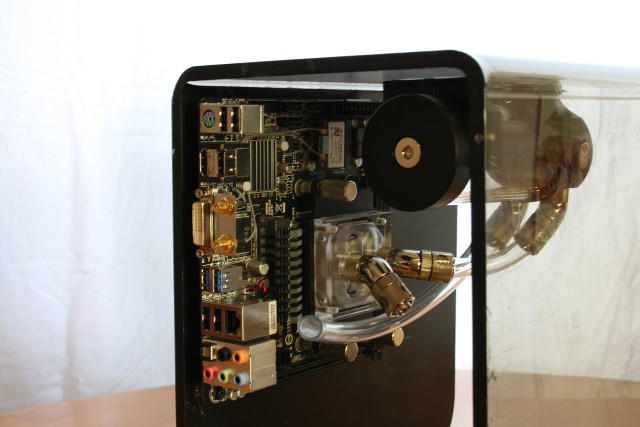
The 120mm XT rad goes in the front of course together with the DCP 2.2 pump on the bottom.
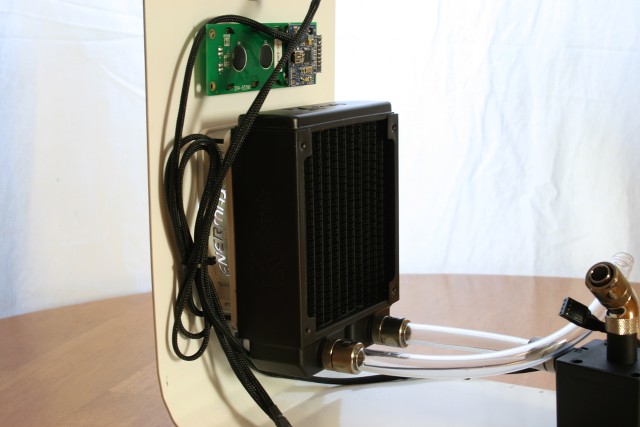
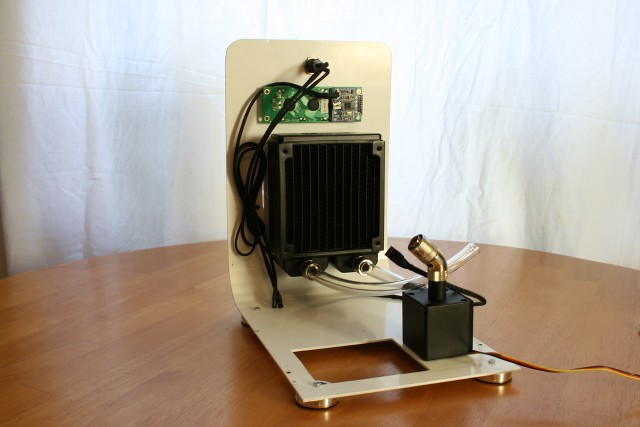
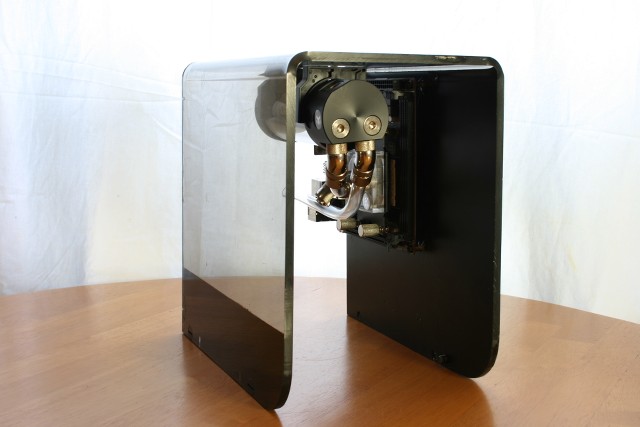
The entire loop from behind, whats missing here is the cover over the PSU and the pump, working on that right now aswell as fixing all the cables to perfect lenght.

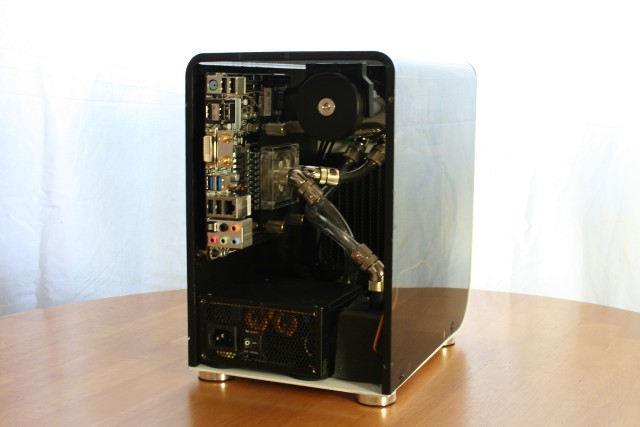
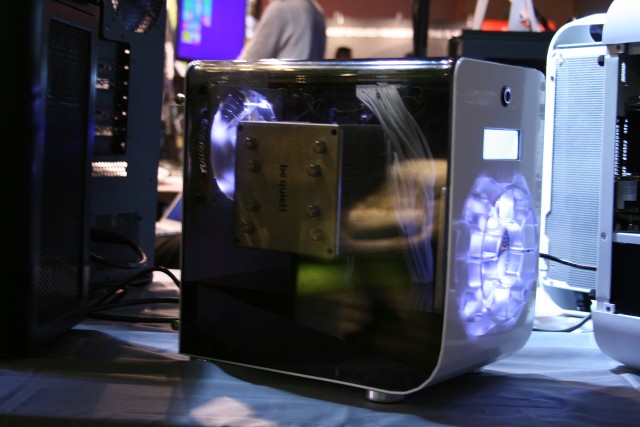
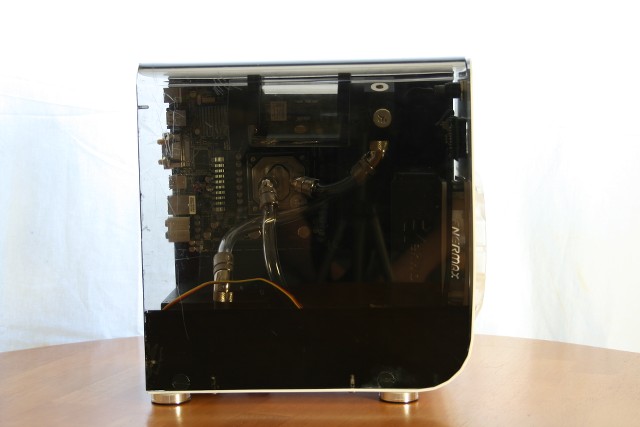
I cant get a good photo from the side because of the tinted plexiglass, although, as soon as I have some lights inside the case there will be good pictures.
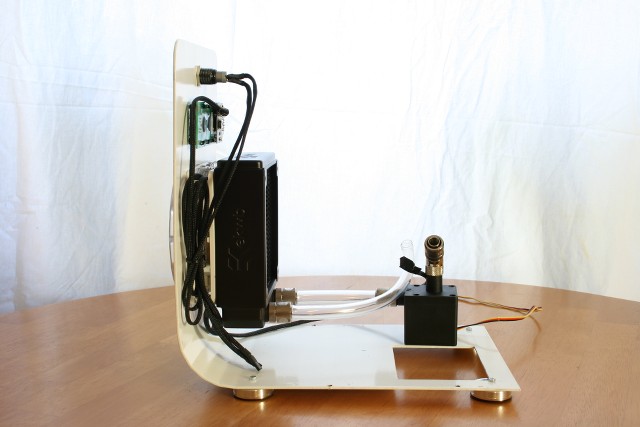
Last picture of the day!

What do you think so far?
I have dissassembled everything now to finish the last small details.
Hopefully Ill have a new update this weekend, until then, have a good day!
With kind regards
Johan Nyman
Minimalistic PC's
- 120mm XT Radiator
- Supremacy Clean CSQ Nickel-Acrylic
- RES X3 150mm
- Fittings
I started out installing the loop to see how I wanted everything, the RES is installed in the top like this.
The 120mm XT rad goes in the front of course together with the DCP 2.2 pump on the bottom.
The entire loop from behind, whats missing here is the cover over the PSU and the pump, working on that right now aswell as fixing all the cables to perfect lenght.
I cant get a good photo from the side because of the tinted plexiglass, although, as soon as I have some lights inside the case there will be good pictures.
Last picture of the day!
What do you think so far?
I have dissassembled everything now to finish the last small details.
- Complete the coverplate for the PSU and pump.
- Fix all the cables to perfect lenght.
- Install a SSD.
- Leaktest.
- OS Install and config.
Hopefully Ill have a new update this weekend, until then, have a good day!
With kind regards
Johan Nyman
Minimalistic PC's
Scratchbuilds | CURV3D | Cold Winter |
Related Content
- Is my Rampage V Edition 10 broken? in Hardware & Build Advice
- PC won't boot from cold start in Hardware & Build Advice
- Desktop went crazy (rog z690 maximus extreme) in Hardware & Build Advice
- X670E-E Memory Overclocking causes post and stability Issues in Overclocking & Tweaking
- Boot times taking an age ASUS ROG Strix AMD B650E-I Gaming in Hardware & Build Advice
