Turn on suggestions
Auto-suggest helps you quickly narrow down your search results by suggesting possible matches as you type.
Showing results for
- Republic of Gamers Forum
- Motherboards
- Previous Generations
- Other Motherboards
- ASUS Maximus IV Gene Z - Unboxing
Options
- Subscribe to RSS Feed
- Mark Topic as New
- Mark Topic as Read
- Float this Topic for Current User
- Bookmark
- Subscribe
- Mute
- Printer Friendly Page
ASUS Maximus IV Gene Z - Unboxing
Options
- Mark as New
- Bookmark
- Subscribe
- Mute
- Subscribe to RSS Feed
- Permalink
11-03-2011
06:55 PM
- last edited on
03-05-2024
07:45 PM
by
![]() ROGBot
ROGBot
The Pinnacle of Aesthetics and Performance Sized for Smaller Builds
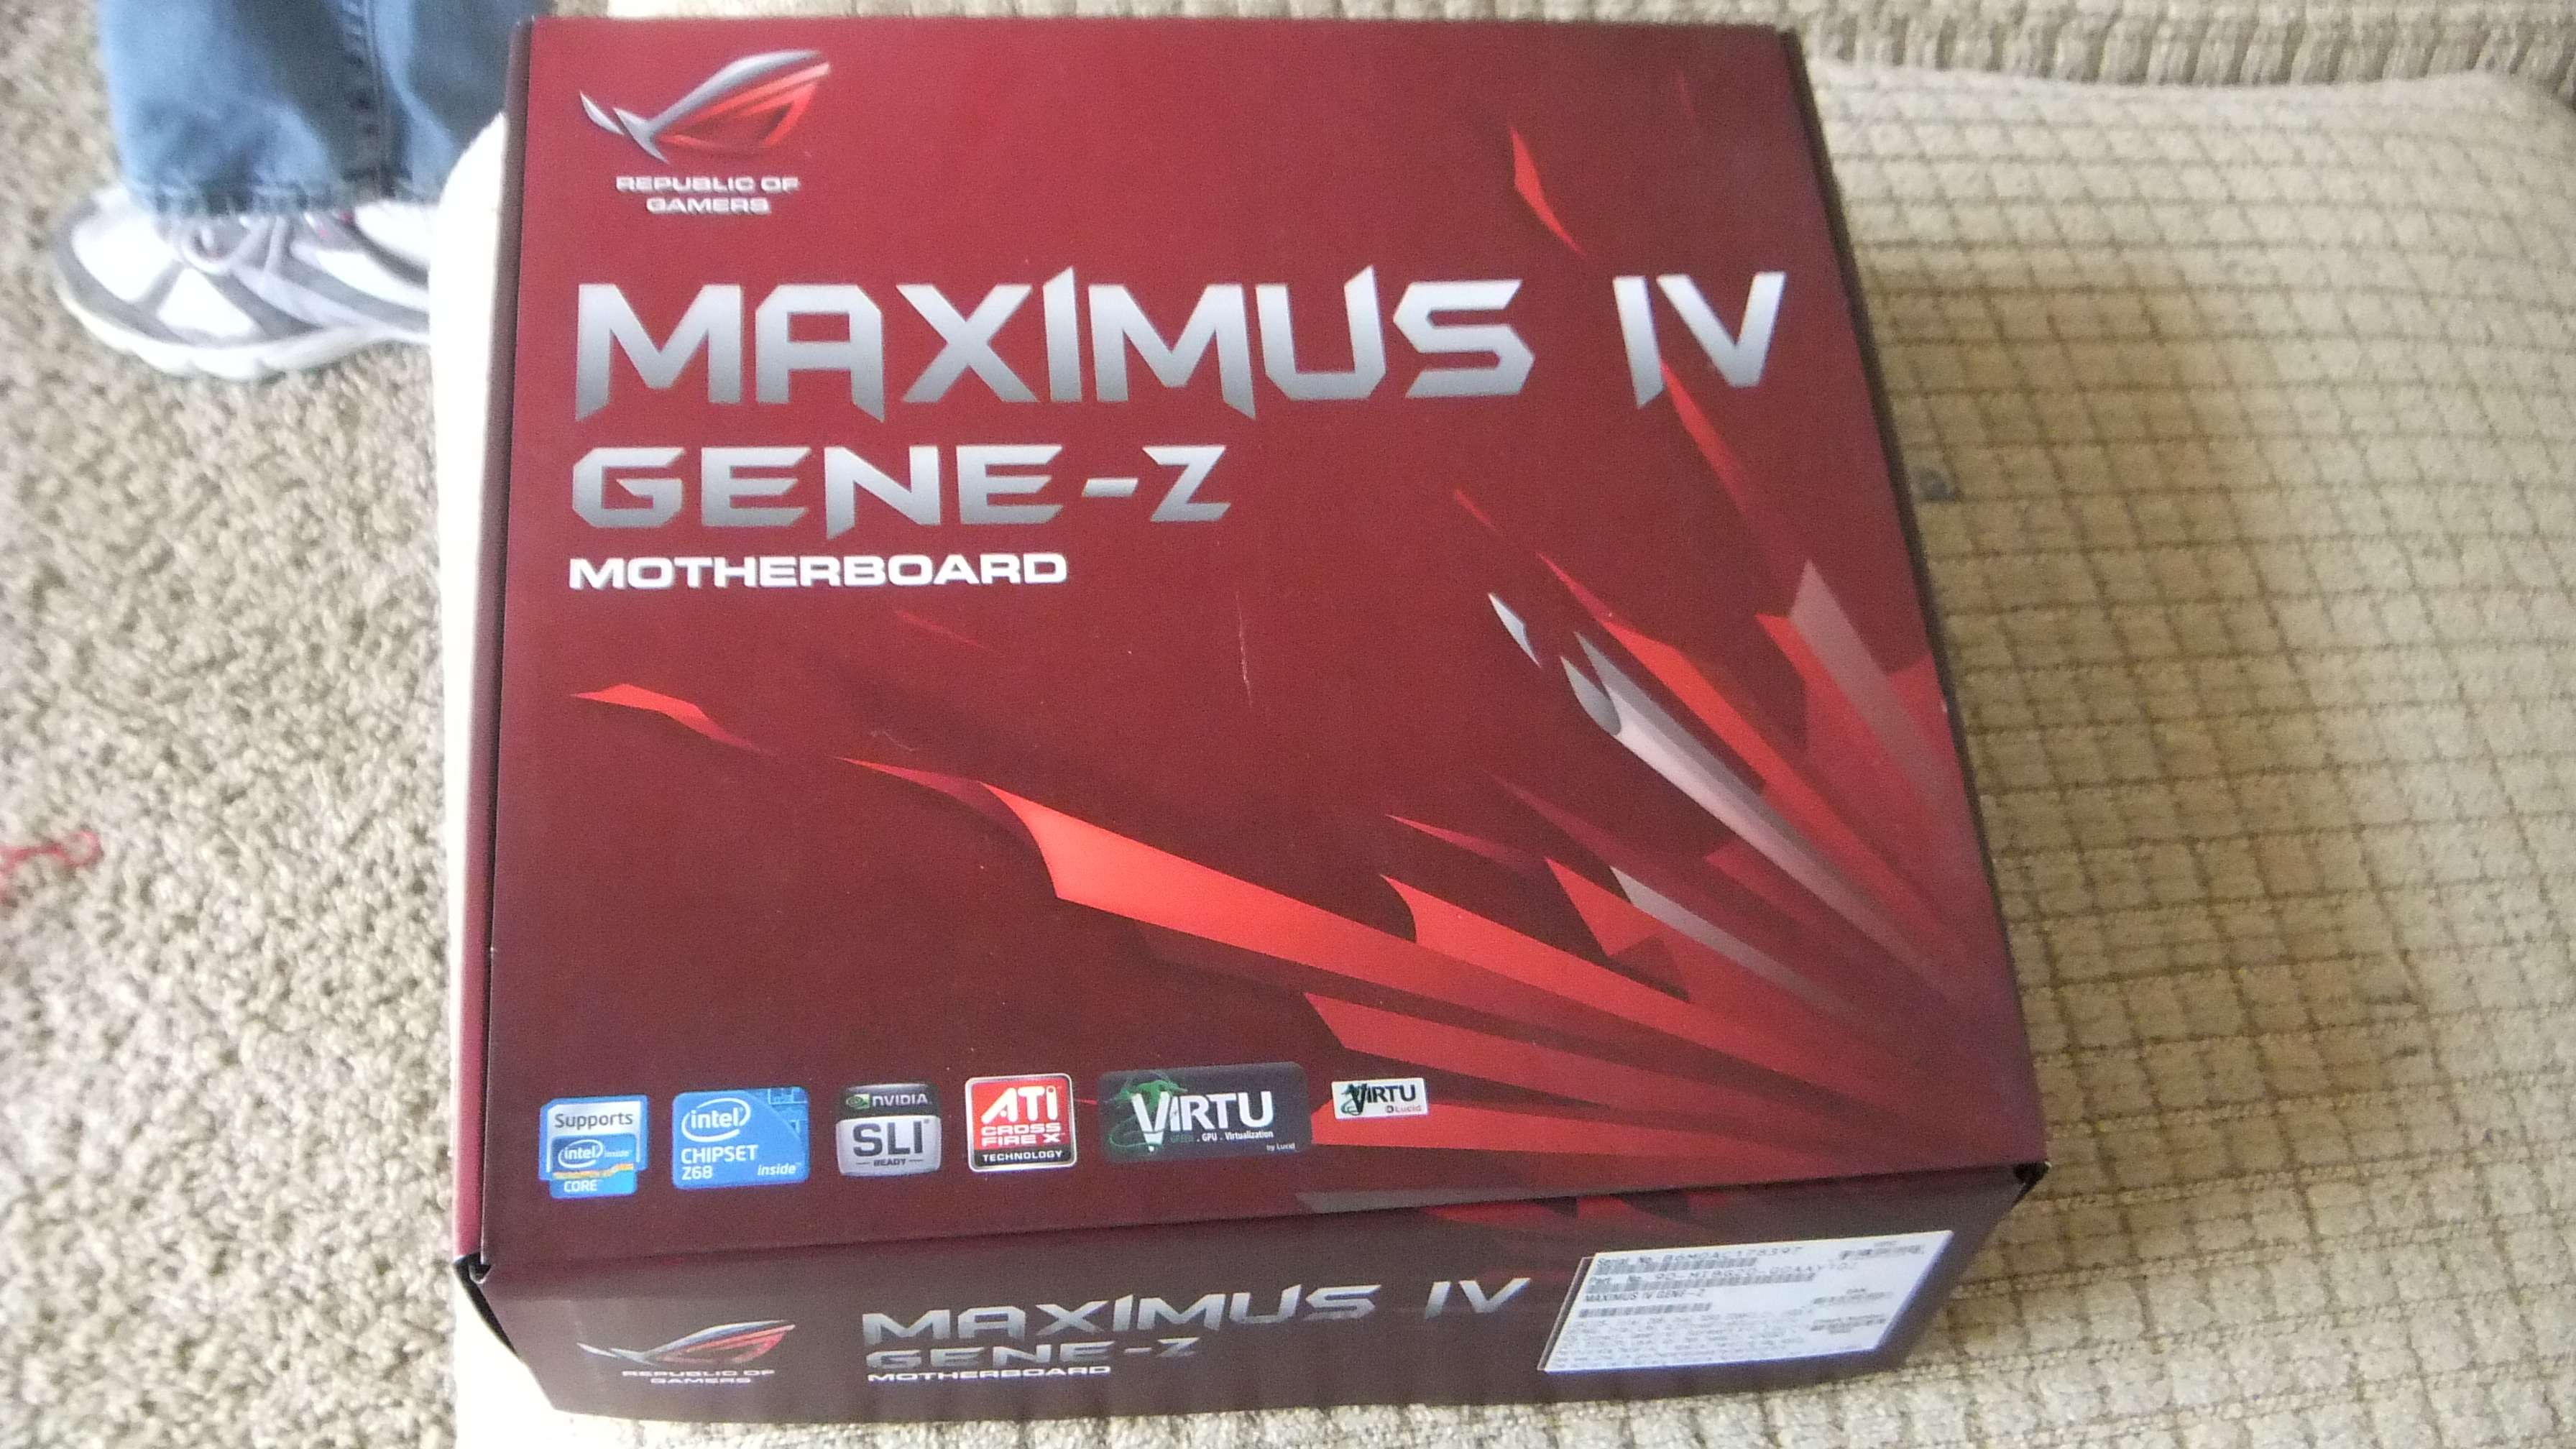
Packaging -
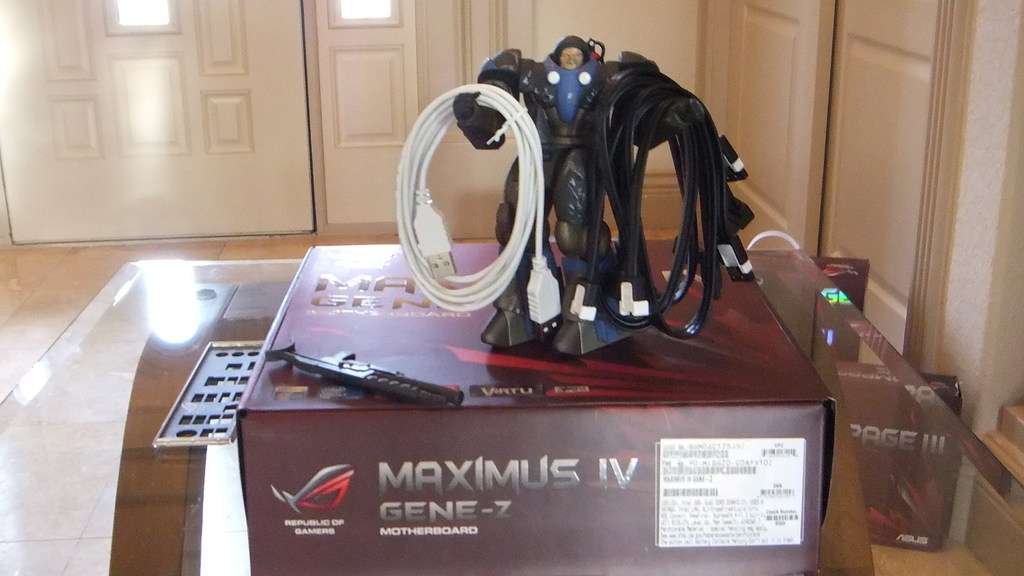
The packaging is pretty important as it gives the ASUS ROG customer the impression the product inside will be as well thought out and designed as the beautiful box which houses it. ASUS does a fine job in this regard. You know instantly you are about to come in contact with the Ferrari of enthusiast motherboards . . .the package has a refined design that speaks of performance and aesthetics . .
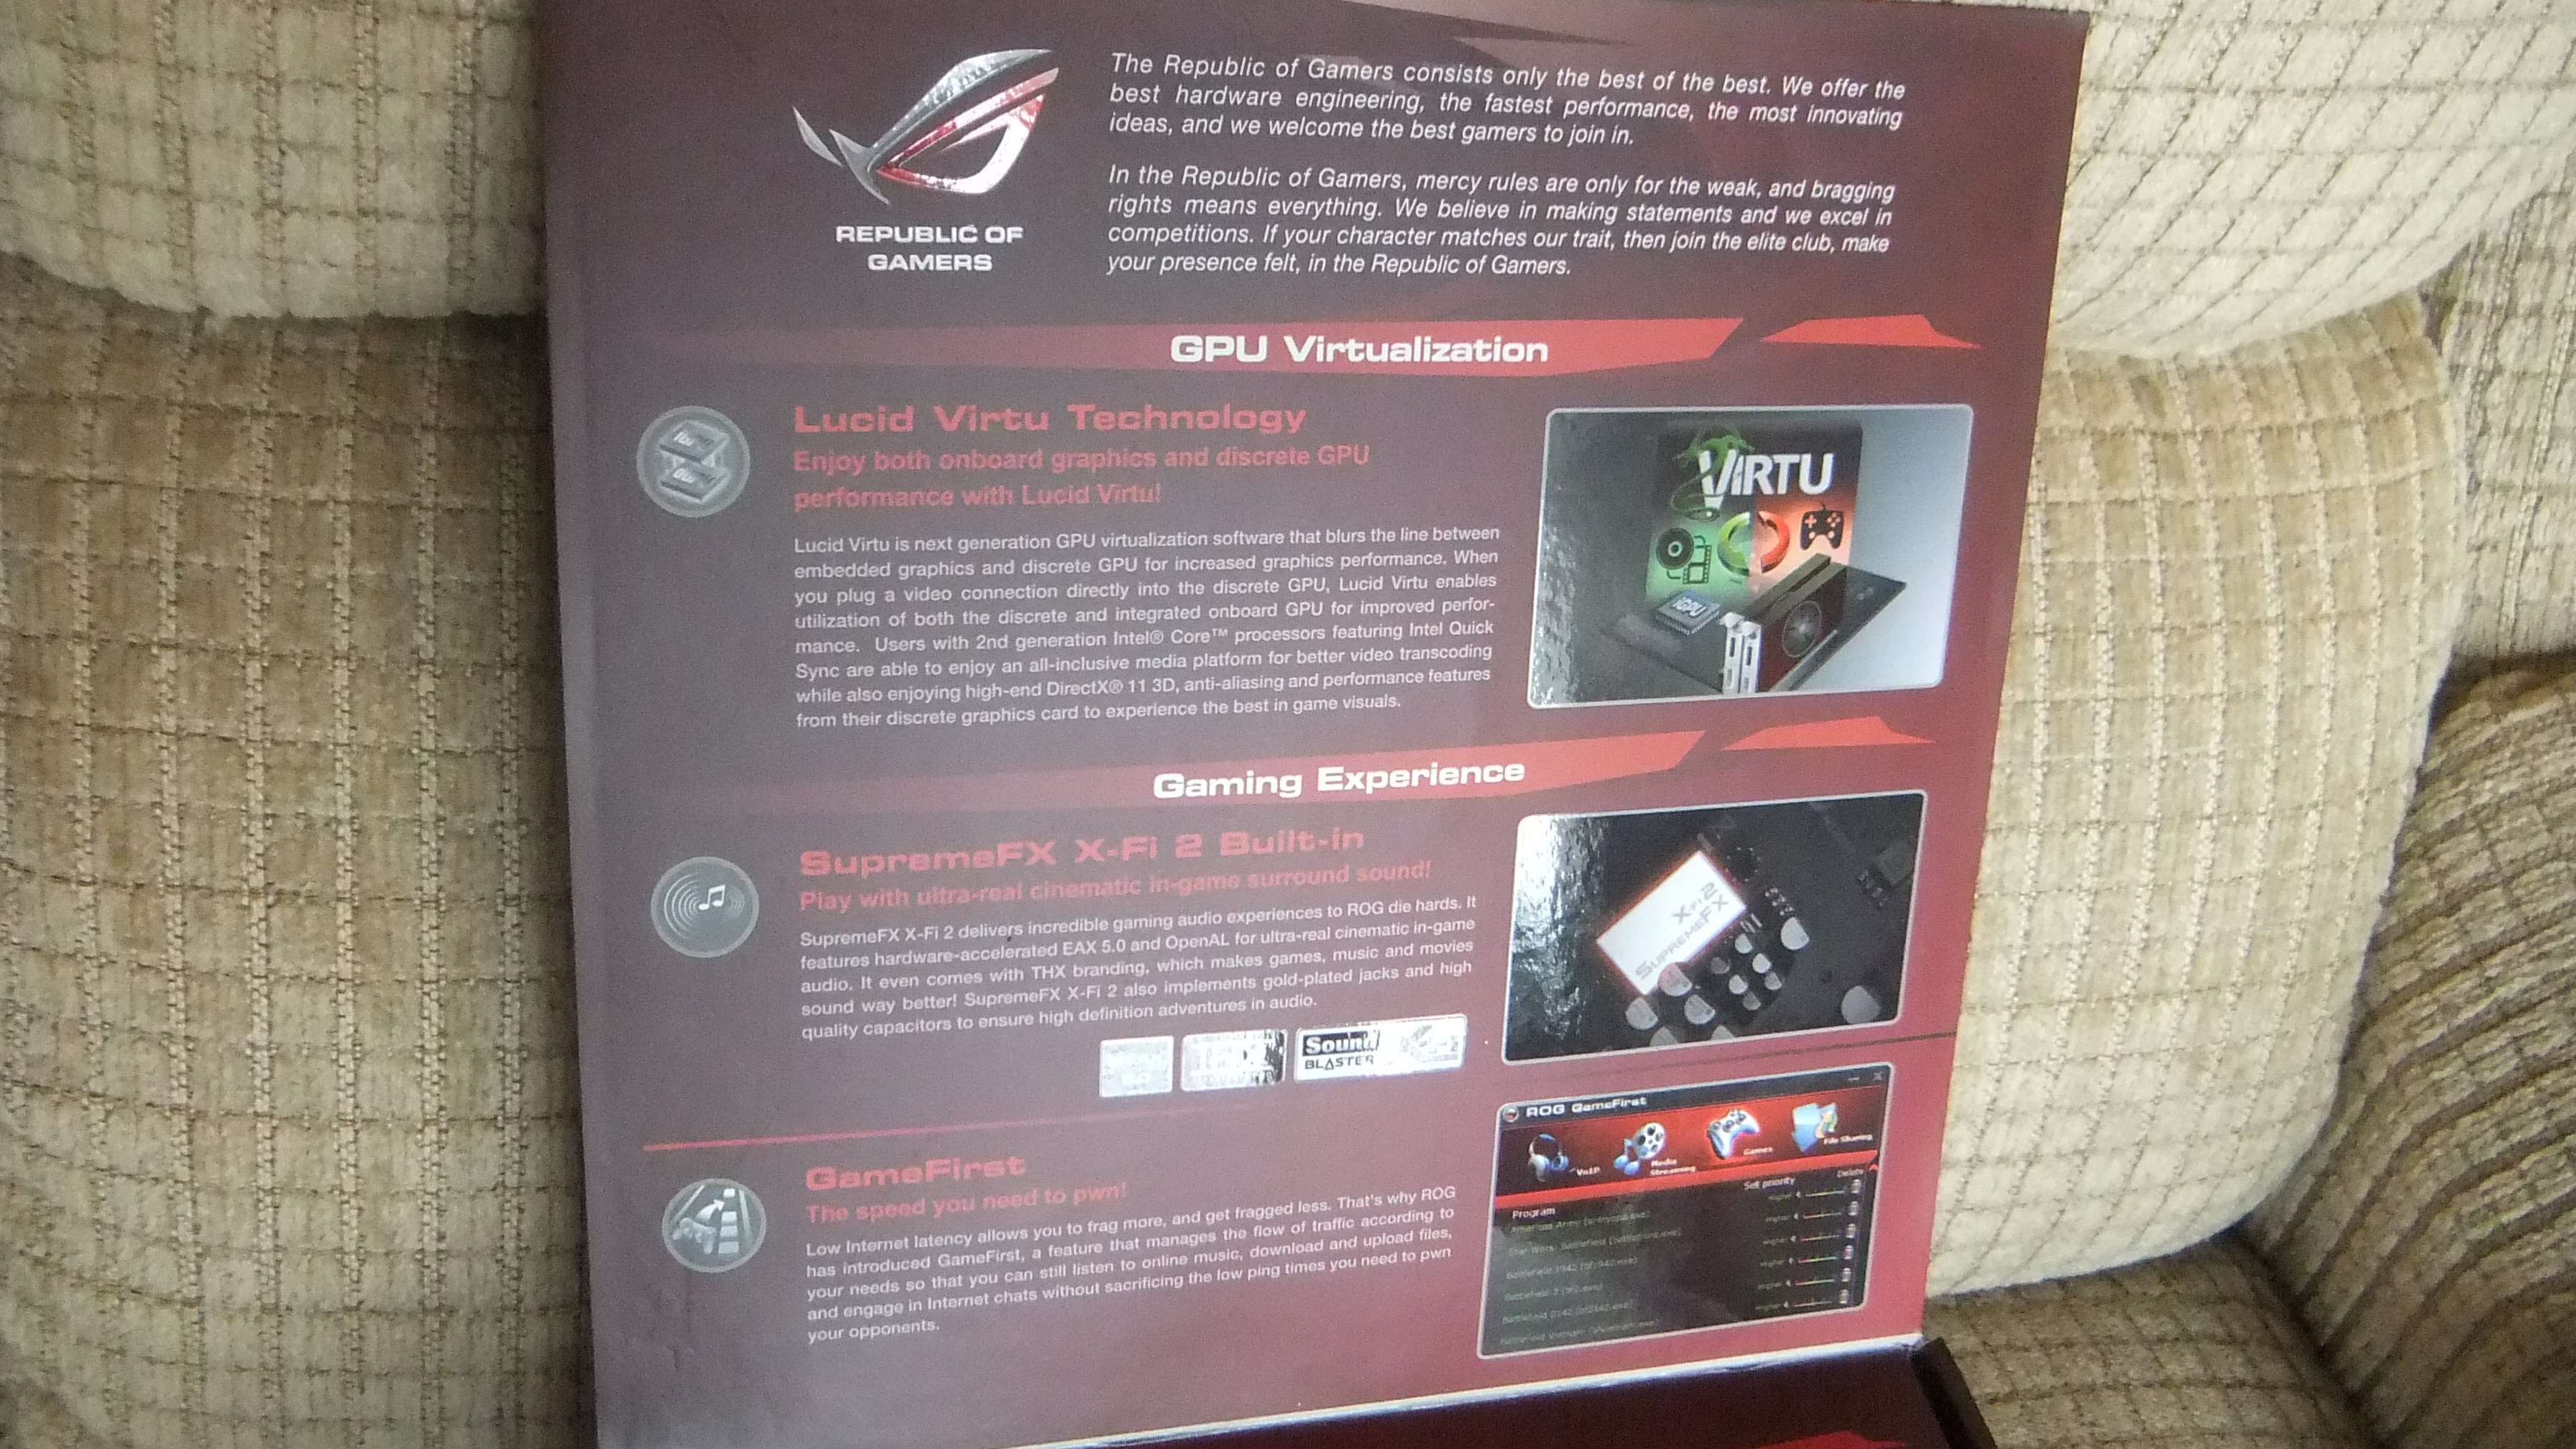
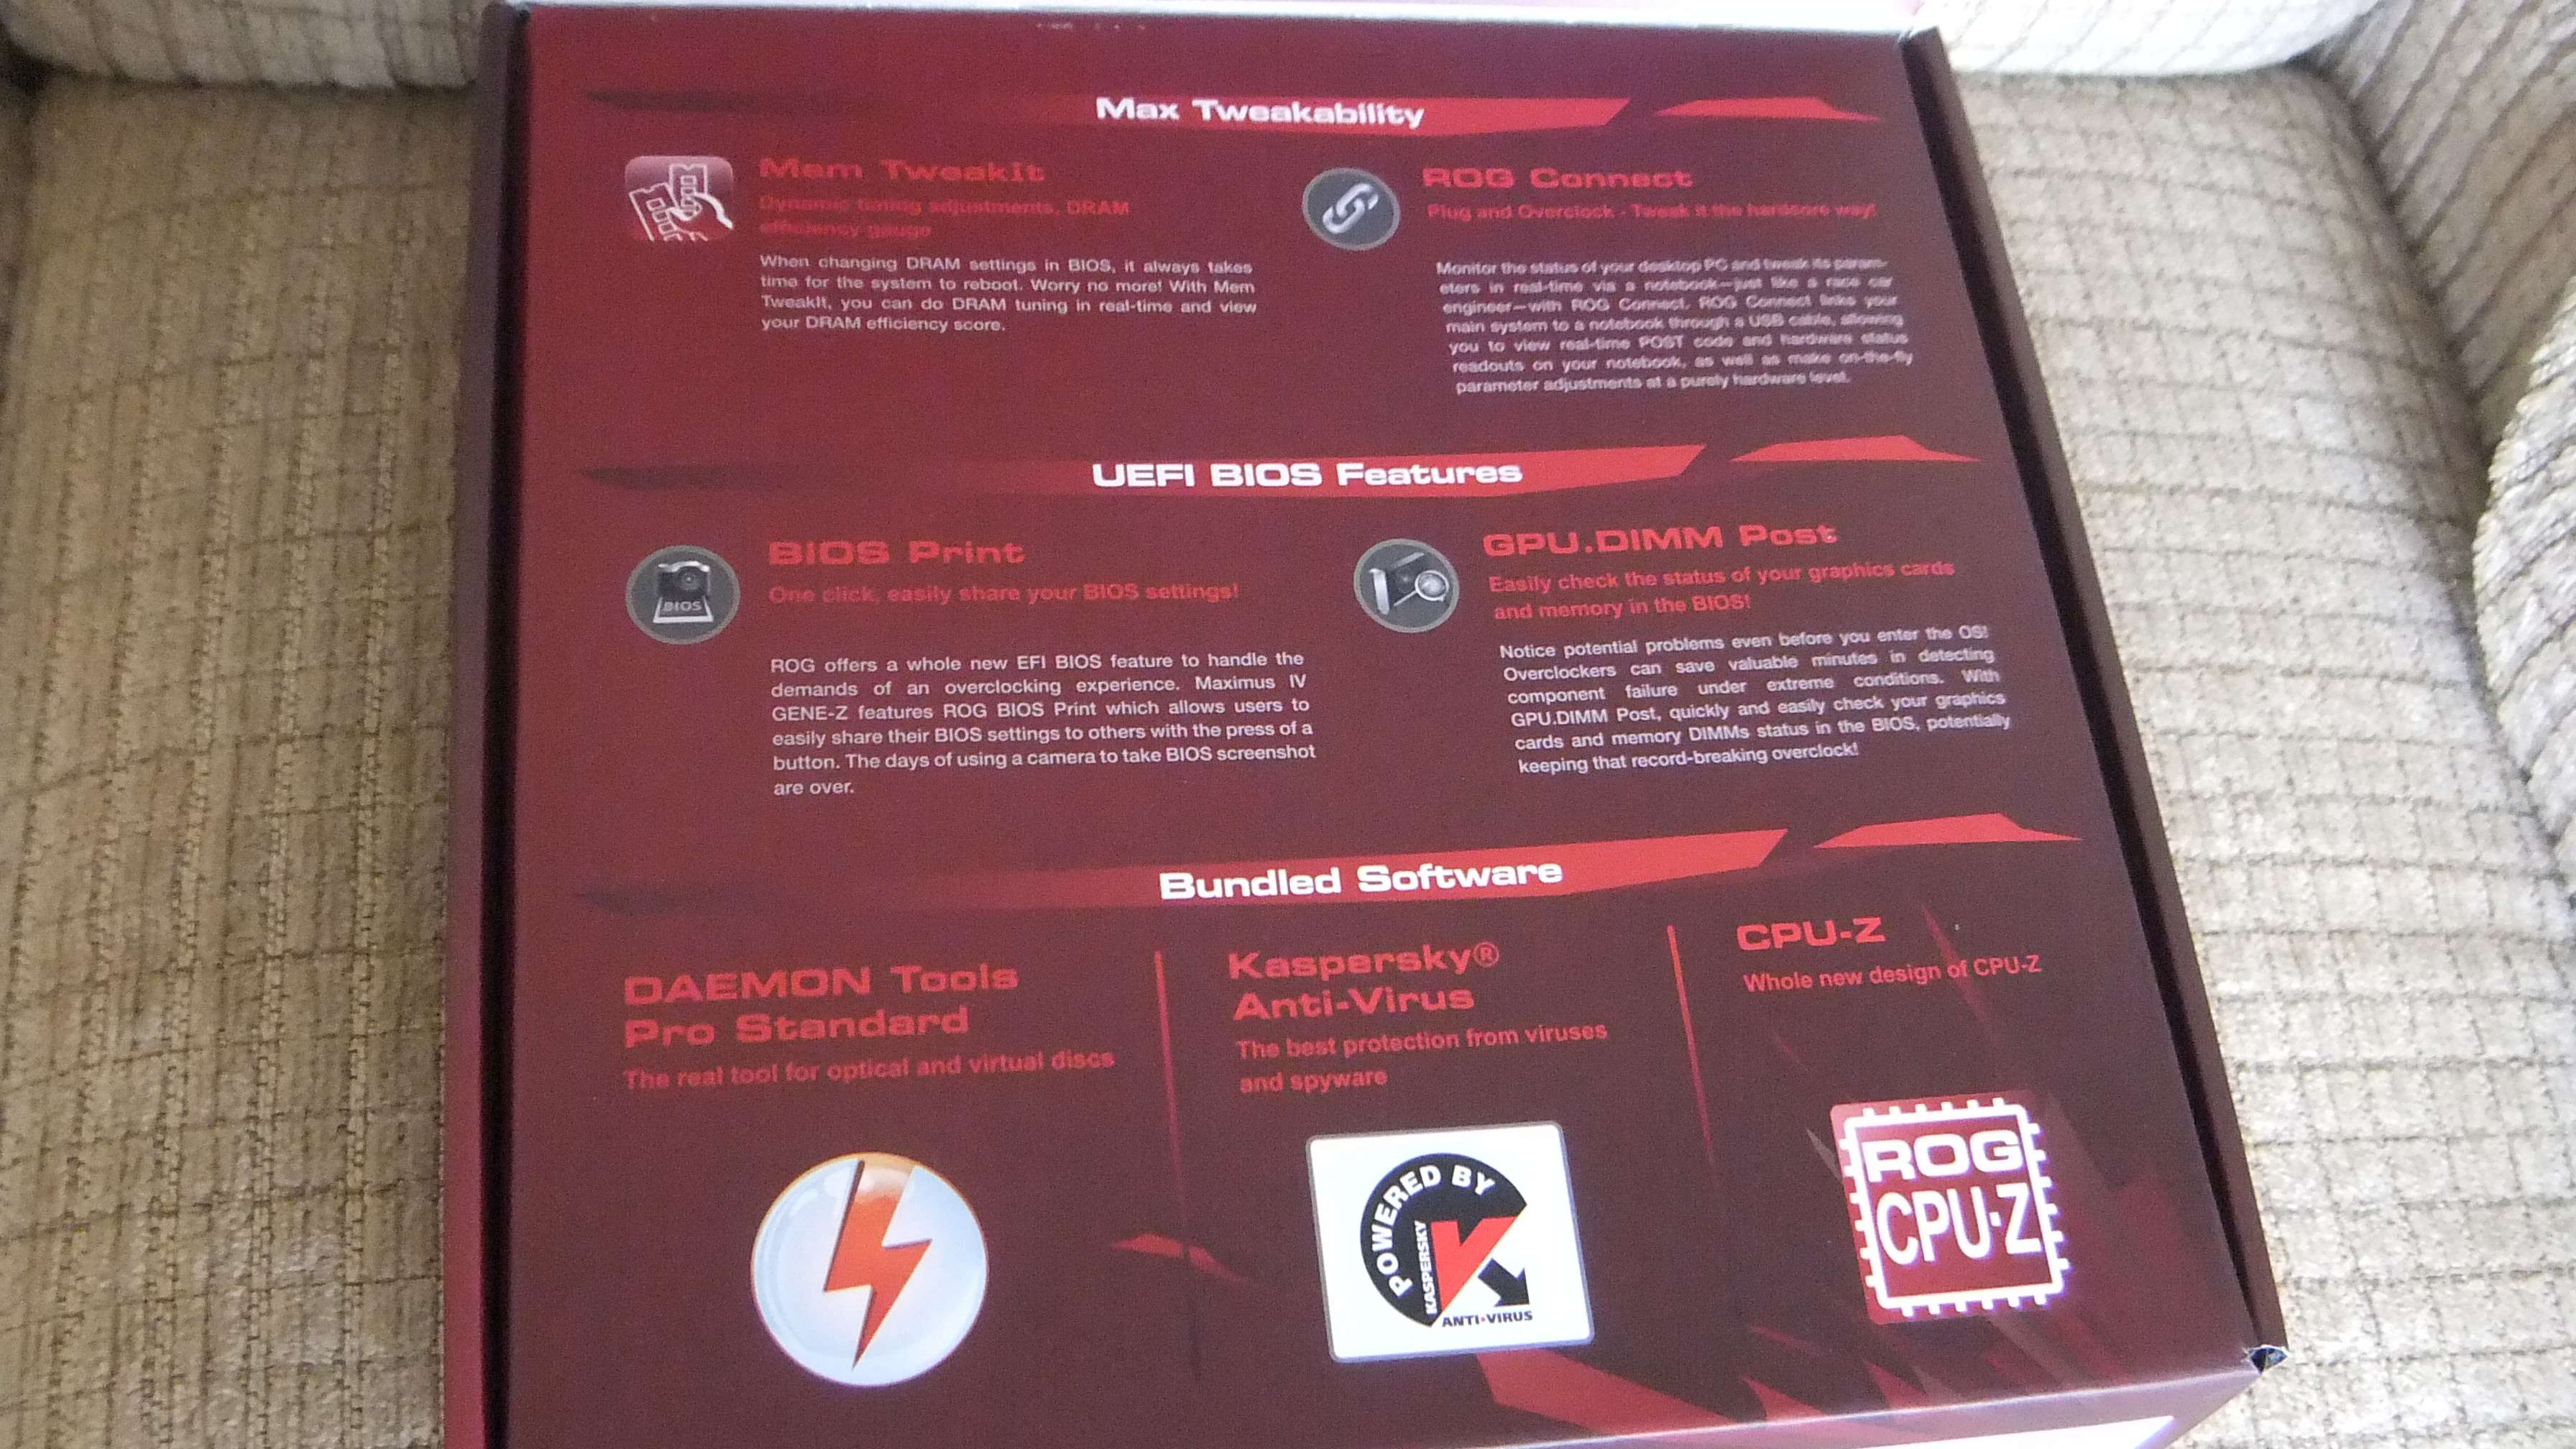
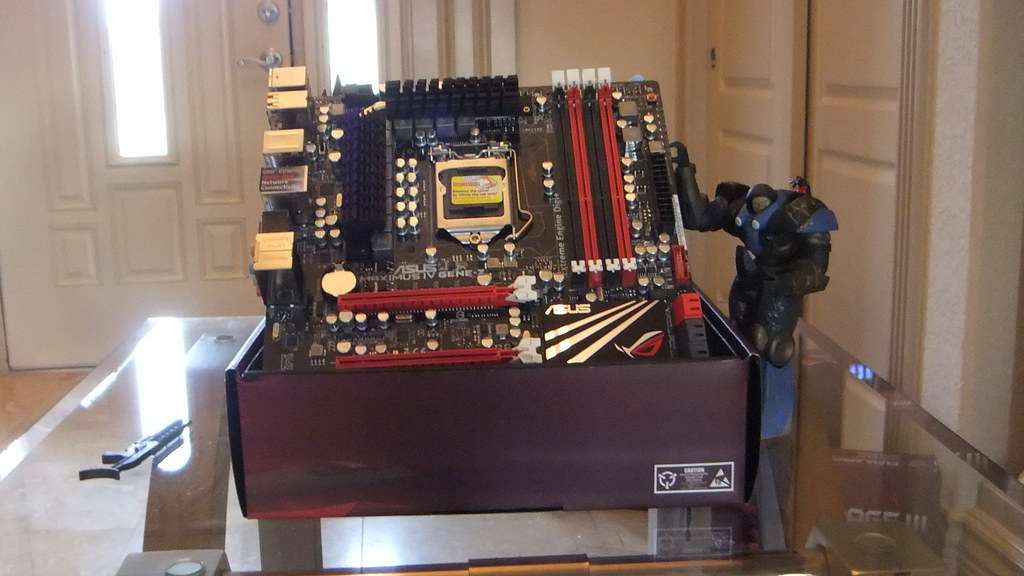
Open the box's top flap to see a detailed description of the many new features that await you.
My favorite revolution on the Maximus IV GENE-Z motherboard is the UEFI graphical bios. ASUS created a new BIOS from the ground up instead of just skinning the old school BIOS. The interface can be set to simple or advanced user mode. Either way makes it easy to set up your system in a very intuitive manner. If you have not experienced this bios, it is a must.
In the box you will find ASUS has included many accessories that will make your do-it-yourself build easier. The QShield IO plate is easy to install thanks to the padded backside (other vendors use tabs which can easily cut your fingers) and also makes connecting peripherals a snap with the easy-to-read labeling of each port.
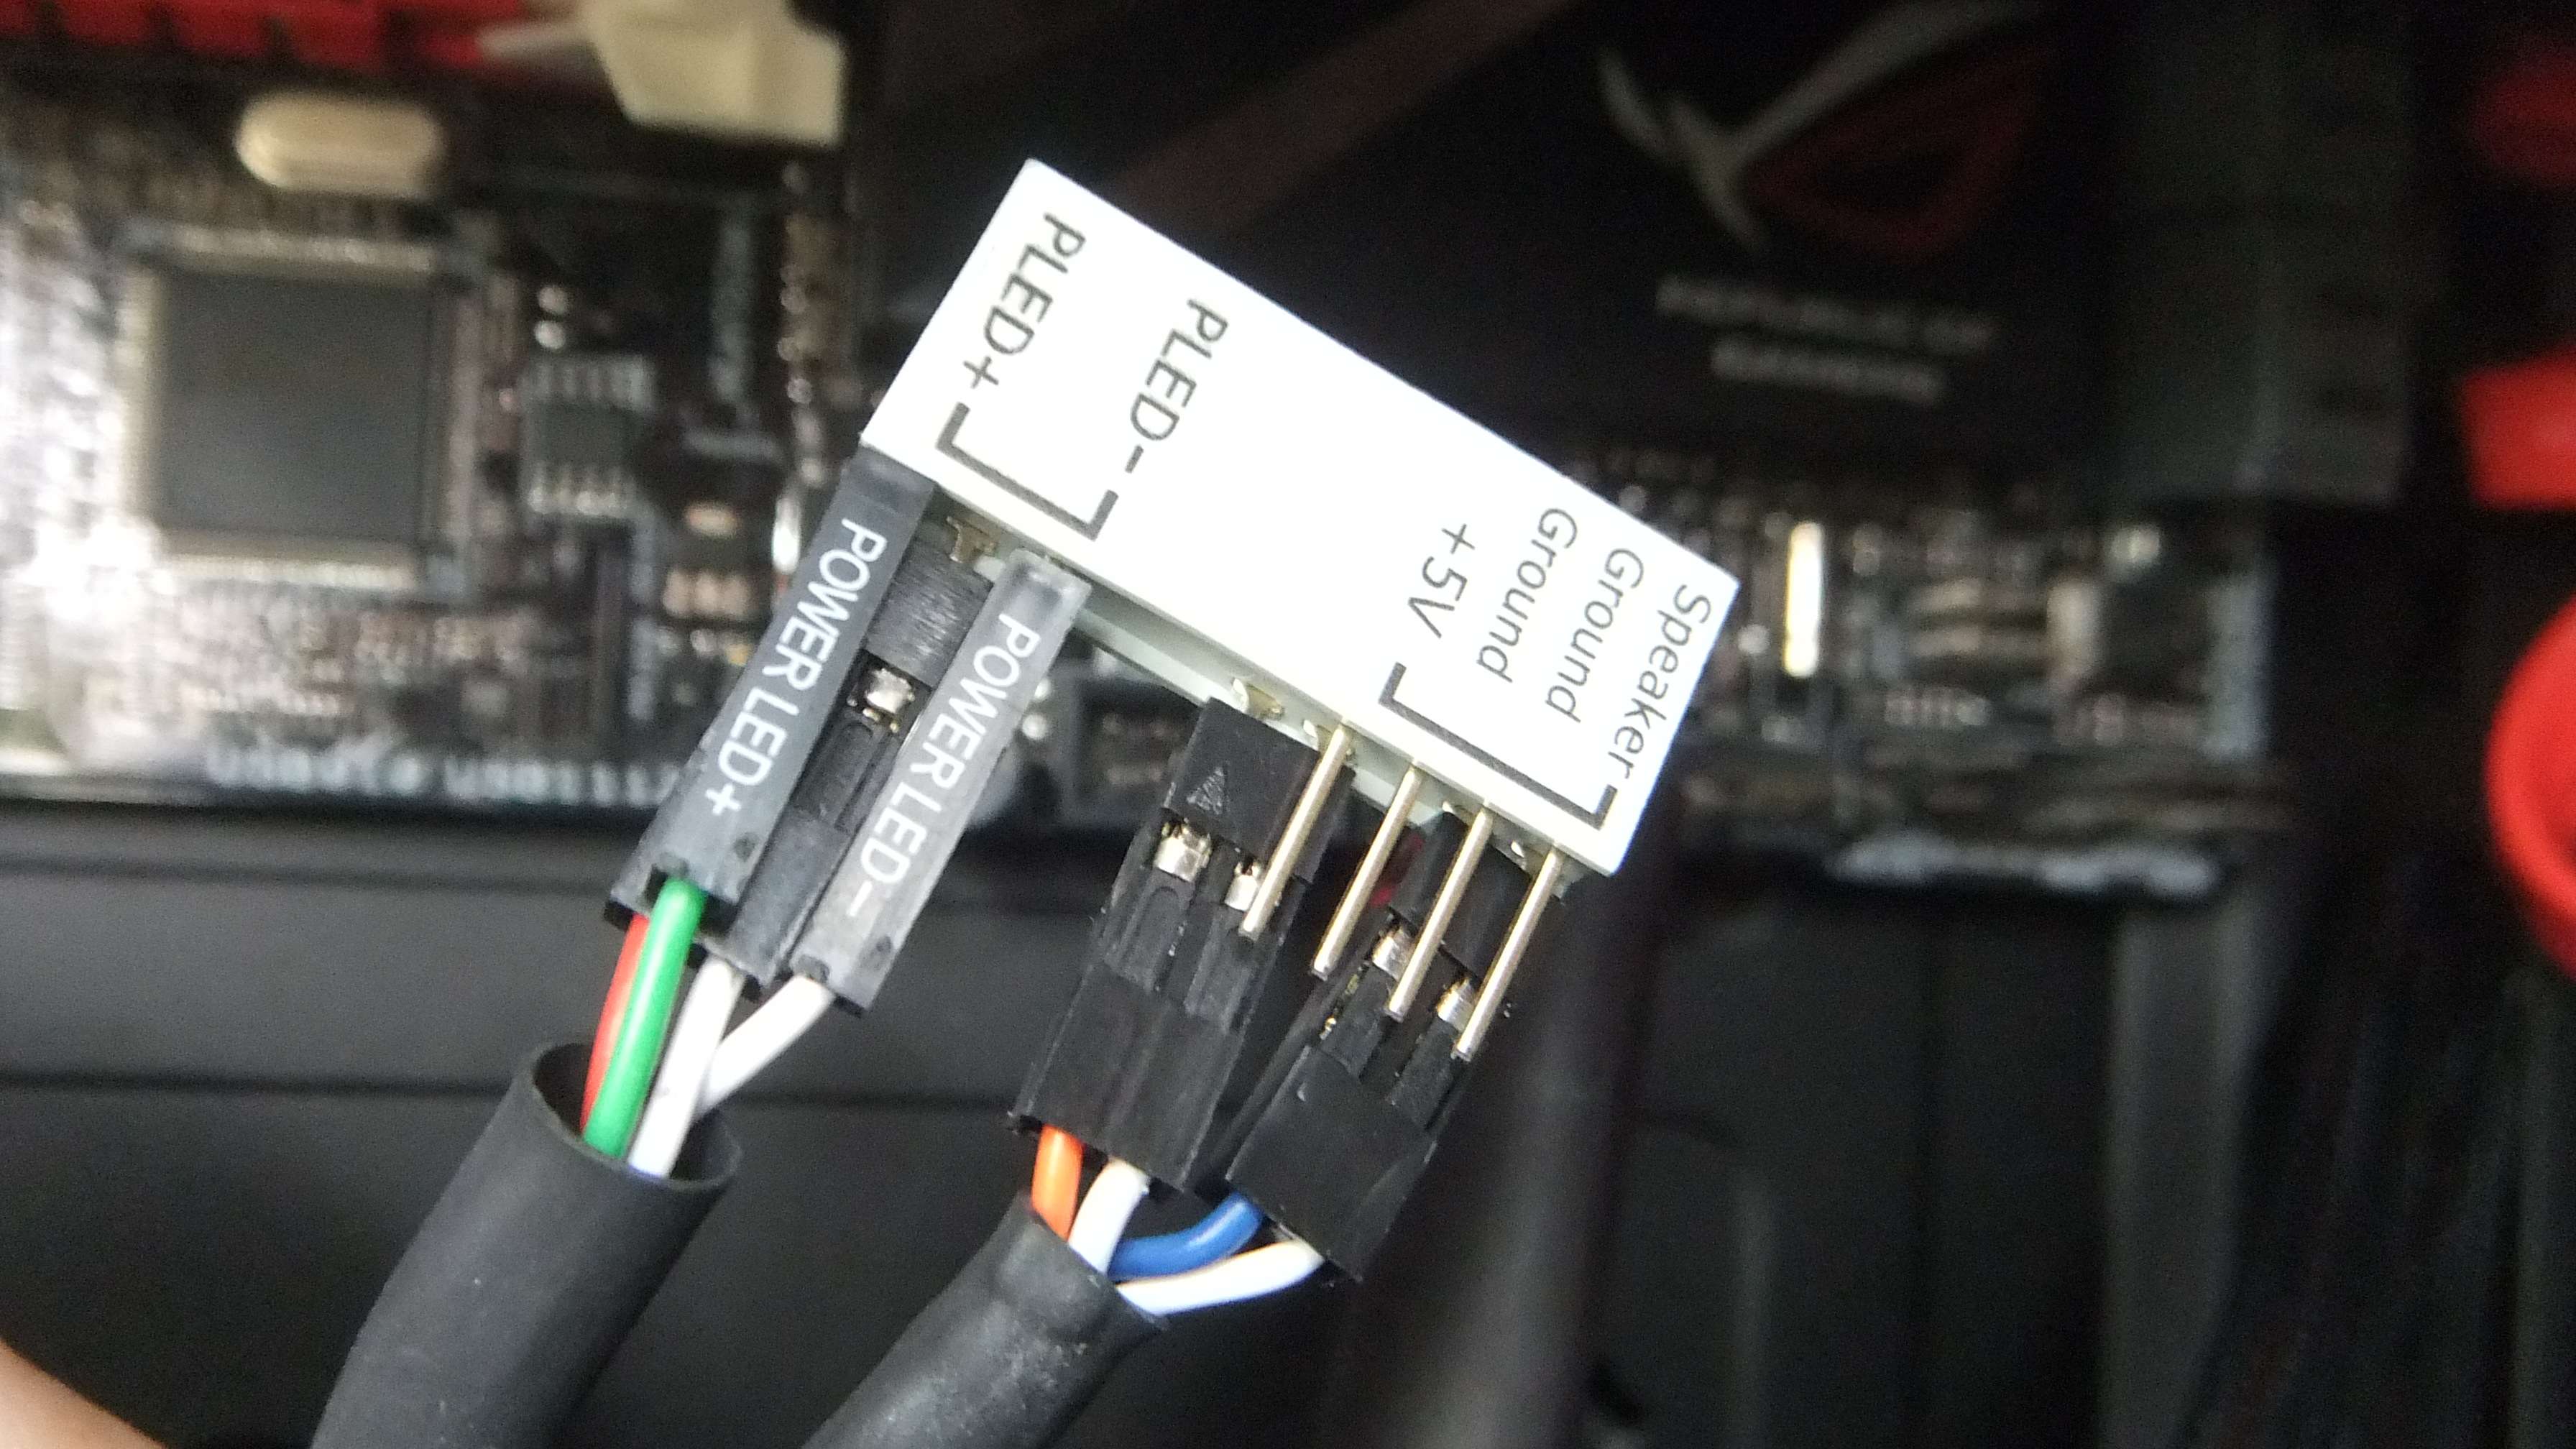
Another accessory I find extremely useful is the Q Connector. This device makes connecting your power/reset buttons and Power and HDD indicators a simple process without having to break out the manual to see which connector goes where. My projects often result in little space to connect these so the Q Connector has saved me time and effort.
ASUS includes the ROG Connect cable so you can use your laptop or tablet to over-clock your ASUS ROG-based desktop. While I have not personally used this functionality I can say it was cool to see Travis and Walker (V2-V3 and Nemesis on the ASUS ROG forums) demonstrate over-clocking with an ASUS Slate tablet at several events.
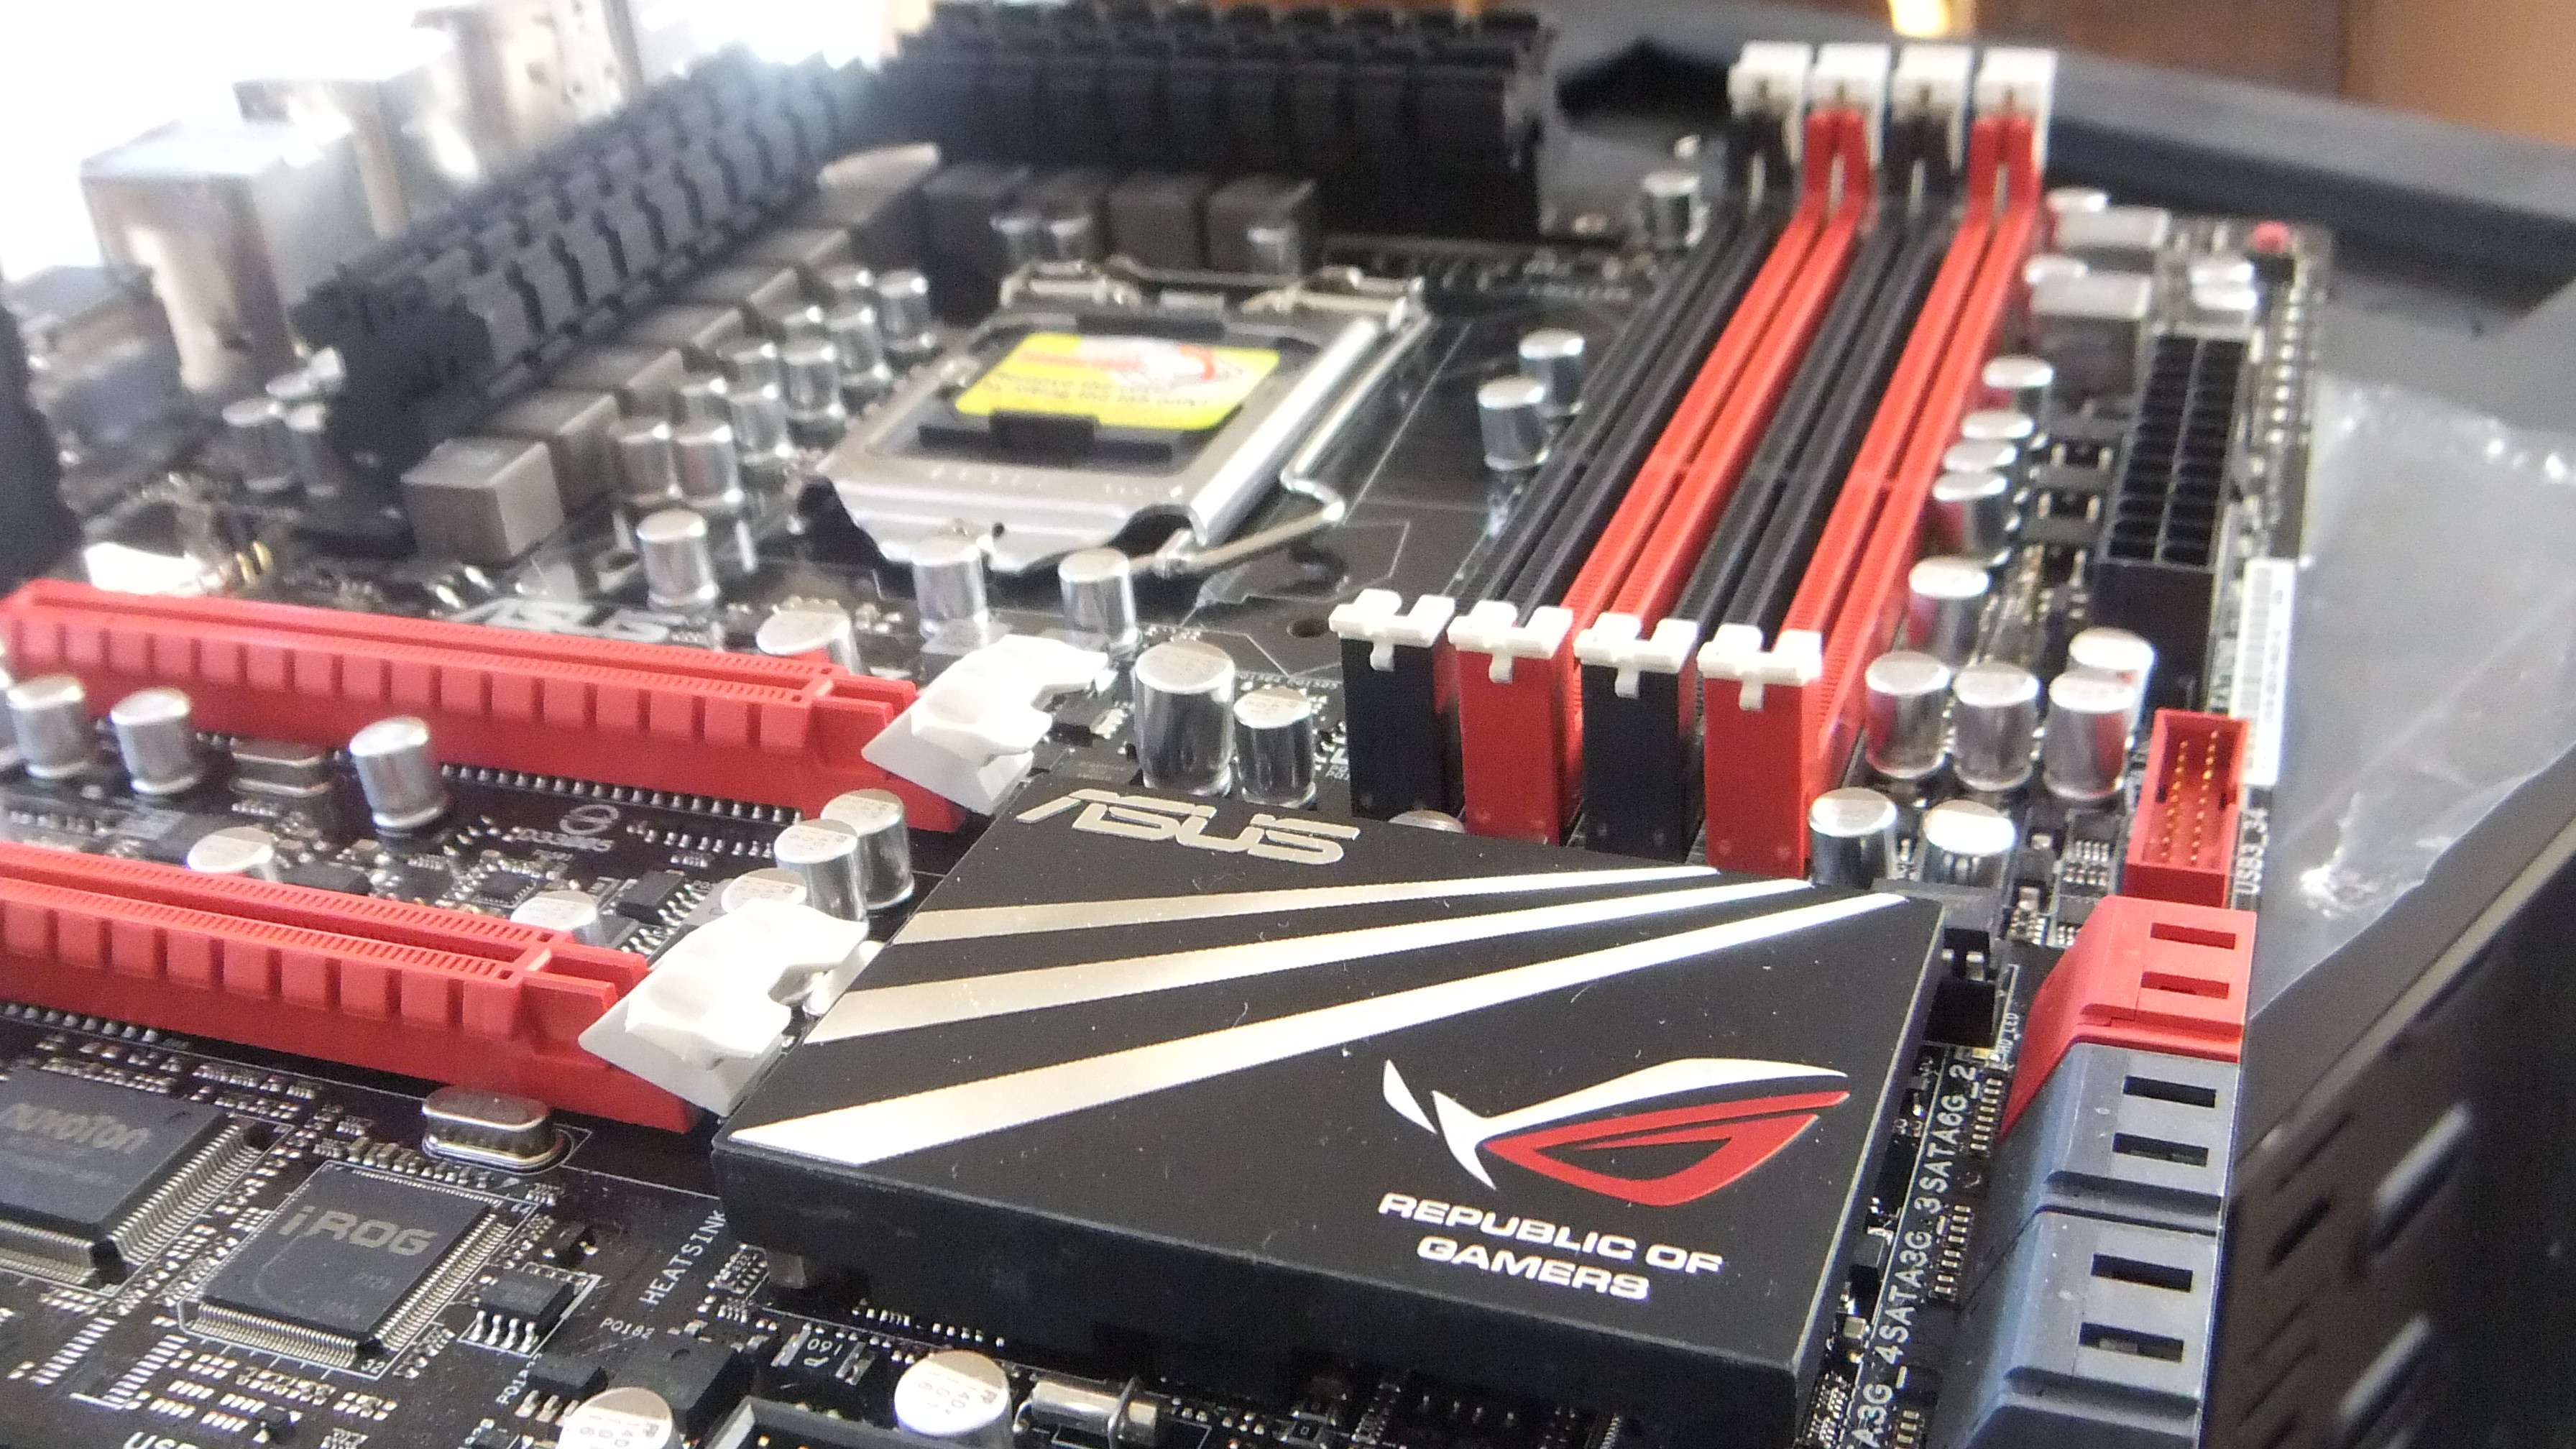
The Maximus IV GENE-Z packs two PCI-E slots which can be populated with two AMD or NVIDIA-based graphics cards. The slot spacing is generous enough to allow SLI or Crossfire cards with their stock two-slot cooling solutions installed. The PCI-E slots utilize ASUS' Q Slot design making installing and removing GPUS easier than other motherboards on the market.
Heat-sinks
The motherboard chipset boasts stylish red and black heat-sinks which are effective in cooling and also blend well with the aesthetics of the motherboard. The color scheme is refined and modern.
The Maximus IV Gene-Z provides a plethora of convenient features consistent with previous ROG motherboards such as lit power button and reset buttons (I use these all the time during the testing the debugging process when building mods - I normally test all my hardware before installing in a case).
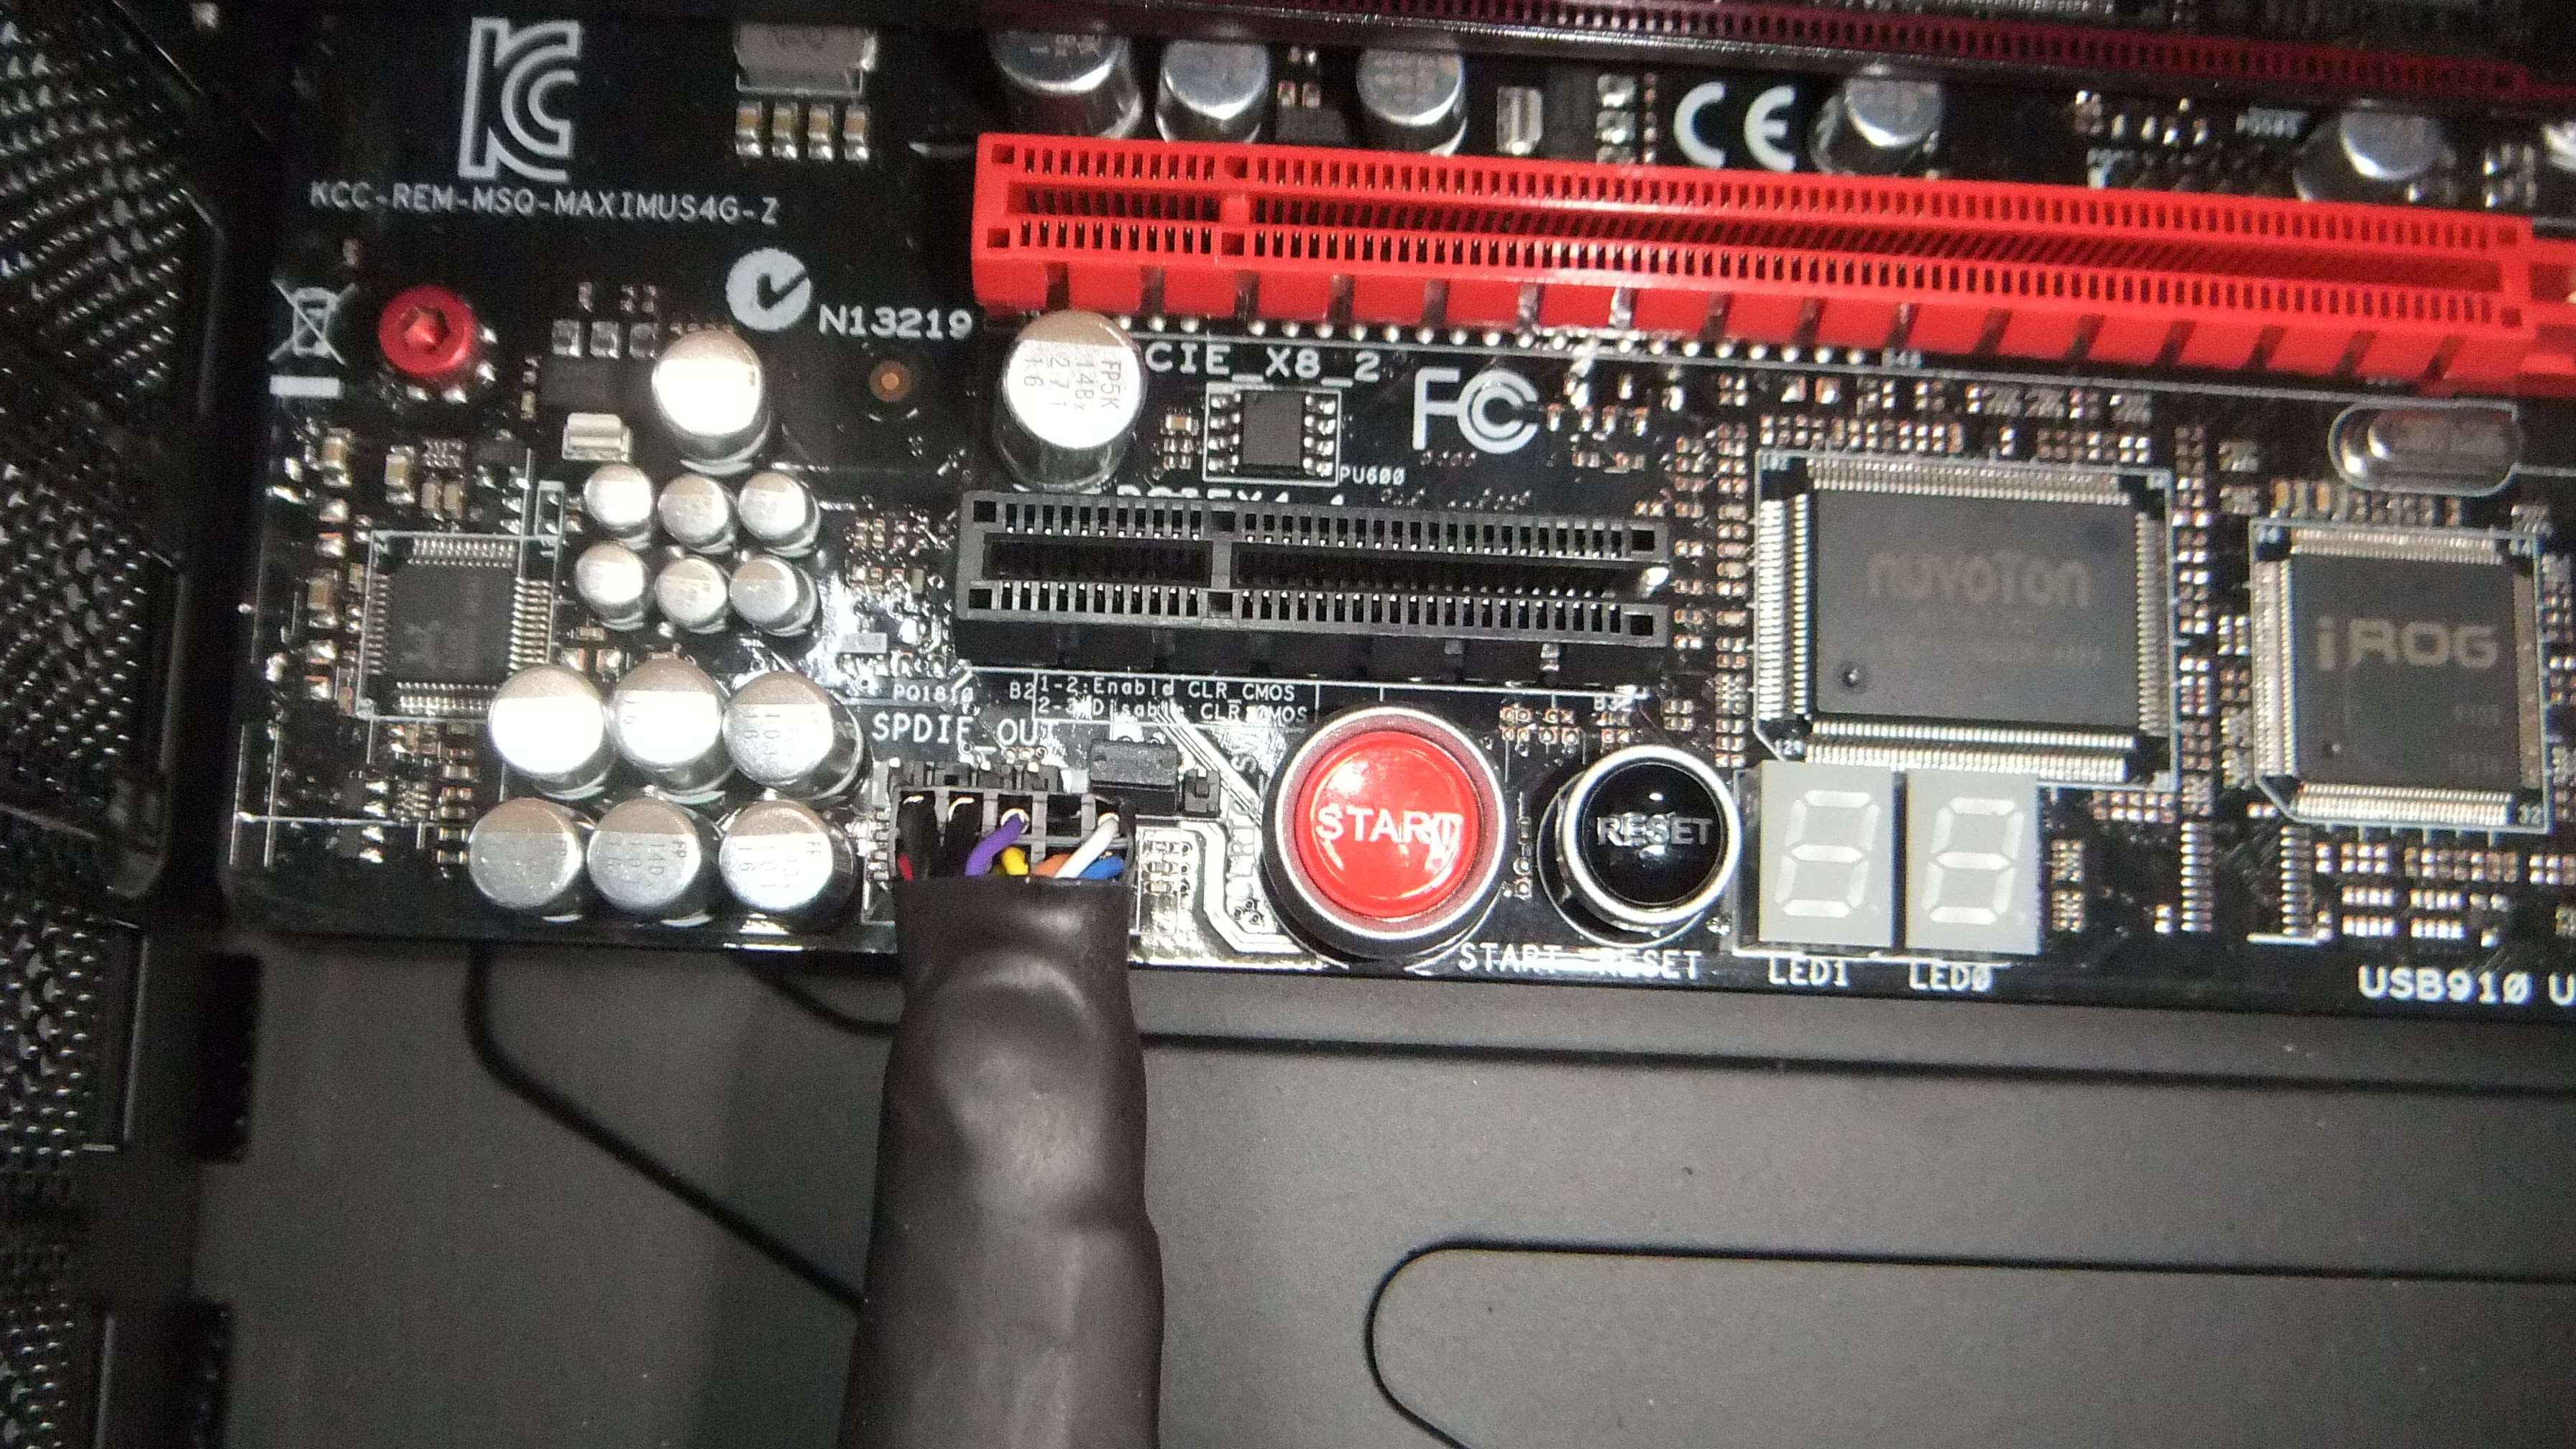
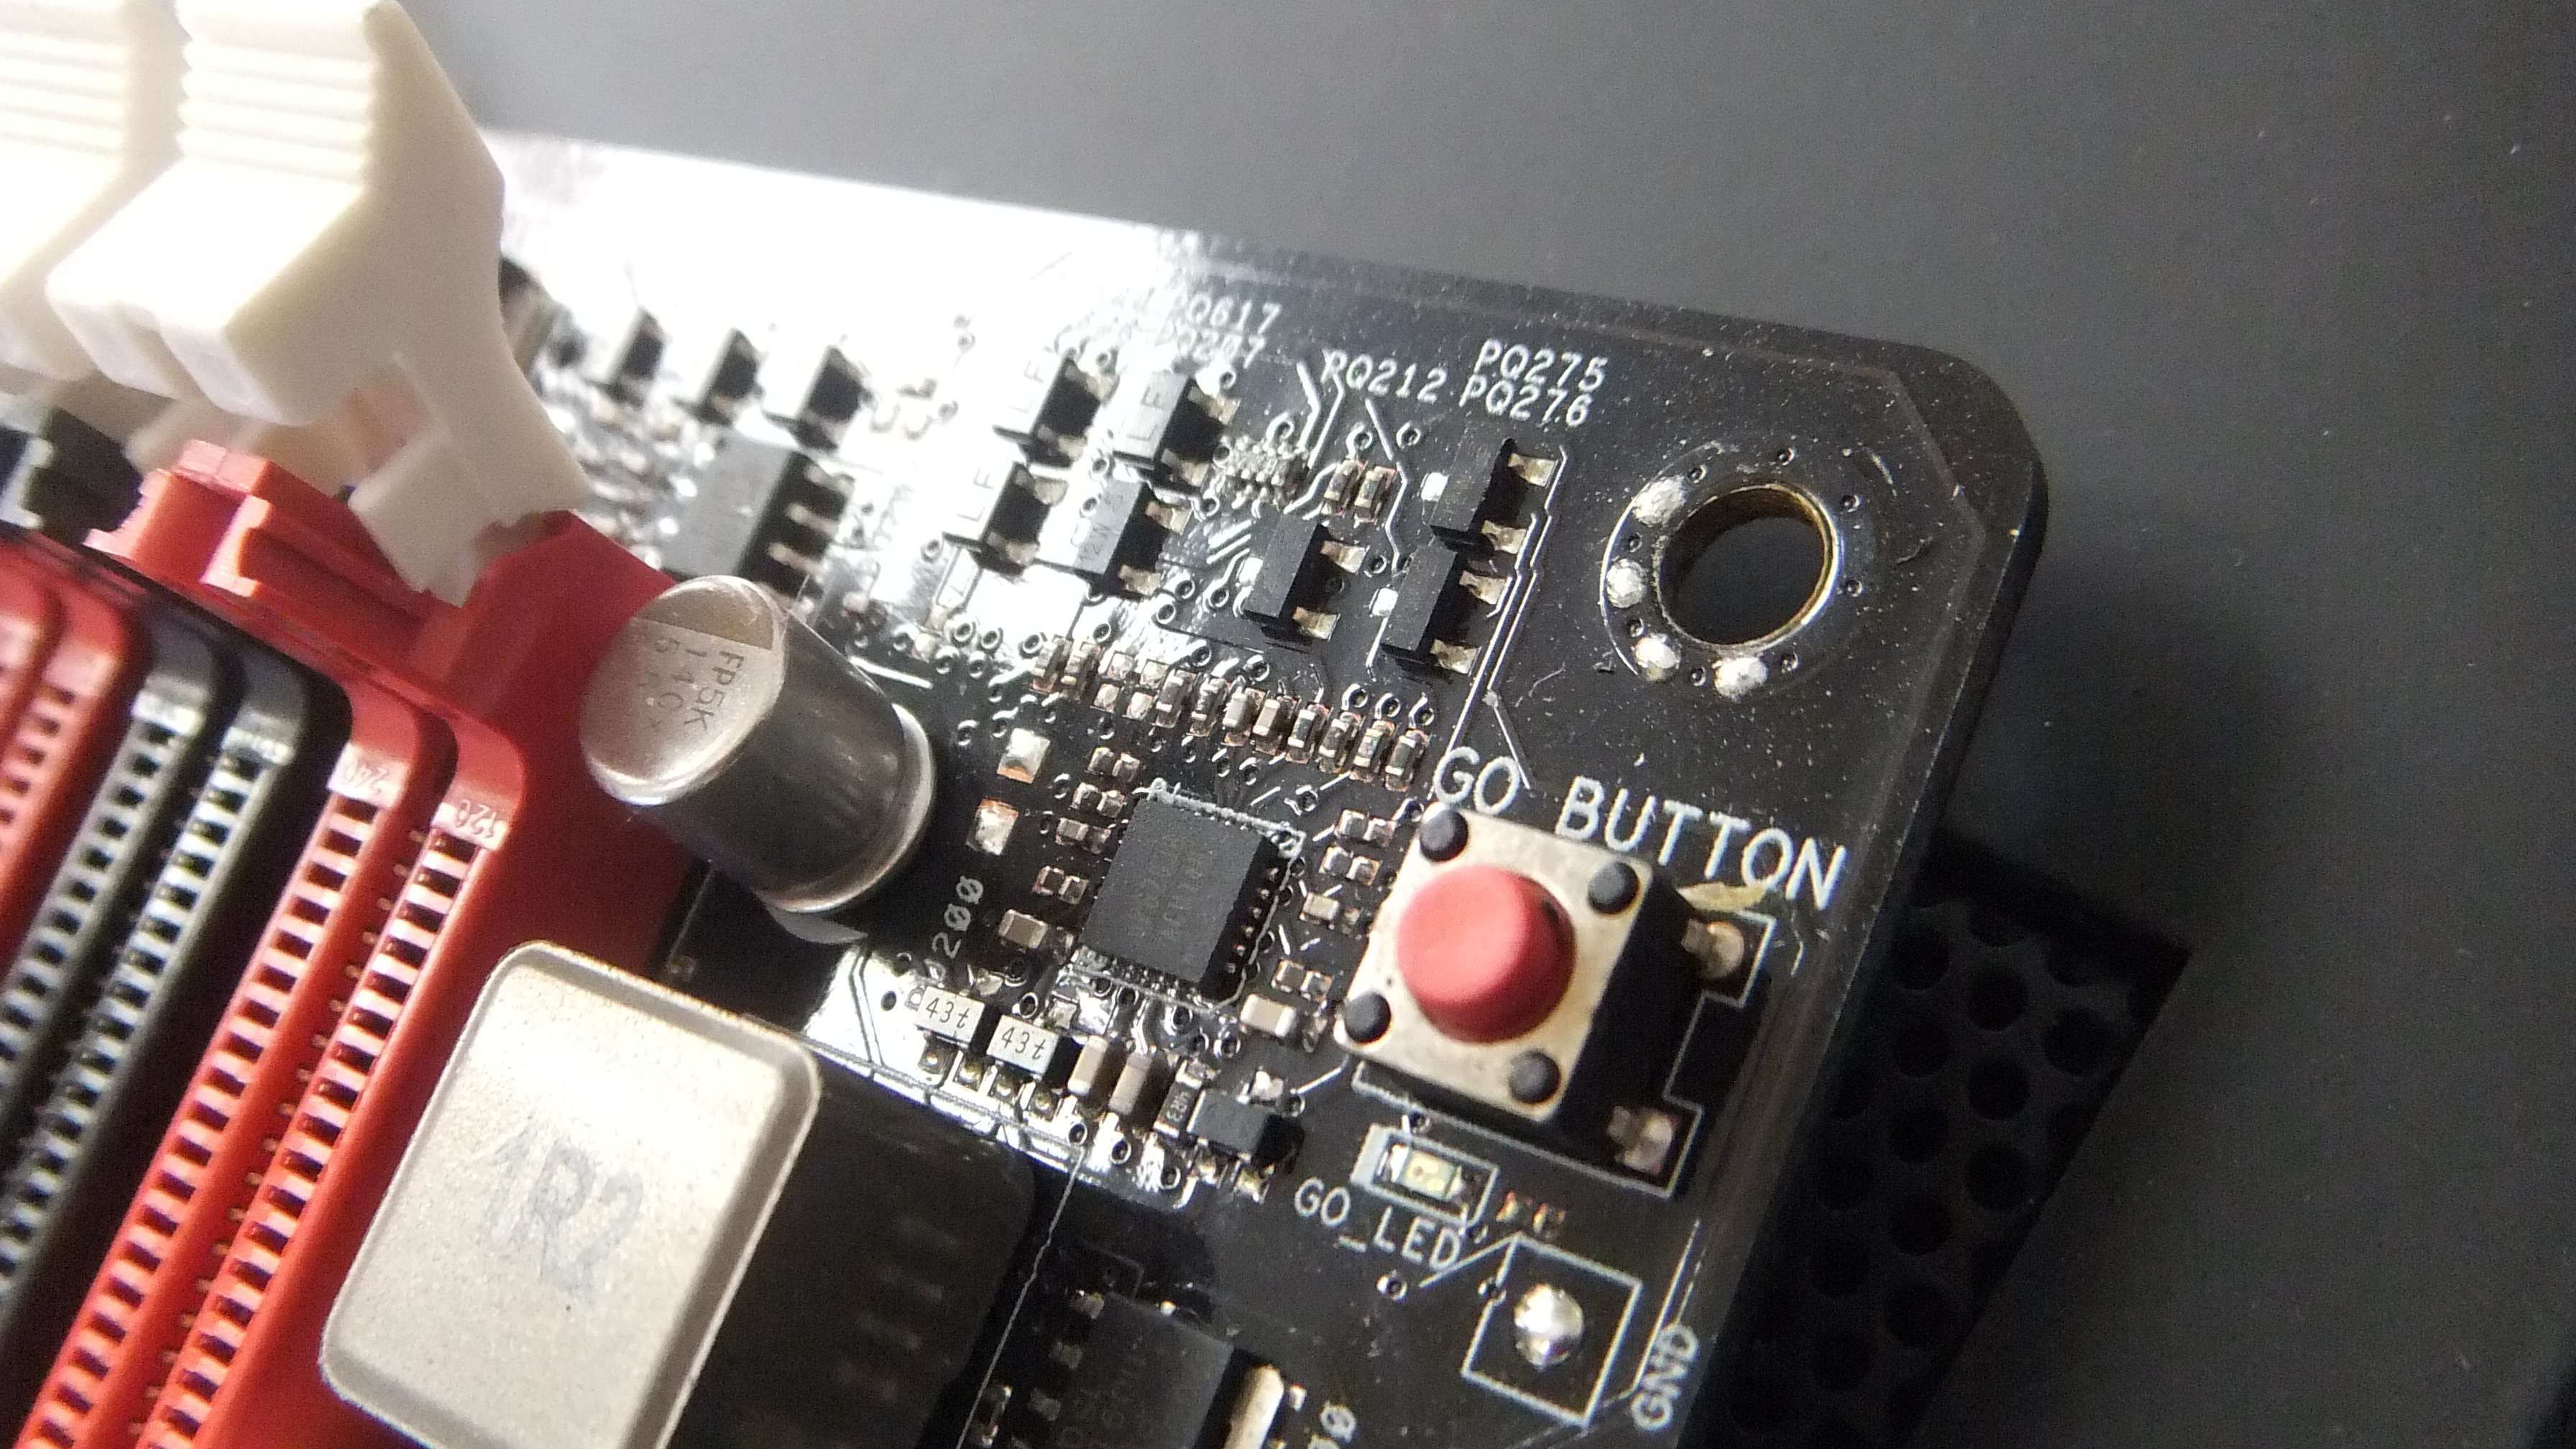
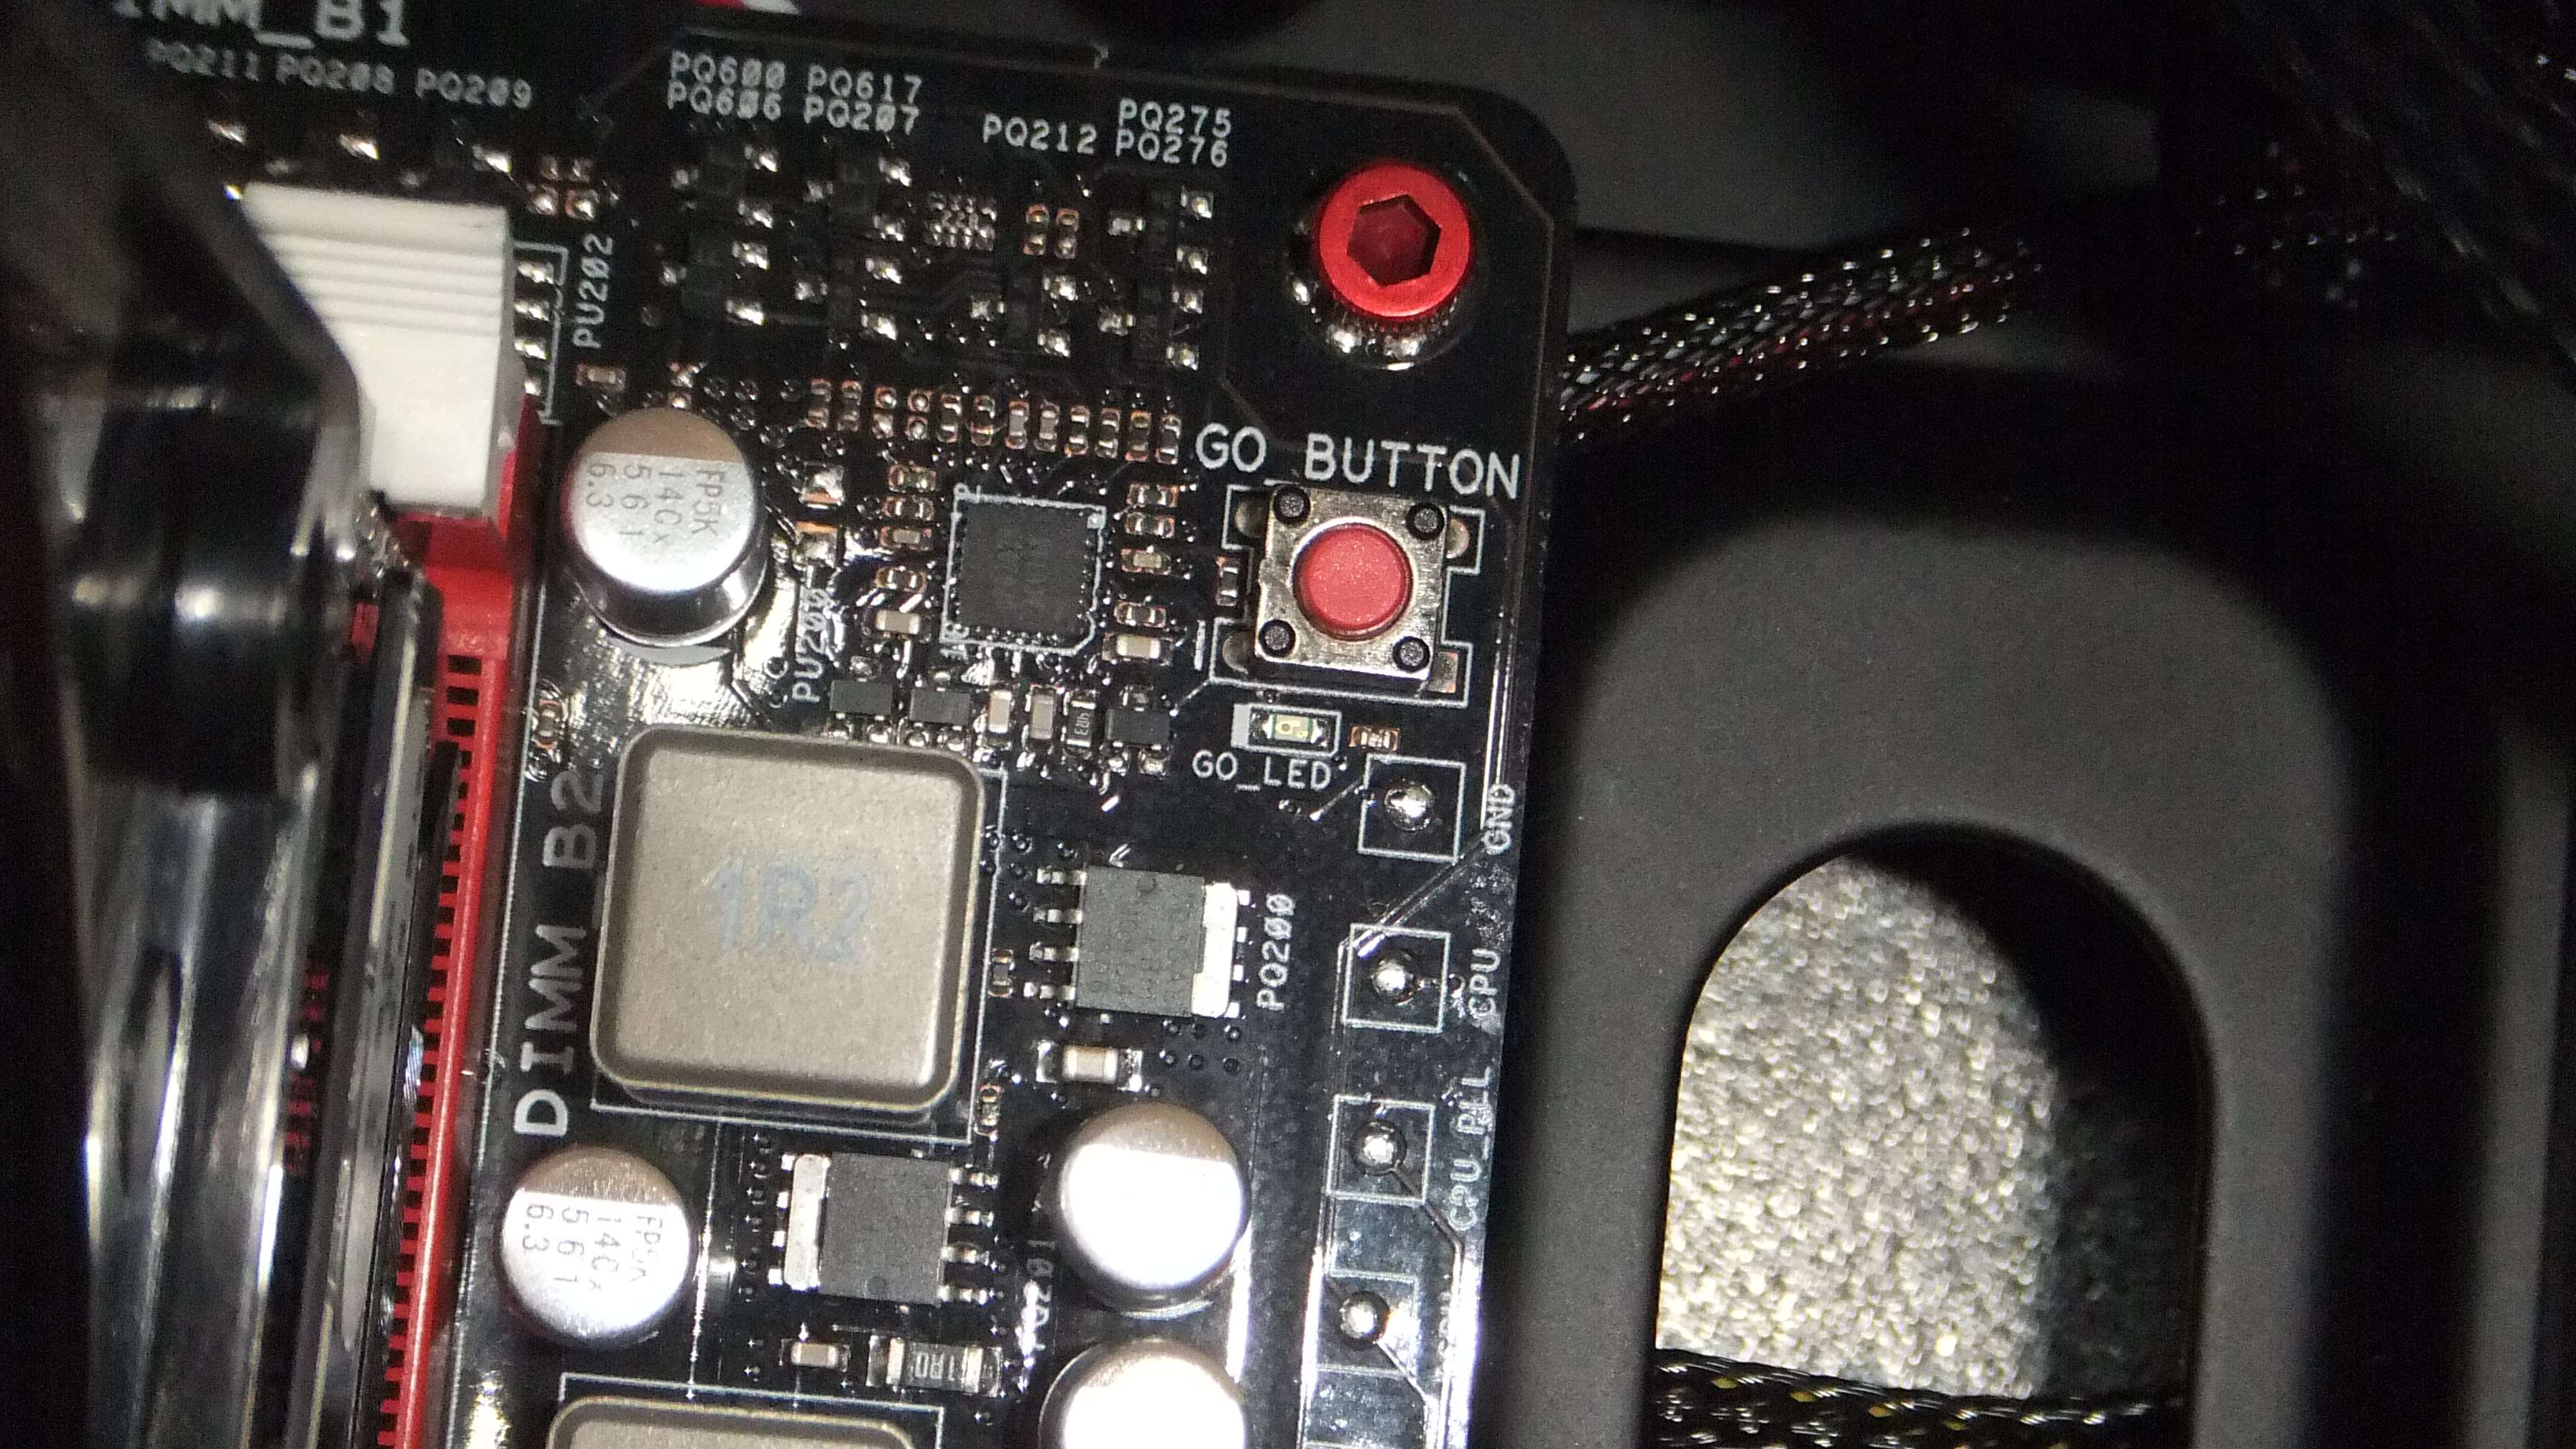
Two Maximus IV Gene-Z features came in particularly handy during my current StarCraft 2-themed build. I installed 16 gigs of Crucial Ballisix memory but could not get the system to post. The Maximus IV Gene-Z debug LEDs showed an error code of 45. Using the handy User guide (included in the retail motherboard box) I determined the problem was related to memory (keep in mind the debug codes are hexadecimal). I could not easily get to the bios to change the memory settings. What could I do? ASUS included a cool feature called MemOK! To enable this function, press the GO-BUTTON before post. A red LED with flash letting you know the Maximus IV Gene-Z is trying different ram settings to allow the system to post. After a couple attempts the system did indeed post! It saved the correct settings allowing me to continue with the project. The Maximus IV Gene-Z also has the Q LEDS which indicate status of key components (Boot Device, VGA, DRAM, and CPU LEDS).
The Maximus IV Gene-Z has eight USB 2.0 ports and two USB 3.0 ports on the back panel (one 2.0 port also serves as the ROG Connect port). There is a gigabit Ethernet port (which is an Intel LAN port - the BEST ethernet option for motherboards in the enthusiast class), an optical audio port, two e-SATA ports, surround sound audio ports, clear CMOS button (lifesaver for troubleshooting), and most interesting: An HDMI port which is used if you choose to utilize i-Mode in Lucid Virtu. You will be able to use Intel Sandy special features (which is good enough for web browsing, listening to music, watching videos, and for HTPC usage). If you choose to rely on your discrete GPU you will still have some advantages from Intel Sandybridge such as transcoding (you can use the Lucid features or just use the discrete GPU). The i-mode will switch to the discrete GPU when needed but will not use the discrete GPU when not necessary to save power. The ROG Connect button allows you to turn on/off the ROG Connect feature which is more convenient than having to flip an internal dip switch (ASUS bends over backwards to make life easier for enthusiasts).

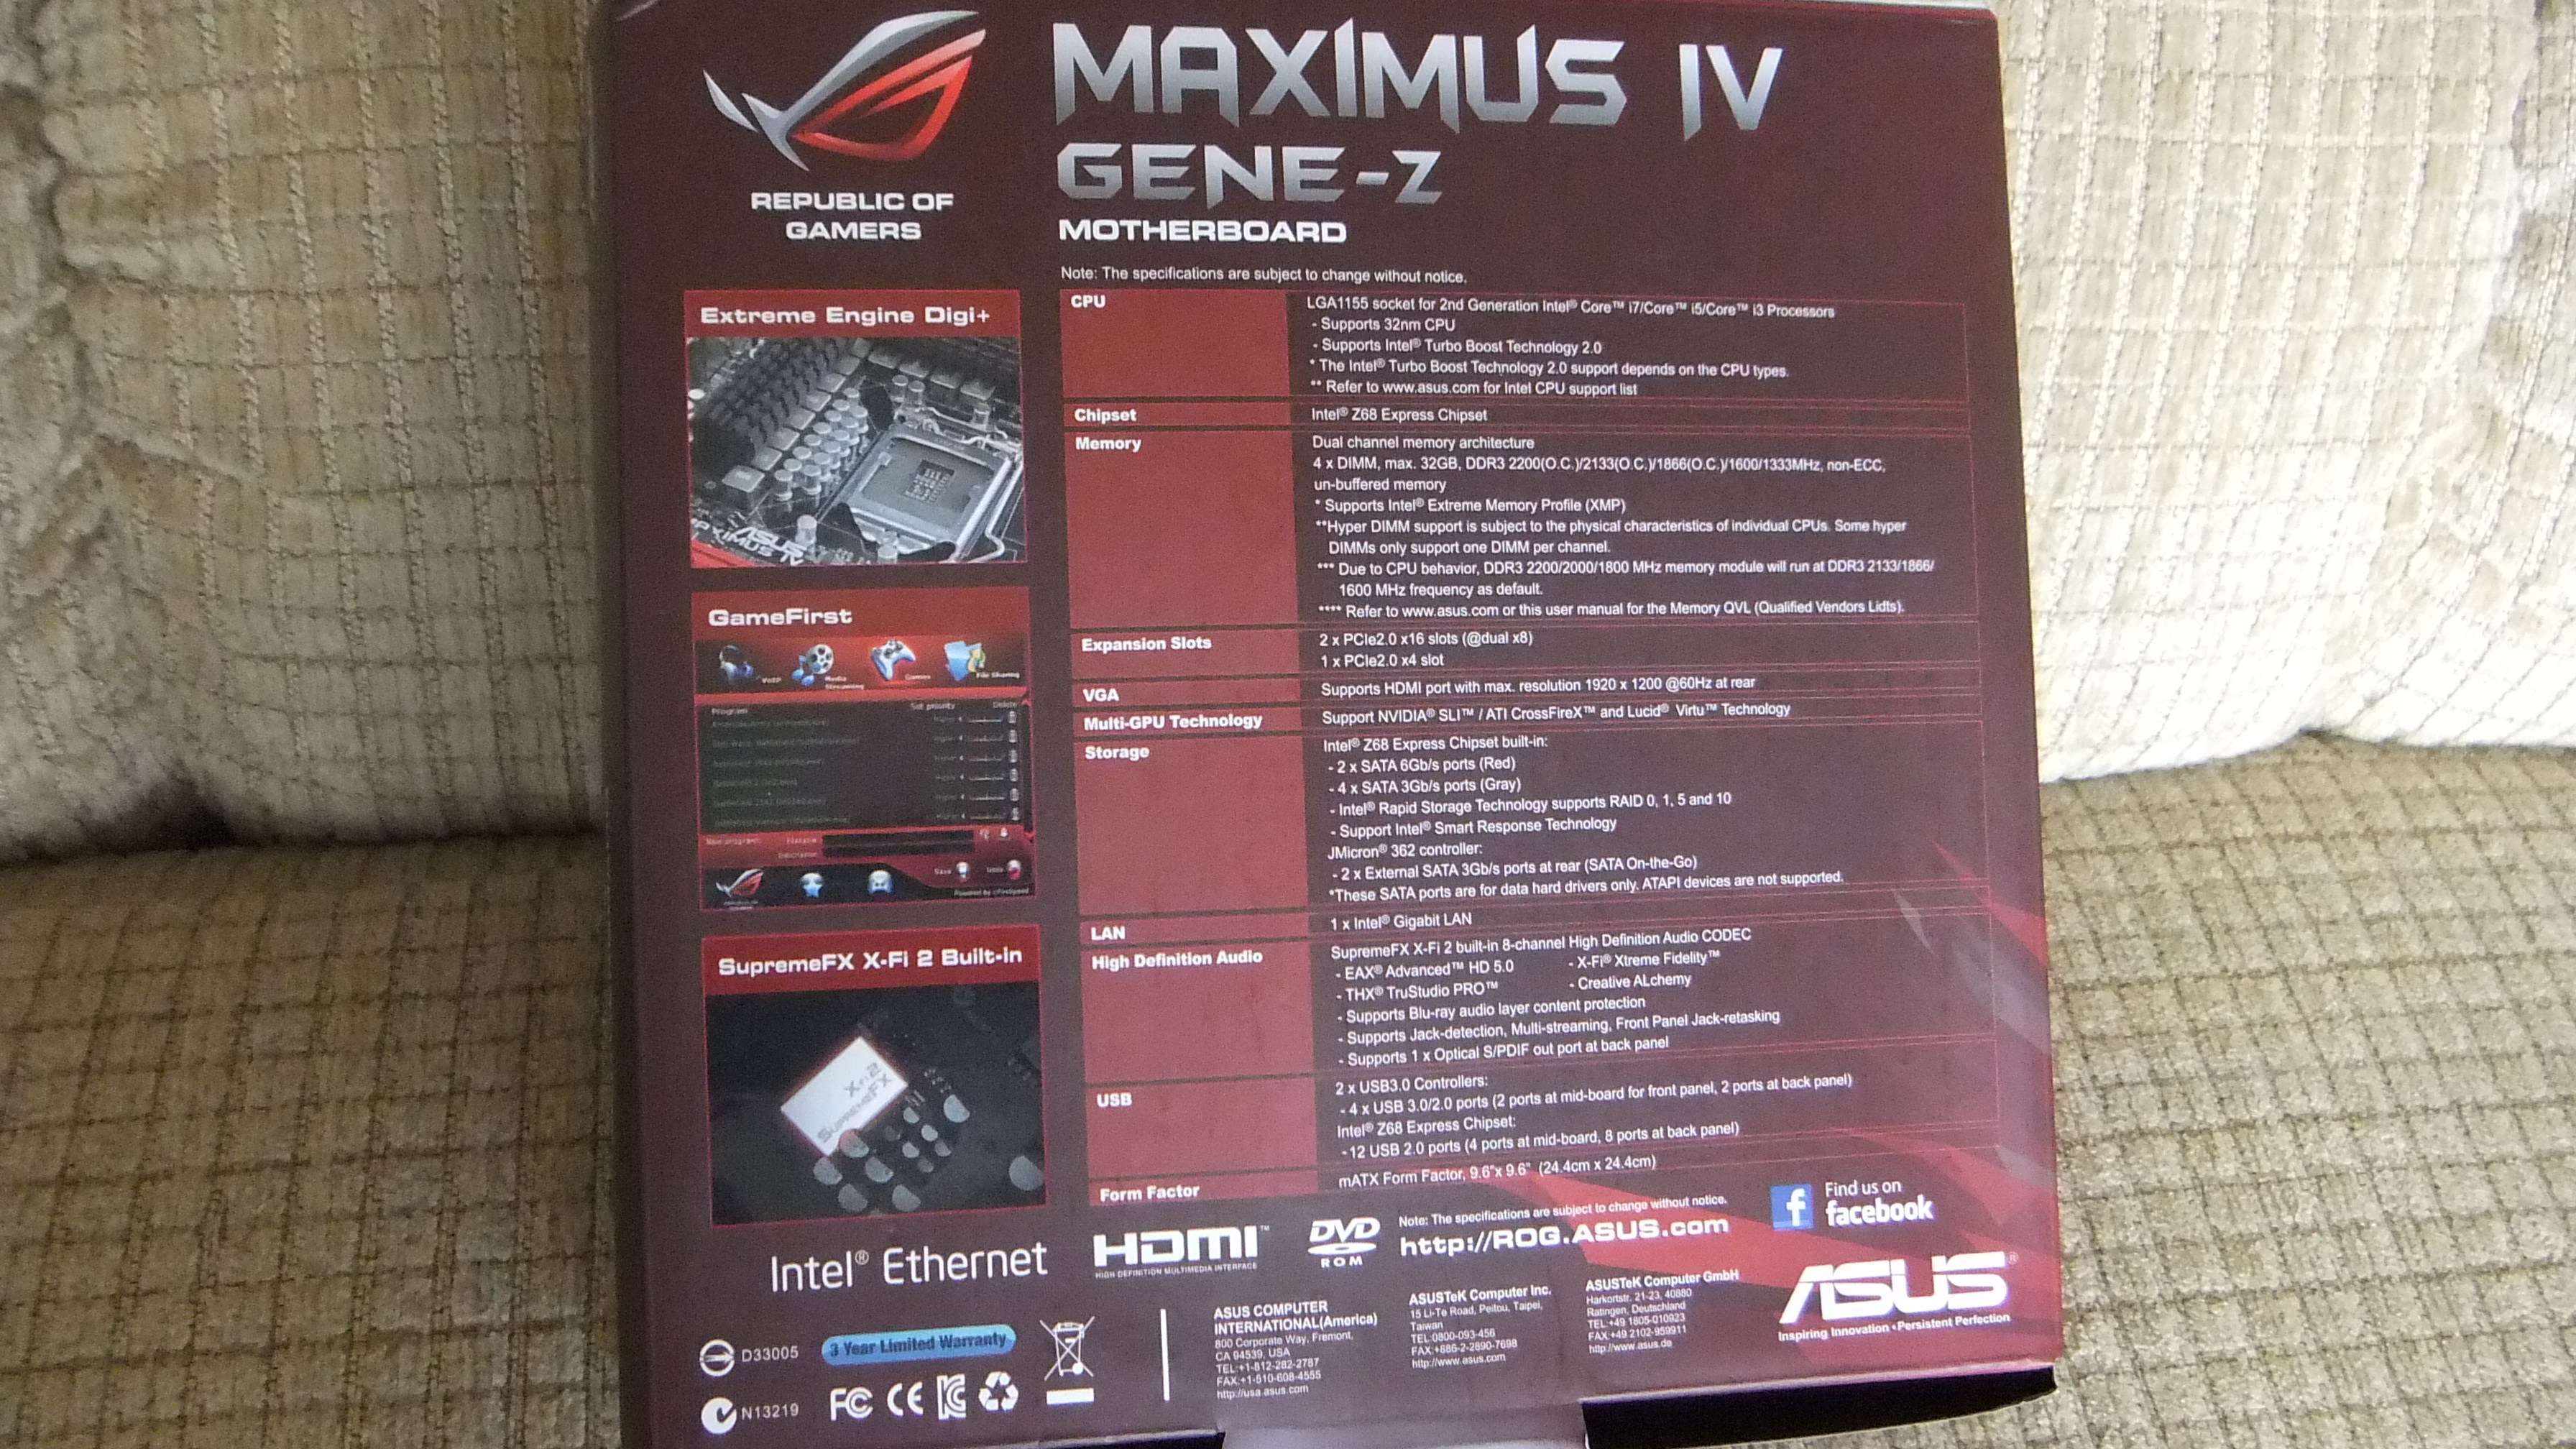
There are DIMM slots for DDR3 ram with a maximum of 32 gigs allowed. Fortunately for this modder, ASUS inlcuded the Q DIMM locks which allow you to lock and unlock your ram using just one DIMM lock. This helped me as the CPU heatsink and fans sit right over the ram thus making accessing a dual lock system almost impossible. The motherboard support high performance DIMMS up to DDR3 2200. SATA ports include four SATA 3gb/s and two SATA 6gb/s for internal connection and two 3Gb/s external ports on the back panel. The motherboard boasts an awesome new feature called SSD caching. This allows you to combine and SSD and standard hard drive together to allow a larger capacity with near the speed of an SSD. To help keep everything cool, ASUS has provided two CPU fan headers with PWM support so you can set parameters such as fan speed and temps. There are also three regular fan speed headers spread out across the board as well.
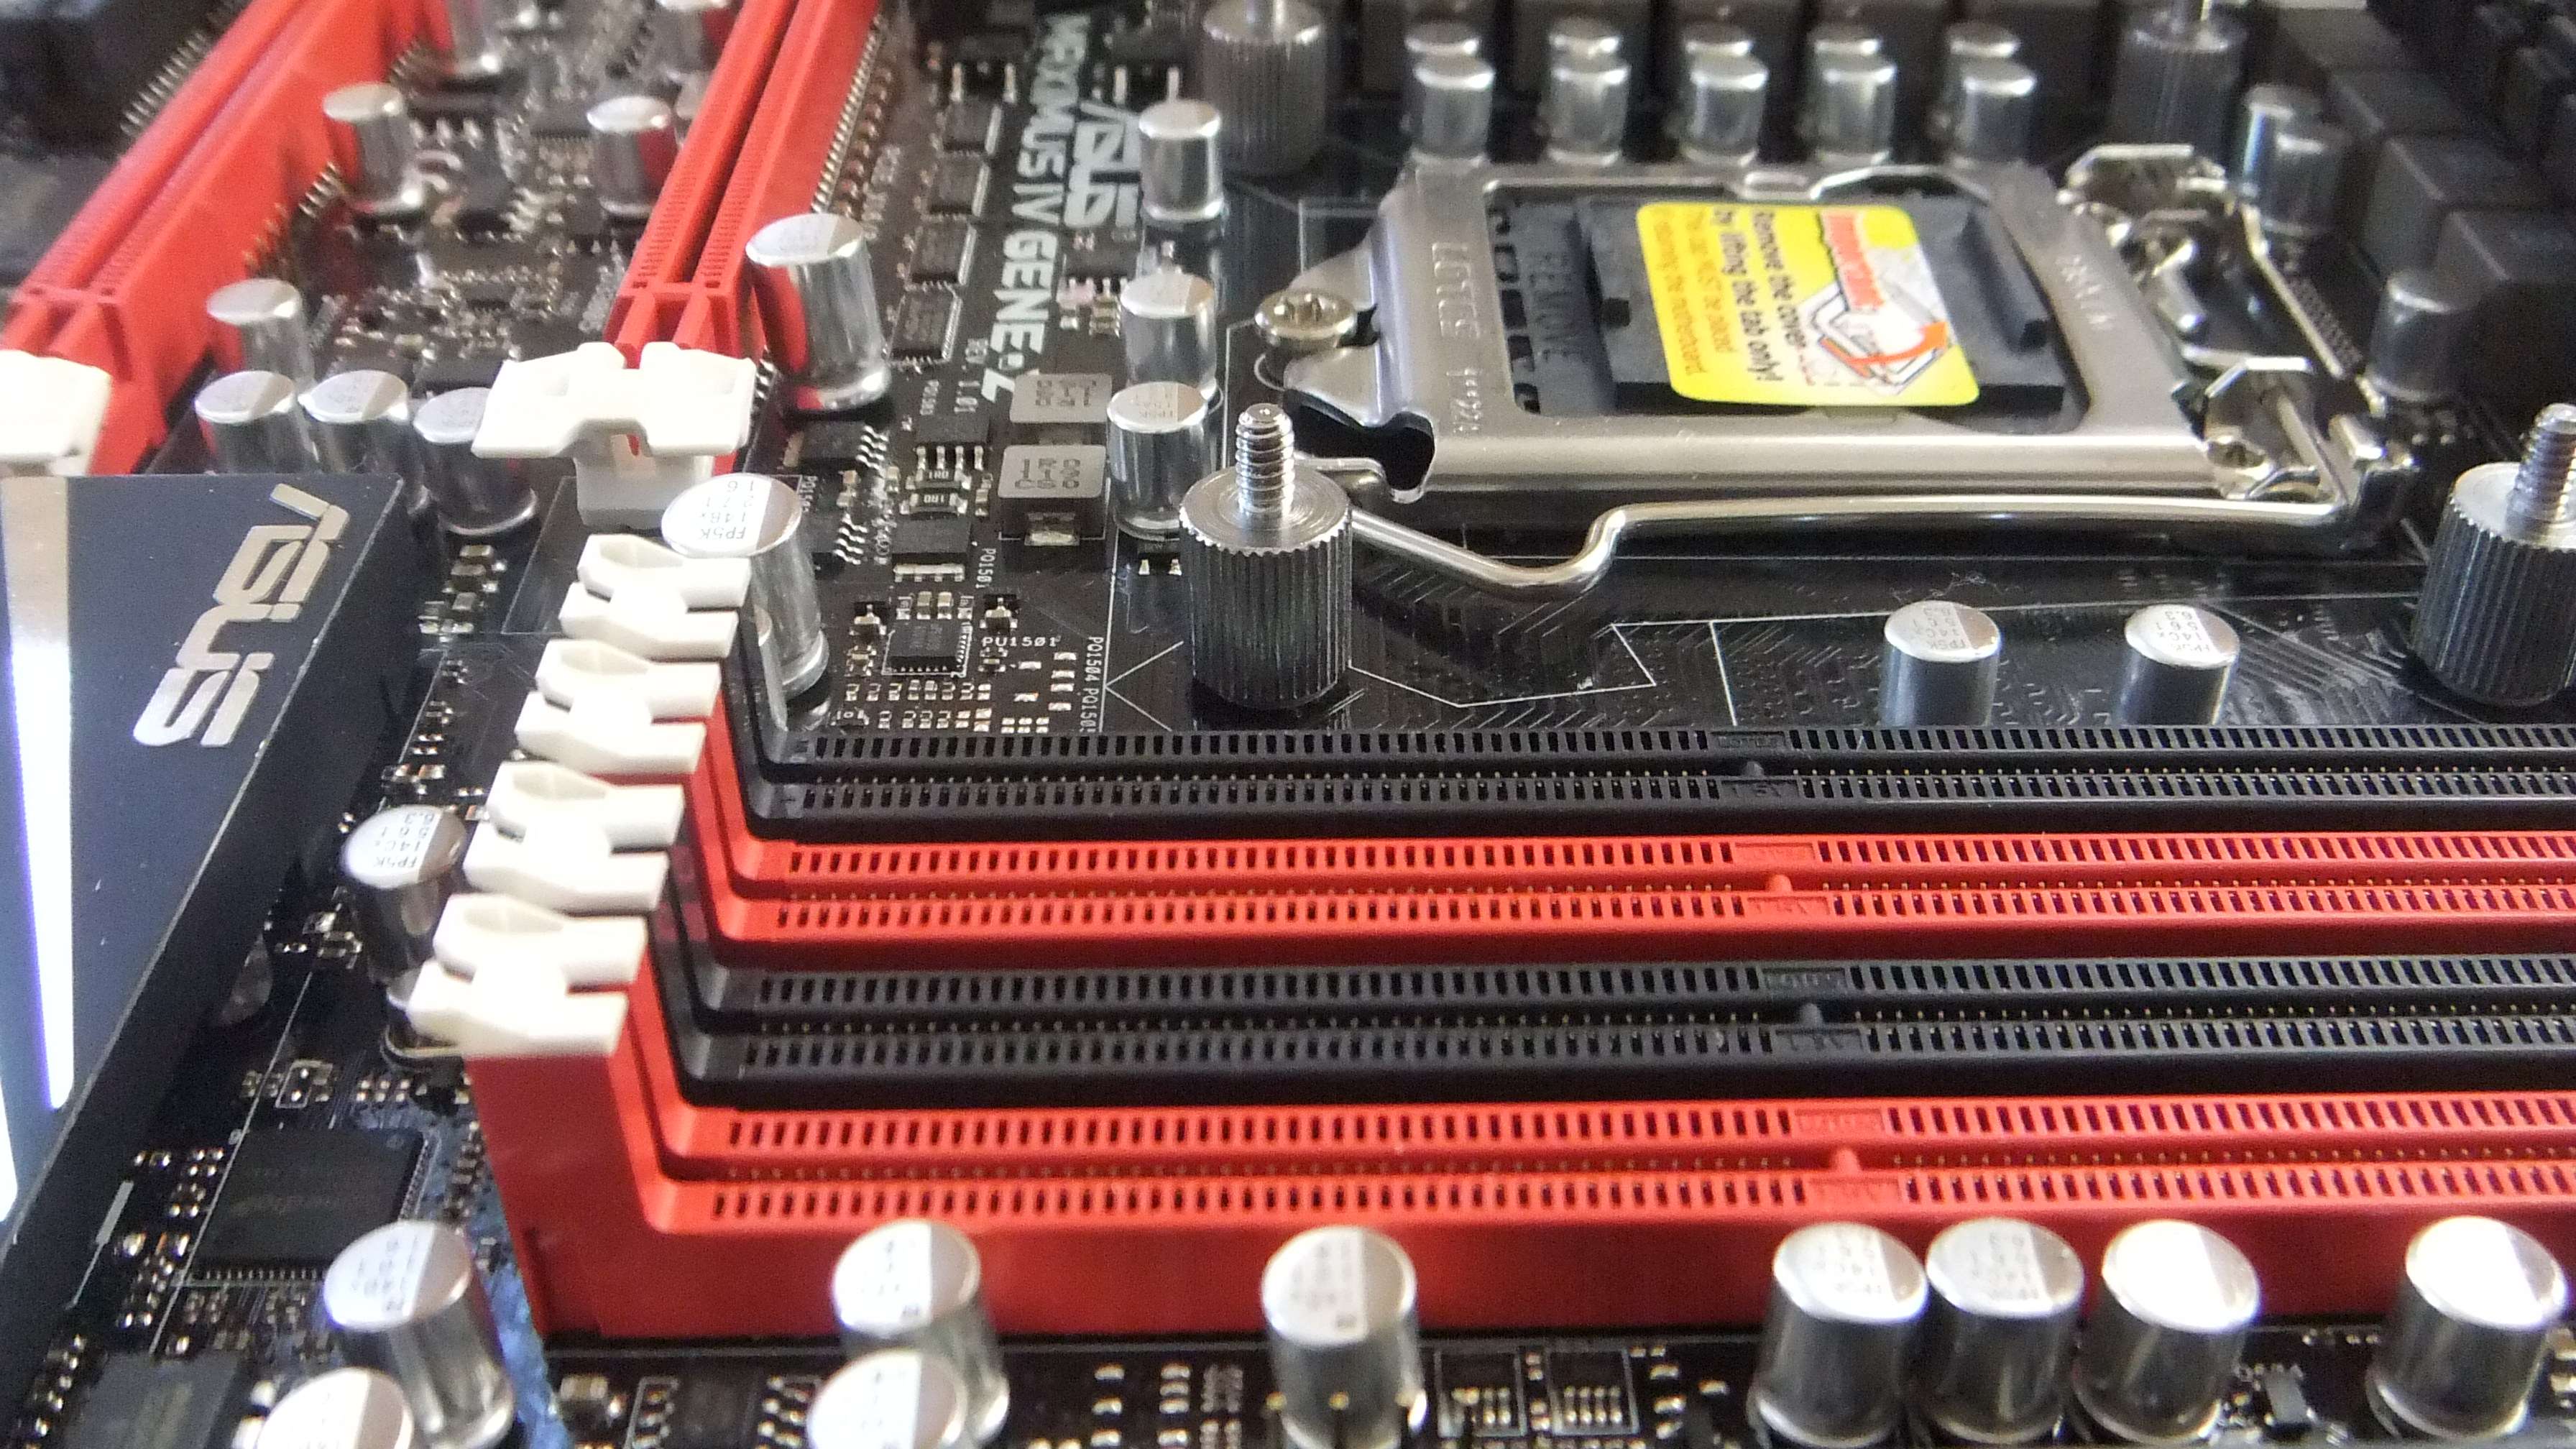
This motherboard is socket 1155 and supports i3/i5/i7 processors. The Z68 chipset allows for a ton of new features, one of the highlights being the added Sandybridge graphics capability including transcoding support for even discrete GPUS.
The on-board sound (SupremeFX X-Fi 2) is so good I will not need to add in a discrete sound card (8 channel surround sound is way beyond my needs but I am glad to have it available).
The ASUS Maximus IV Gene-Z motherboard has been a pleasure to build with. The aesthetics perfectly compliment my black and red theme and are refined and stylish. Features such as MemOK! and the debug LEDS made troubleshooting a breeze (the less time trouble-shooting means more time to mod and game). I would highly recommend this board to an person looking for a motherboard with tons of high-end features in a compact form factor.
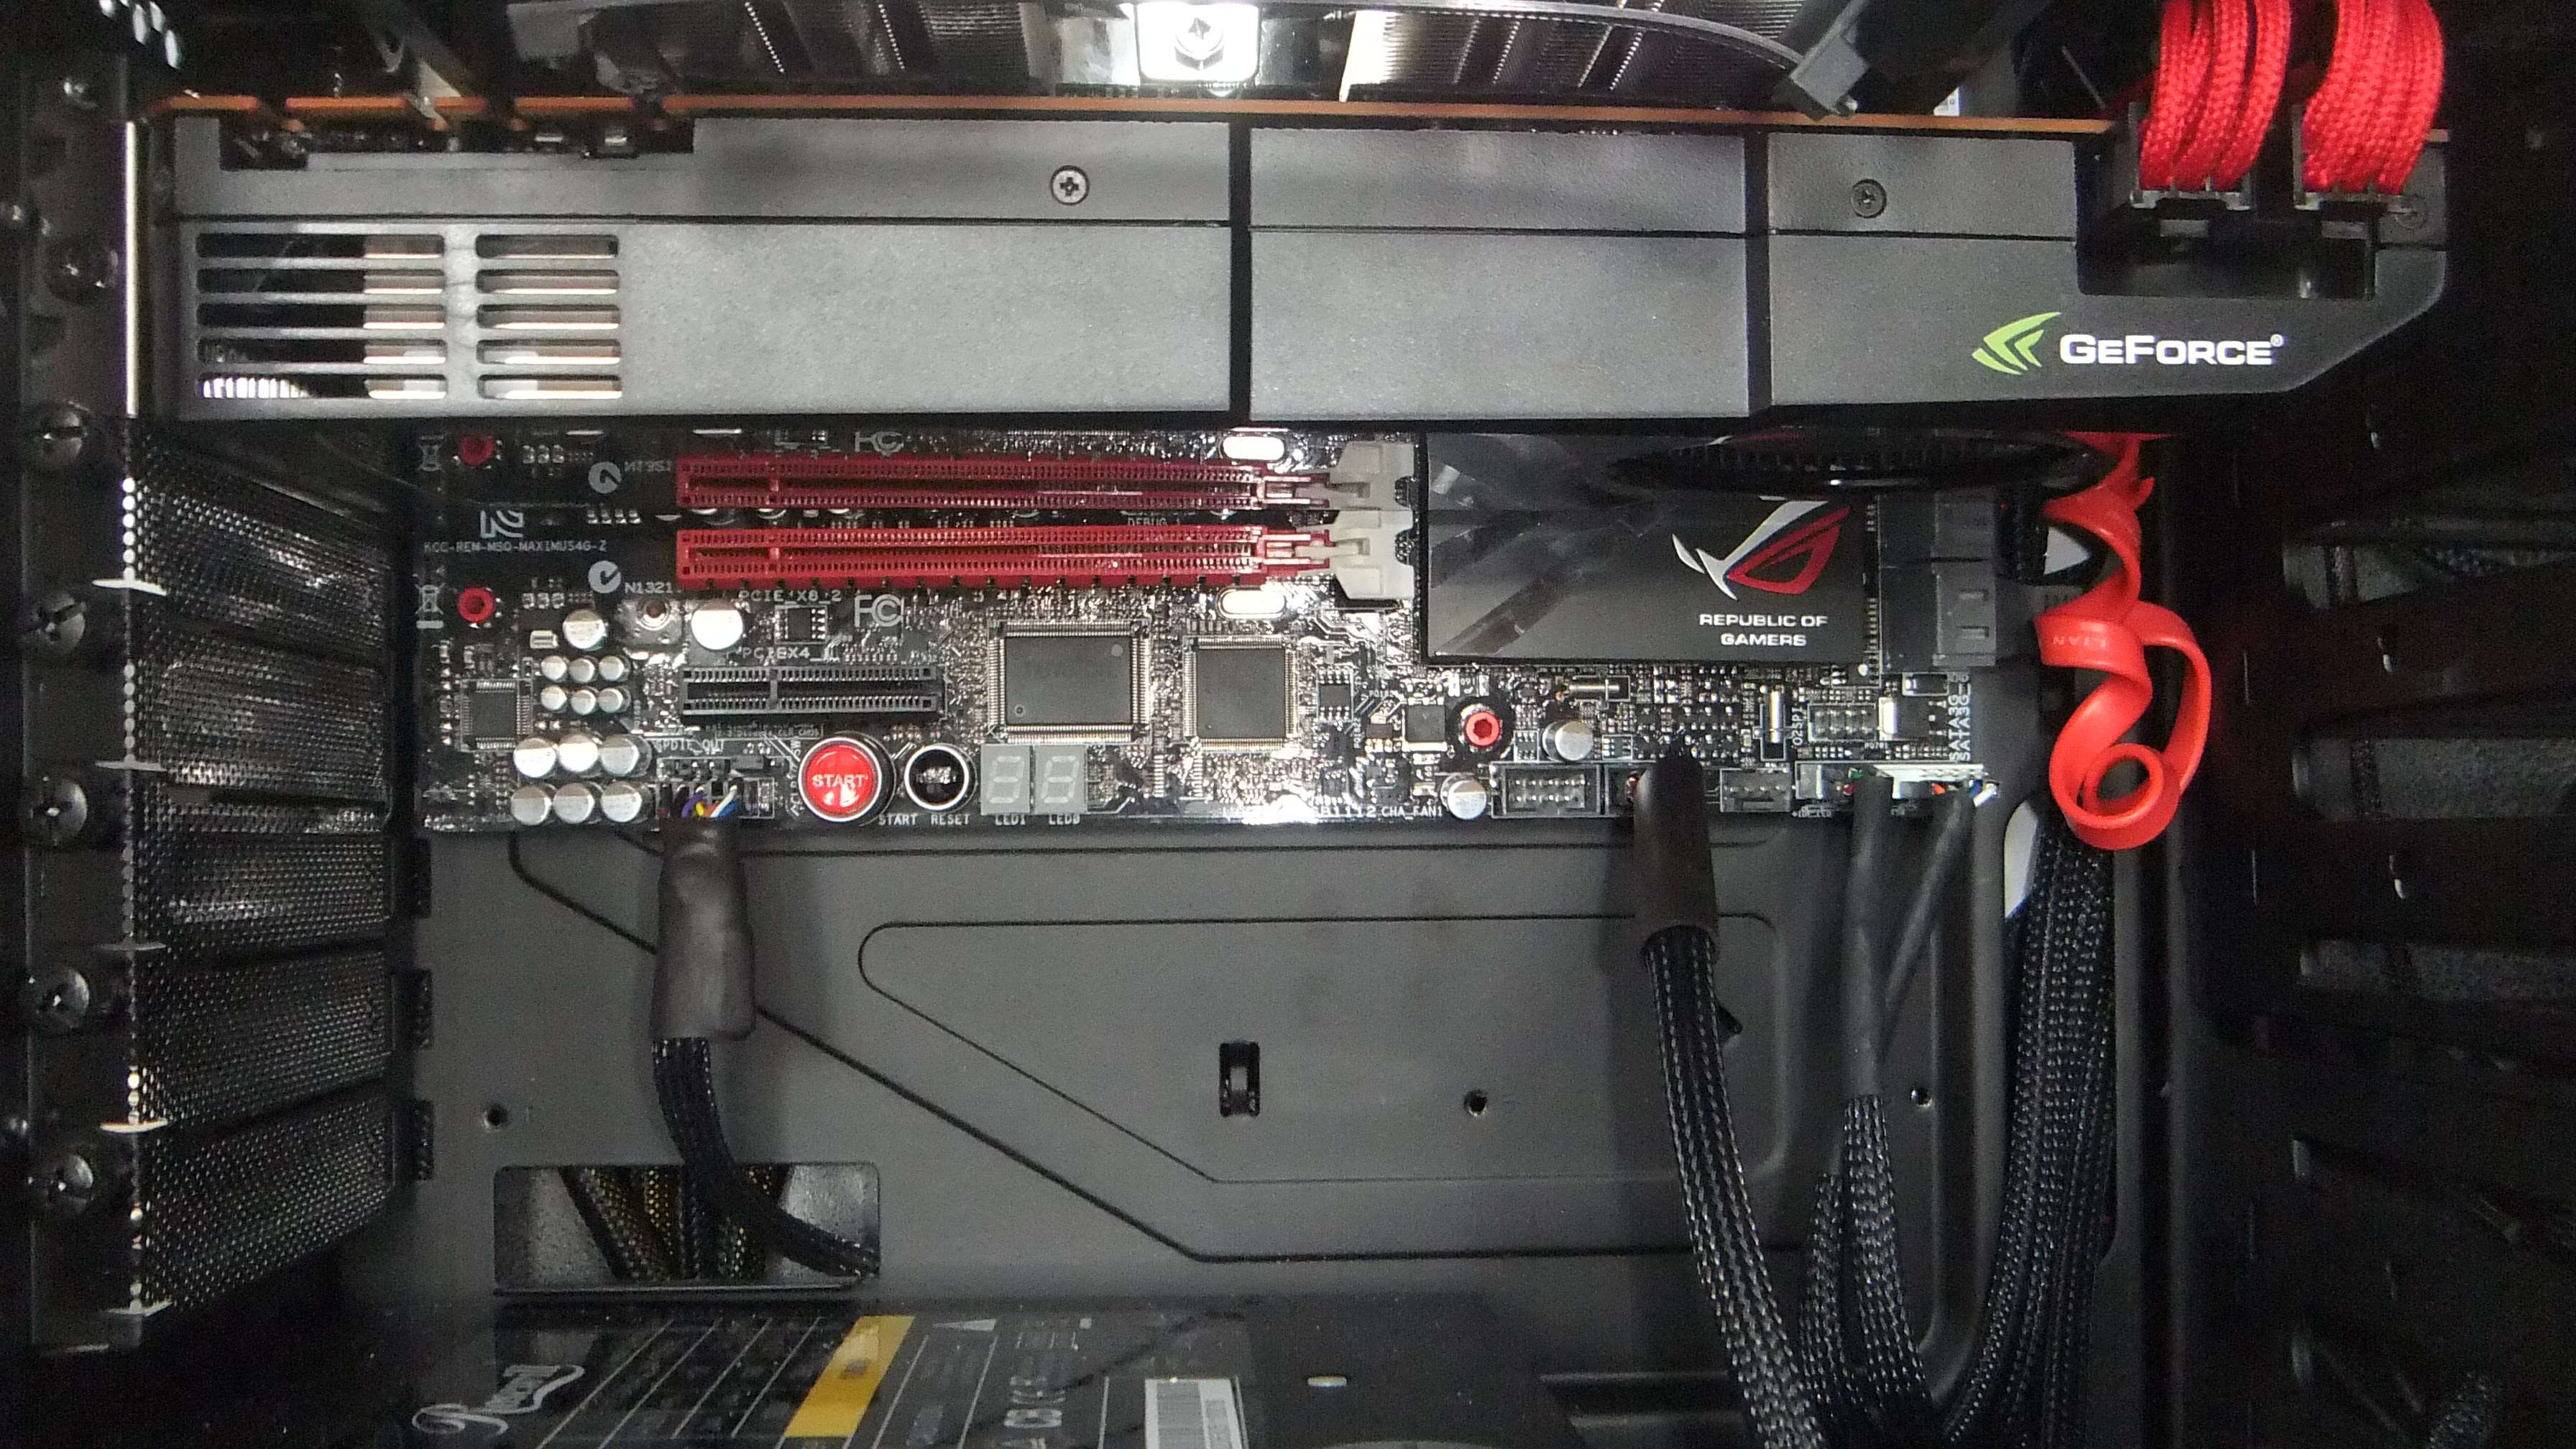
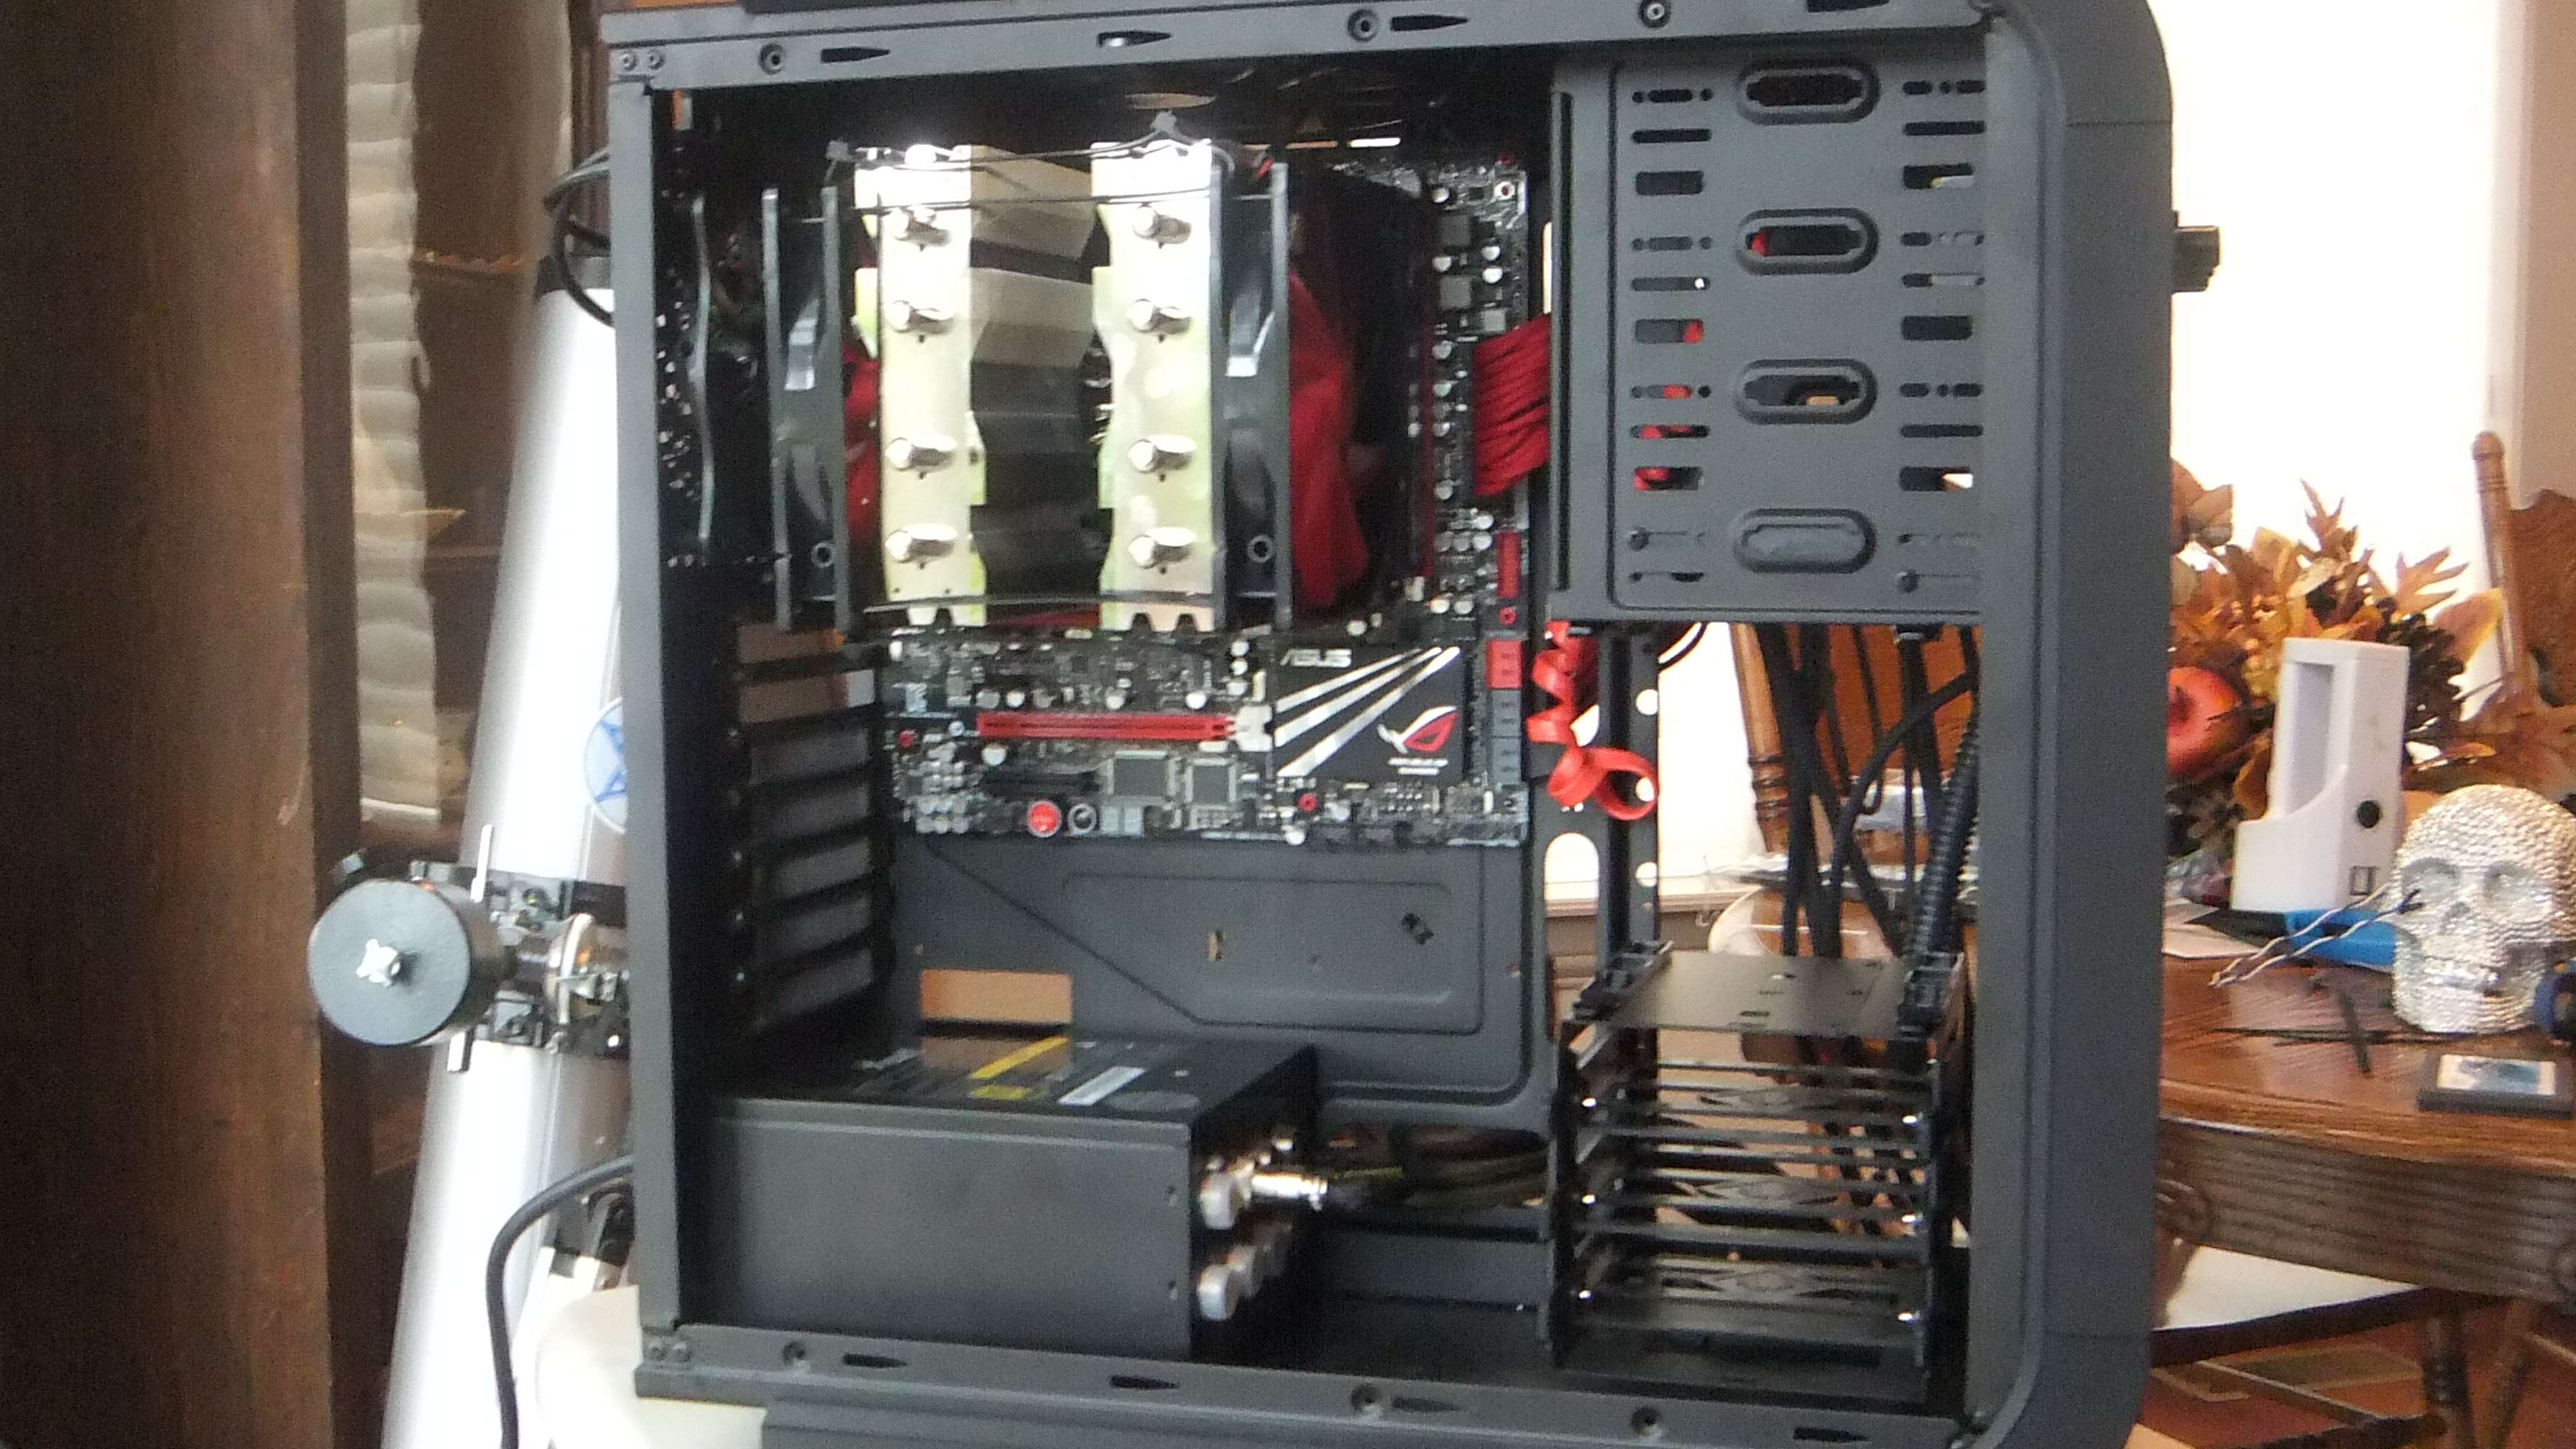
Here is a picture of the motherboard installed to give you a reference on size
ASUS MAXIMUS IV GENE-Z RESOURCES
Index with hyperlinks to other guides
_________________________________________________________________________________________________________________________
MAXIMUS IV GENE-Z : UNBOXING
MAXIMUS IV GENE-Z : SYSTEM BUILDING
MAXIMUS IV GENE-Z : OVERCLOCKING
_________________________________________________________________________________________________________________________
Packaging -
The packaging is pretty important as it gives the ASUS ROG customer the impression the product inside will be as well thought out and designed as the beautiful box which houses it. ASUS does a fine job in this regard. You know instantly you are about to come in contact with the Ferrari of enthusiast motherboards . . .the package has a refined design that speaks of performance and aesthetics . .
Open the box's top flap to see a detailed description of the many new features that await you.
My favorite revolution on the Maximus IV GENE-Z motherboard is the UEFI graphical bios. ASUS created a new BIOS from the ground up instead of just skinning the old school BIOS. The interface can be set to simple or advanced user mode. Either way makes it easy to set up your system in a very intuitive manner. If you have not experienced this bios, it is a must.
In the box you will find ASUS has included many accessories that will make your do-it-yourself build easier. The QShield IO plate is easy to install thanks to the padded backside (other vendors use tabs which can easily cut your fingers) and also makes connecting peripherals a snap with the easy-to-read labeling of each port.
Another accessory I find extremely useful is the Q Connector. This device makes connecting your power/reset buttons and Power and HDD indicators a simple process without having to break out the manual to see which connector goes where. My projects often result in little space to connect these so the Q Connector has saved me time and effort.
ASUS includes the ROG Connect cable so you can use your laptop or tablet to over-clock your ASUS ROG-based desktop. While I have not personally used this functionality I can say it was cool to see Travis and Walker (V2-V3 and Nemesis on the ASUS ROG forums) demonstrate over-clocking with an ASUS Slate tablet at several events.
The Maximus IV GENE-Z packs two PCI-E slots which can be populated with two AMD or NVIDIA-based graphics cards. The slot spacing is generous enough to allow SLI or Crossfire cards with their stock two-slot cooling solutions installed. The PCI-E slots utilize ASUS' Q Slot design making installing and removing GPUS easier than other motherboards on the market.
Heat-sinks
The motherboard chipset boasts stylish red and black heat-sinks which are effective in cooling and also blend well with the aesthetics of the motherboard. The color scheme is refined and modern.
The Maximus IV Gene-Z provides a plethora of convenient features consistent with previous ROG motherboards such as lit power button and reset buttons (I use these all the time during the testing the debugging process when building mods - I normally test all my hardware before installing in a case).
Two Maximus IV Gene-Z features came in particularly handy during my current StarCraft 2-themed build. I installed 16 gigs of Crucial Ballisix memory but could not get the system to post. The Maximus IV Gene-Z debug LEDs showed an error code of 45. Using the handy User guide (included in the retail motherboard box) I determined the problem was related to memory (keep in mind the debug codes are hexadecimal). I could not easily get to the bios to change the memory settings. What could I do? ASUS included a cool feature called MemOK! To enable this function, press the GO-BUTTON before post. A red LED with flash letting you know the Maximus IV Gene-Z is trying different ram settings to allow the system to post. After a couple attempts the system did indeed post! It saved the correct settings allowing me to continue with the project. The Maximus IV Gene-Z also has the Q LEDS which indicate status of key components (Boot Device, VGA, DRAM, and CPU LEDS).
The Maximus IV Gene-Z has eight USB 2.0 ports and two USB 3.0 ports on the back panel (one 2.0 port also serves as the ROG Connect port). There is a gigabit Ethernet port (which is an Intel LAN port - the BEST ethernet option for motherboards in the enthusiast class), an optical audio port, two e-SATA ports, surround sound audio ports, clear CMOS button (lifesaver for troubleshooting), and most interesting: An HDMI port which is used if you choose to utilize i-Mode in Lucid Virtu. You will be able to use Intel Sandy special features (which is good enough for web browsing, listening to music, watching videos, and for HTPC usage). If you choose to rely on your discrete GPU you will still have some advantages from Intel Sandybridge such as transcoding (you can use the Lucid features or just use the discrete GPU). The i-mode will switch to the discrete GPU when needed but will not use the discrete GPU when not necessary to save power. The ROG Connect button allows you to turn on/off the ROG Connect feature which is more convenient than having to flip an internal dip switch (ASUS bends over backwards to make life easier for enthusiasts).
There are DIMM slots for DDR3 ram with a maximum of 32 gigs allowed. Fortunately for this modder, ASUS inlcuded the Q DIMM locks which allow you to lock and unlock your ram using just one DIMM lock. This helped me as the CPU heatsink and fans sit right over the ram thus making accessing a dual lock system almost impossible. The motherboard support high performance DIMMS up to DDR3 2200. SATA ports include four SATA 3gb/s and two SATA 6gb/s for internal connection and two 3Gb/s external ports on the back panel. The motherboard boasts an awesome new feature called SSD caching. This allows you to combine and SSD and standard hard drive together to allow a larger capacity with near the speed of an SSD. To help keep everything cool, ASUS has provided two CPU fan headers with PWM support so you can set parameters such as fan speed and temps. There are also three regular fan speed headers spread out across the board as well.
This motherboard is socket 1155 and supports i3/i5/i7 processors. The Z68 chipset allows for a ton of new features, one of the highlights being the added Sandybridge graphics capability including transcoding support for even discrete GPUS.
The on-board sound (SupremeFX X-Fi 2) is so good I will not need to add in a discrete sound card (8 channel surround sound is way beyond my needs but I am glad to have it available).
The ASUS Maximus IV Gene-Z motherboard has been a pleasure to build with. The aesthetics perfectly compliment my black and red theme and are refined and stylish. Features such as MemOK! and the debug LEDS made troubleshooting a breeze (the less time trouble-shooting means more time to mod and game). I would highly recommend this board to an person looking for a motherboard with tons of high-end features in a compact form factor.
Here is a picture of the motherboard installed to give you a reference on size
Index with hyperlinks to other guides
_________________________________________________________________________________________________________________________
MAXIMUS IV GENE-Z : UNBOXING
MAXIMUS IV GENE-Z : SYSTEM BUILDING
MAXIMUS IV GENE-Z : OVERCLOCKING
_________________________________________________________________________________________________________________________
Labels:
- Labels:
-
Other Motherboards
8,593 Views
1 REPLY 1
Retired
Not applicable
Options
- Mark as New
- Bookmark
- Subscribe
- Mute
- Subscribe to RSS Feed
- Permalink
11-08-2011 05:53 PM
Nice unboxing Darth!
Related Content
- 2023: MAXIMUS VI GENE Ram upgrade to 32 GB - any recommendations please? in Other Motherboards
- Intel Management Engine N/A on z87 Maximus VI Gene in Other Motherboards
- Asus Maximus VIII Gene nvme runs only at 3.0x1 in m.2 slot in Z170
- My 2013 build with 2020 bottleneck challenge: I need your help! in Other Motherboards
- Safe to download Maximus Viii Gene BIOS? in Z170
