Turn on suggestions
Auto-suggest helps you quickly narrow down your search results by suggesting possible matches as you type.
Showing results for
- Republic of Gamers Forum
- Discussions
- Case Mods & PC Builds
- Project Deadpool: Merc with a Mouth
Options
- Subscribe to RSS Feed
- Mark Topic as New
- Mark Topic as Read
- Float this Topic for Current User
- Bookmark
- Subscribe
- Mute
- Printer Friendly Page
Project Deadpool: Merc with a Mouth
Options
- Mark as New
- Bookmark
- Subscribe
- Mute
- Subscribe to RSS Feed
- Permalink
07-23-2015
11:33 PM
- last edited on
03-06-2024
02:12 AM
by
![]() ROGBot
ROGBot
It's time for a new casemod and this time with my favorite Marvel character as the theme.

Ever since the test footage leaked I've been planning to do a casemod with Deadpool as the theme, when it was announced that they agreed to a movie and with the release date of the 12th of February 2016 I was overjoyed.
The idea's I had where quickly put back into the freezer due to the large amount of work I was putting into starting my own custom design company this year.
Then in May I saw a picture of an In Win D Frame Mini in the perfect color and that's where the ball started rolling.
In Win
Avexir
T-Grizzly
Cooler Master
Part list
Case: In Win D Frame Mini in Anodized Red
Motherboard: ASUS Rampage V Extreme
CPU: Intel 5820K
GPU('s): MSI GTX980 Ti 6G
RAM: Avexir Blitz 1.1 DDR4 4x4Gb (16GB)
SSD('s): 2x Samsung 850 EVO 500GB
PSU: Cooler Master V1200
12,804 Views
13 REPLIES 13
Options
- Mark as New
- Bookmark
- Subscribe
- Mute
- Subscribe to RSS Feed
- Permalink
07-23-2015 11:36 PM
June 19th:
The first parts came in a while ago
In Win sent over one of their red anodized D Frame Mini cases.

As soon as the case came in I started taking measurements to see how much space there is and what is possible, the case is made to work with a Mini-ITX motherboard but soon I found out there was a lot more space.
I started with the design of a custom motherboard tray, the motherboard size was soon lifted to Micro ATX.
A little while later I decided to put my old Maximus IV Extreme Z (E-ATX) in there to see if ATX would fit and....well here things changed a lot, E-ATX fits fine and I decided to make this the most extreme build in a D Frame Mini to date (correct me if I am wrong)

But you can't design a custom tray with only images to go on so a few days after my birthday I went out and bought myself a few gifts 😉
The ASUS Rampage V Extreme and two Samsung 850 EVO 500GB SSD's which will be sunken into the tray.

Quick photo of how the Rampage will be placed inside the case 😄

At this moment the motherboard tray is still in the design fase and that will take some time, here are two images of the current progression of the final version, there have been a few test versions before this design.


The tray will be milled from 12mm thick aluminium, cables will be sunken into the backside of the tray just like the SSD's and the whole tray will be anodized red in the end to match
This is it for now, I am hard at work to get to the next step 😄
The first parts came in a while ago
In Win sent over one of their red anodized D Frame Mini cases.
As soon as the case came in I started taking measurements to see how much space there is and what is possible, the case is made to work with a Mini-ITX motherboard but soon I found out there was a lot more space.
I started with the design of a custom motherboard tray, the motherboard size was soon lifted to Micro ATX.
A little while later I decided to put my old Maximus IV Extreme Z (E-ATX) in there to see if ATX would fit and....well here things changed a lot, E-ATX fits fine and I decided to make this the most extreme build in a D Frame Mini to date (correct me if I am wrong)
But you can't design a custom tray with only images to go on so a few days after my birthday I went out and bought myself a few gifts 😉
The ASUS Rampage V Extreme and two Samsung 850 EVO 500GB SSD's which will be sunken into the tray.
Quick photo of how the Rampage will be placed inside the case 😄
At this moment the motherboard tray is still in the design fase and that will take some time, here are two images of the current progression of the final version, there have been a few test versions before this design.
The tray will be milled from 12mm thick aluminium, cables will be sunken into the backside of the tray just like the SSD's and the whole tray will be anodized red in the end to match
This is it for now, I am hard at work to get to the next step 😄
Options
- Mark as New
- Bookmark
- Subscribe
- Mute
- Subscribe to RSS Feed
- Permalink
07-24-2015 12:07 AM
July 9th:
Still working on the motherboard tray but in the meanwhile I got some packages.
First I received the DDR4 Blitz RAM from Avexir

Looks good on the motherboard but it needs some customization so lets get the calipers

The final parts that I needed for the tray design came in, I needed the ultra thin SATA cables from Silverstone and the switches, the other parts are a valve and a deburrer but for now those are for my other casemod

I am finishing the tray design this week and then it will go to the CNC milling company to have it made since I do not own a CNC mill 😞 Will put up the final design of the tray.
Already working on the other custom part, a radiator mount to be mounted on the side for some cooling power, for anyone thinking I could fit a radiator inside the frame, you are correct but a small radiator doesn't do it for me 😛
Got some more parts coming in this week, I hope to receive the tray somewhere near the end of this month so I can start mounting the board and all the parts.
See you at the next update 🙂
Still working on the motherboard tray but in the meanwhile I got some packages.
First I received the DDR4 Blitz RAM from Avexir
Looks good on the motherboard but it needs some customization so lets get the calipers
The final parts that I needed for the tray design came in, I needed the ultra thin SATA cables from Silverstone and the switches, the other parts are a valve and a deburrer but for now those are for my other casemod
I am finishing the tray design this week and then it will go to the CNC milling company to have it made since I do not own a CNC mill 😞 Will put up the final design of the tray.
Already working on the other custom part, a radiator mount to be mounted on the side for some cooling power, for anyone thinking I could fit a radiator inside the frame, you are correct but a small radiator doesn't do it for me 😛
Got some more parts coming in this week, I hope to receive the tray somewhere near the end of this month so I can start mounting the board and all the parts.
See you at the next update 🙂
Options
- Mark as New
- Bookmark
- Subscribe
- Mute
- Subscribe to RSS Feed
- Permalink
07-24-2015 12:14 AM
July 21st
Renders!!!
After 4 nights of hard work, solving a lot of dilemma's and some changes in my plans I am finally done with the design of the motherboard tray .
At the same time I gave myself a new version of my logo, looks a little nicer.
The tray offers support for the E-ATX form factor Rampage V Extreme, cable channels for a 24 pin and 4x8 pin to supply two high end GPU's of power.
The backside with the channels, SSD placing cut outs, clear cover on the right and a red cover on the left to do some laser engraving on.

The frontside has the holes for the cable channels, SSD power and data cables and the mounting holes for E-ATX.

To make this tray design perfect before having it made I had some 1:1 scale prints made to check everything, I put those on the standard tray and checked for imperfections, changed a few things to make everything work (At least I hope).

And the other side (uncut).

These where some quick pictures and my apologies for the smudges, the lens wasn't clean I see.
I hope the tray is finished soon so I can continue on some other parts 🙂 Some parts I am already working on like the radiator mounts and pump mount, I'm still ironing out the kinks on that.
To end this update, here is a picture with the current hardware on the print, looks like it will work fine.

Renders!!!
After 4 nights of hard work, solving a lot of dilemma's and some changes in my plans I am finally done with the design of the motherboard tray .
At the same time I gave myself a new version of my logo, looks a little nicer.
The tray offers support for the E-ATX form factor Rampage V Extreme, cable channels for a 24 pin and 4x8 pin to supply two high end GPU's of power.
The backside with the channels, SSD placing cut outs, clear cover on the right and a red cover on the left to do some laser engraving on.
The frontside has the holes for the cable channels, SSD power and data cables and the mounting holes for E-ATX.
To make this tray design perfect before having it made I had some 1:1 scale prints made to check everything, I put those on the standard tray and checked for imperfections, changed a few things to make everything work (At least I hope).
And the other side (uncut).
These where some quick pictures and my apologies for the smudges, the lens wasn't clean I see.
I hope the tray is finished soon so I can continue on some other parts 🙂 Some parts I am already working on like the radiator mounts and pump mount, I'm still ironing out the kinks on that.
To end this update, here is a picture with the current hardware on the print, looks like it will work fine.
Options
- Mark as New
- Bookmark
- Subscribe
- Mute
- Subscribe to RSS Feed
- Permalink
07-27-2015 05:12 AM
The card for the project came in.
The MSI GTX980 Ti Gaming 6G is currently in my HAF Pipe system for testing (and OC'ing)

My photography equipment will arrive later this week and then I'll make some better pictures of pretty much everything, for now I need to wait. 🙂
The MSI GTX980 Ti Gaming 6G is currently in my HAF Pipe system for testing (and OC'ing)
My photography equipment will arrive later this week and then I'll make some better pictures of pretty much everything, for now I need to wait. 🙂
Options
- Mark as New
- Bookmark
- Subscribe
- Mute
- Subscribe to RSS Feed
- Permalink
08-15-2015 06:52 PM
Long time no updates but finally things are moving quicker again, the motherboard tray is being milled at the moment (by a life saver from Denmark).
Sleeving equipment and materials will arrive somewhere next week, I do not yet have a PSU but that will of course also come in.
Yesterday I received the CPU and cooler that I ordered, a 5820K for now cooled by a Be Quiet! Dark Rock Pro 3.
There are two reasons for this aircooler, the first being that watercooling before Insomnia 55 would not be done well enough, the second reason is that this is the largest cooler I could get that does not cover the nice RAM

Also the MSI 980 TI 6G block isn't out yet 😞
As soon as the motherboard tray and PSU get in I can start making the custom cables, the two covers for the back of the tray will be cut, some covers cut and the system will be ready to go with me to Insomnia 55.
The next two weeks are going to be very busy
Sleeving equipment and materials will arrive somewhere next week, I do not yet have a PSU but that will of course also come in.
Yesterday I received the CPU and cooler that I ordered, a 5820K for now cooled by a Be Quiet! Dark Rock Pro 3.
There are two reasons for this aircooler, the first being that watercooling before Insomnia 55 would not be done well enough, the second reason is that this is the largest cooler I could get that does not cover the nice RAM
Also the MSI 980 TI 6G block isn't out yet 😞
As soon as the motherboard tray and PSU get in I can start making the custom cables, the two covers for the back of the tray will be cut, some covers cut and the system will be ready to go with me to Insomnia 55.
The next two weeks are going to be very busy
Options
- Mark as New
- Bookmark
- Subscribe
- Mute
- Subscribe to RSS Feed
- Permalink
08-16-2015 01:11 PM
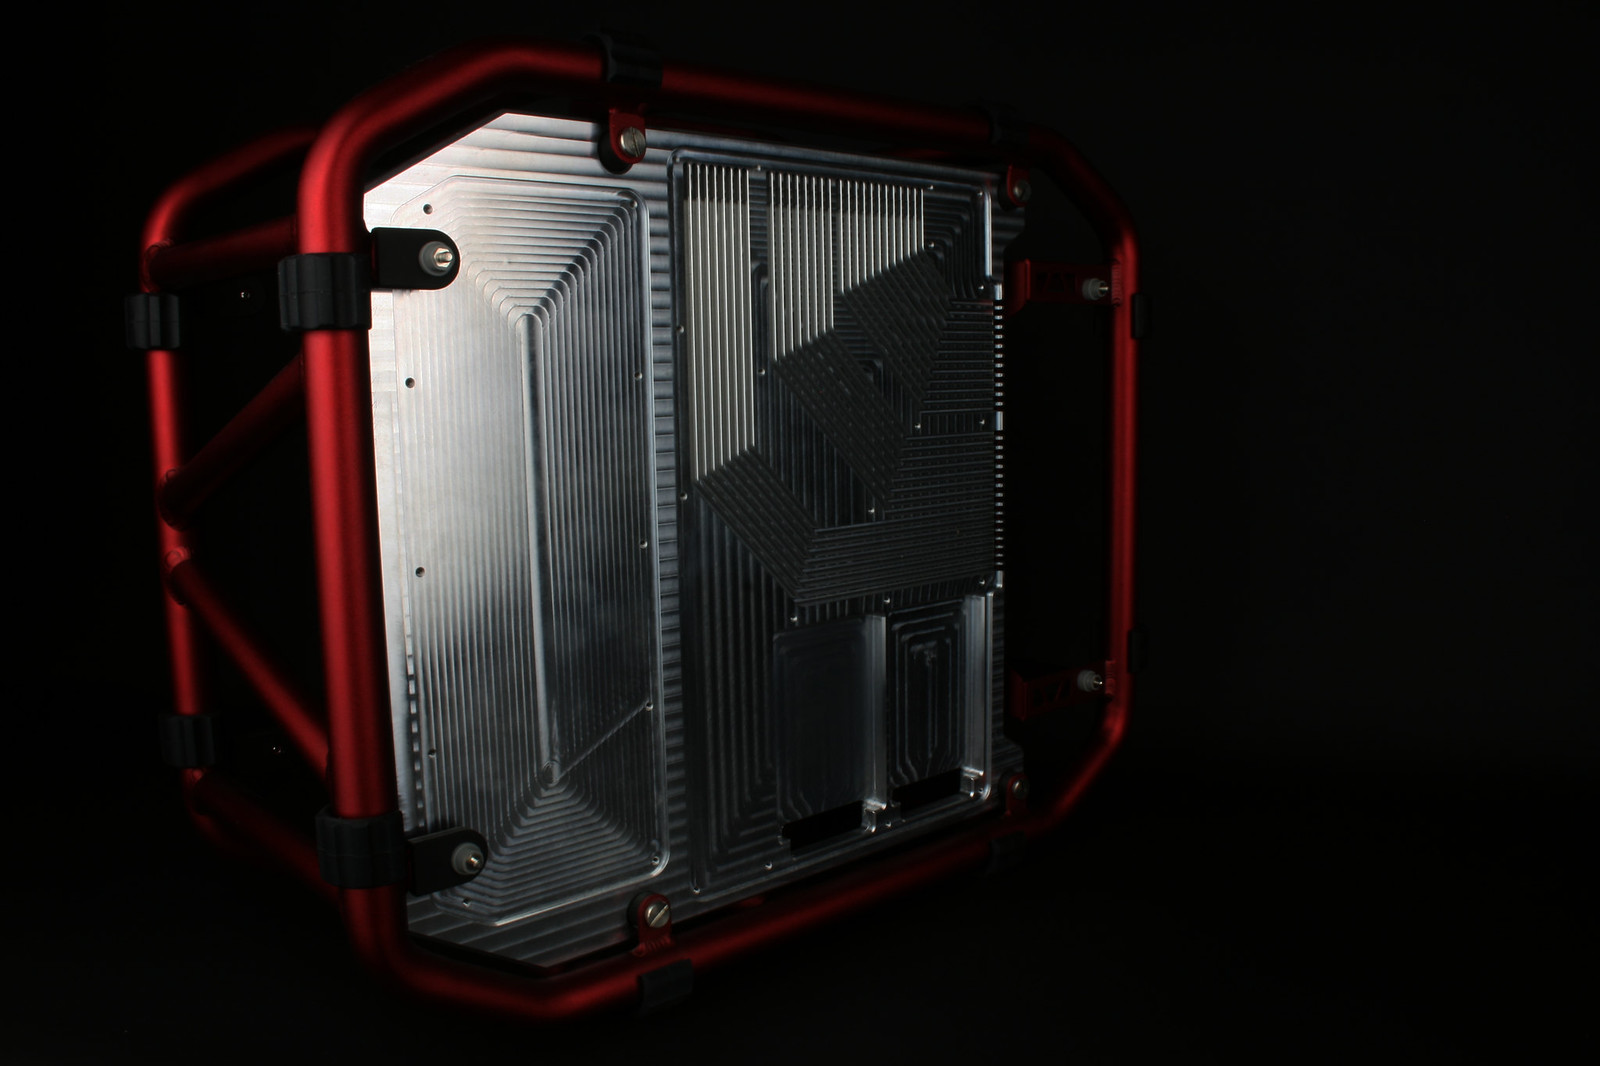
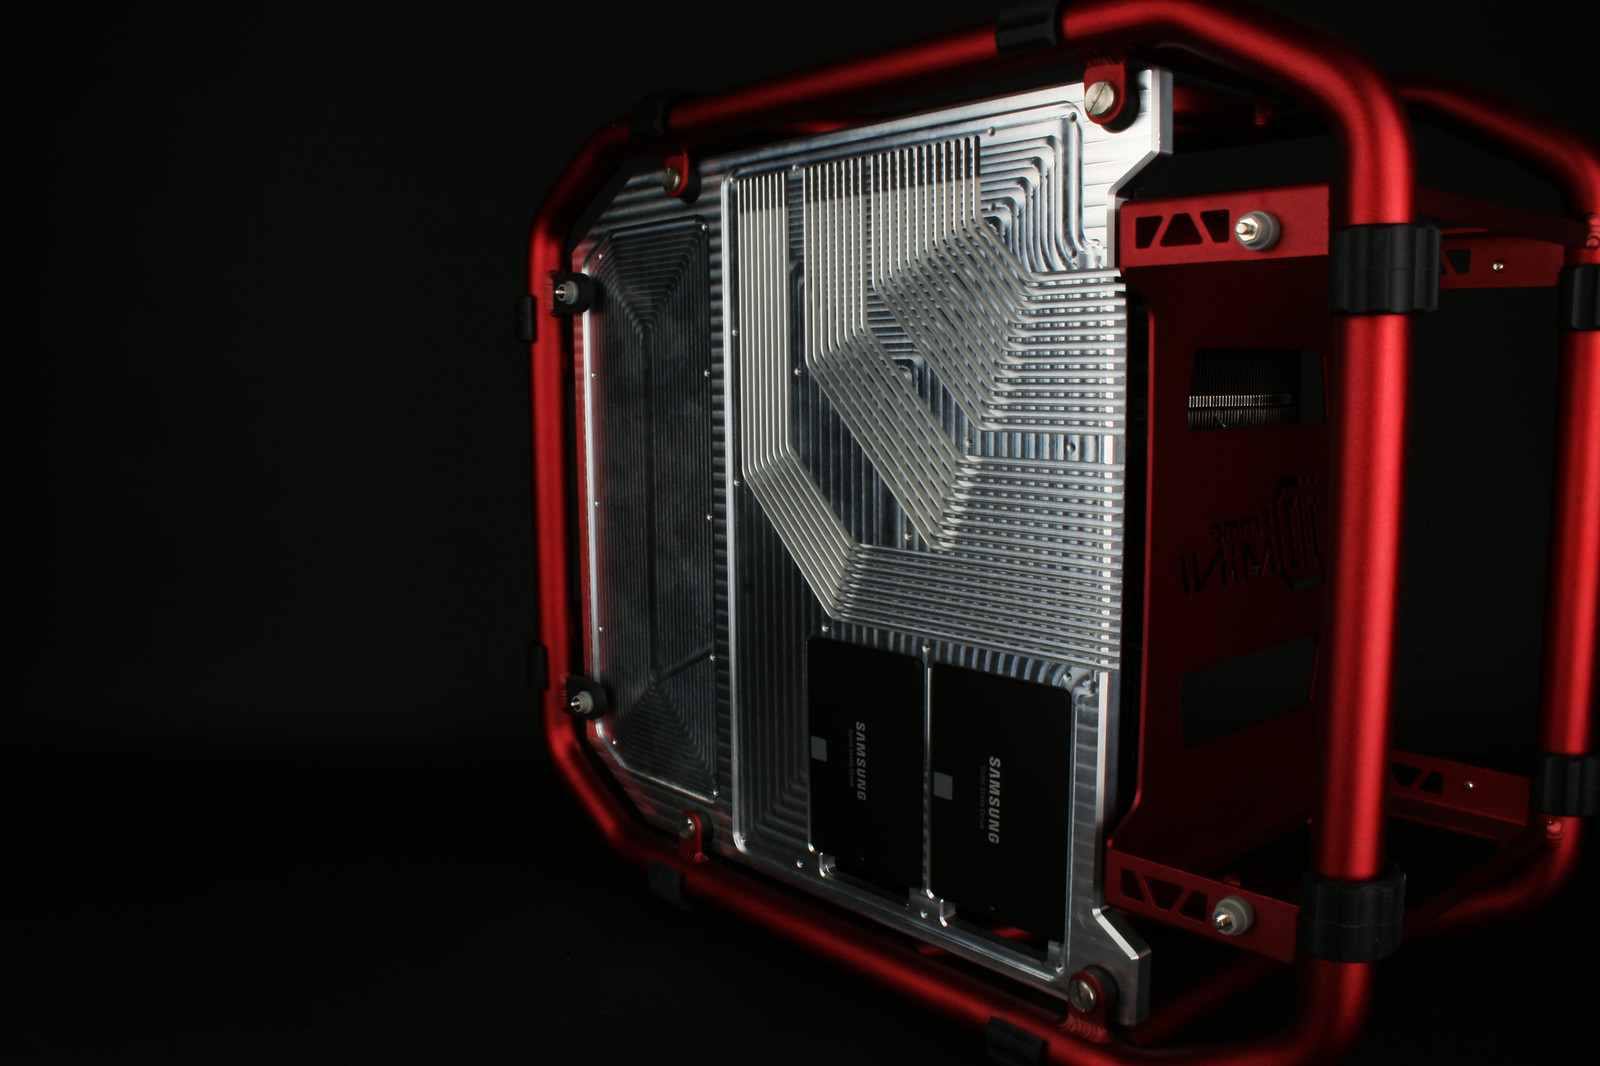
The amazing CNC work from Peter Uhrskov Berg on the custom motherboard tray for Project Deadpool, he is done with this side and will be doing the other side soon.
Can't wait to get it in and put it on the D Frame Mini.
This part makes the In Win D Frame mini hold an E-ATX motherboard, 2x 2,5 inch drive sunken into the tray and the ultimate cable management by using grooves for the 24-pin and up to 4x 8-pin cable to supply two GPU's.
Here are some photo's of the part that he sent me, the other side is being done tomorrow.
The first grooves are cut
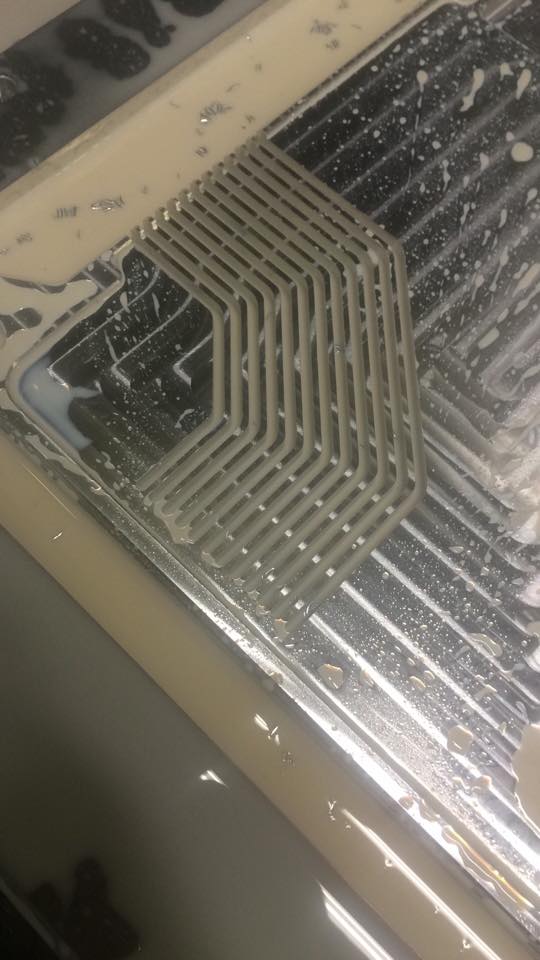
Remaining grooves made
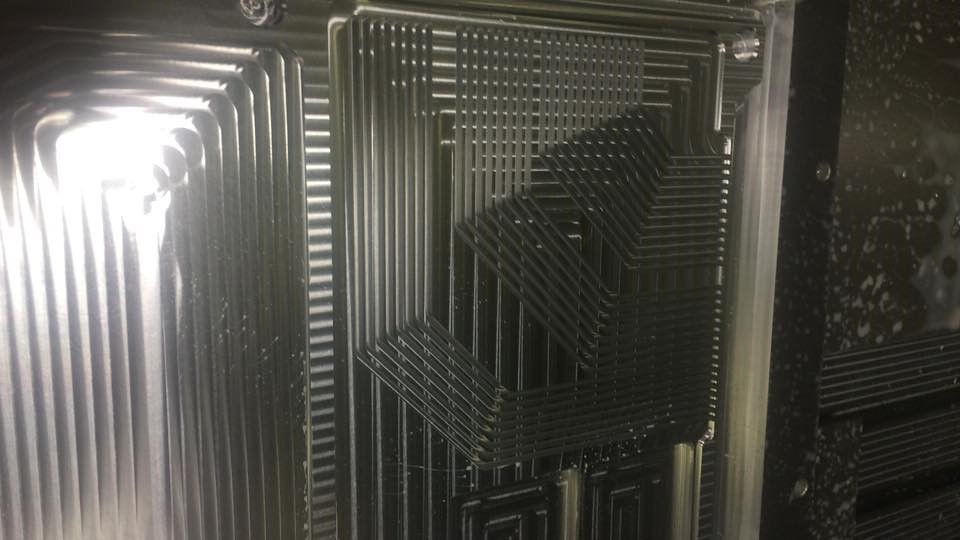
First side completed
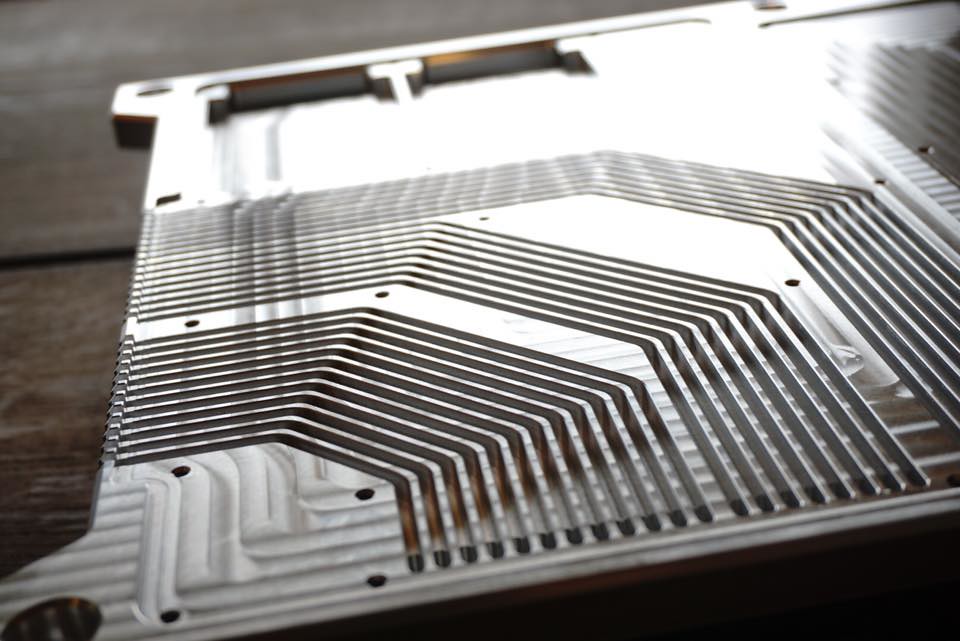
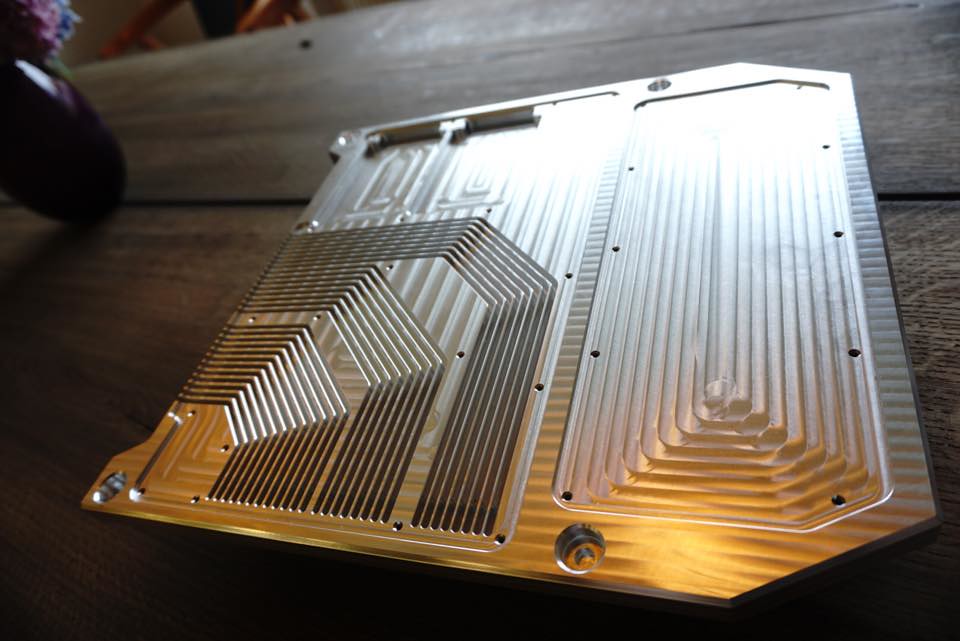
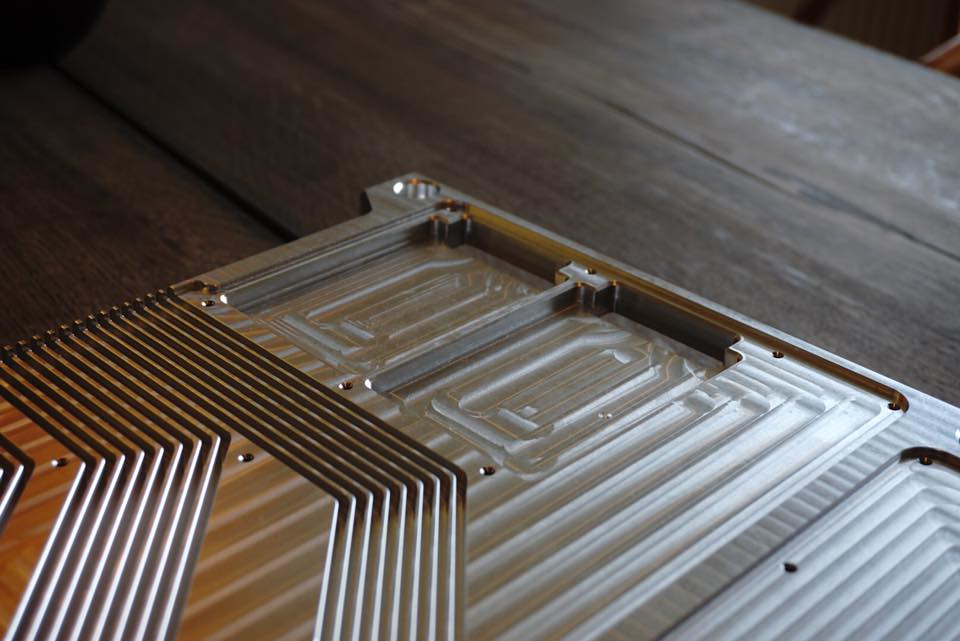
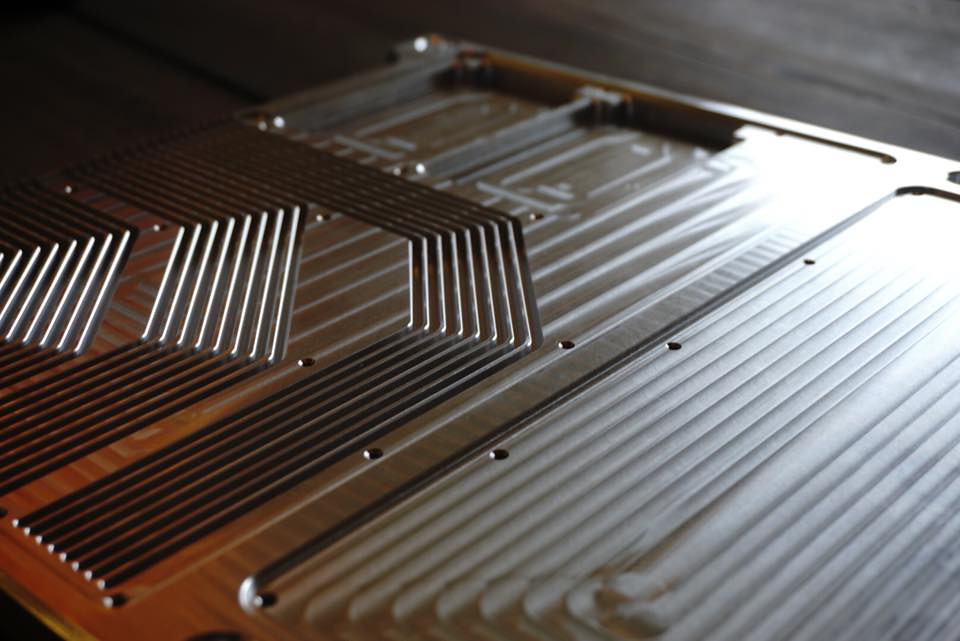
Tomorrow the other side is being done and then it shouldn't take too long before I get it in to fit in the D Frame Mini 🙂
Can't wait to get it in and put it on the D Frame Mini.
This part makes the In Win D Frame mini hold an E-ATX motherboard, 2x 2,5 inch drive sunken into the tray and the ultimate cable management by using grooves for the 24-pin and up to 4x 8-pin cable to supply two GPU's.
Here are some photo's of the part that he sent me, the other side is being done tomorrow.
The first grooves are cut
Remaining grooves made
First side completed
Tomorrow the other side is being done and then it shouldn't take too long before I get it in to fit in the D Frame Mini 🙂
Options
- Mark as New
- Bookmark
- Subscribe
- Mute
- Subscribe to RSS Feed
- Permalink
08-17-2015 07:08 AM
Options
- Mark as New
- Bookmark
- Subscribe
- Mute
- Subscribe to RSS Feed
- Permalink
09-11-2015 10:36 PM
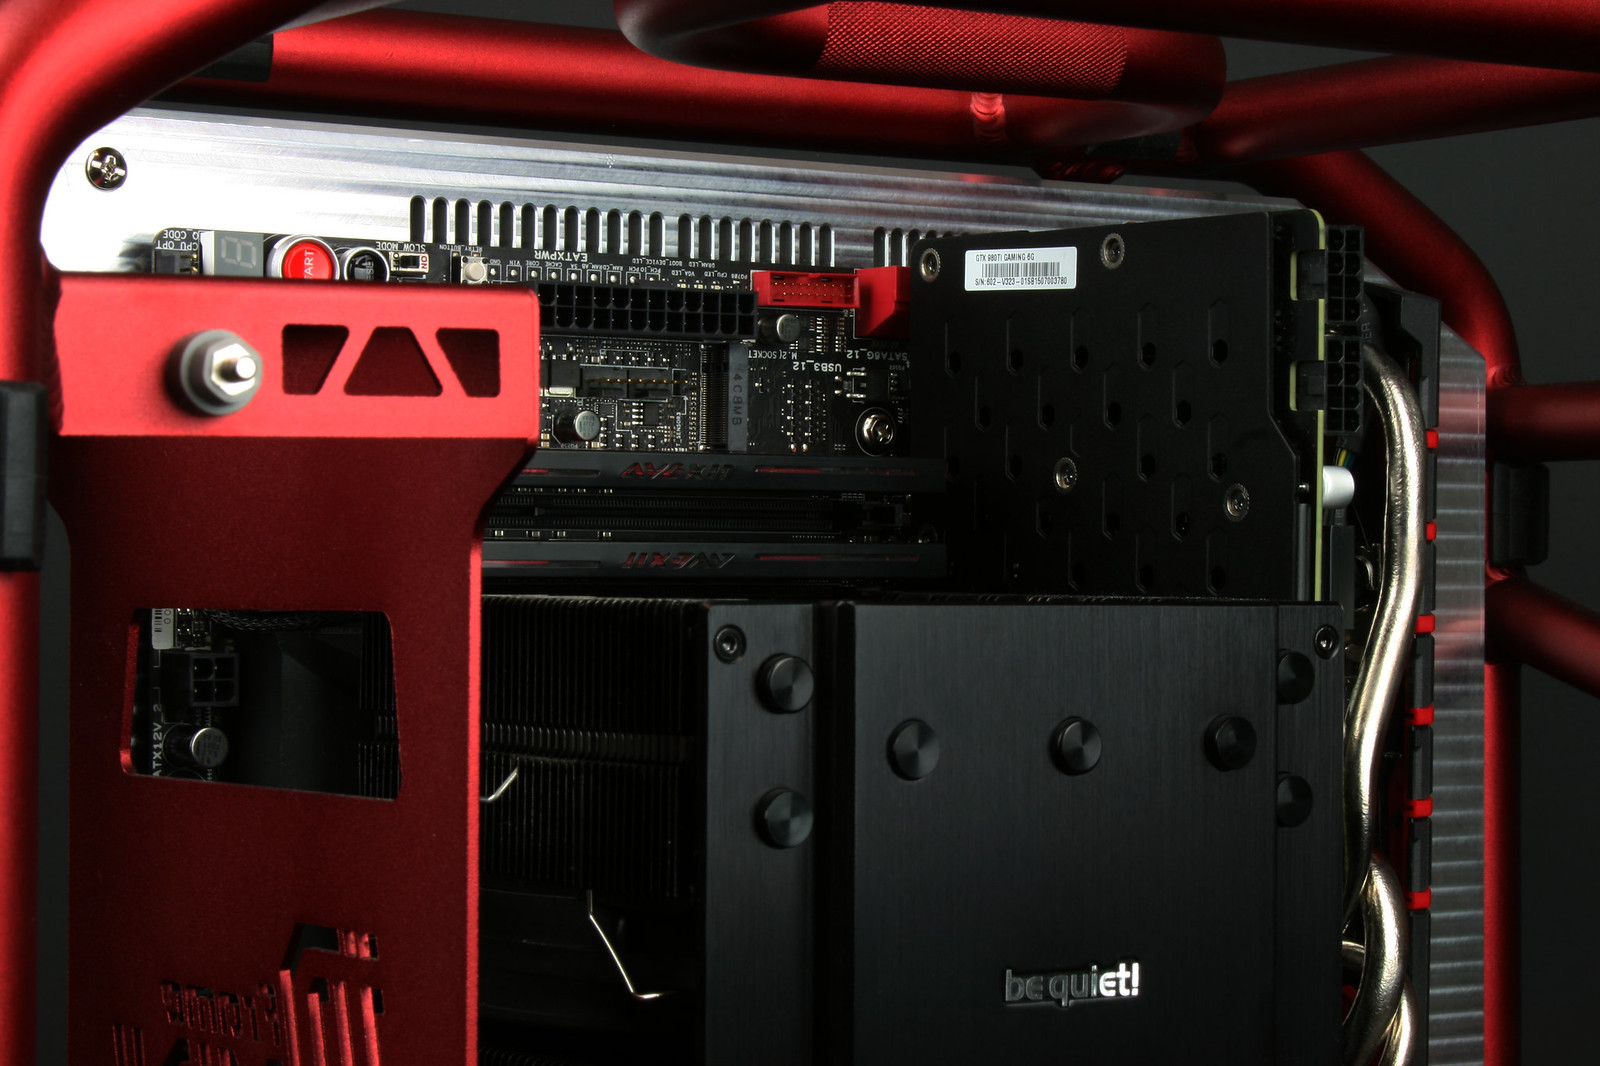
This build is now divided into two stages, the first being air, the build will be put together and in working order on air for testing and OC'ing before i continue and go on to stage two which is of course water, watercooling will be added and for that I am now designing a custom radiator and pump mount.
Okay now it is time for the actual update 😄
It's been a while but finally the update I was looking forward to, in this update I test fitted all the hardware on the custom tray 🙂
I finally received my Thread cutters for 6-32 (the size that the stand offs use) and went straight to it.
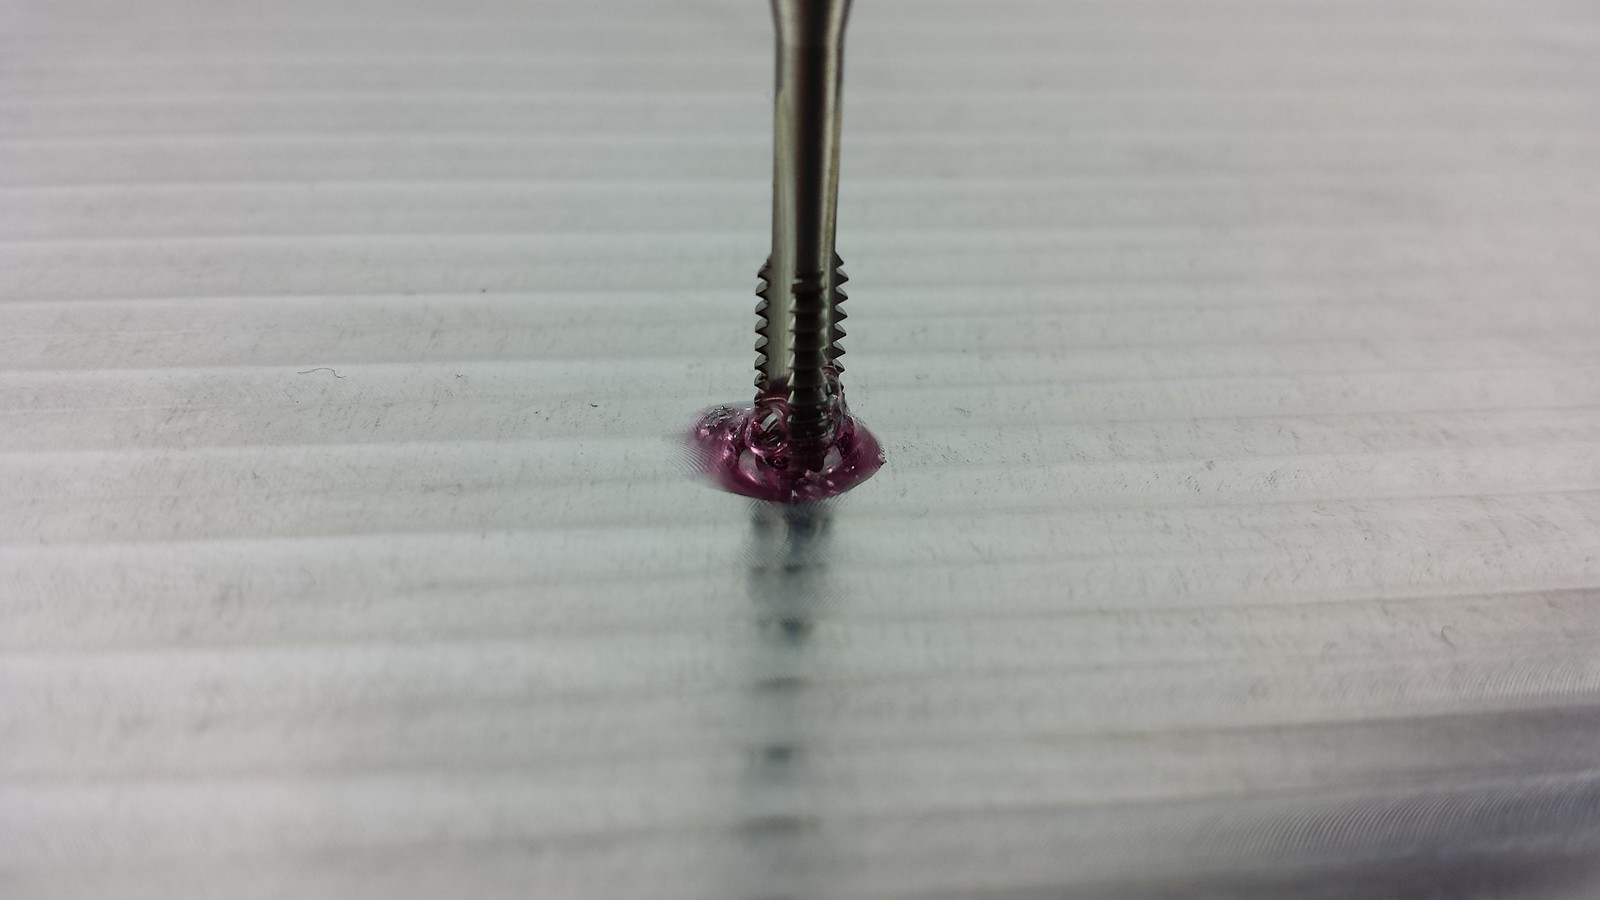
I don't have any photo's of mounting the hardware because that's pretty basic and I was too enthusiast to think about it.
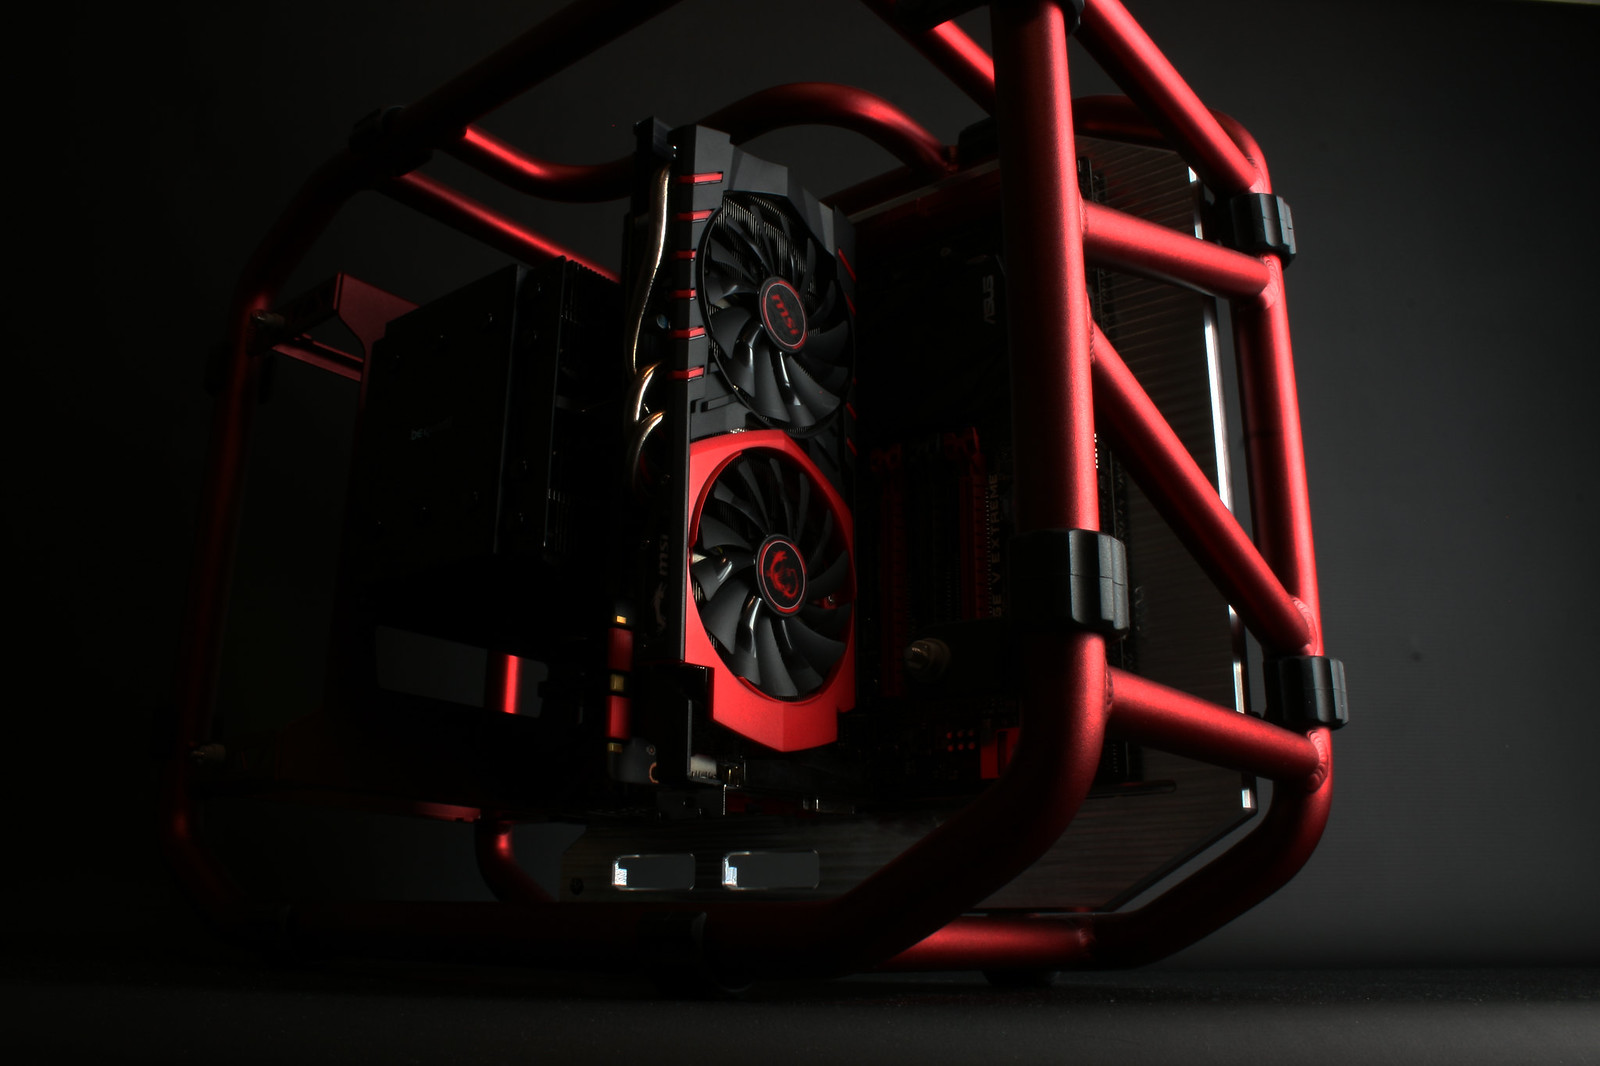
Here are some pictures that I made after everything was mounted, there are a lot more pictures but I won't post all of them.
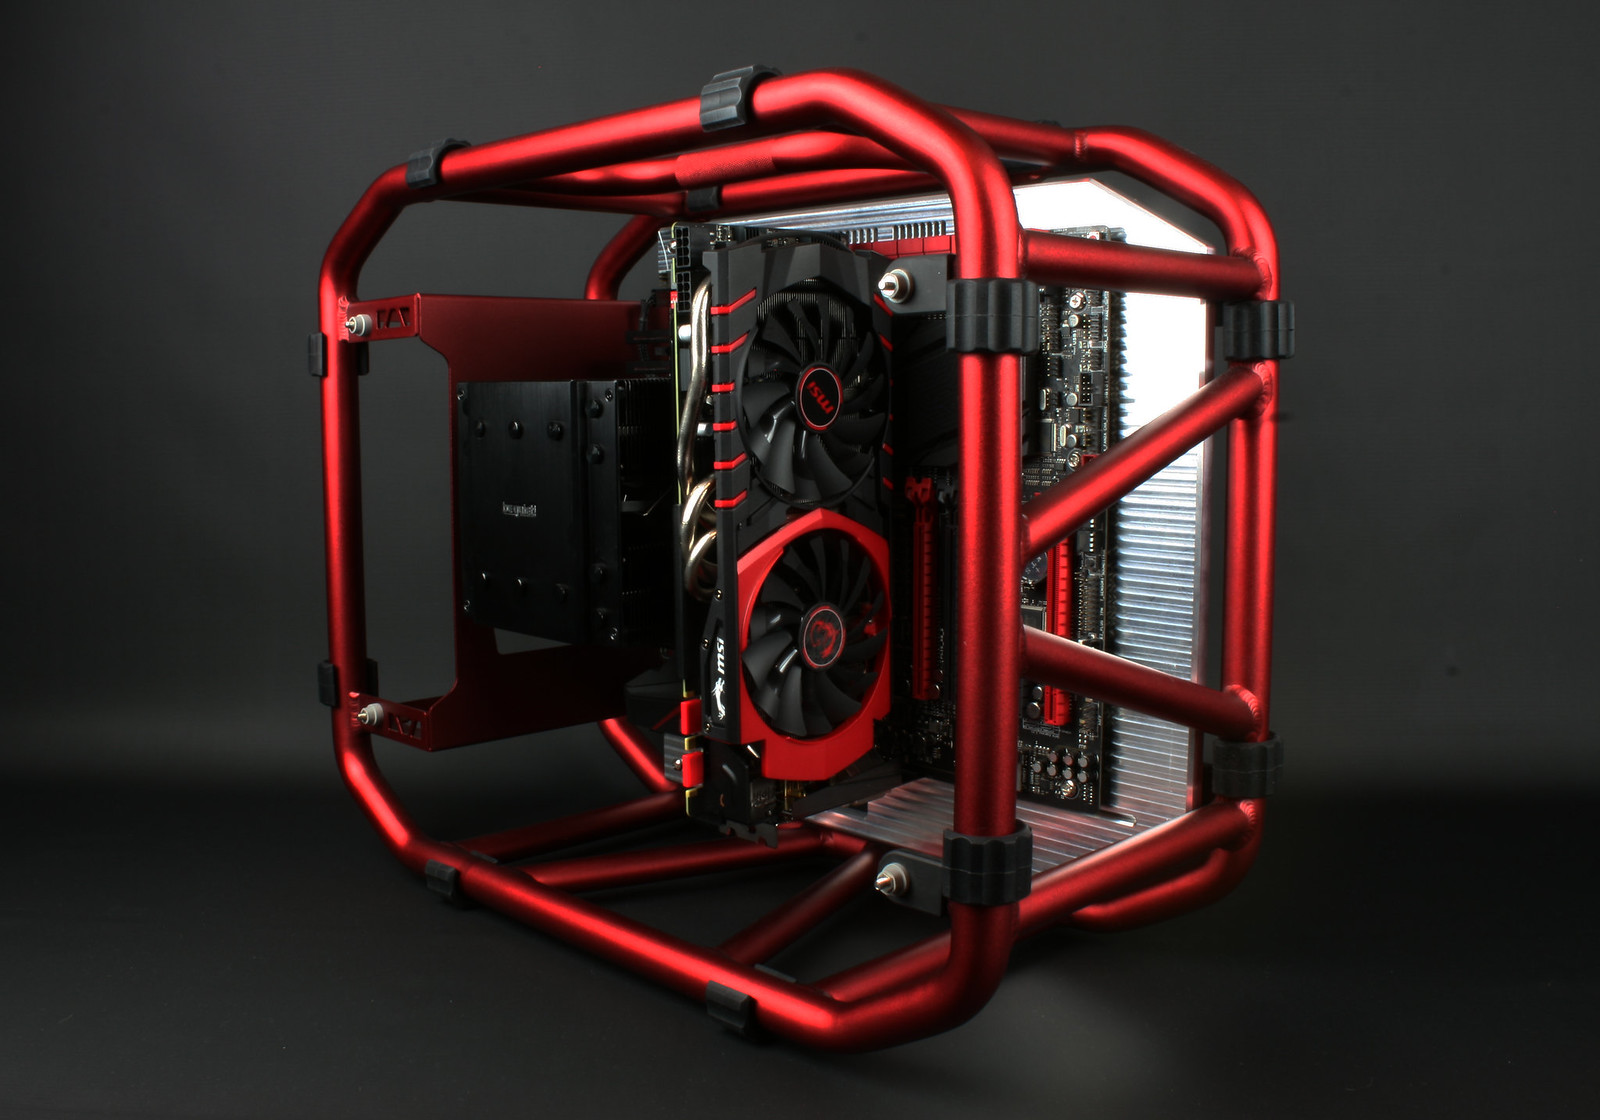
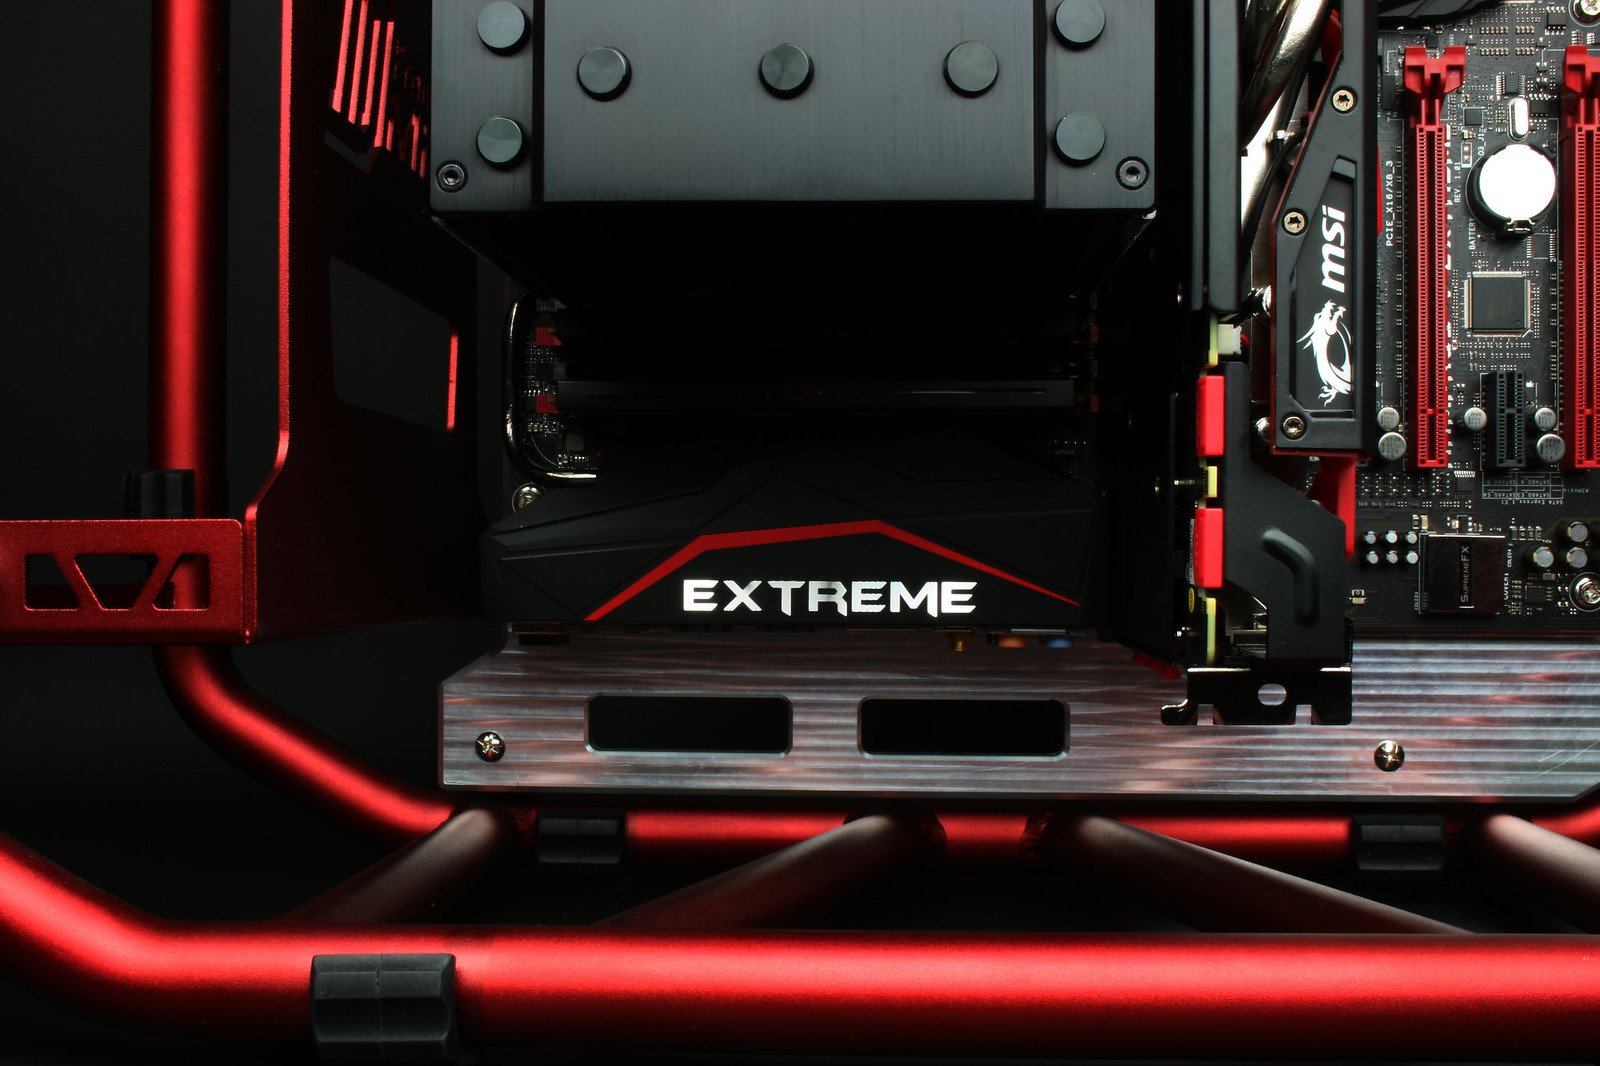
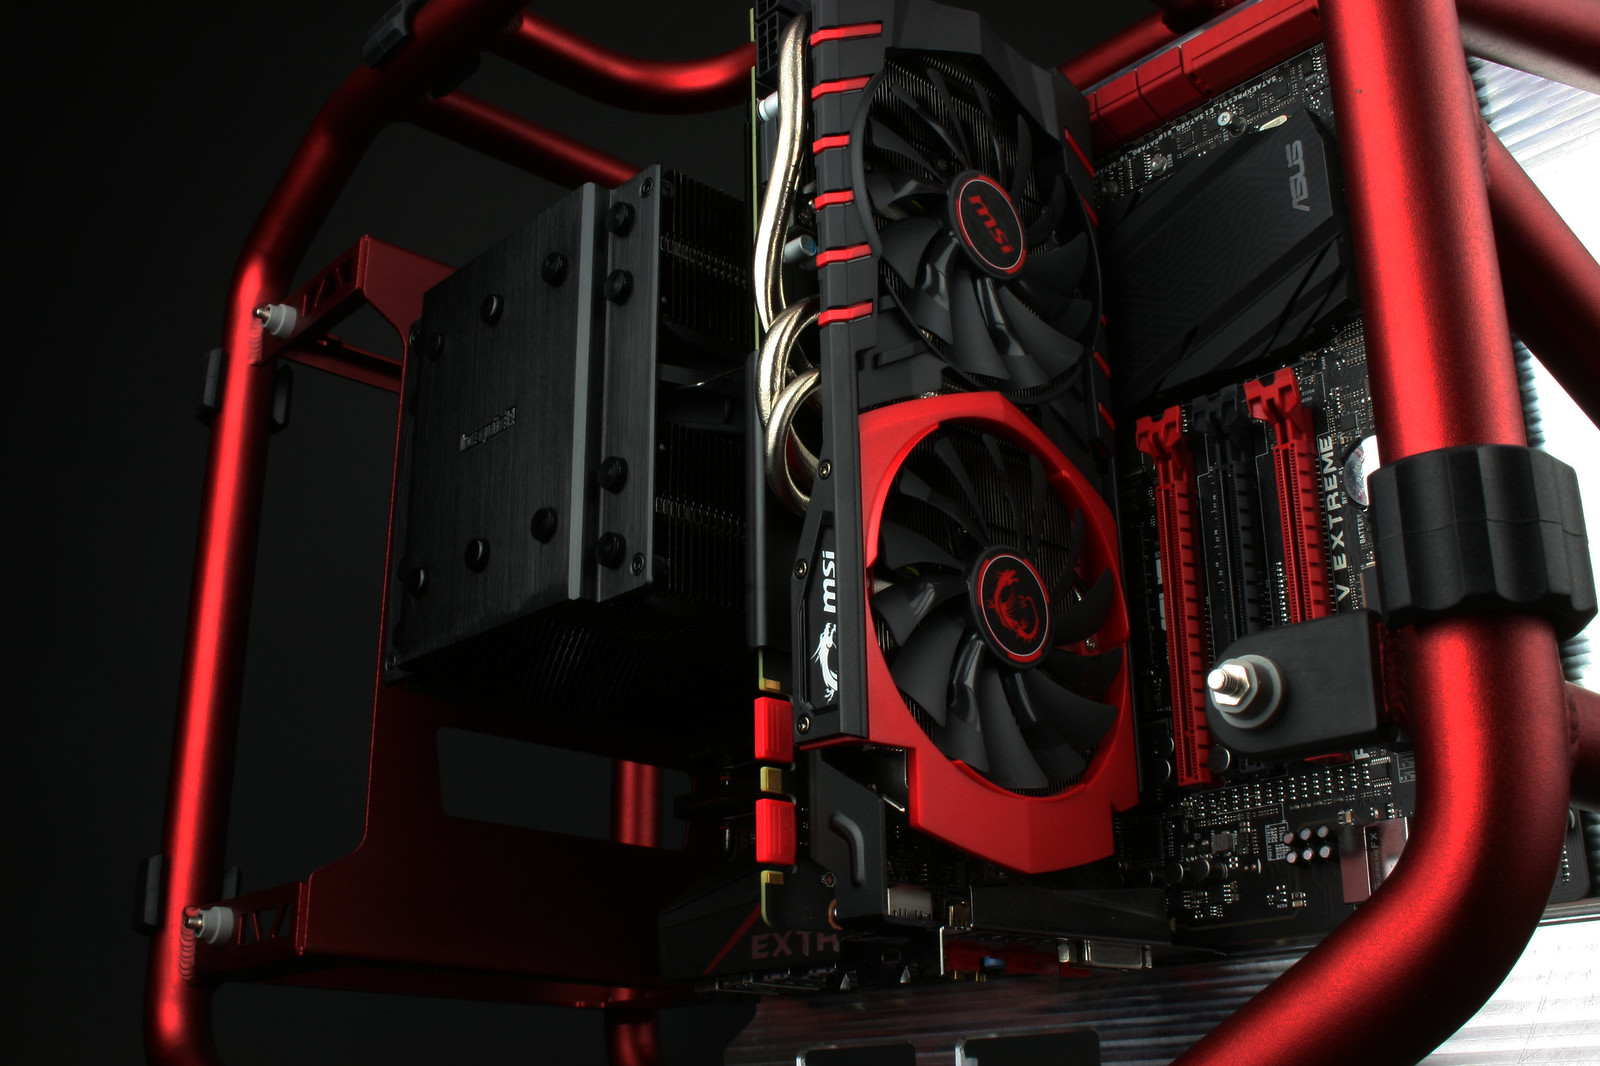
I've also put together another banner, this one I made myself, what's your opinion, which one should I use?
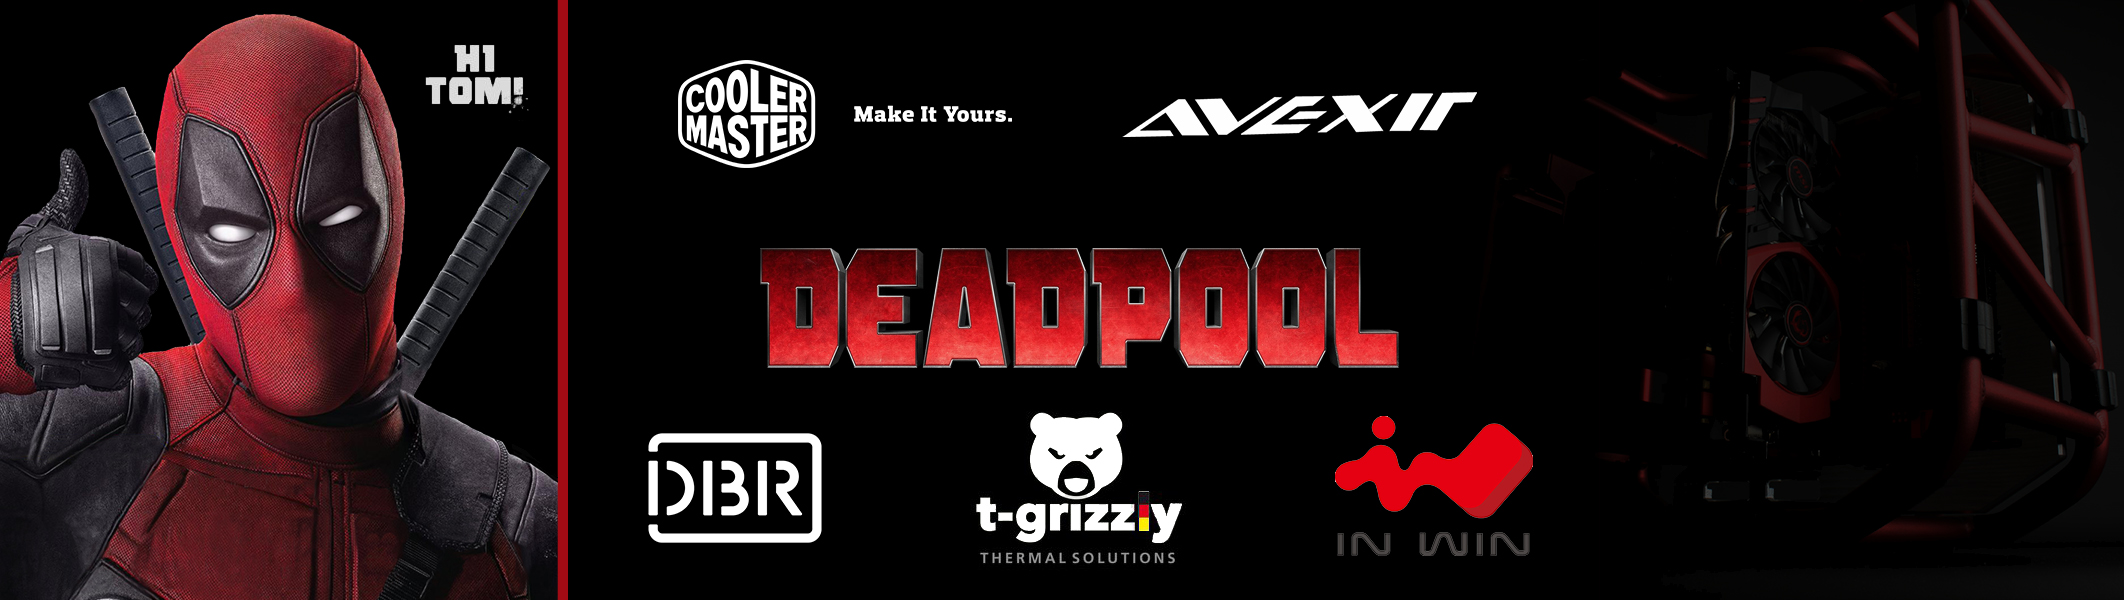
In this new banner you can also clearly see two new supporters of Project Deadpool, T-Grizzly and Cooler Master joined the project.
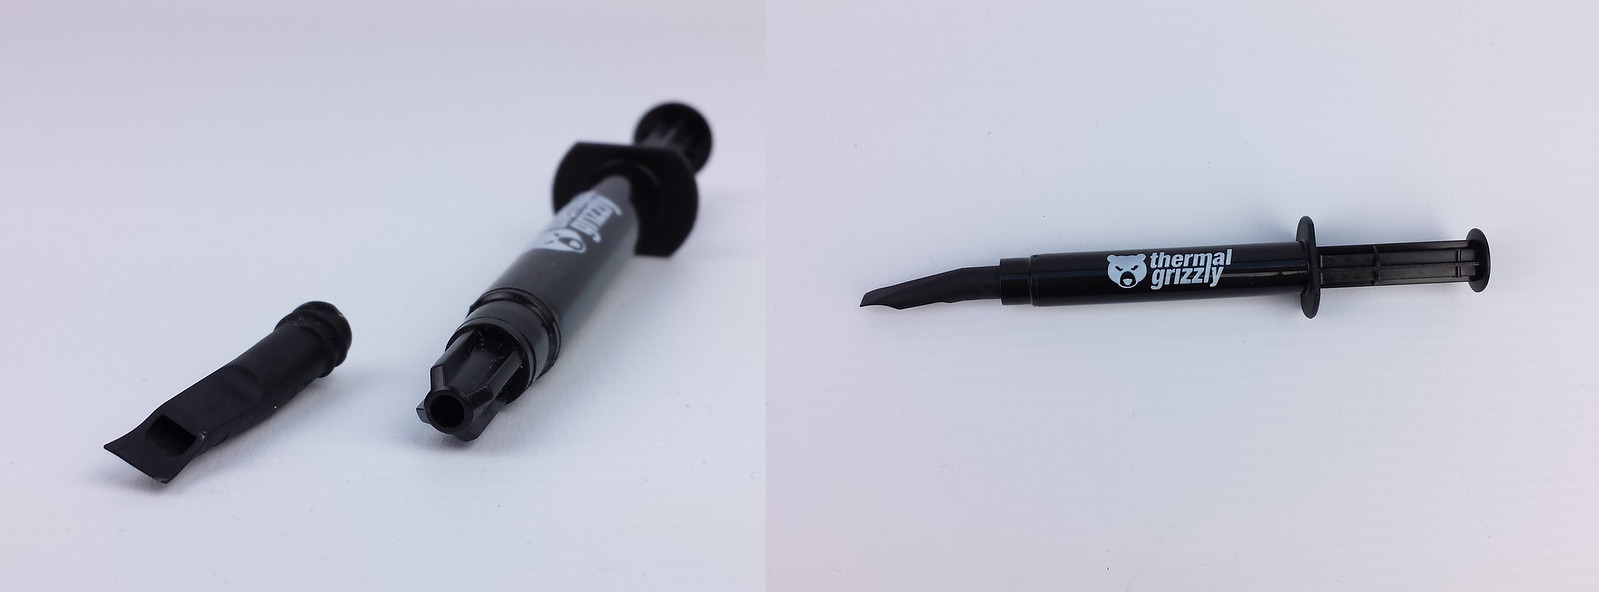
T-Grizzly sent out two Hydronaut kits for this and future projects, this is one of their High End Thermal Paste and comes with a special applying nozzle (called an Applicator) O.o can't wait to use it 😄
Cooler Master is sponsoring a PSU, the V1000 to be specific and also two other things but I'll keep that for myself for now 🙂
Tell me your opinion about the current progress, even if you think something is off or did I forget to explain or mention something ?
Next update will probably have pictures of the modified SATA power connectors since they where 2 hairs too long and I need to make them a tiny bit shorter to have it fit and work 🙂
Okay now it is time for the actual update 😄
It's been a while but finally the update I was looking forward to, in this update I test fitted all the hardware on the custom tray 🙂
I finally received my Thread cutters for 6-32 (the size that the stand offs use) and went straight to it.
I don't have any photo's of mounting the hardware because that's pretty basic and I was too enthusiast to think about it.
Here are some pictures that I made after everything was mounted, there are a lot more pictures but I won't post all of them.
I've also put together another banner, this one I made myself, what's your opinion, which one should I use?
In this new banner you can also clearly see two new supporters of Project Deadpool, T-Grizzly and Cooler Master joined the project.
T-Grizzly sent out two Hydronaut kits for this and future projects, this is one of their High End Thermal Paste and comes with a special applying nozzle (called an Applicator) O.o can't wait to use it 😄
Cooler Master is sponsoring a PSU, the V1000 to be specific and also two other things but I'll keep that for myself for now 🙂
Tell me your opinion about the current progress, even if you think something is off or did I forget to explain or mention something ?
Next update will probably have pictures of the modified SATA power connectors since they where 2 hairs too long and I need to make them a tiny bit shorter to have it fit and work 🙂
Options
- Mark as New
- Bookmark
- Subscribe
- Mute
- Subscribe to RSS Feed
- Permalink
10-11-2015 03:53 PM
For some time there was no update, the reason was that I had to wait a little for the last package.
Cooler Master didn't have everything in stock (especially the PSU) but when they finally had everything they got it over to me in record time 🙂
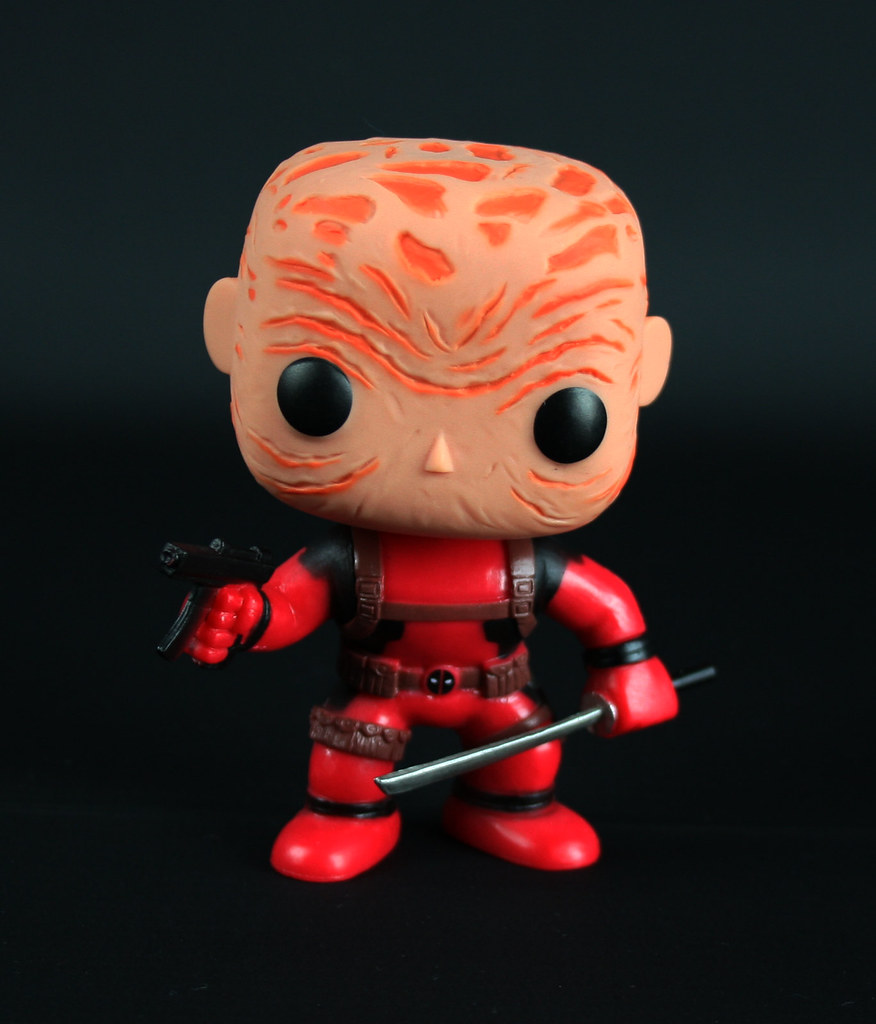
I have picked up a bobblehead Deadpool figure when I was at Firstlook (Dutch gaming event) so he will watch over me working on everything 😉
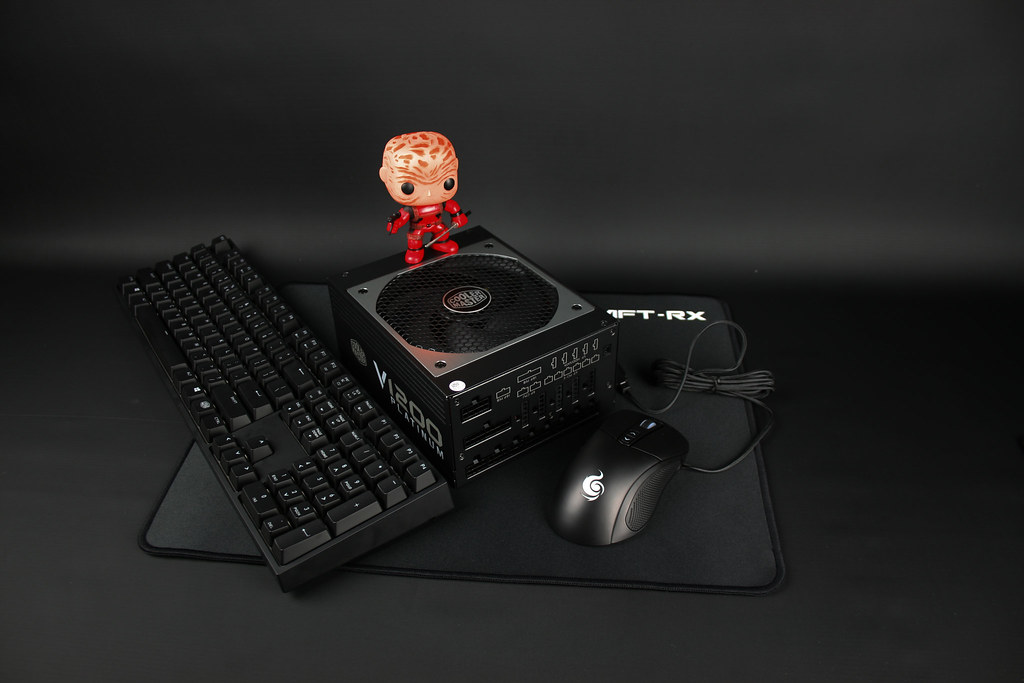
In the package was the final main hardware part, they sent over their V1200 PSU, the newly released Quickfire XTi keyboard, a Mizar mouse and also the Swift RX Large mouse mat to make the set complete 😄
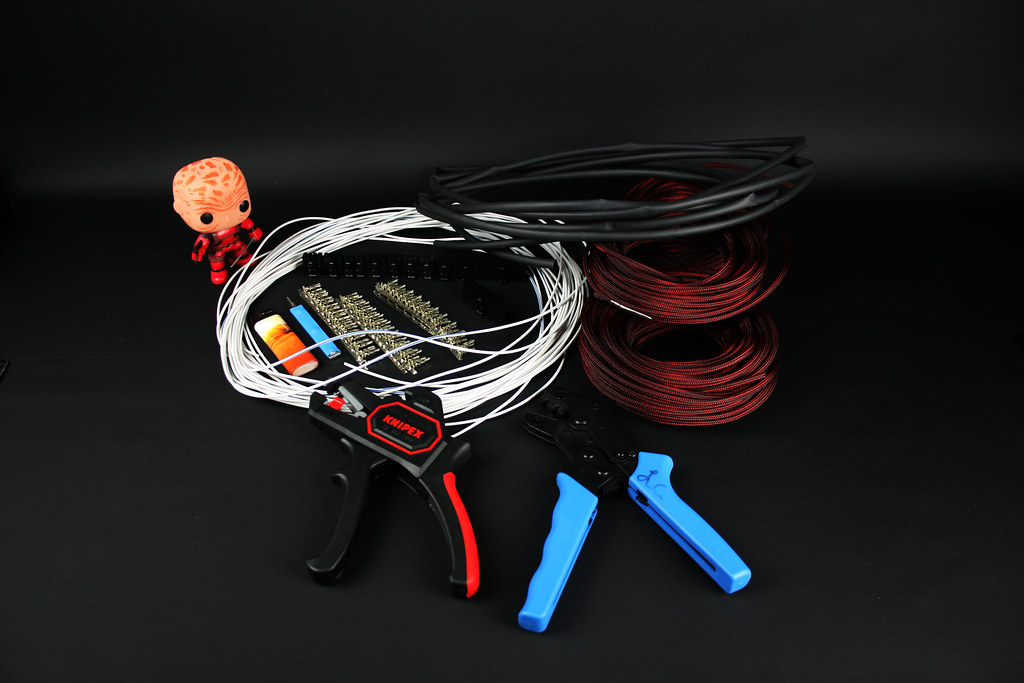
Everything for sleeving the cables is in, some Teleios Red and Black fusion sleeving, heatshrink for heatshrinkless style sleeving (yeah makes no sense), connectors, terminals, LC crimper, wire stripper, 18 AWG black wire (not in the picture) and some thinner white cables since the black wires are a tiny bit to thick for the grooves on the back and these are thinner so they'll be able to go in between.
Next week it will be time for me to burn my fingers sleeving the cables 😄
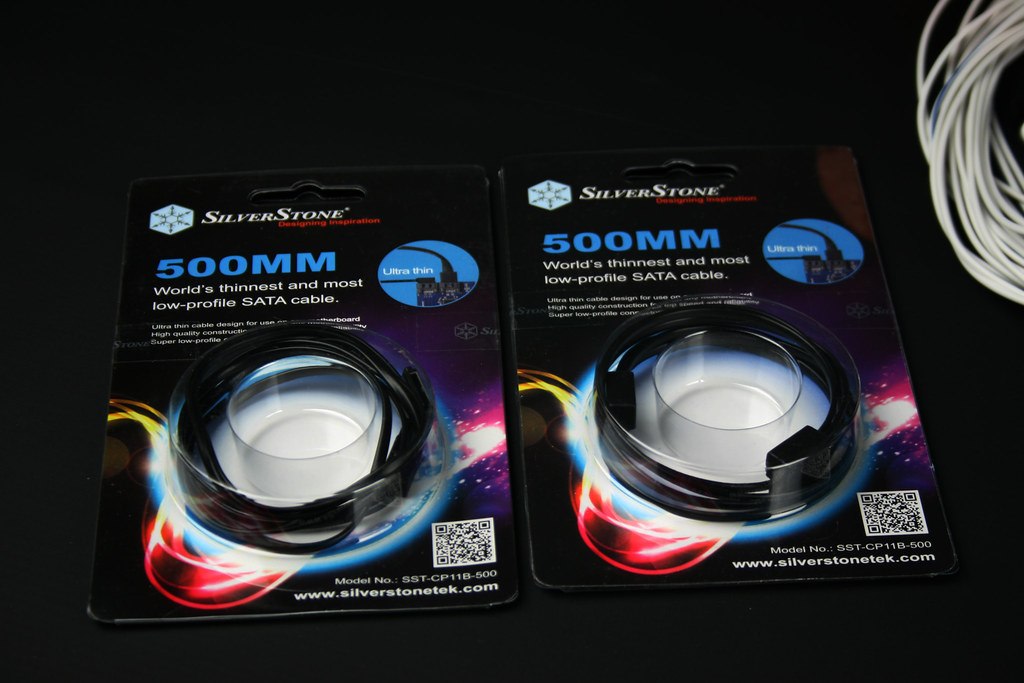
In the meanwhile I also got two longer SATA data cables since the 30CM versions came short by 2-3 centimeters thanks to the layout change, these 50CM versions should do the trick.
Cooler Master didn't have everything in stock (especially the PSU) but when they finally had everything they got it over to me in record time 🙂
I have picked up a bobblehead Deadpool figure when I was at Firstlook (Dutch gaming event) so he will watch over me working on everything 😉
In the package was the final main hardware part, they sent over their V1200 PSU, the newly released Quickfire XTi keyboard, a Mizar mouse and also the Swift RX Large mouse mat to make the set complete 😄
Everything for sleeving the cables is in, some Teleios Red and Black fusion sleeving, heatshrink for heatshrinkless style sleeving (yeah makes no sense), connectors, terminals, LC crimper, wire stripper, 18 AWG black wire (not in the picture) and some thinner white cables since the black wires are a tiny bit to thick for the grooves on the back and these are thinner so they'll be able to go in between.
Next week it will be time for me to burn my fingers sleeving the cables 😄
In the meanwhile I also got two longer SATA data cables since the 30CM versions came short by 2-3 centimeters thanks to the layout change, these 50CM versions should do the trick.
