Turn on suggestions
Auto-suggest helps you quickly narrow down your search results by suggesting possible matches as you type.
Showing results for
- Republic of Gamers Forum
- Discussions
- Case Mods & PC Builds
- XB'owner (water cooled pc inside xbox one)
Options
- Subscribe to RSS Feed
- Mark Topic as New
- Mark Topic as Read
- Float this Topic for Current User
- Bookmark
- Subscribe
- Mute
- Printer Friendly Page
XB'owner (water cooled pc inside xbox one)
Options
- Mark as New
- Bookmark
- Subscribe
- Mute
- Subscribe to RSS Feed
- Permalink
03-11-2016
11:47 AM
- last edited on
03-06-2024
02:31 AM
by
![]() ROGBot
ROGBot
A little warning up front, this thread is going to be picture heavy.
So, ever since the Xbox one was released, and we knew it's dimensions, I was pretty certain a pc would fit in there.
And so ever since I've been planning out how to optimize a build in there. I've had different idea's on how to make it possible, but yet it never quite fit.:( Then I finally decided to keep the psu out of the case (just like the xbox has) and work from there. And let me tell you there's a whole lot of room.:o
So now finally the time has come to actually build the damn thing, and see if my planning is any good.
So here's the component list:
Case: Xbox one (off course)
Mobo: Asus Maximu VII Impact
CPU: Intel core i5-4690k
Memory: 16Gb Crucial Ballistix DDR3 1600MHz CL9 (Low profile)
GPU: TBA
PSU: SilverStone ST45SF-G (450W sfx, 80 plus gold)
Storage: 750 GB WD Black 2,5" hdd + 250GB Samsung 850 EVO ssd + .........
Cooling: EK-FB ASUS M6I - Nickel + even more.
HAHAHAHAAAA....., you really thought it was going to be that easy? hell no!! 😛 (well only the gpu left I guess)
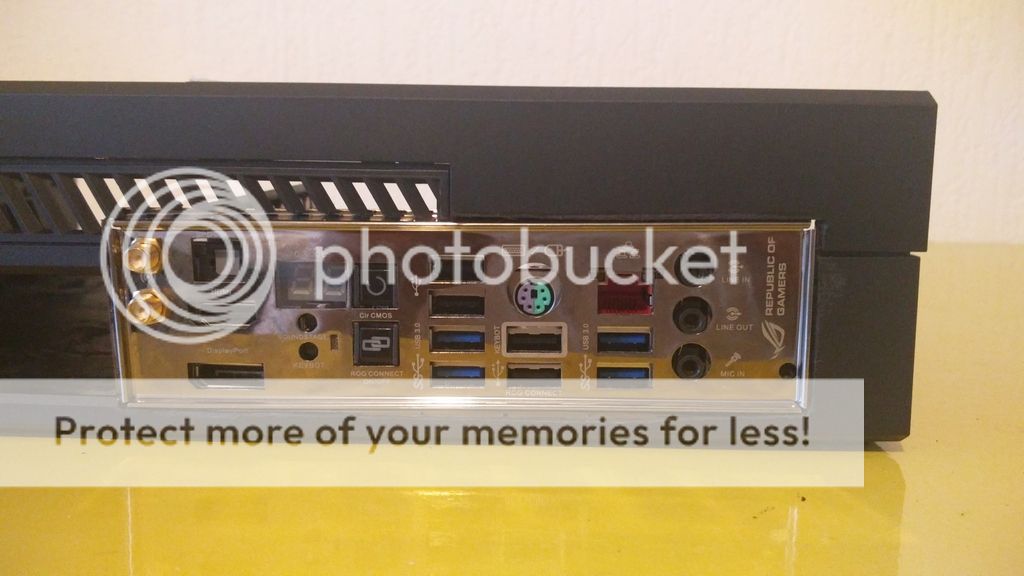
But first to start off with, the case. We all know how it looks but still I have to make some photo's right??
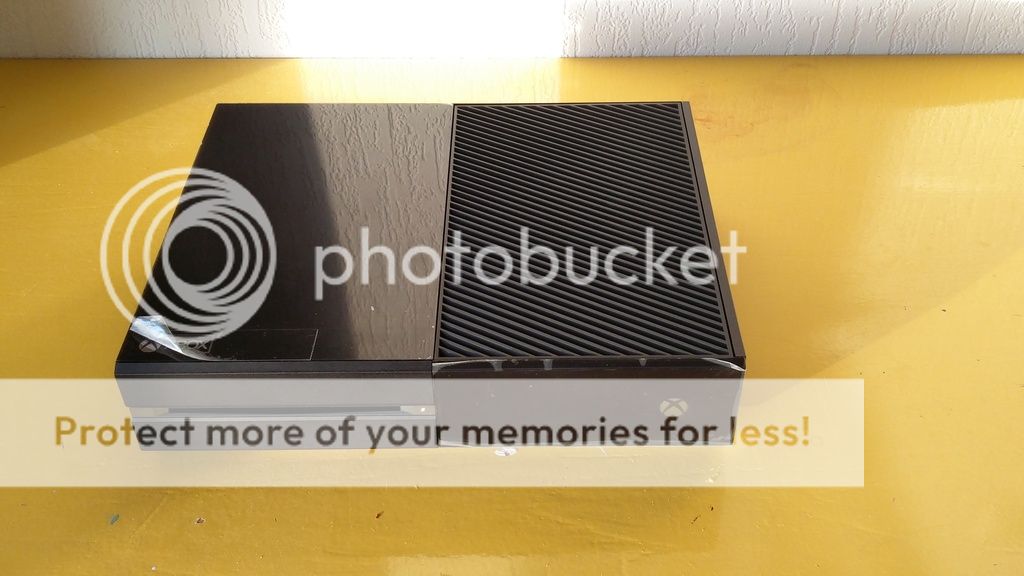


I got the case from ebay, and apparently the inner metal case was also included, but I won't be needing that. If YOU do, you know where to find me.(Filthy console peasant)
Oh and by the way these feet are really sticky:
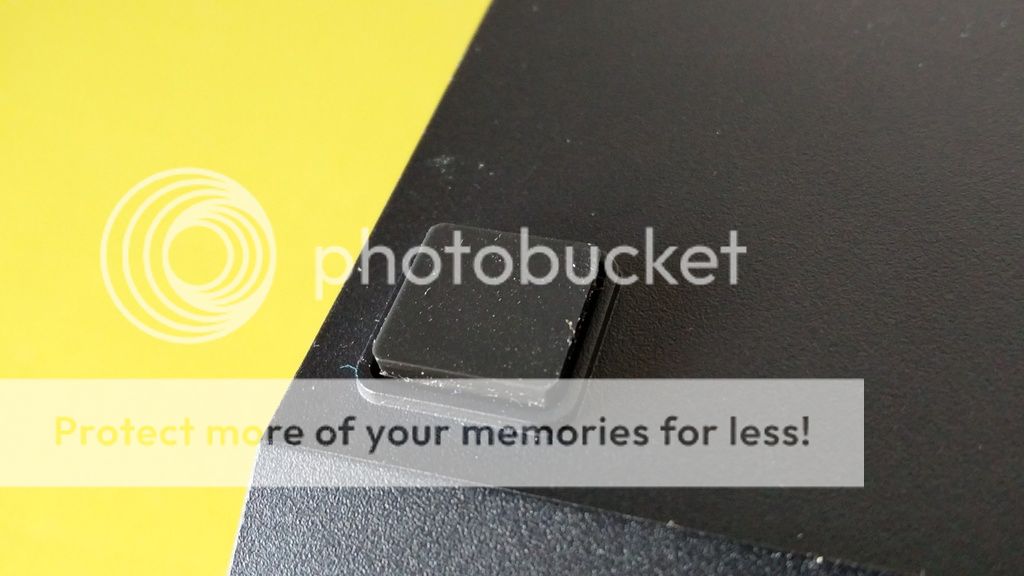
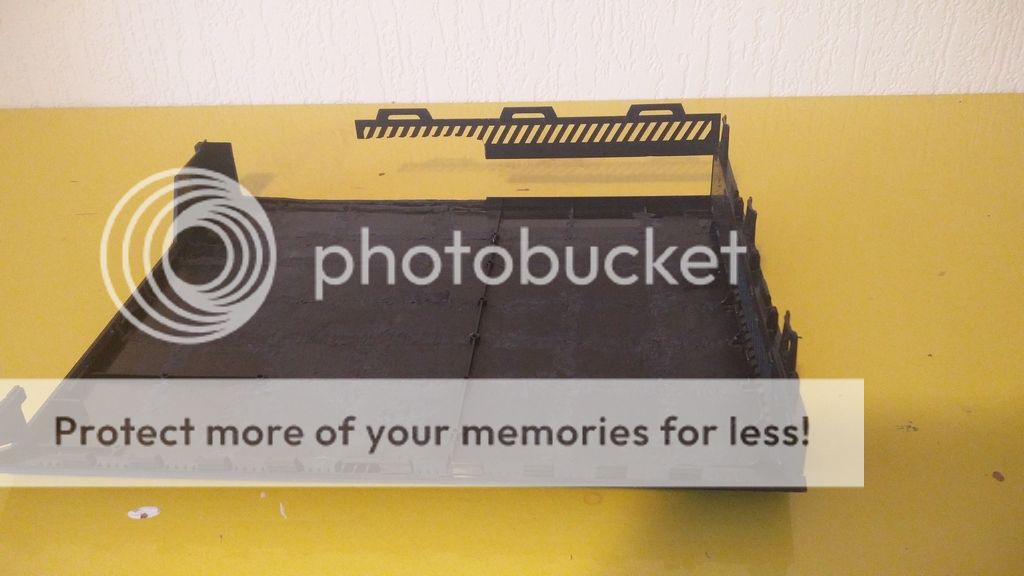
So that was the outside, now let's go inside:


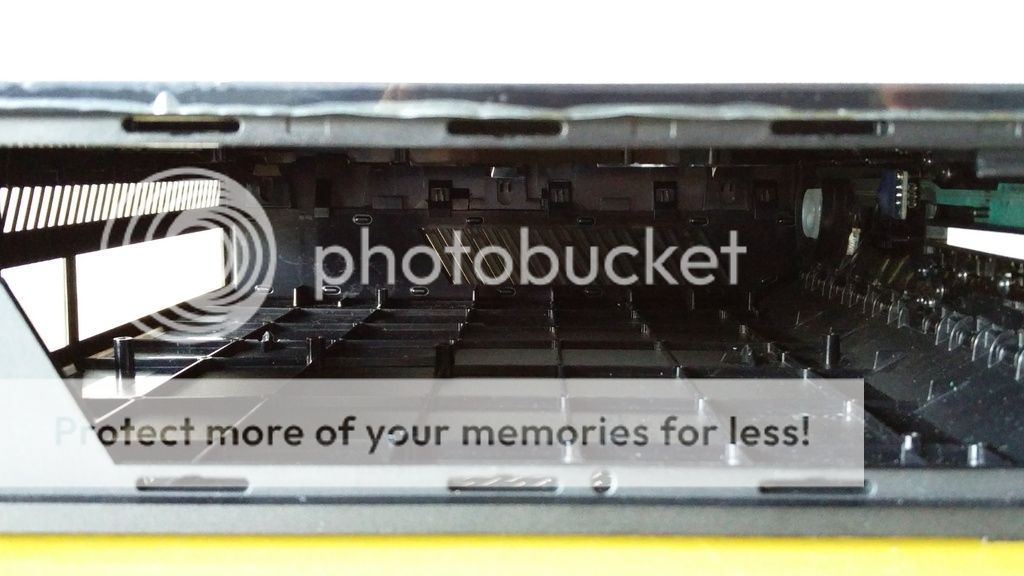


And that was it for now. In the next update we're going to rip this thing apart. MUHAHAHAHA (insert devil emoticon) (WHAAAA, it's not here :()
So, ever since the Xbox one was released, and we knew it's dimensions, I was pretty certain a pc would fit in there.
And so ever since I've been planning out how to optimize a build in there. I've had different idea's on how to make it possible, but yet it never quite fit.:( Then I finally decided to keep the psu out of the case (just like the xbox has) and work from there. And let me tell you there's a whole lot of room.:o
So now finally the time has come to actually build the damn thing, and see if my planning is any good.
So here's the component list:
Case: Xbox one (off course)
Mobo: Asus Maximu VII Impact
CPU: Intel core i5-4690k
Memory: 16Gb Crucial Ballistix DDR3 1600MHz CL9 (Low profile)
GPU: TBA
PSU: SilverStone ST45SF-G (450W sfx, 80 plus gold)
Storage: 750 GB WD Black 2,5" hdd + 250GB Samsung 850 EVO ssd + .........
Cooling: EK-FB ASUS M6I - Nickel + even more.
HAHAHAHAAAA....., you really thought it was going to be that easy? hell no!! 😛 (well only the gpu left I guess)
But first to start off with, the case. We all know how it looks but still I have to make some photo's right??
I got the case from ebay, and apparently the inner metal case was also included, but I won't be needing that. If YOU do, you know where to find me.(Filthy console peasant)
Oh and by the way these feet are really sticky:
So that was the outside, now let's go inside:
And that was it for now. In the next update we're going to rip this thing apart. MUHAHAHAHA (insert devil emoticon) (WHAAAA, it's not here :()
13,301 Views
14 REPLIES 14
Options
- Mark as New
- Bookmark
- Subscribe
- Mute
- Subscribe to RSS Feed
- Permalink
03-11-2016 11:58 AM
This is the dream of every Xbox come true for one very lucky one! 😄
Options
- Mark as New
- Bookmark
- Subscribe
- Mute
- Subscribe to RSS Feed
- Permalink
03-13-2016 10:36 AM
You are definitely going have to make the PSU external. Even an SFX PSU is going to be hard pressed to fit in there.
I would do an Impact with a full cover block and then something like a Fury Nano or Fury X with a block and then offset it with a PCIE extension. The top vents on the XB1 should be perfect for a 240mm rad which should be enough for the entire system.
I would do an Impact with a full cover block and then something like a Fury Nano or Fury X with a block and then offset it with a PCIE extension. The top vents on the XB1 should be perfect for a 240mm rad which should be enough for the entire system.
Options
- Mark as New
- Bookmark
- Subscribe
- Mute
- Subscribe to RSS Feed
- Permalink
03-13-2016 12:08 PM
AMP_US wrote:
You are definitely going have to make the PSU external. Even an SFX PSU is going to be hard pressed to fit in there.
I would do an Impact with a full cover block and then something like a Fury Nano or Fury X with a block and then offset it with a PCIE extension. The top vents on the XB1 should be perfect for a 240mm rad which should be enough for the entire system.
WHAT?? have you seen this already?
well hello again. let's tear apart the casing shall we.
so everyone see all these plastic lines/spacers. they need to go.
So lets grab a dremel and start cutting away. (sorry for no in progress shot)

so that's the initial cut where I made room for the mobo and io shield, also yes those screw's are going to be the mobo stand off's.
After this I had to do a test fit with the mobo to see if I've messed up.
And it fits like a charm, so lets get going on the top panel.
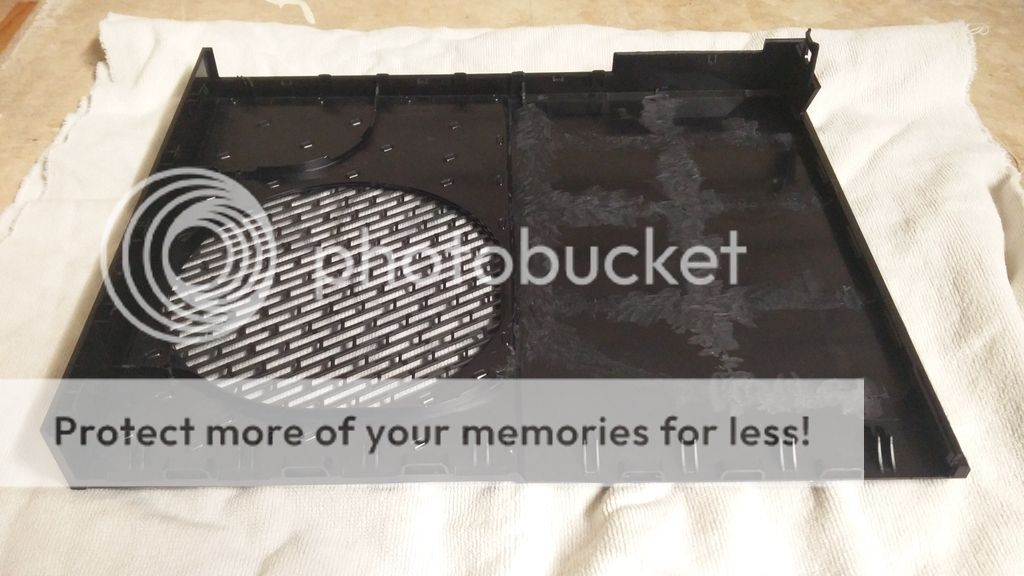
that's a nice beginning however there's one more problem.

the entire shroud needs to be exposed without cutting in to it.:o
so let's hope I've got a steady hand and the right technique.
Seems to be going alright.
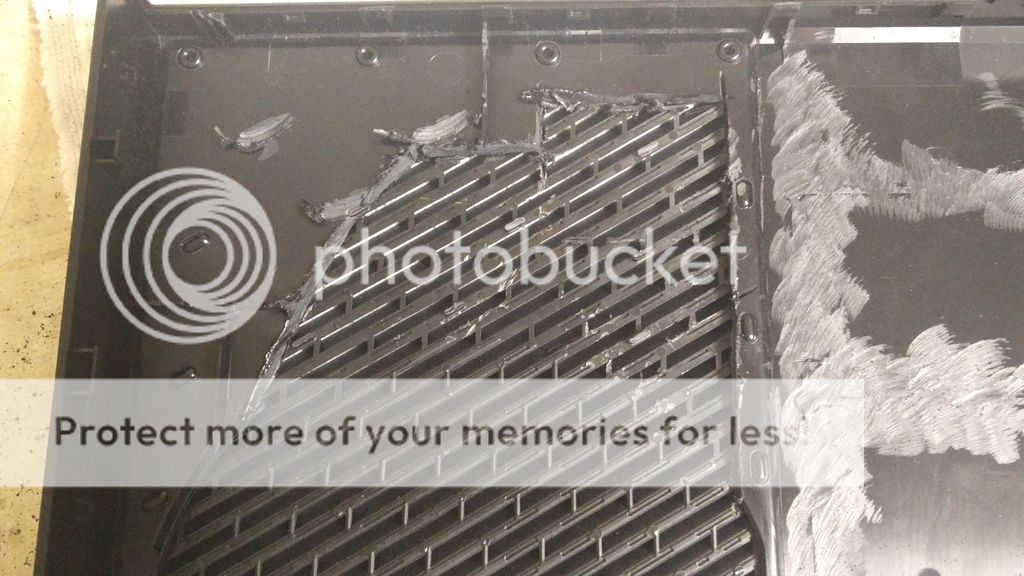
so how I managed to do this is put a screwdriver in between the panel and mesh to keep them separated and cut away little bits at a time:

NOOOOOOOOOOOOOOOOOOOOOOOOOO I messed up, not to bad though:

and mostly finished here:


not bad if I may say so myself. In the end there were only 2 mis cuts and you can barely see them, so mission accomplished.
so now lets get back to the bottom panel because we where not done yet.
we need to drill some more holes in order to cool this machine.
first let's see how far we want them seperated:

seems to be alright, lets draw some more and start the tedious work.

luckily I don't need to use a hand drill because that would be murder to my arm.

and yes that is a really old machine.
and then now the finished result

now I'm almost done because I decided to change it up a little bit, so some more drilling and cutting was necessary.
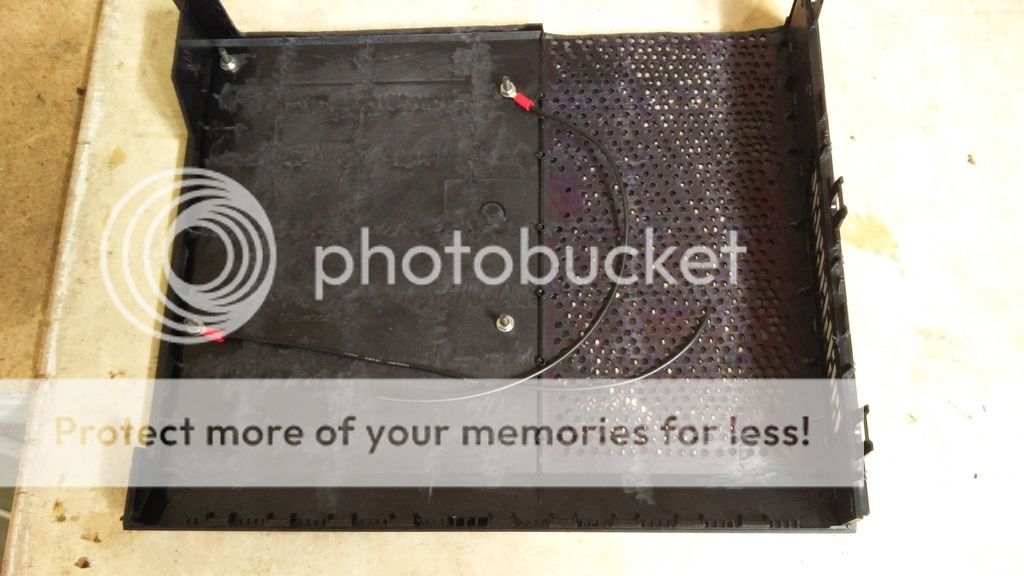
and done. at least for now.
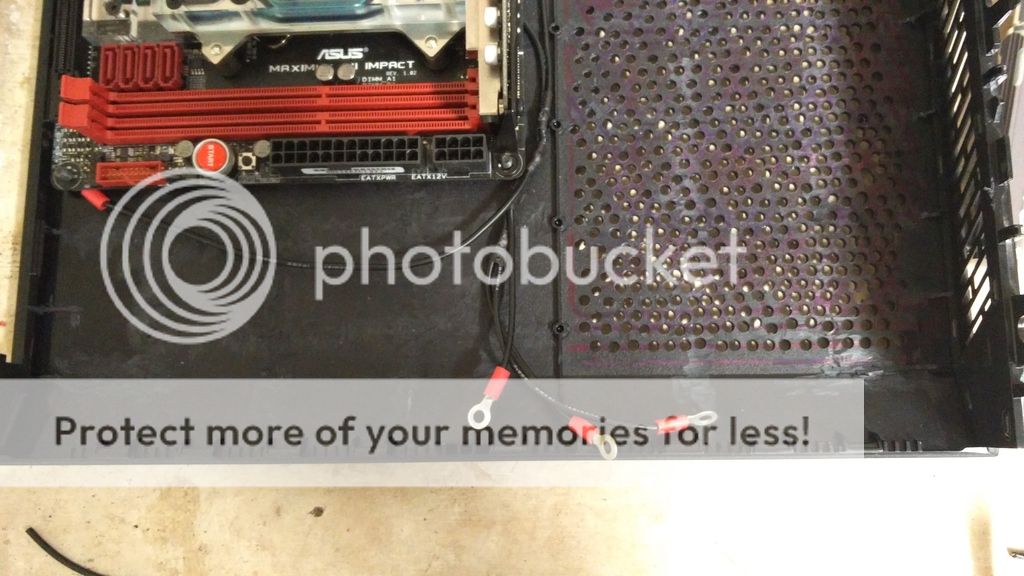
If you are wondering about those wire's, I'll need them as a ground since I don't use a metal case on the inside.
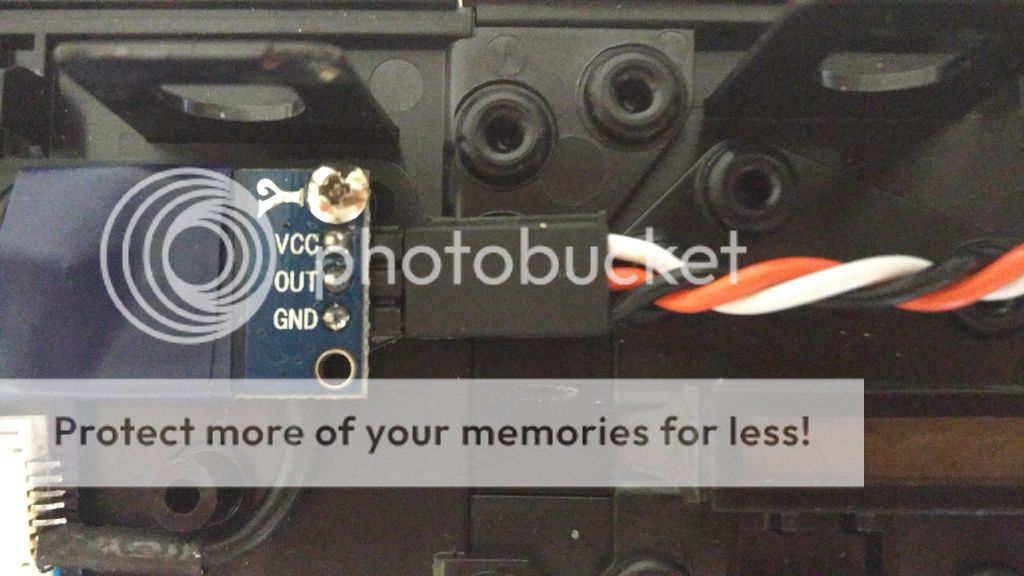
now last but not least the front-panel, I really wanted to keep the touch sensing so I had to make something up for that.
So I bought some touch sensors to mount to the front ribbon cable.
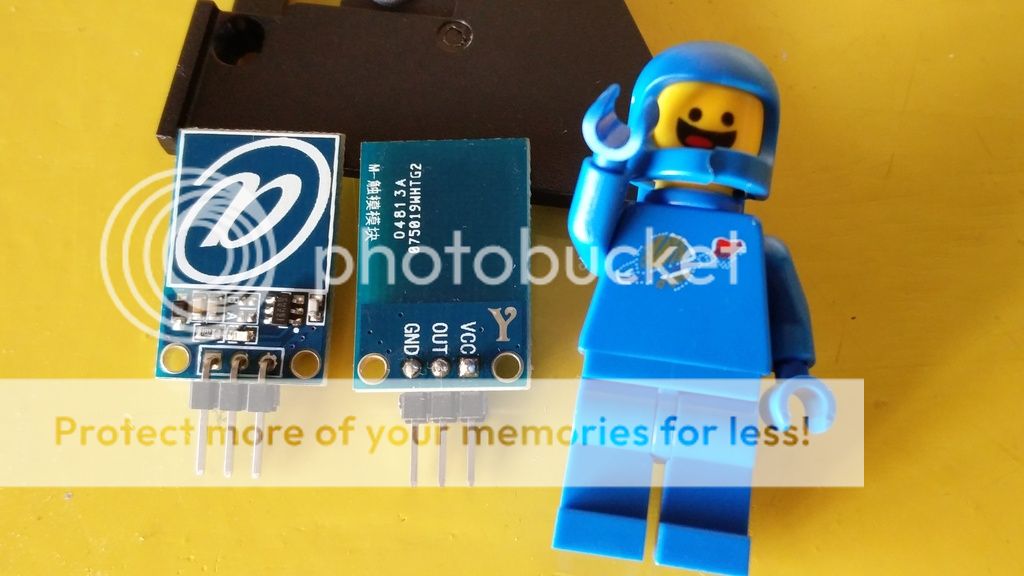
So i got those but it doesn't work like that sadly enough. so lets get creative.
I needed to tap into the capacitive sensor so I could wire it to the ribbon cable, I had 2 options, number one solder a wire to this little pin:
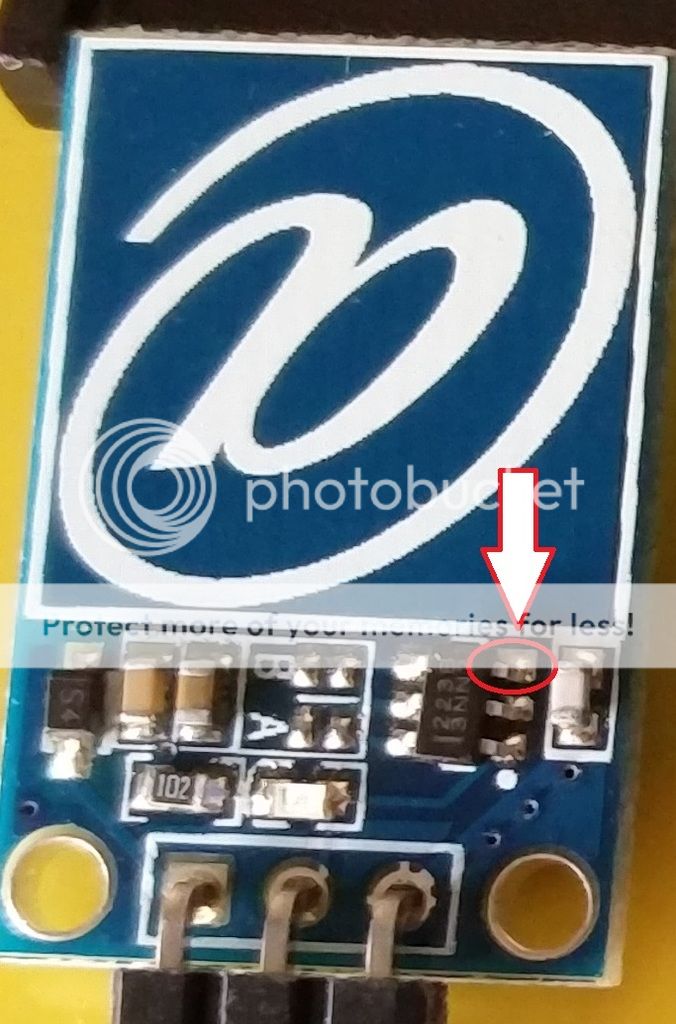
But that thing is so tiny you would almost need a magnifying-glass in order to solder on it.
so option 2 it was, actually quite simple, drill a hole, scrape away some solder mask on the front, feed a wire through and solder it on there:
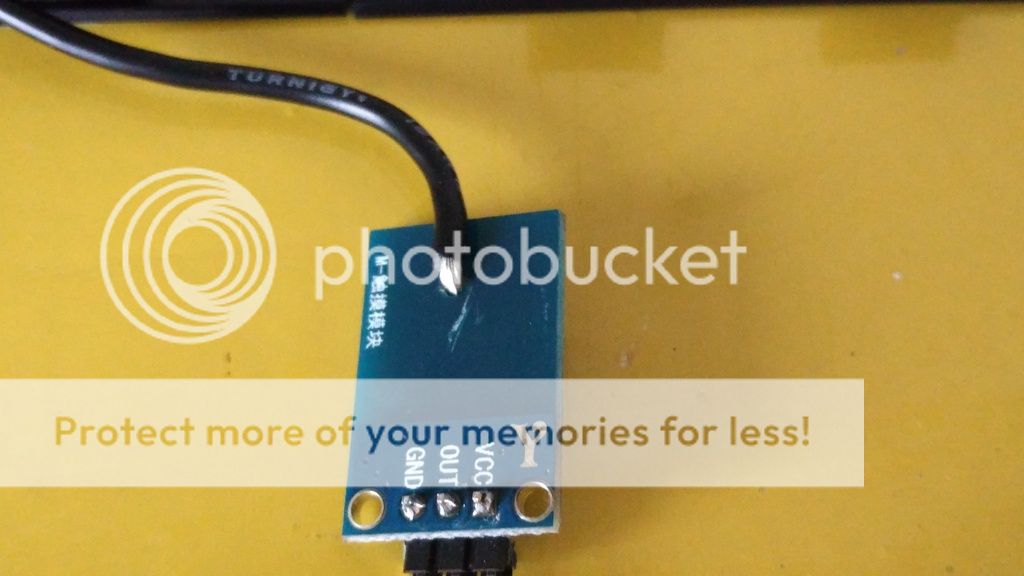

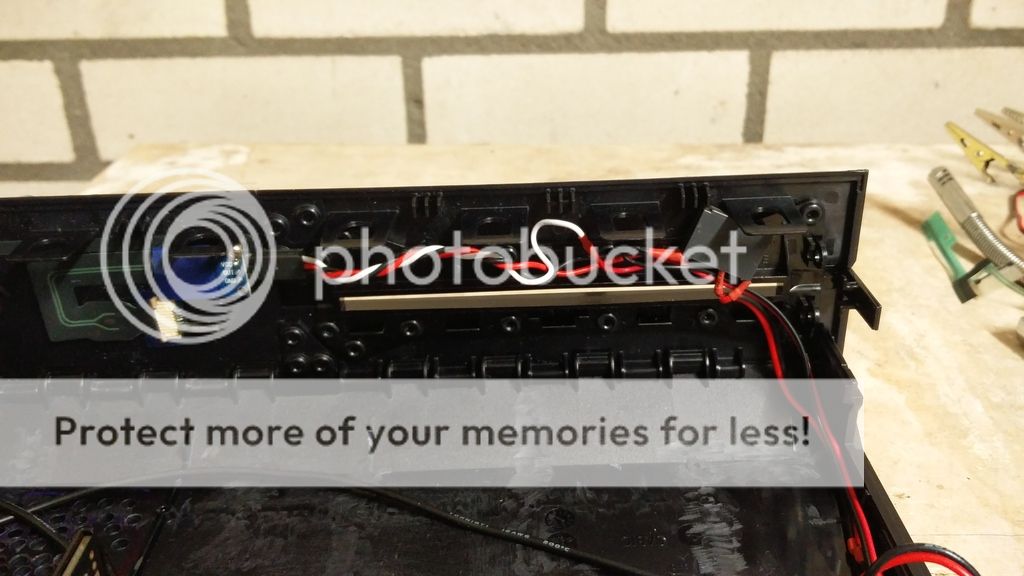
then all I needed to do is mount it to front ribbon cable:
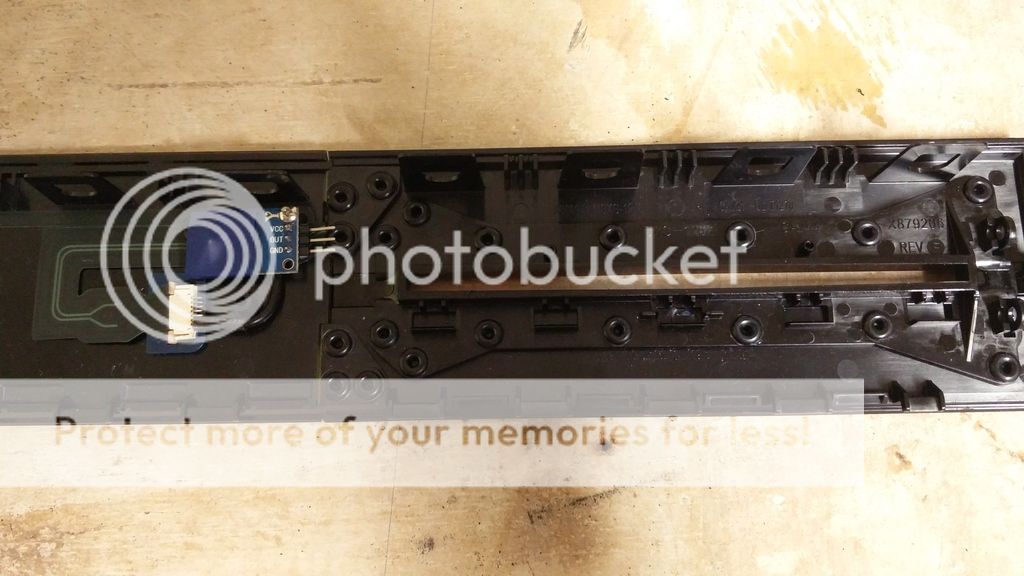
but it still doesn't work, I need to power the thing and make it work with thew mobo.
so grab a servo wire mount it to the sensor and remember what color is what.
then grab a relaid and wire it up to the sensor.


Now the last part about the front panel, lighting up the xbox logo:
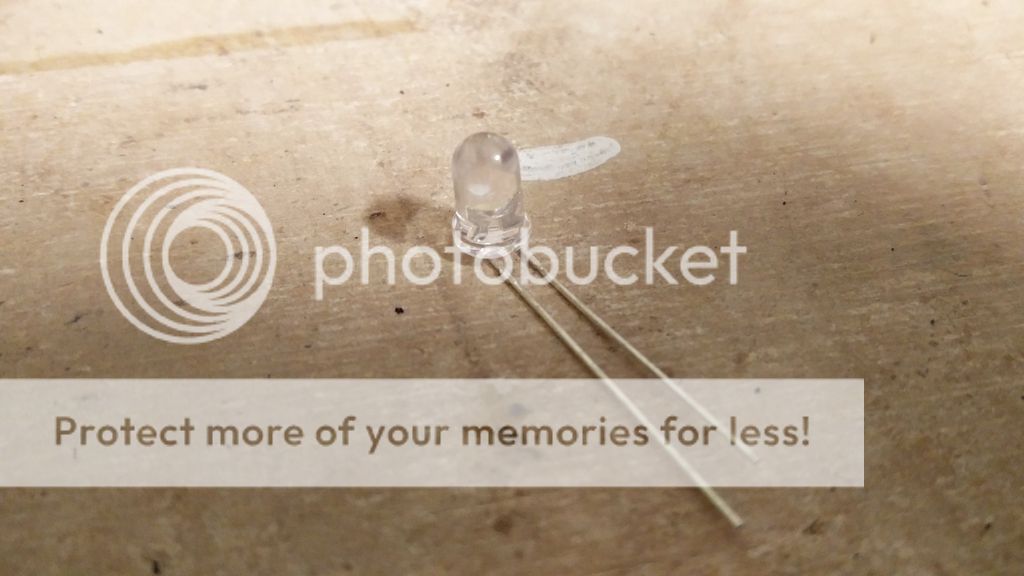

seems like a perfect fit to me.
now here is the finished result, I just glued the led that's why the tape:

Power to the touch sensor comes from the on-board usb 2 header, because those things have standby power. and I definitely need that.
Lets leave it at that for now, was already more than planned 😉
Options
- Mark as New
- Bookmark
- Subscribe
- Mute
- Subscribe to RSS Feed
- Permalink
03-17-2016 02:00 AM
AMP_US wrote:
You are definitely going have to make the PSU external. Even an SFX PSU is going to be hard pressed to fit in there.
I would do an Impact with a full cover block and then something like a Fury Nano or Fury X with a block and then offset it with a PCIE extension. The top vents on the XB1 should be perfect for a 240mm rad which should be enough for the entire system.
Psssh, you need to check out smallformfactor.net where there are a number of builds with HDPlex, FlexATX, short 1U PSUs, and the like.
Options
- Mark as New
- Bookmark
- Subscribe
- Mute
- Subscribe to RSS Feed
- Permalink
03-17-2016 11:48 AM
The BIG reveal
Let's start talking hardware,
to keep the suspense don't scroll to fast 😉
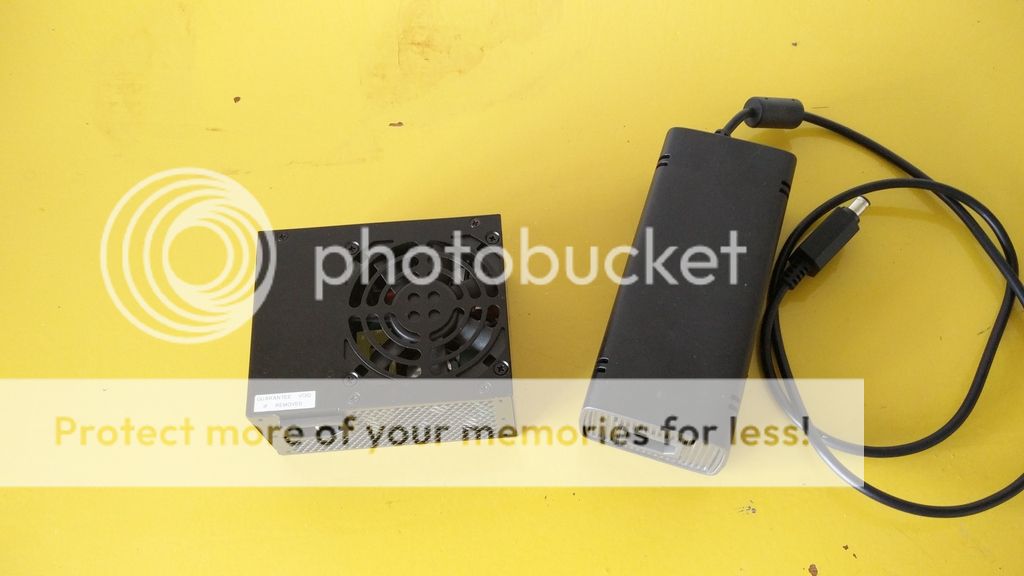
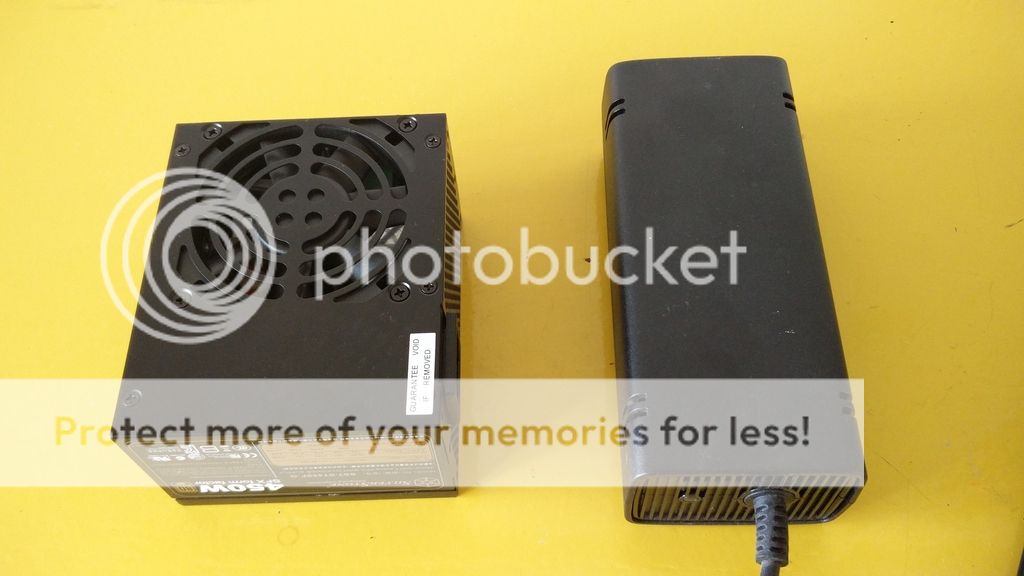
The psu I'll be using. A SilverStone 450W sfx psu. the thought process behind this was actually pretty simple, I wanted an external psu which wasn't any/much bigger compared to an xbox power brick. so sfx or tfx was the way to go.
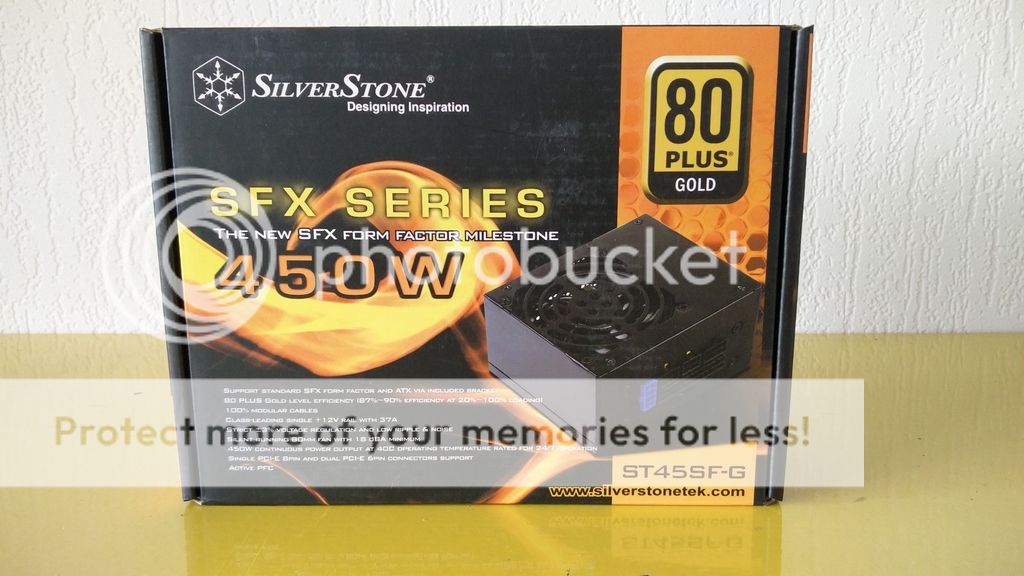


Honestly I was amazed at how small this thing actually is. so to give you guys an useless comparison her it is next to an xbox 360s power brick

Now I also know what you WANT to tell me.
DAT FAN
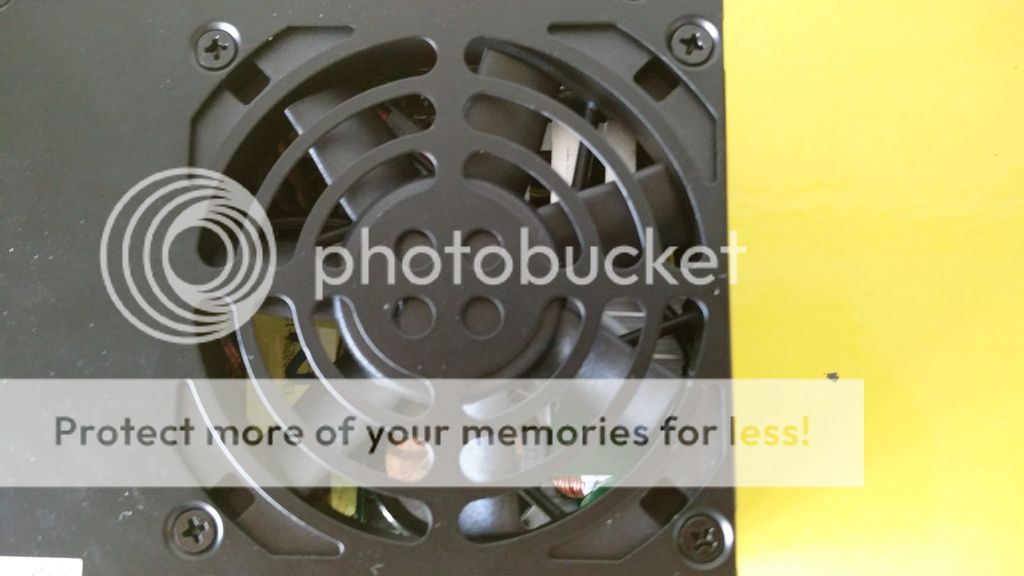
And I know, so I came prepared, it is going to be replaced with a noctua 92mm fan


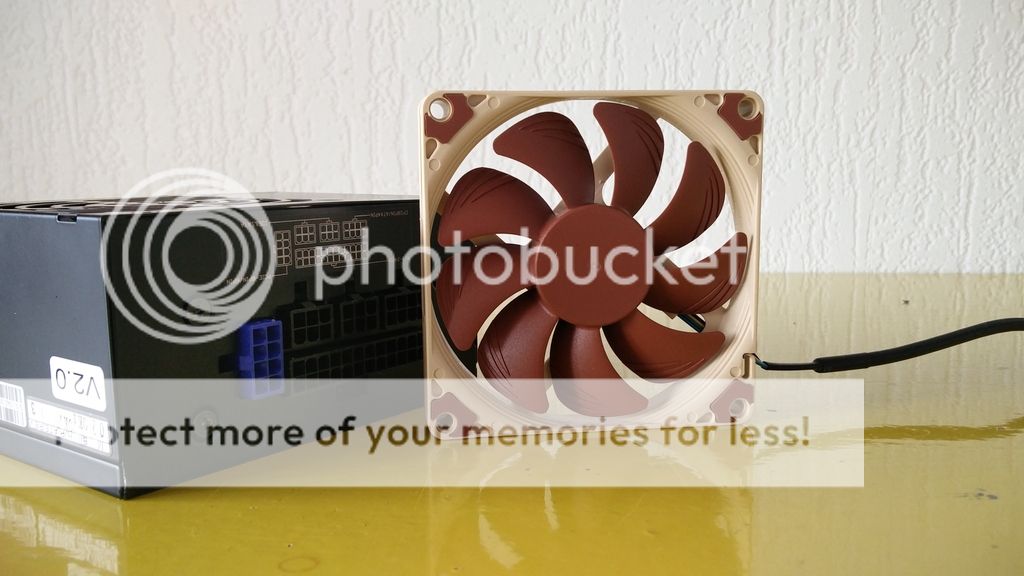
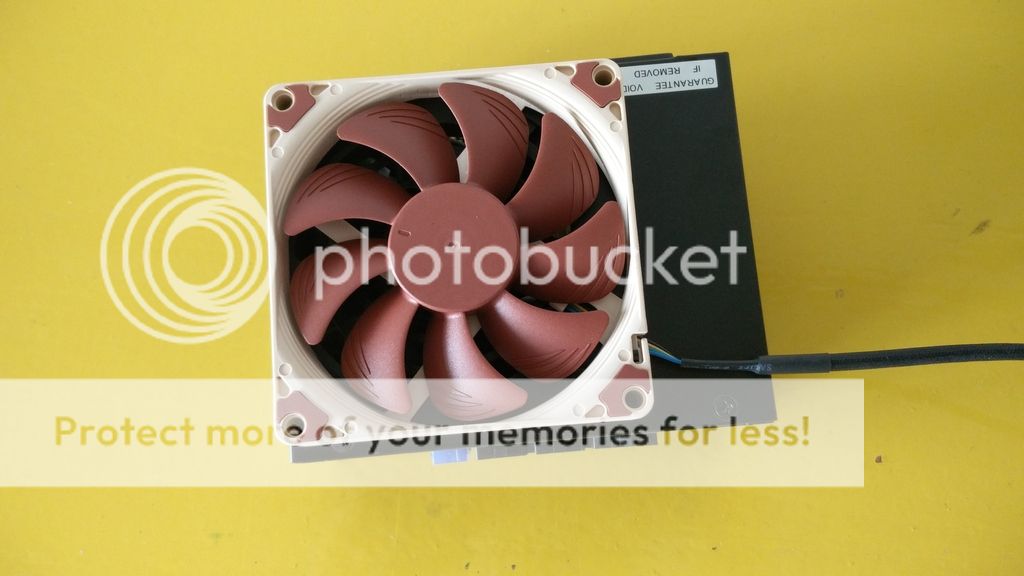

And yes I believe it is going to fit, at 14mm thick it'll even fit inside the chassis. I just have to move the power plug a tad bit.
Next up on the hardware list is going to be storage.
For games l'll be using a 750GB WD Black 2,5" hard drive. yet again one of those things that is impressively small for what it delivers (hur hurB|)


Now to cash this drive and for the OS l'll be using a Samsung 850 EVO 250GB


Keeping in line with flash storage, here is the memory I'll be using. and what can I say about size again 😛
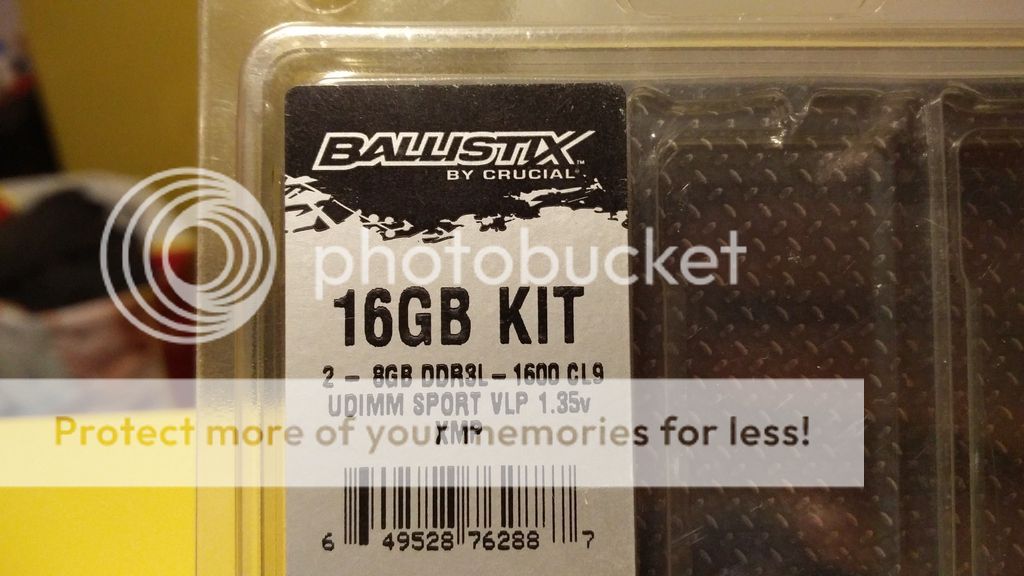
Uuuuhhhhmmmm wait that's not what I meant with size.:dry:

Ah a lot better:D, I mean like, these are really small, just see for yourself

top left some random ddr2 stick, top right old corsair vengeance ddr3, bottom left uhmmm.... sdram I believe (no I'm not 50 years old) and bottom right, my stick^_^
so these sticks barely get out above the memory slot
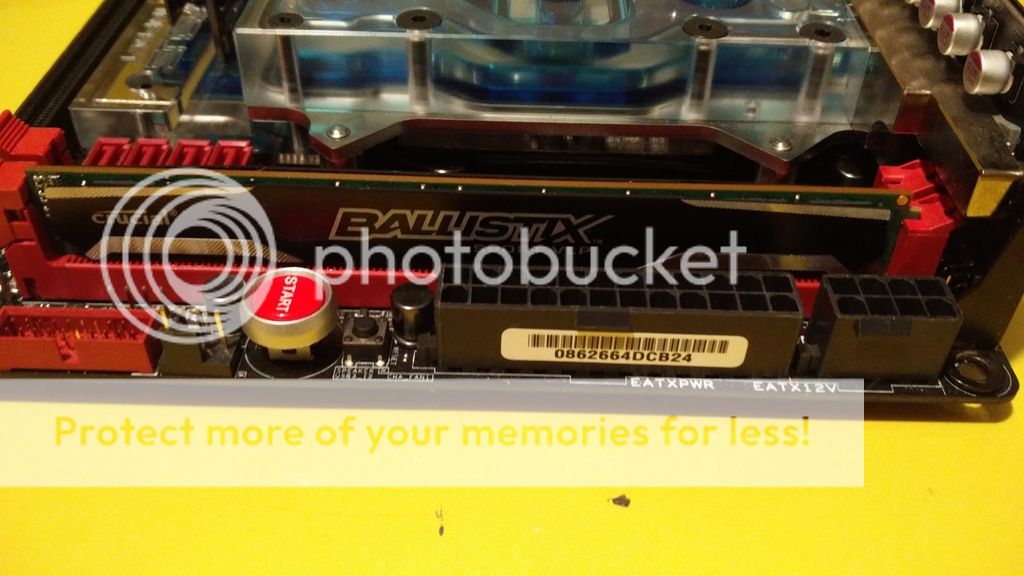
And wait what's that??
that looks like, like, like...uhhhmmm a water block?
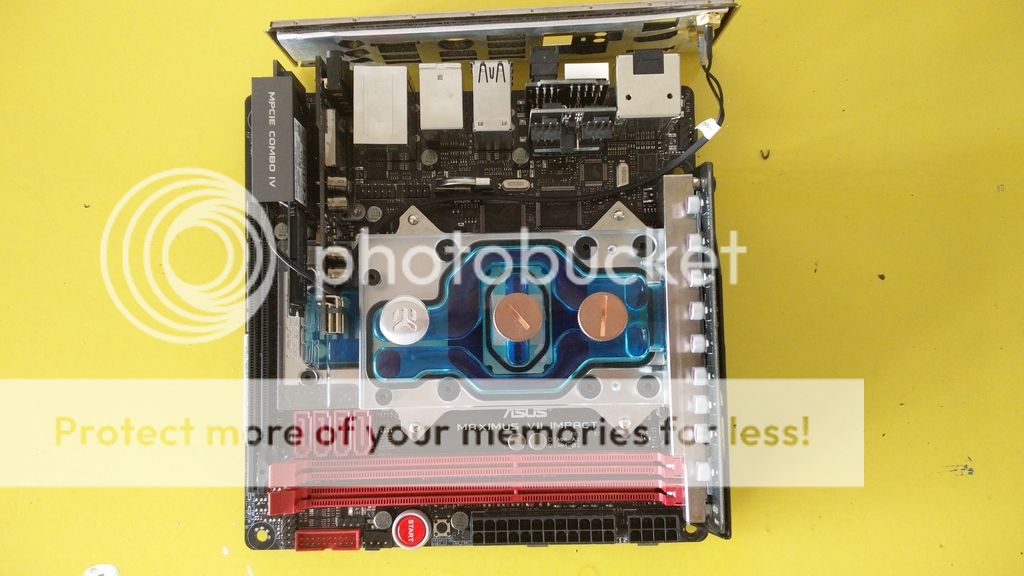
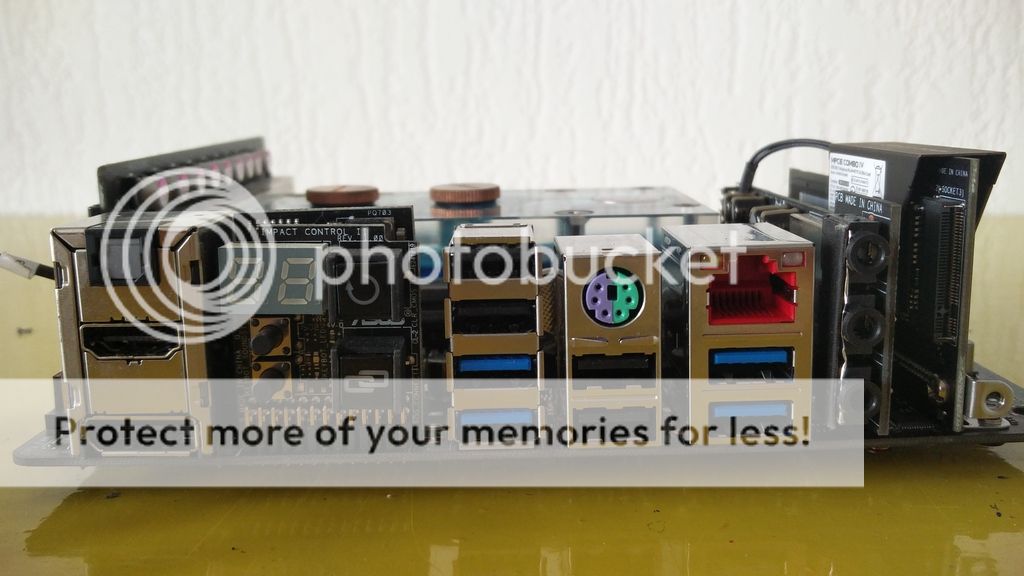
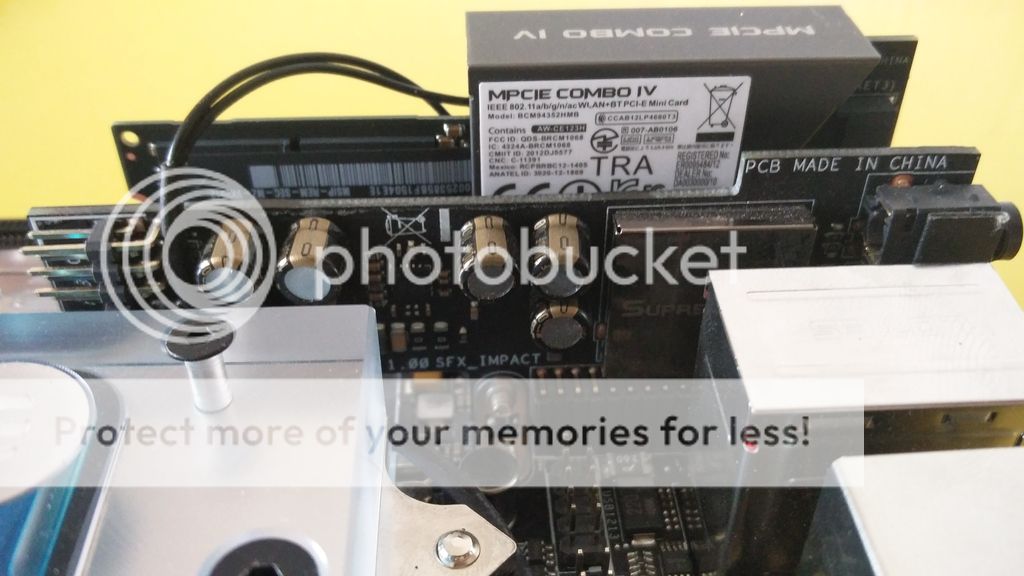
Indeed it is. A maximus VII impact from asus with an EK full cover water block
Also explains the random placement of the mobo in the case.
In between these bad boys there is sandwiched an intel core i5 4690k

Yes I could've gone with an i7, however it won't provide a performance benefit in gaming scenario's (that is what this machine is for) so spending that extra €100 wasn't worth it to me.
anyway back to the mobo:


That was enough eye candy for today guys. I hope you enjoyed once again and keep the guess work coming as to what's in it more
Let's start talking hardware,
to keep the suspense don't scroll to fast 😉
The psu I'll be using. A SilverStone 450W sfx psu. the thought process behind this was actually pretty simple, I wanted an external psu which wasn't any/much bigger compared to an xbox power brick. so sfx or tfx was the way to go.
Honestly I was amazed at how small this thing actually is. so to give you guys an useless comparison her it is next to an xbox 360s power brick
Now I also know what you WANT to tell me.
DAT FAN
And I know, so I came prepared, it is going to be replaced with a noctua 92mm fan
And yes I believe it is going to fit, at 14mm thick it'll even fit inside the chassis. I just have to move the power plug a tad bit.
Next up on the hardware list is going to be storage.
For games l'll be using a 750GB WD Black 2,5" hard drive. yet again one of those things that is impressively small for what it delivers (hur hurB|)
Now to cash this drive and for the OS l'll be using a Samsung 850 EVO 250GB
Keeping in line with flash storage, here is the memory I'll be using. and what can I say about size again 😛
Uuuuhhhhmmmm wait that's not what I meant with size.:dry:
Ah a lot better:D, I mean like, these are really small, just see for yourself
top left some random ddr2 stick, top right old corsair vengeance ddr3, bottom left uhmmm.... sdram I believe (no I'm not 50 years old) and bottom right, my stick^_^
so these sticks barely get out above the memory slot
And wait what's that??
that looks like, like, like...uhhhmmm a water block?
Indeed it is. A maximus VII impact from asus with an EK full cover water block
Also explains the random placement of the mobo in the case.
In between these bad boys there is sandwiched an intel core i5 4690k
Yes I could've gone with an i7, however it won't provide a performance benefit in gaming scenario's (that is what this machine is for) so spending that extra €100 wasn't worth it to me.
anyway back to the mobo:
That was enough eye candy for today guys. I hope you enjoyed once again and keep the guess work coming as to what's in it more
Options
- Mark as New
- Bookmark
- Subscribe
- Mute
- Subscribe to RSS Feed
- Permalink
03-17-2016 07:03 PM
Small form factor and water cooled. :cool: Count me in.
Can't wait to see how this turns out and the temps you get.
My next build will hopefully be small, well it has to be smaller than my TJ07 lol.
But a small, quiet gaming rig... that's what I'm thinking of going for eventually.
Thanks for posting all this.
Can't wait to see how this turns out and the temps you get.
My next build will hopefully be small, well it has to be smaller than my TJ07 lol.
But a small, quiet gaming rig... that's what I'm thinking of going for eventually.
Thanks for posting all this.
Options
- Mark as New
- Bookmark
- Subscribe
- Mute
- Subscribe to RSS Feed
- Permalink
03-22-2016 09:17 AM
INHALE ALL THE FUMES
well, apparently it'll take up 3 posts for this update
Yes guys it's soldering time.
I have to make the psu completely external, and to go with that I have to make a wire harness for inside the xbox.
Lets start with the simple stuff, the ground wire's

seems to be ok.
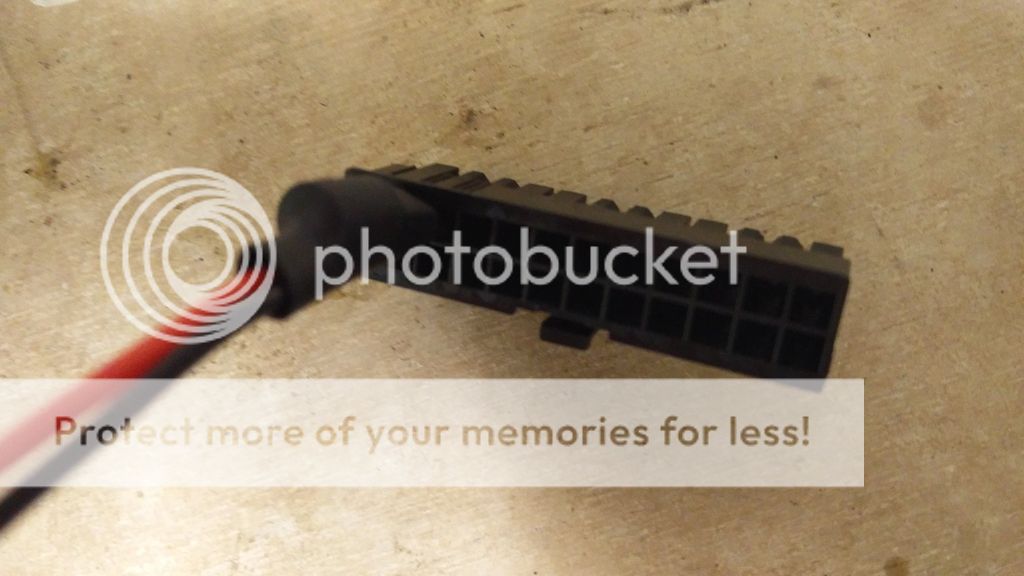
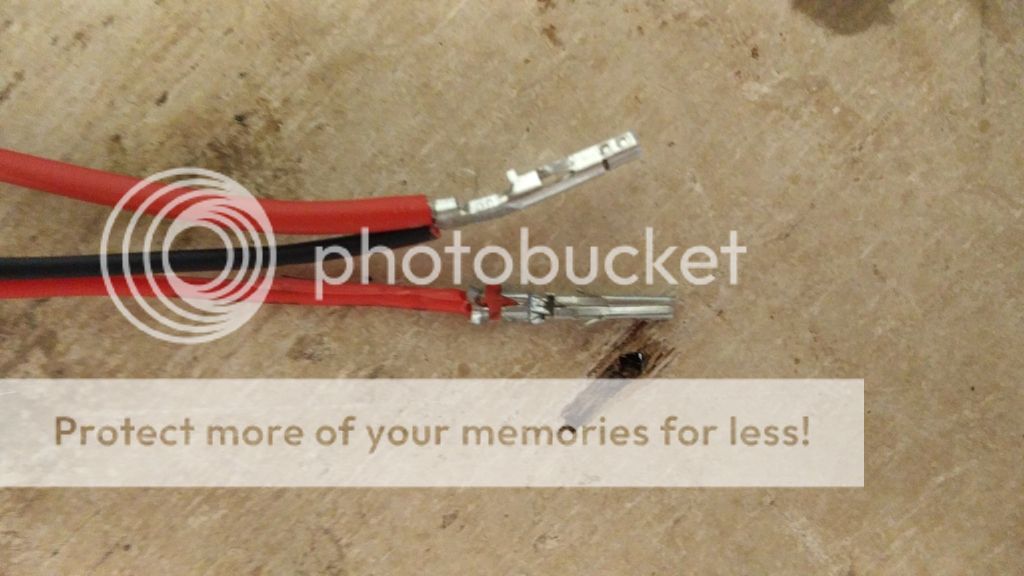
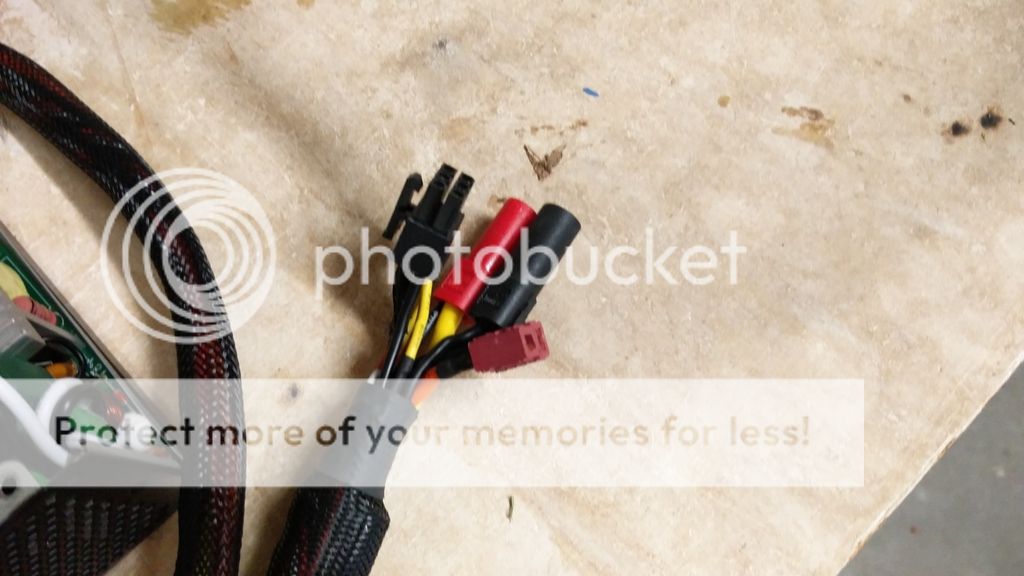
now lets go on to the other simple stuff, 8pin psu and 6pin pci-e


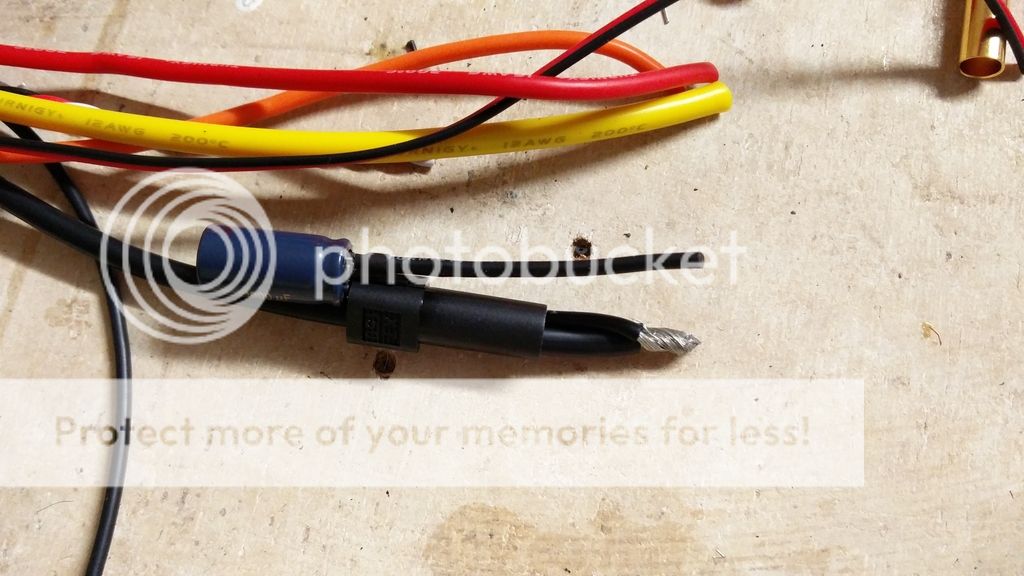
When inspecting the 24 pin from the psu I was a little surprised to find what looks like a capacitor.

so lets see if we can reuse it, take of the sleeving and pull out the pins.

and done. now lets connect all the 12V wires.


I used the same technique of in line soldering on the negative leads.
don't enter guys crazy scientist at work:

now lets get going on the 5v


here's the 3.3v with sense:

and here's where I made a mistake, nope even I am not perfect 😞
I just put a bit of solder in there and everything was just fine.
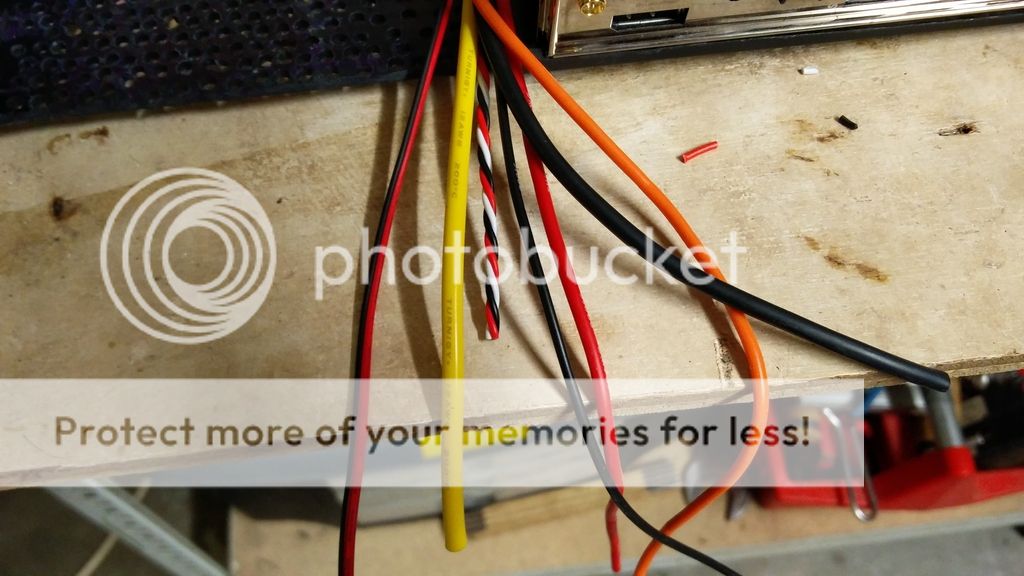
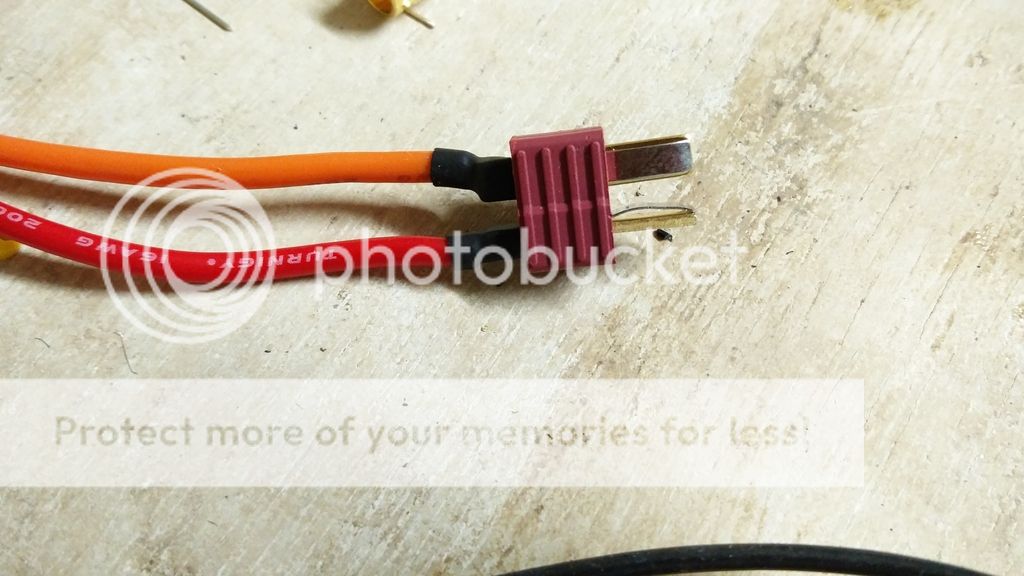
And BAM here's the finished result:

All the connectors and wires in place, it does get a bit crowded doesn't it.
in the meantime I had to also make a fan cable so I'm able to control at least 1 fan by the gpu.
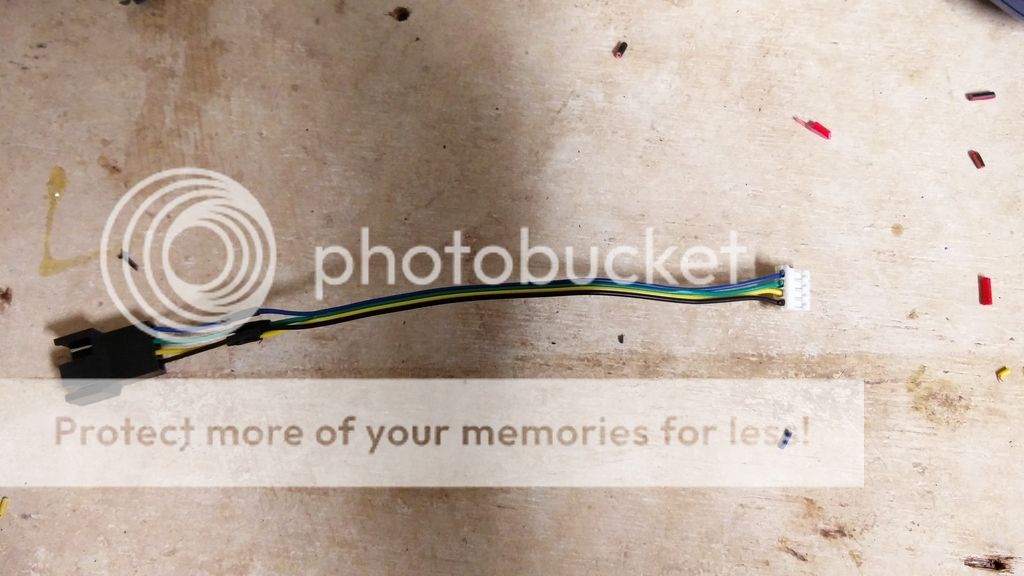
but now the other end of the cable
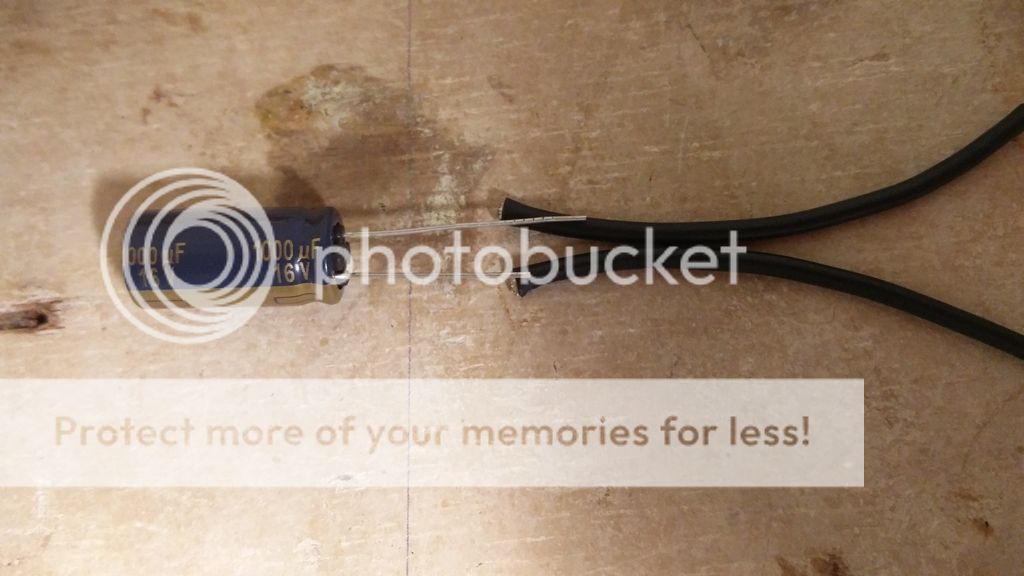
I'm going to be using 3 of these capacitors in order to smooth out the incoming power. one on each voltage.
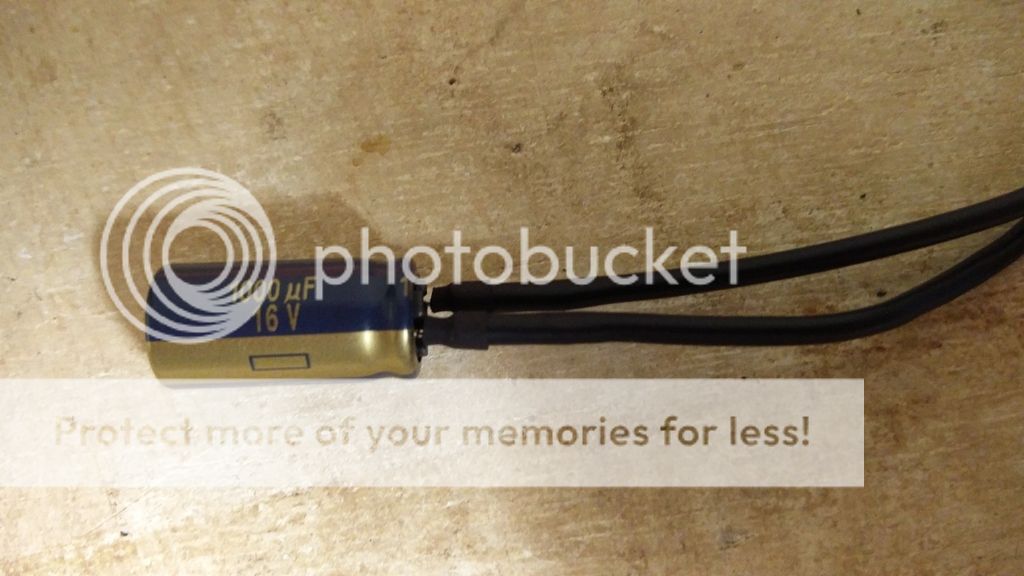
So here we go lets make it modular


both 12v and ground are like this.
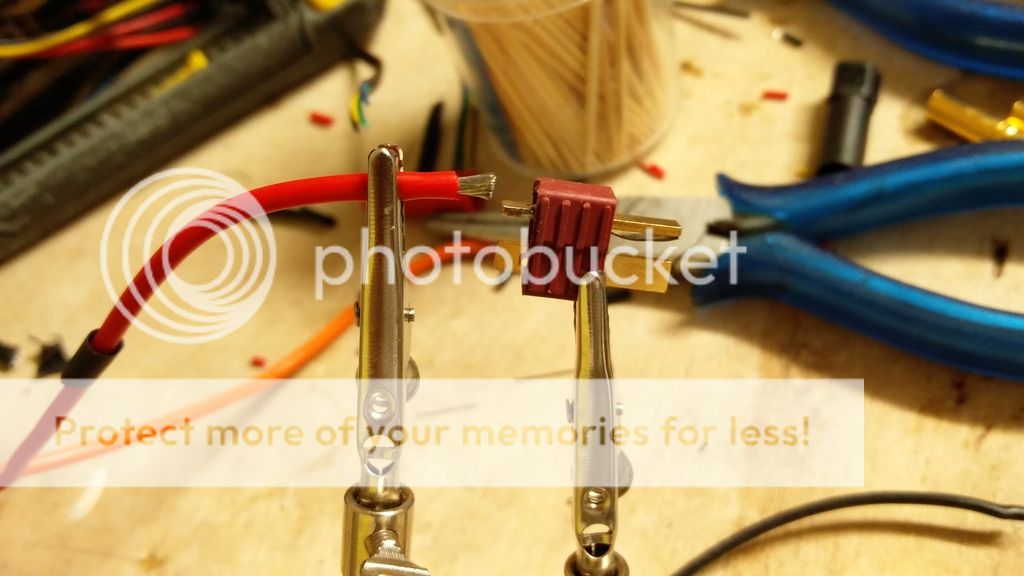


not to bad of a result is it.
well, apparently it'll take up 3 posts for this update
Yes guys it's soldering time.
I have to make the psu completely external, and to go with that I have to make a wire harness for inside the xbox.
Lets start with the simple stuff, the ground wire's
seems to be ok.
now lets go on to the other simple stuff, 8pin psu and 6pin pci-e
When inspecting the 24 pin from the psu I was a little surprised to find what looks like a capacitor.
so lets see if we can reuse it, take of the sleeving and pull out the pins.
and done. now lets connect all the 12V wires.
I used the same technique of in line soldering on the negative leads.
don't enter guys crazy scientist at work:
now lets get going on the 5v
here's the 3.3v with sense:
and here's where I made a mistake, nope even I am not perfect 😞
I just put a bit of solder in there and everything was just fine.
And BAM here's the finished result:
All the connectors and wires in place, it does get a bit crowded doesn't it.
in the meantime I had to also make a fan cable so I'm able to control at least 1 fan by the gpu.
but now the other end of the cable
I'm going to be using 3 of these capacitors in order to smooth out the incoming power. one on each voltage.
So here we go lets make it modular
both 12v and ground are like this.
not to bad of a result is it.
Options
- Mark as New
- Bookmark
- Subscribe
- Mute
- Subscribe to RSS Feed
- Permalink
03-22-2016 09:24 AM
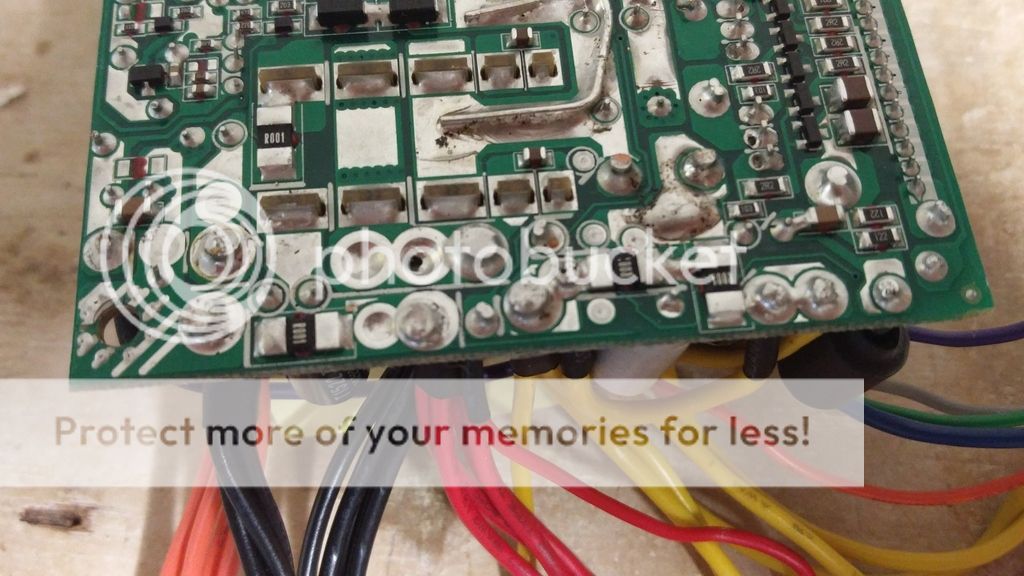
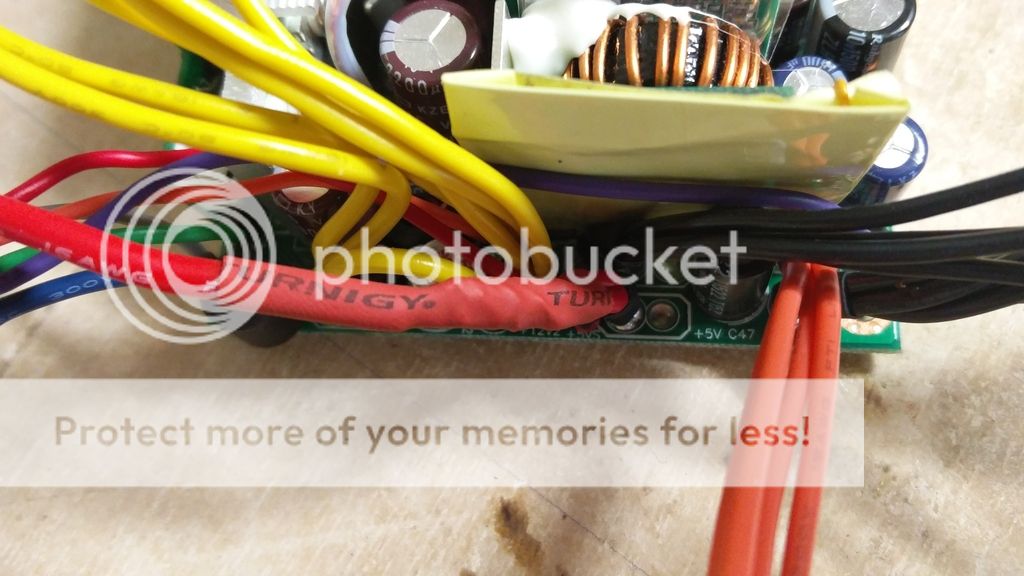
but we're not done yet. we now have all the connections in the pc but no power coming in yet.
welcome back my old friend, let's tear you apart
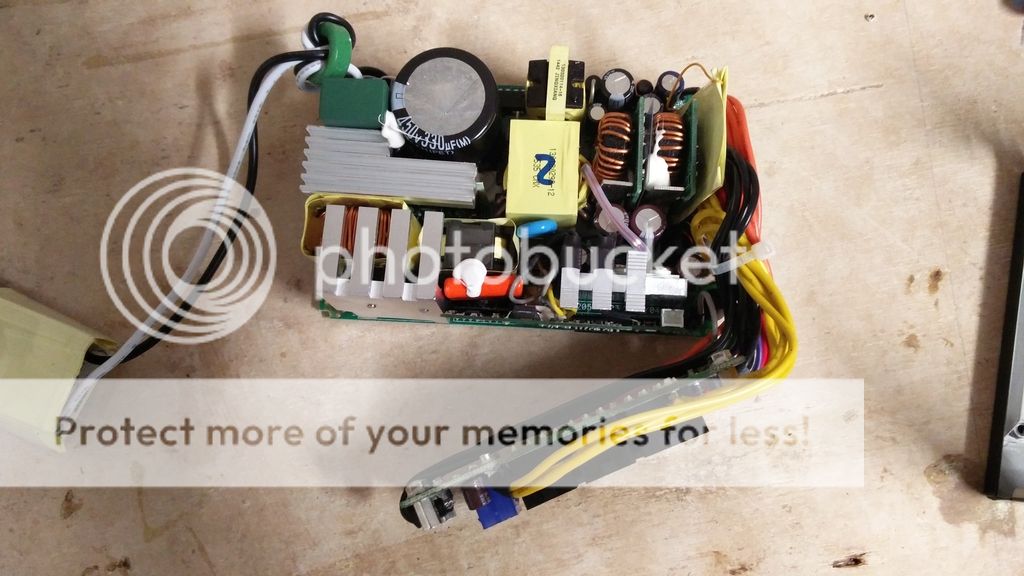
Damn this thing is packed, but i managed to get her out.
now let's see what we have over here:


Not a whole lot special however you notice those 3 capacitor's there's 1 for each voltage, sounds familiar doesn't it.
now that's something I didn't expect, apparently this psu also uses a 5v sense tracing into the 24 pin. I'll make sure he gets a home as well.
but first lets de-solder, I want to get all the cables out of the pcb so I can install my own into them.
well, turns out to be a problem, all the wires are crimped together and it's holding them in there when I want to pull them out. so plan b it is. solder the wires to the wires
let's start with the smaller single ones
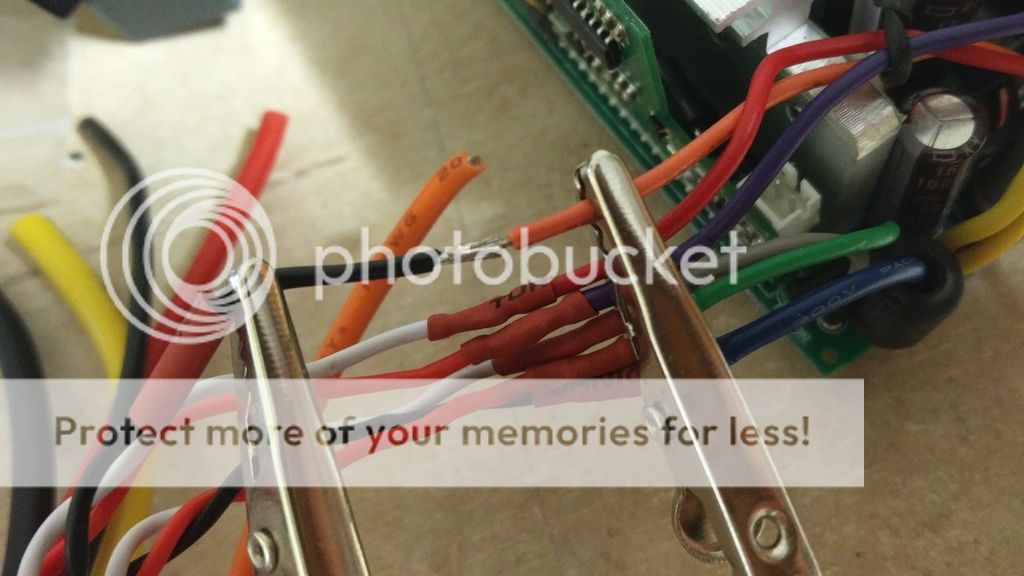
that's easy
on to the big ones
5V
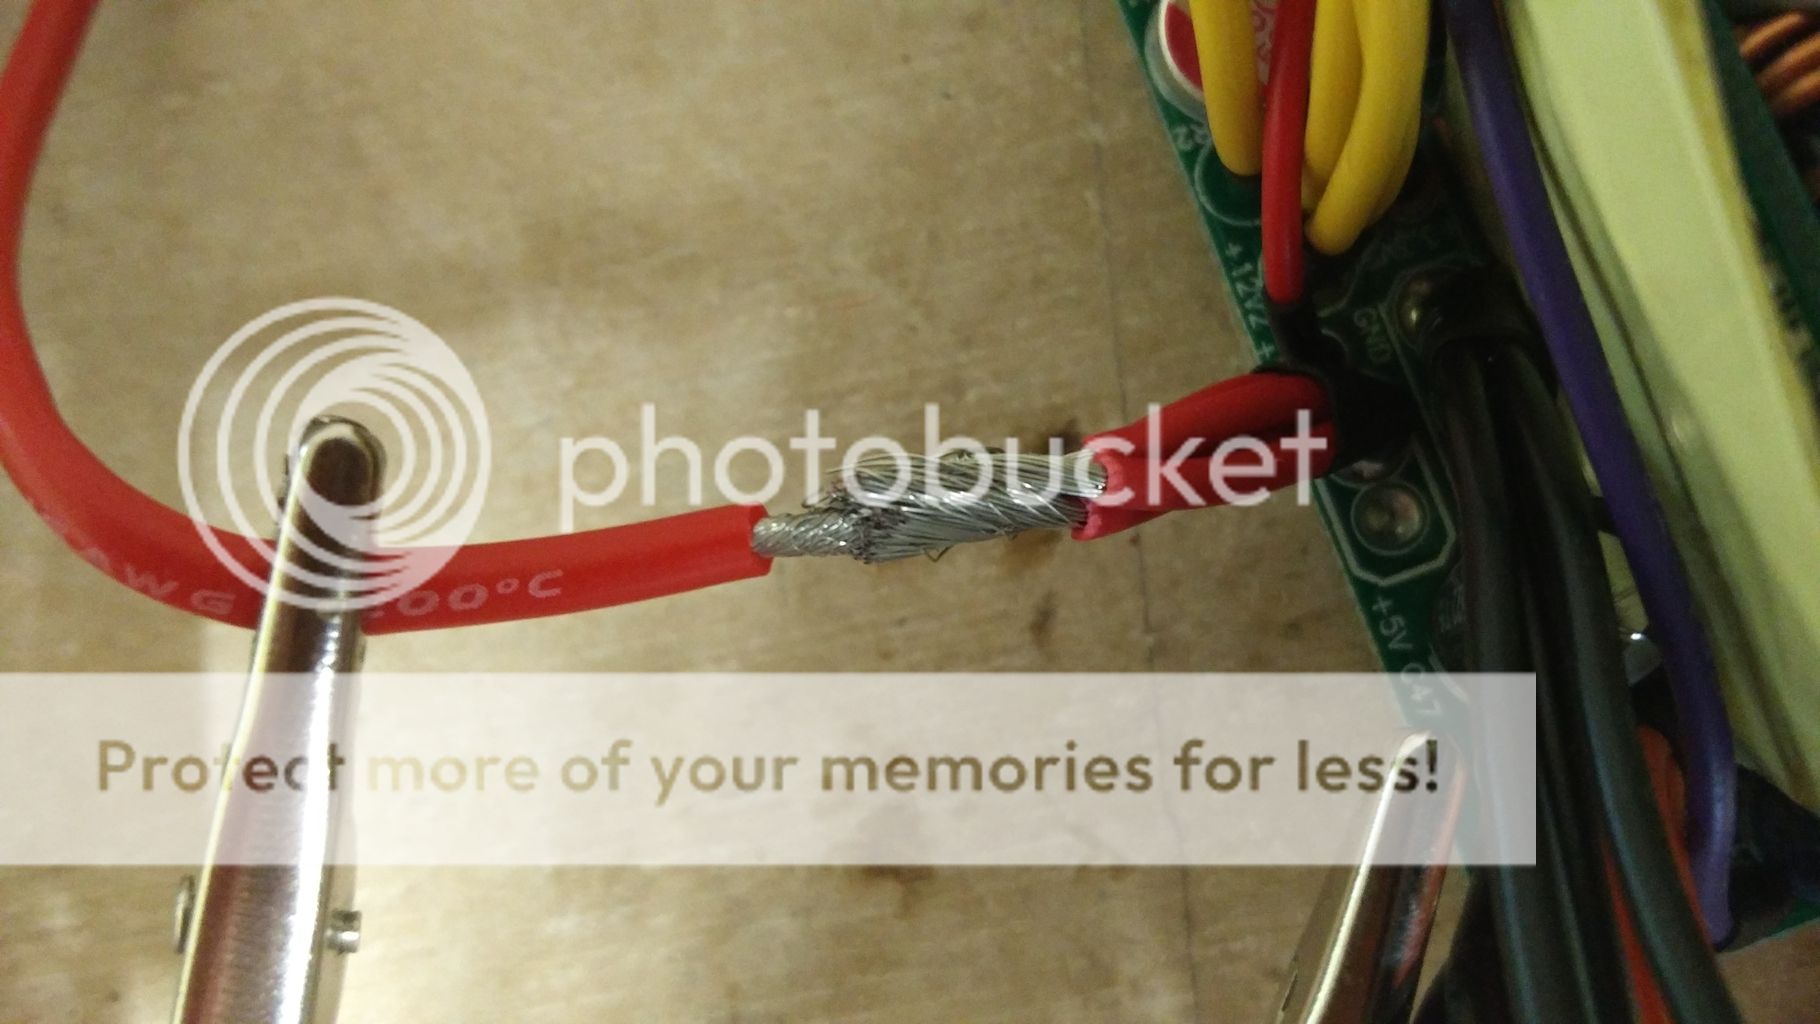
3.3v
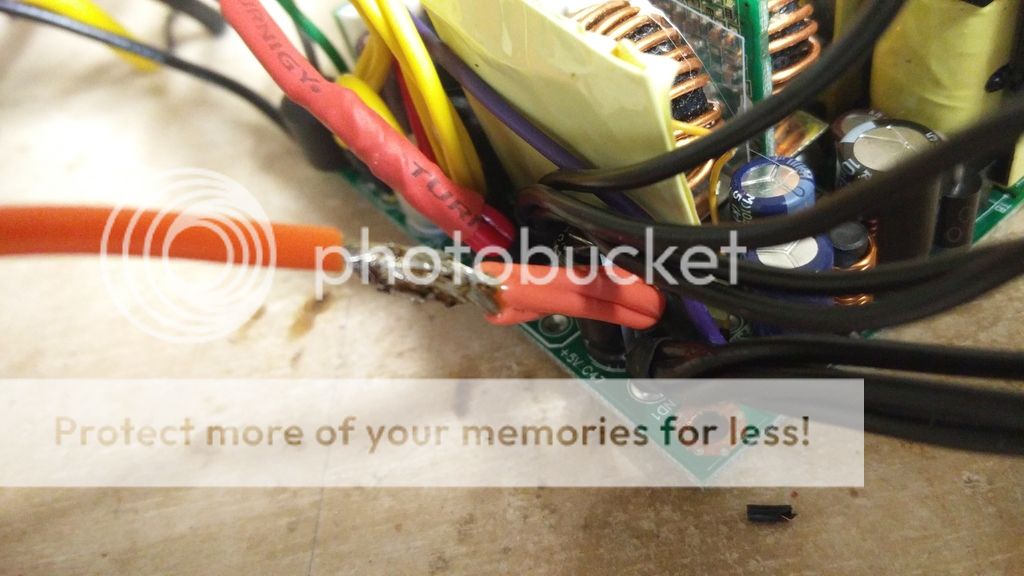
12v

and ground

and here is the end result:
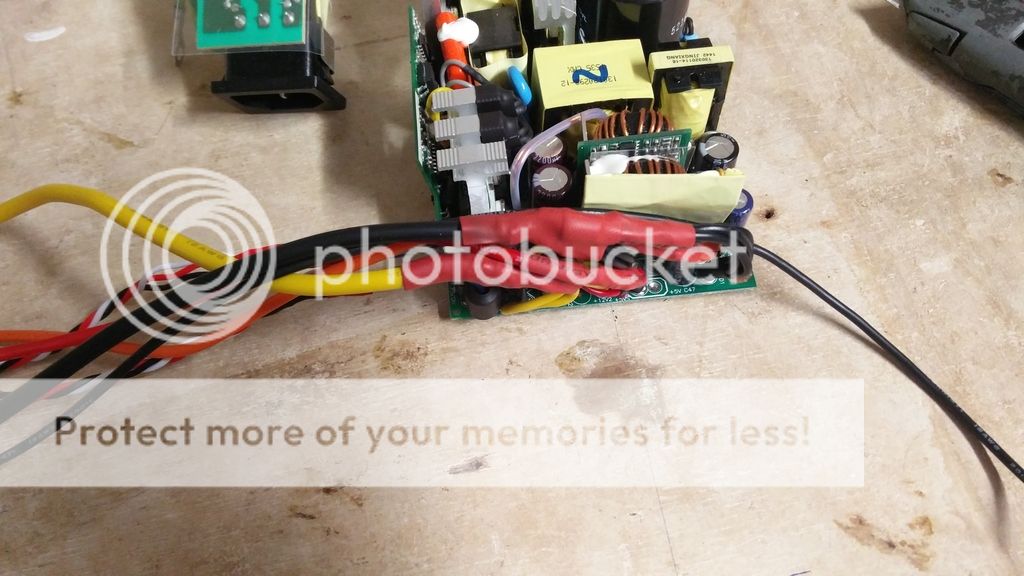
now lets make the case fit:


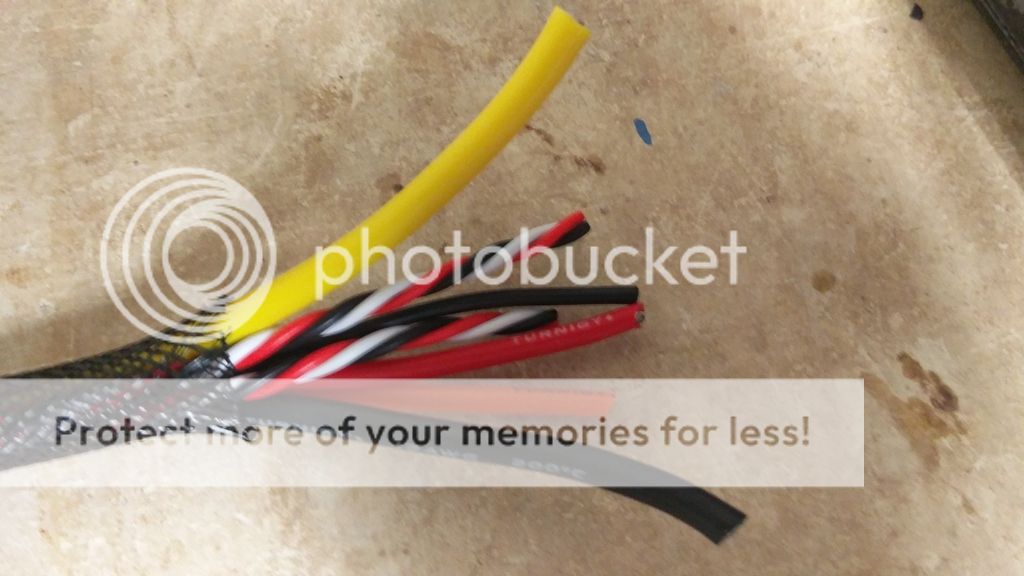
and continue on the cable. this one's gonna be sleeved


now that that is out of the way, lets tackle the modular part again
get my 2 remaining capacitors ready and lets get going

now this is where my 5v sense has gone, about 10cm off of the t-connector togheter with the capacitor

And here is the finished result
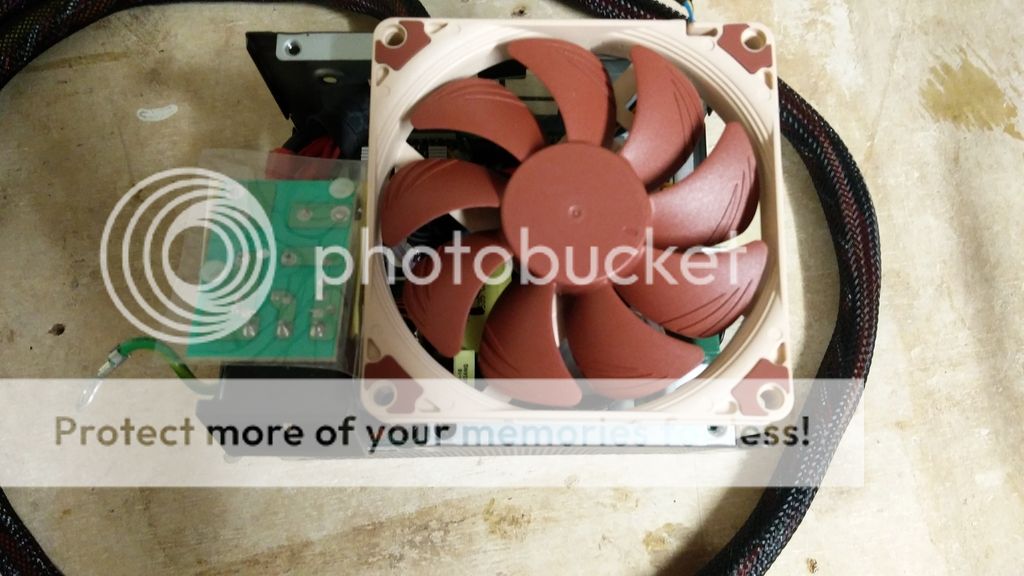
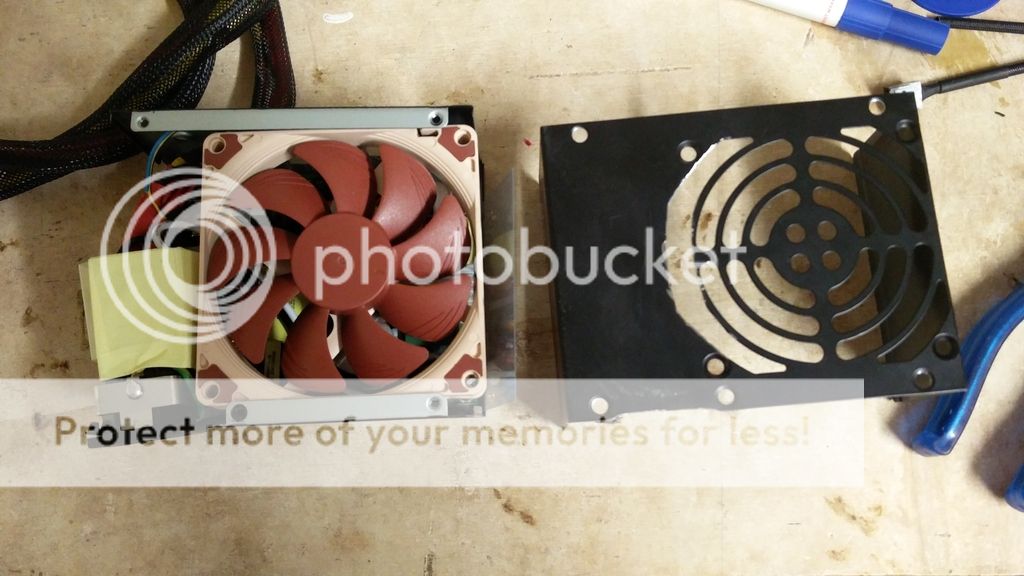
now lets put this fan inside the psu
I'll have to move the power plug and mount it upside down in order to make the fan fit
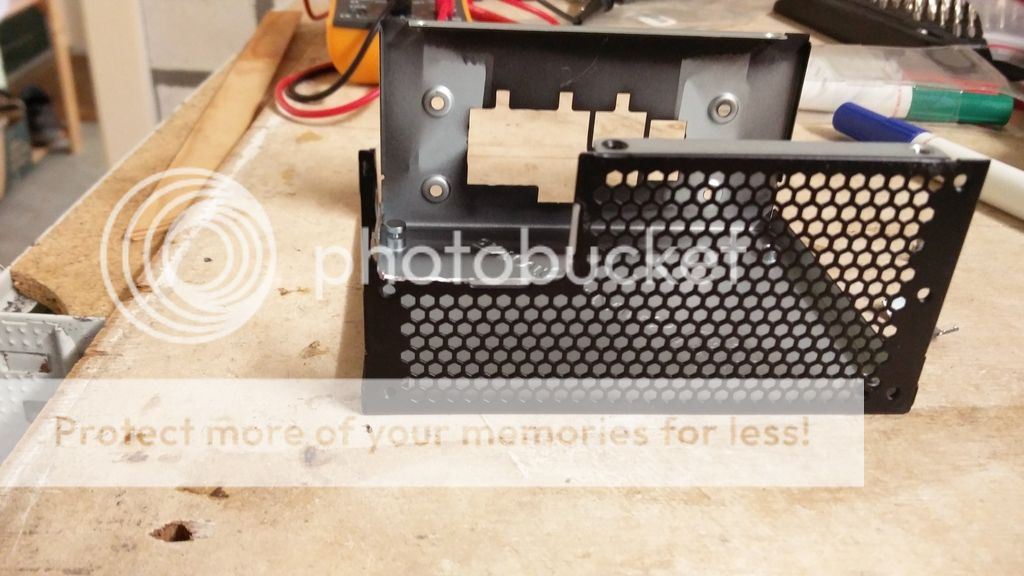
next up is some more cutting,
I'll have to make the top part fit as well, so get rid of the little tab and make the fan grill a little bigger

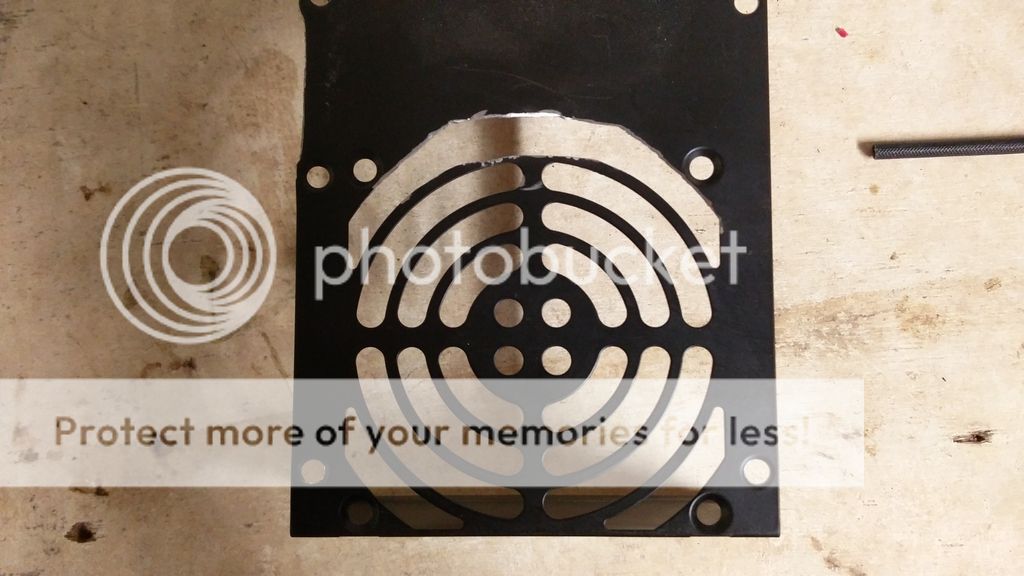
now let's see if it fits
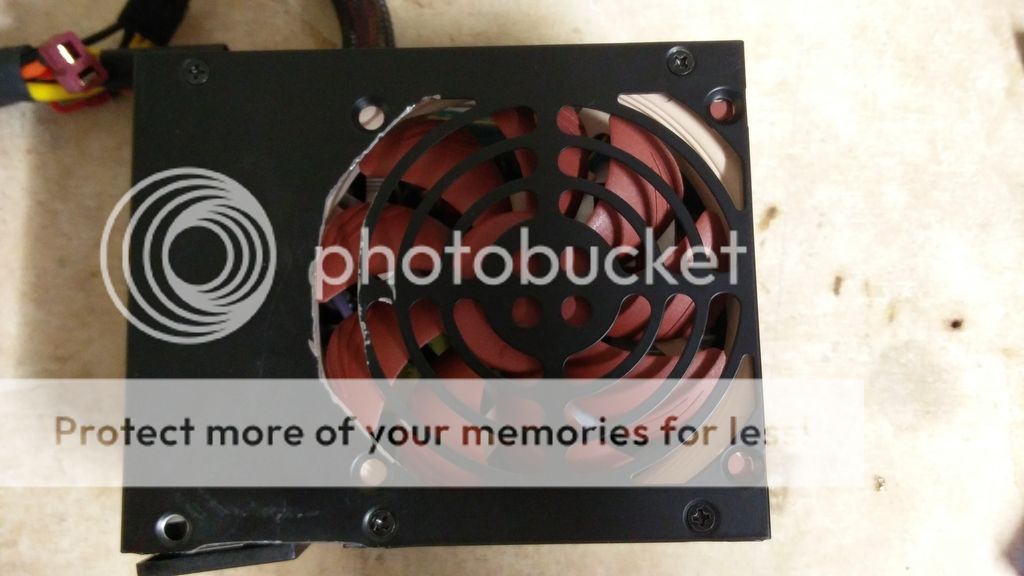
fit's like a charm(ish) getting the top part over the psu was actually a really tight fit.
welcome back my old friend, let's tear you apart
Damn this thing is packed, but i managed to get her out.
now let's see what we have over here:
Not a whole lot special however you notice those 3 capacitor's there's 1 for each voltage, sounds familiar doesn't it.
now that's something I didn't expect, apparently this psu also uses a 5v sense tracing into the 24 pin. I'll make sure he gets a home as well.
but first lets de-solder, I want to get all the cables out of the pcb so I can install my own into them.
well, turns out to be a problem, all the wires are crimped together and it's holding them in there when I want to pull them out. so plan b it is. solder the wires to the wires
let's start with the smaller single ones
that's easy
on to the big ones
5V
3.3v
12v
and ground
and here is the end result:
now lets make the case fit:
and continue on the cable. this one's gonna be sleeved
now that that is out of the way, lets tackle the modular part again
get my 2 remaining capacitors ready and lets get going
now this is where my 5v sense has gone, about 10cm off of the t-connector togheter with the capacitor
And here is the finished result
now lets put this fan inside the psu
I'll have to move the power plug and mount it upside down in order to make the fan fit
next up is some more cutting,
I'll have to make the top part fit as well, so get rid of the little tab and make the fan grill a little bigger
now let's see if it fits
fit's like a charm(ish) getting the top part over the psu was actually a really tight fit.
Options
- Mark as New
- Bookmark
- Subscribe
- Mute
- Subscribe to RSS Feed
- Permalink
03-22-2016 09:26 AM
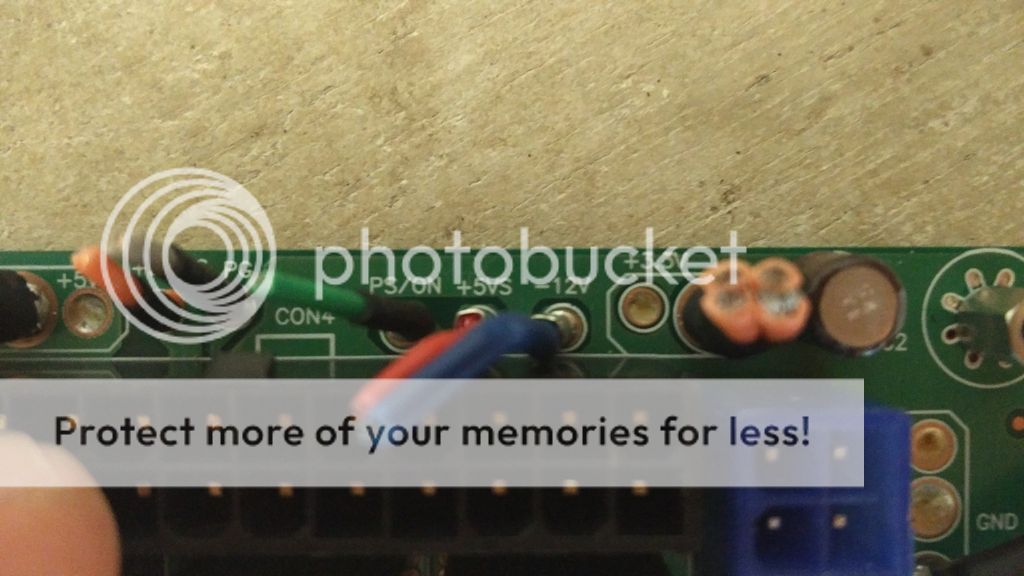
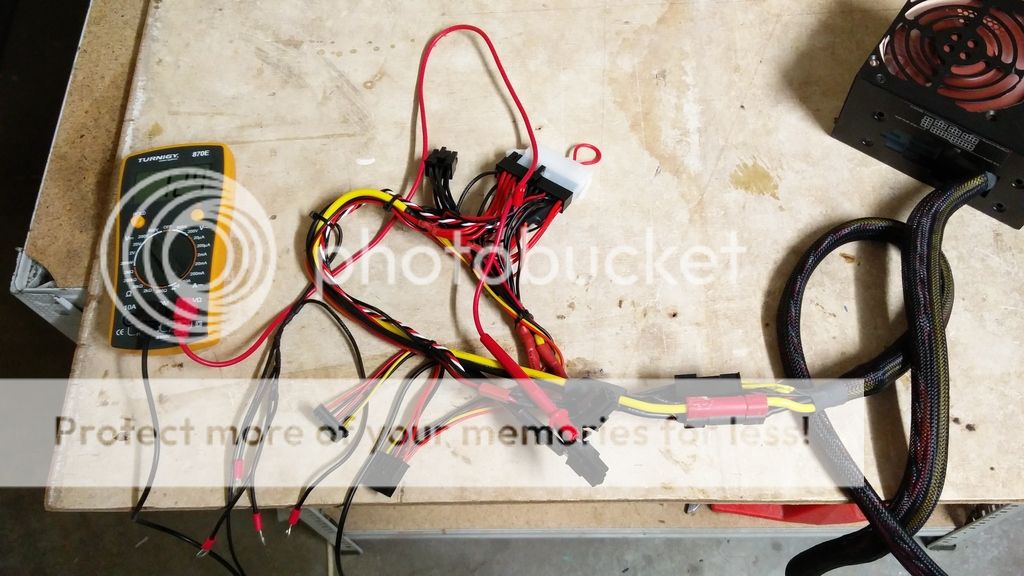
now that all of the above is done it's time to measure the voltages and see if everything is hooked up correctly

here's the ps-on voltage

and here the 5v standby
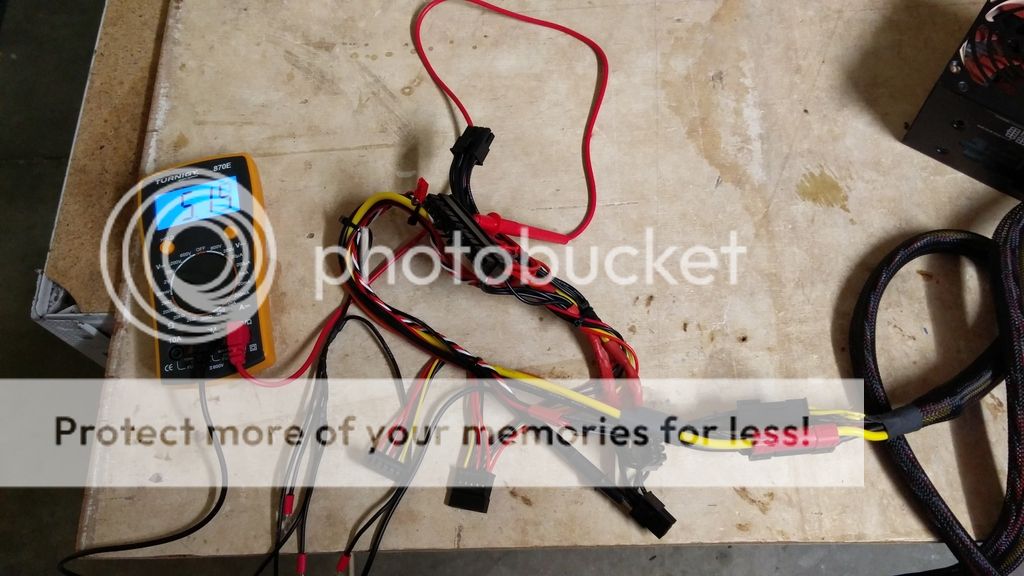
seems to be alright, now lets turn her on
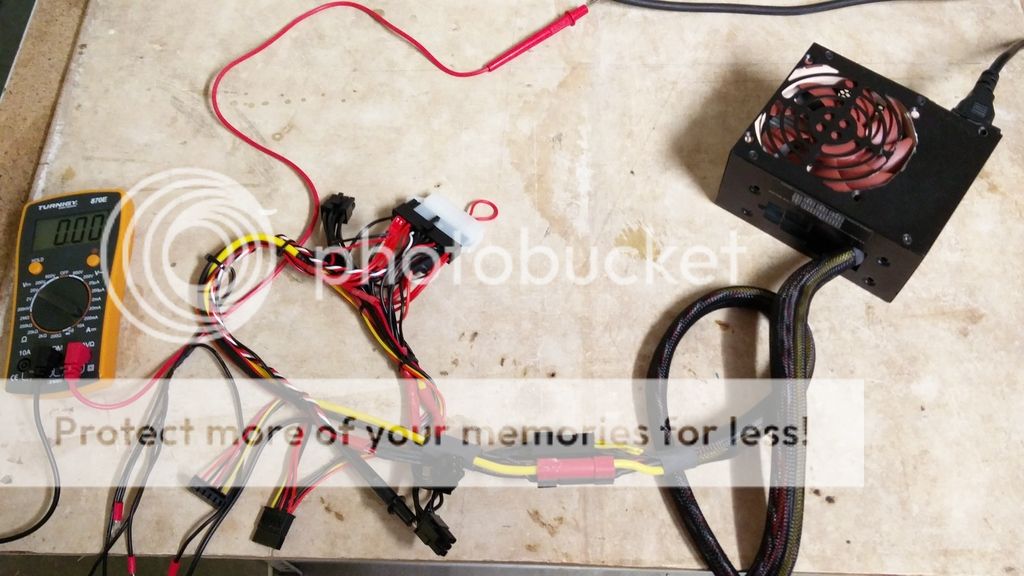
12v is fluctuating a bit but probably because nothing is connected.
both 5v and 3.3v where all right
now let's bring in an old motherboard


no explosion so everything is still good. lets continue measuring
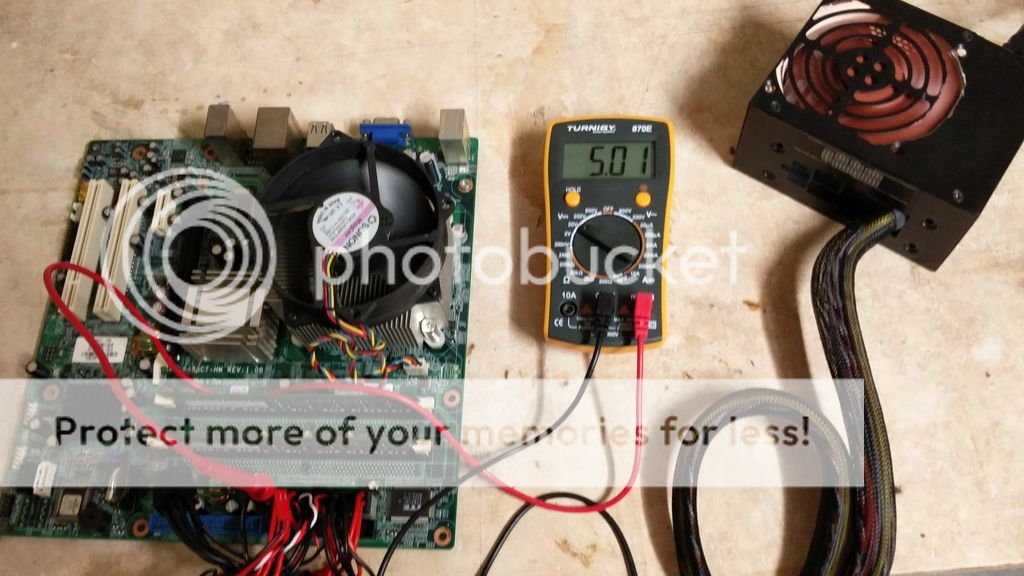


all looks good so lets call it a day and go home. ehmmm wait I am home :rolleyes:
I hope you've enjoyed the little....... uhmmmm BIG update.
here's the ps-on voltage
and here the 5v standby
seems to be alright, now lets turn her on
12v is fluctuating a bit but probably because nothing is connected.
both 5v and 3.3v where all right
now let's bring in an old motherboard
no explosion so everything is still good. lets continue measuring
all looks good so lets call it a day and go home. ehmmm wait I am home :rolleyes:
I hope you've enjoyed the little....... uhmmmm BIG update.
Related Content
- Asus ROG Strix Z390-H motherboard Max RAM in Hardware & Build Advice
- Advice for my ROG Strix Z790-E build in Hardware & Build Advice
- Cleaning the laptop from dust, is there such a service at ASUS in Germany ? in Promotions & General Discussions
- 13900K Overclocking with ASUS ROG Z790-H in Overclocking & Tweaking
- Pc rgb case lights not turning on (g10dk prebuilt) in Hardware & Build Advice
