Installation of ROG RYUJIN II series AIO water cooling
To provide you more detailed instruction, you can also click ASUS YouTube video link below to know more about Installation of ROG RYUJIN II series AIO water cooling
https://www.youtube.com/watch?v=wTY6_5jlFHc
If you are new to the ROG RYUJIN II series AIO water cooling, you can install it on your motherboard by referring to the following steps.
(Example of RYUJIN II 360 ARGB)
- Installation of water pump on Intel models
- Installation of water pump on AMD models
- Installation of other water cooling accessories
1.2 Insert the four legs of the Intel bracket from the back of the MB into the four holes near the CPU socket, as shown in the following figure.
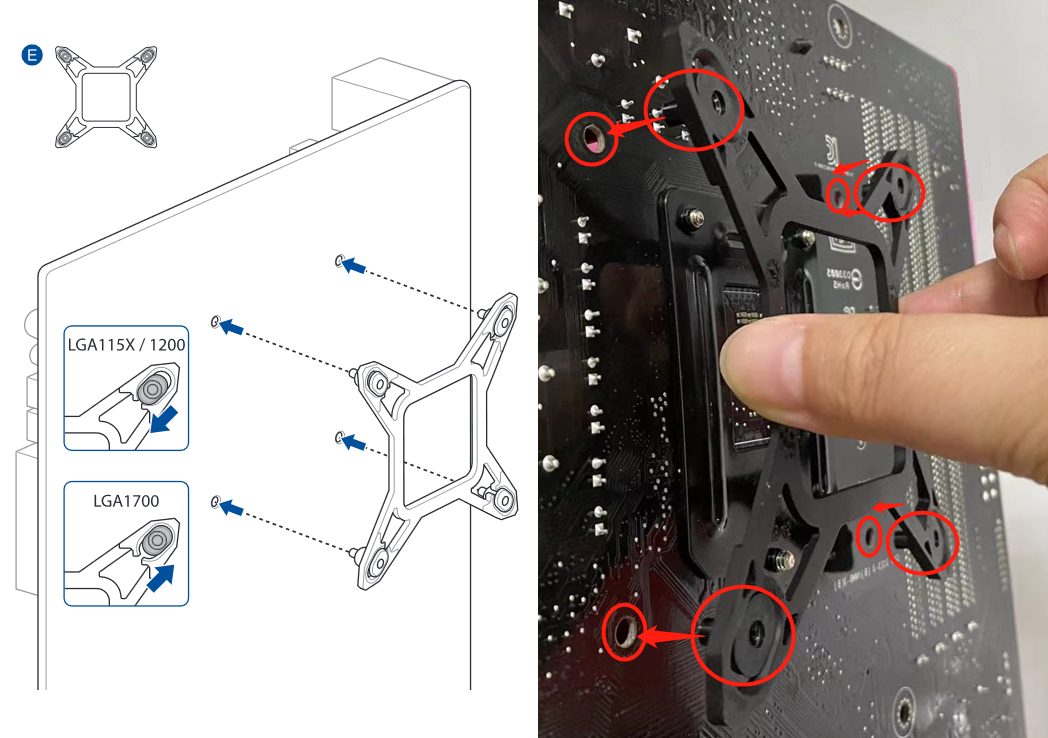
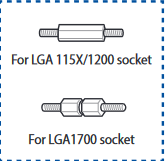
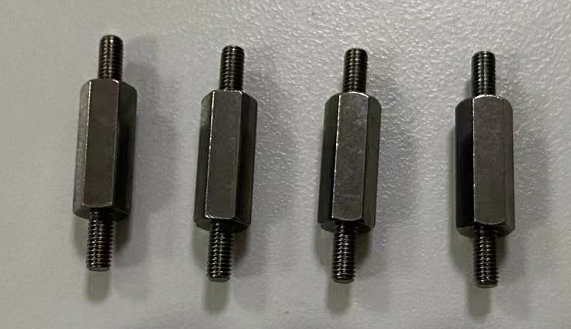
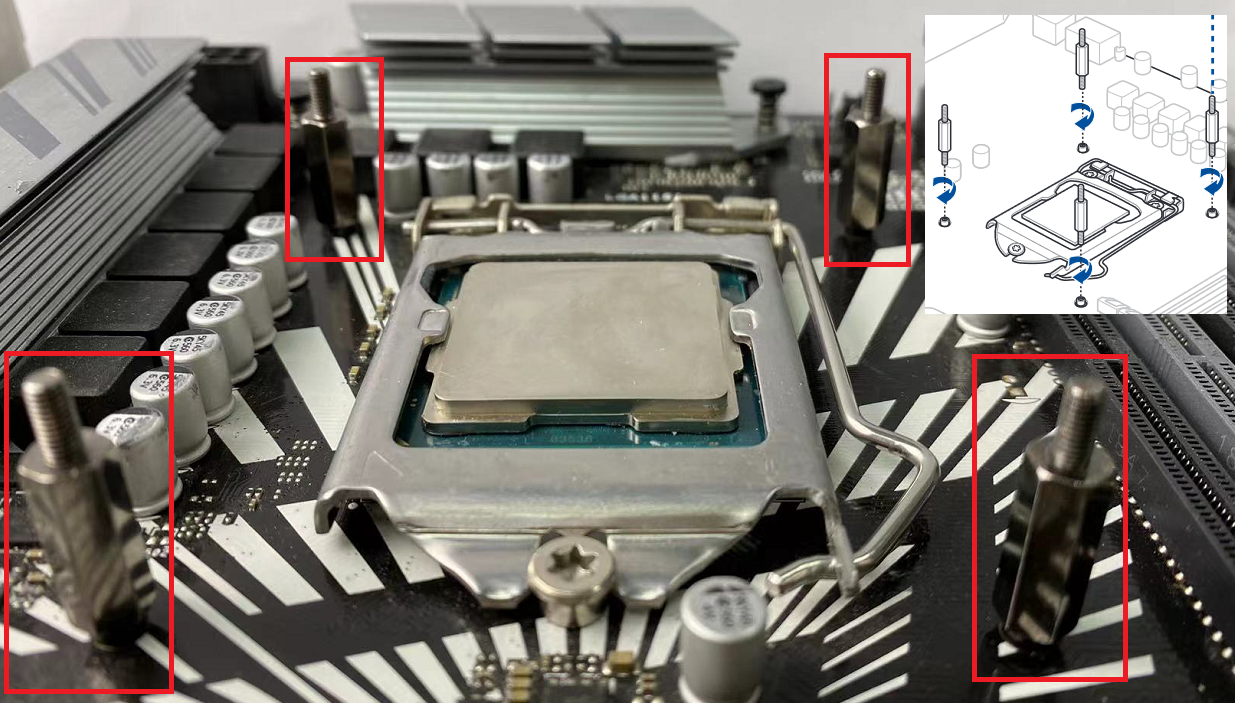
1.3 Find the long screws corresponding to the MB and respectively screw them from the front of the MB to the Intel bracket installed in the previous step, as shown in the following figure.
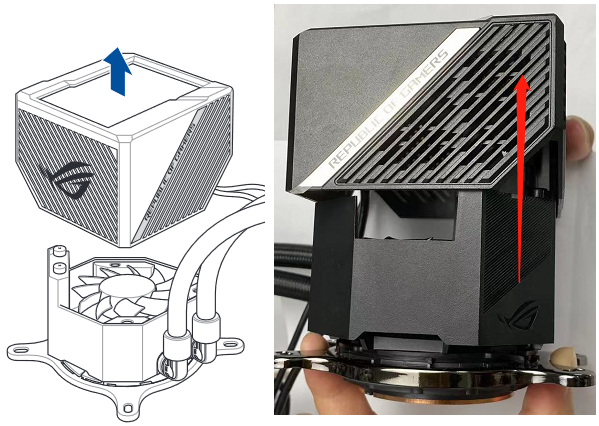
1.4 Pull up and remove the water pump's magnetic LCD screen casing, as shown in the following figure.
1.5 Attach the water cooling pump to the four studs in step 1.3, as shown in the following figure.
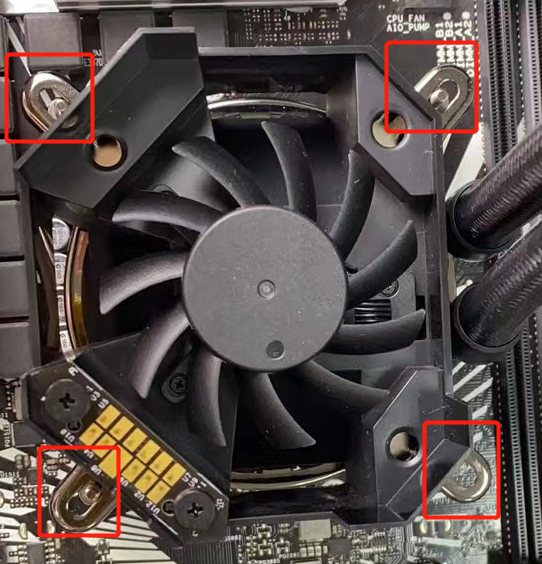
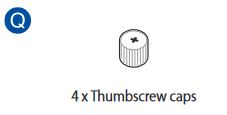
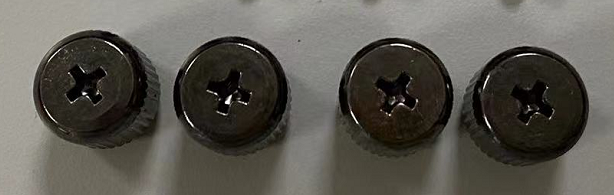
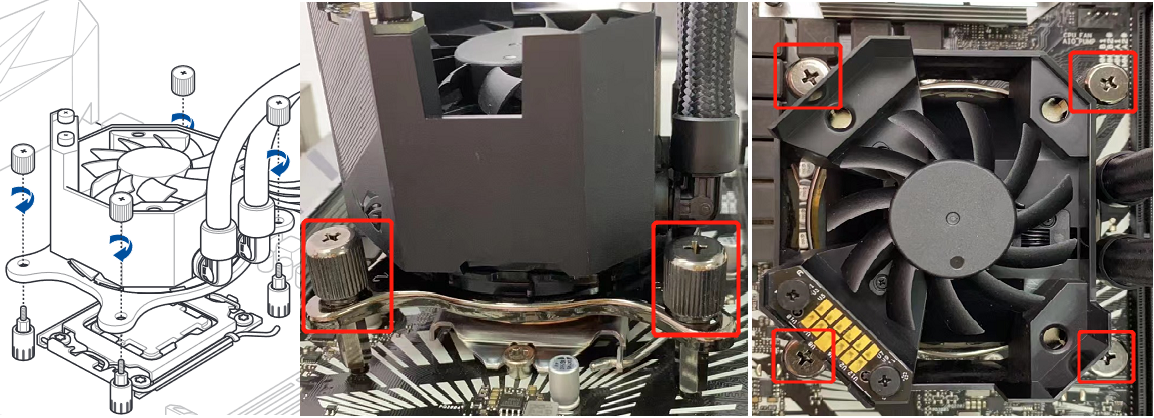
1.6 Find the screw caps in the screw package, install it on the 4 studs of the water pump and screw them tightly to fix the pump, as shown in the following figure.
1.7 Install the water-cooled pump magnetic LCD screen case removed in step 1.4 vertically, as shown in the following figure.

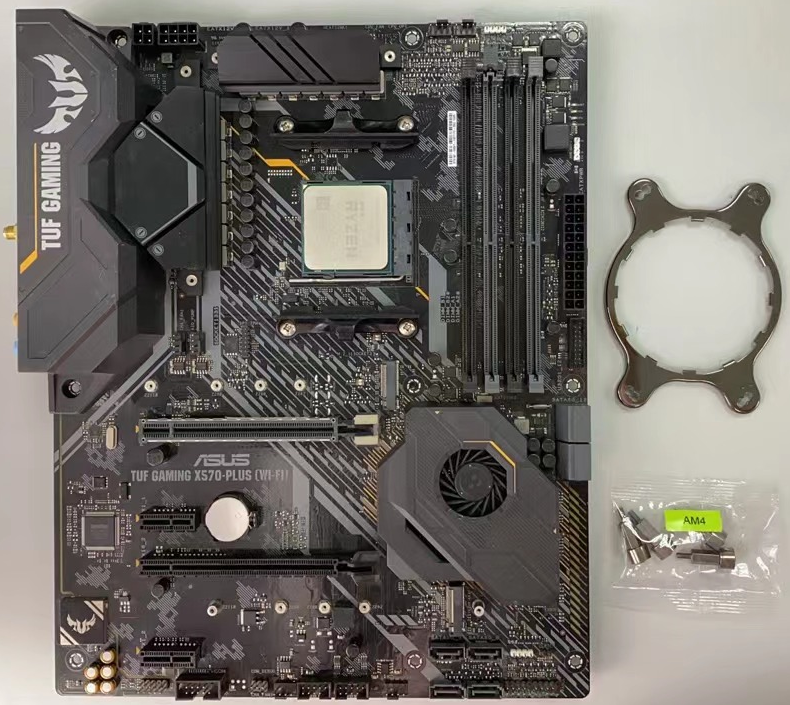
AMD models (Example:TUF GAMING X570-PLUS WIFI)
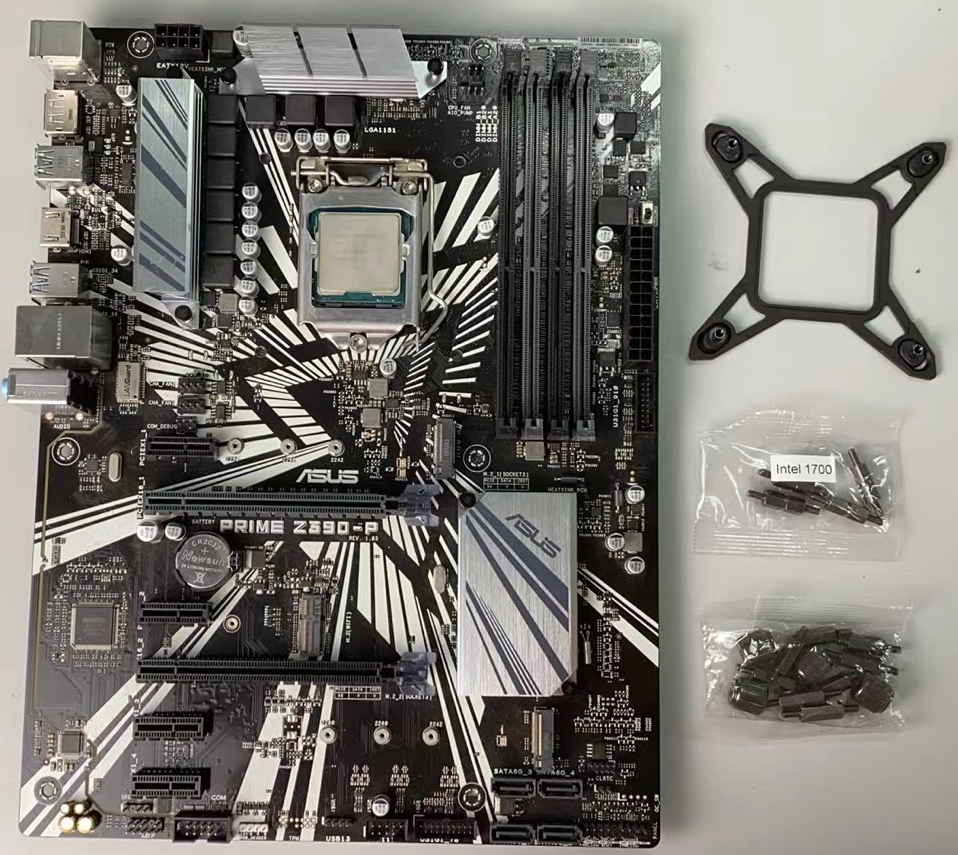
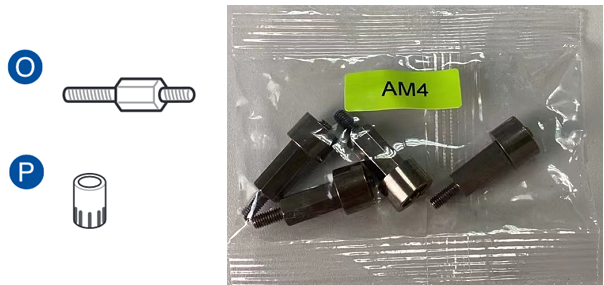
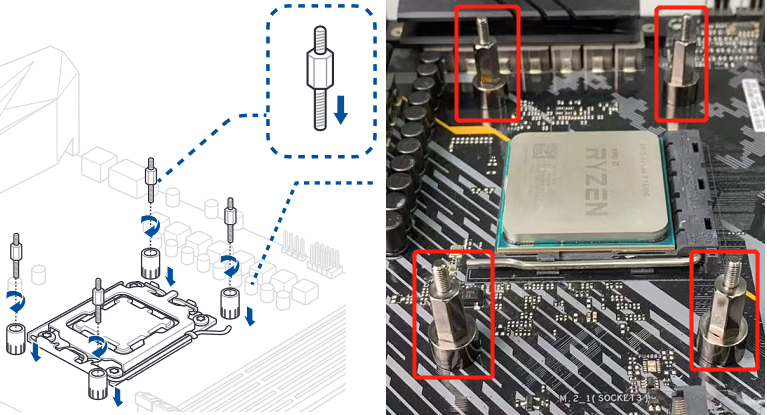
2.1 Find the MB corresponding AMD AM4 socket bracket and studs, as shown in the following figure.
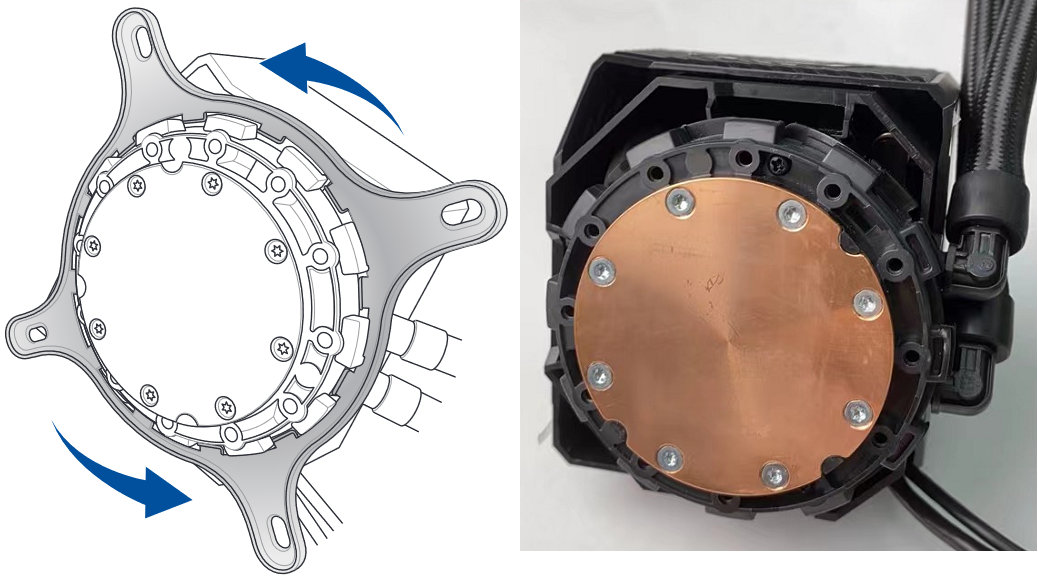
2.2 Press the Intel bracket pre-installed on the water pump and rotate it counterclockwise to remove, as shown in the following figure.
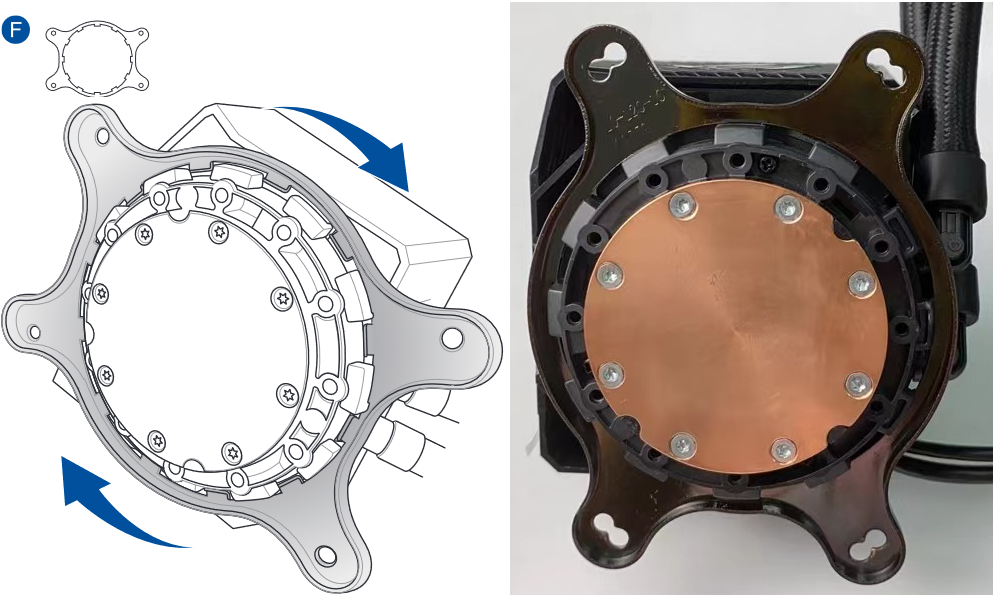
2.3 Install the AM4 bracket (press the AM4 bracket and rotate clockwise), as shown in the following figure.
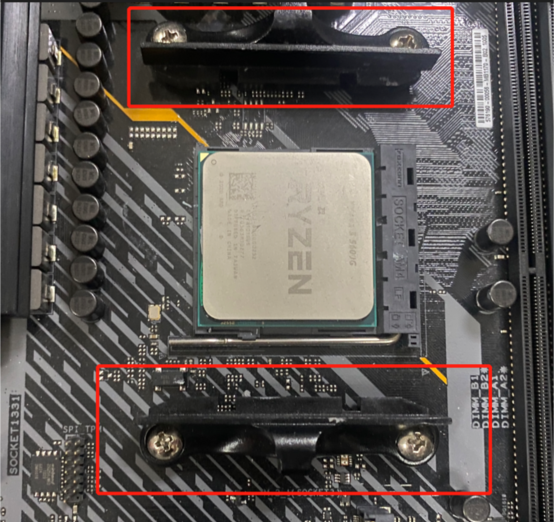
2.4 Remove the pre-installed cooler bracket from the MB, as shown in the following figure.
2.5 Find the corresponding studs of the AM4 socket and install them, as shown in the following figure.
2.6 Pull up the water pump magnetic LCD screen casing and remove it, as shown in the following figure.

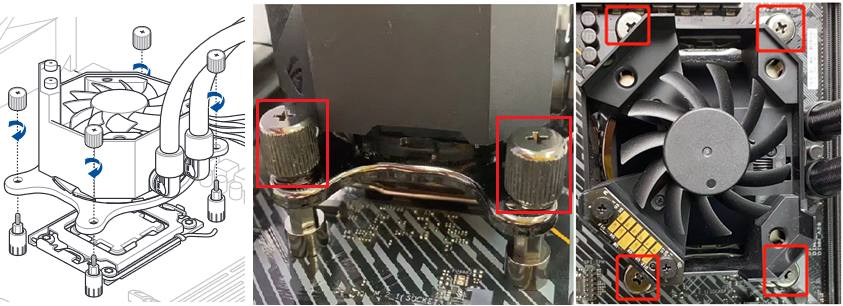
2.7 Install the water pump to the stud of the AM4 socket and screw them, as shown in the following figure.
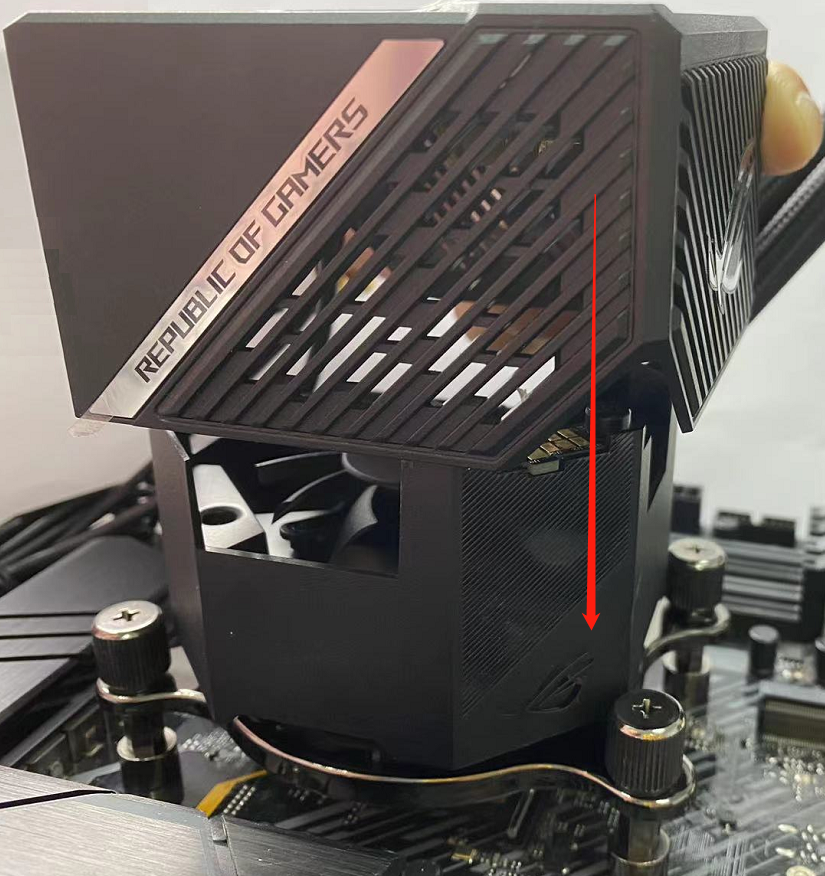
2.8 Install the water-cooled pump magnetic LCD screen case removed in step 2.6 vertically, as shown in the following figure.
Installation of other water cooling accessories
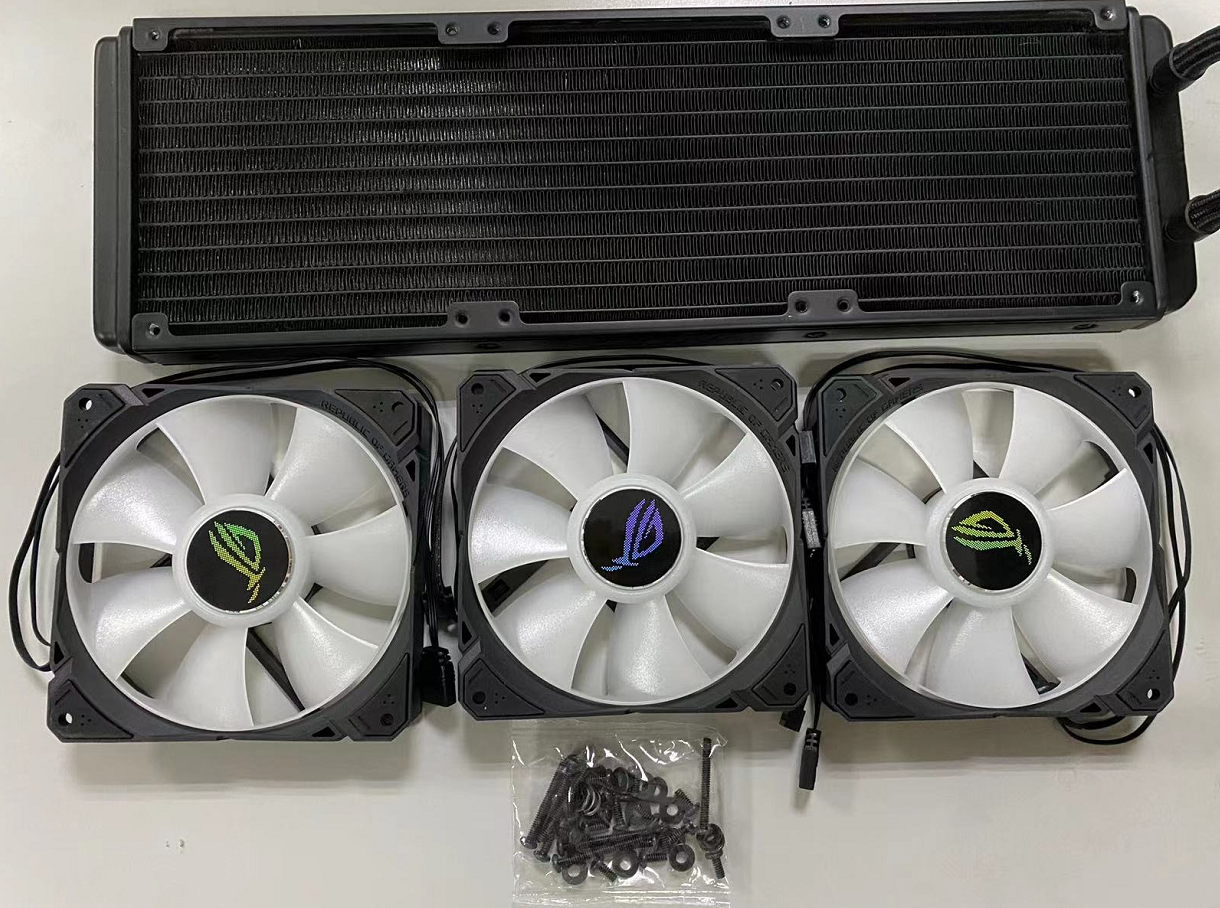
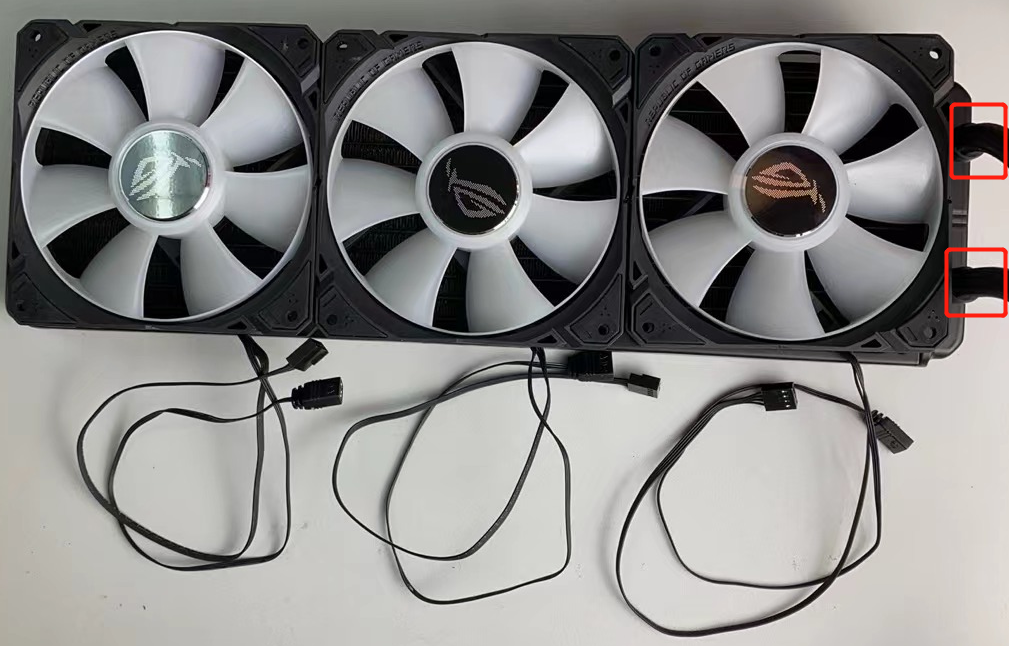
3.1 Find the three fans and the black screw package, as shown in the following figure.
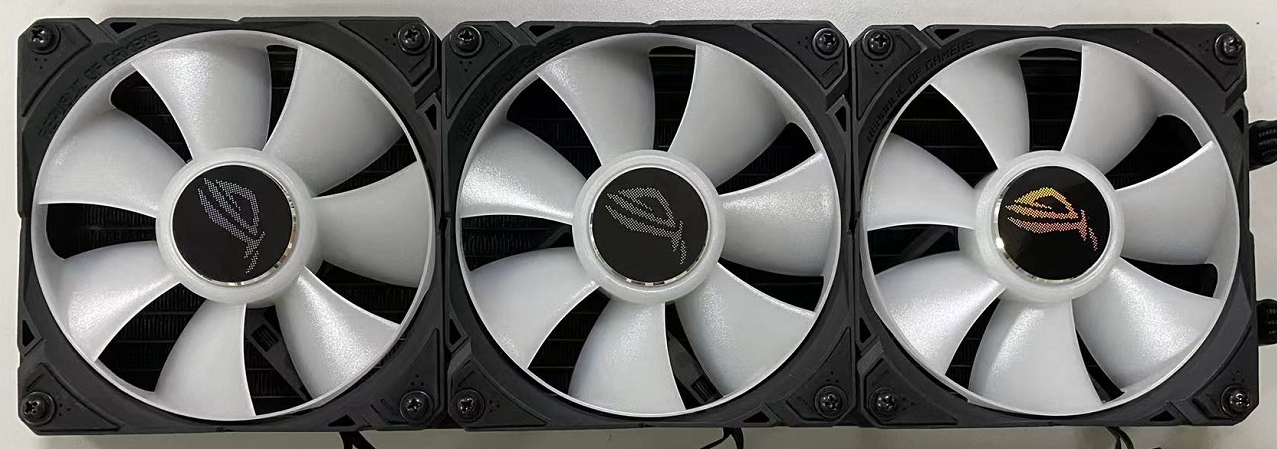
3.2 Place the three fans with the ROG logo facing outward and align them with the screw holes on the heatsink, as shown in the following figure.
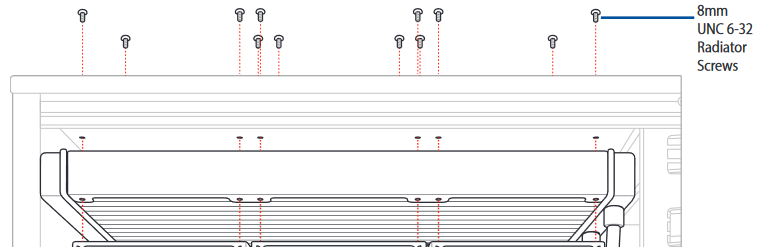
3.3 Put the washers in the screw packs onto the long screws, and thread through the three fan screw holes and lock all 3 fans to the heatsink, as shown in the following figure.
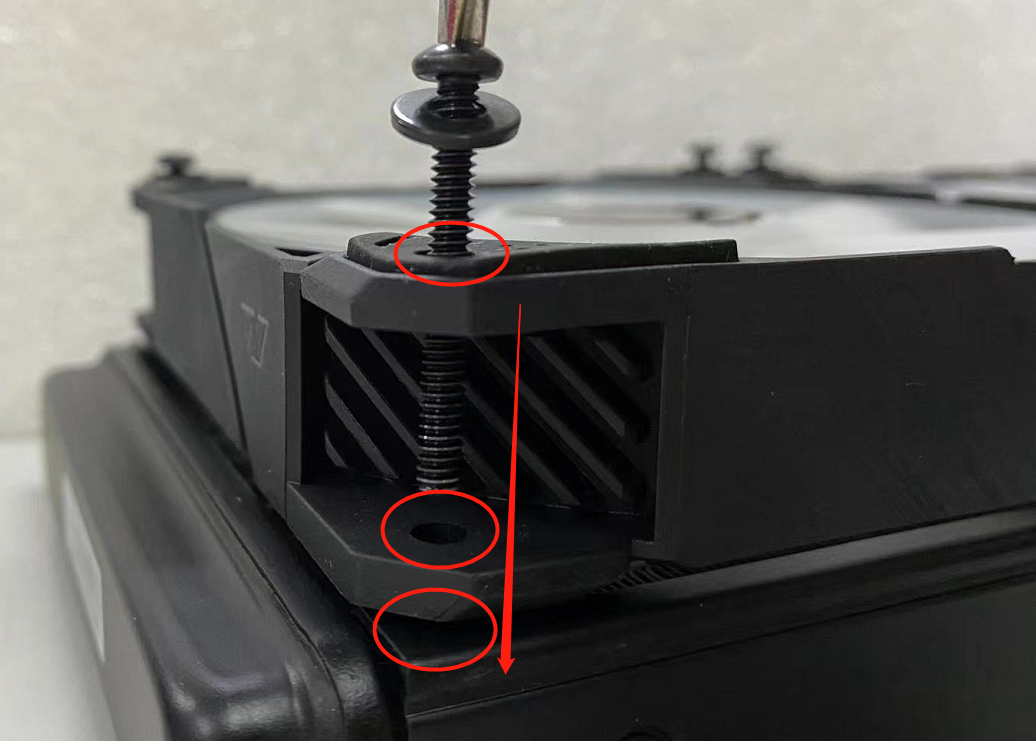
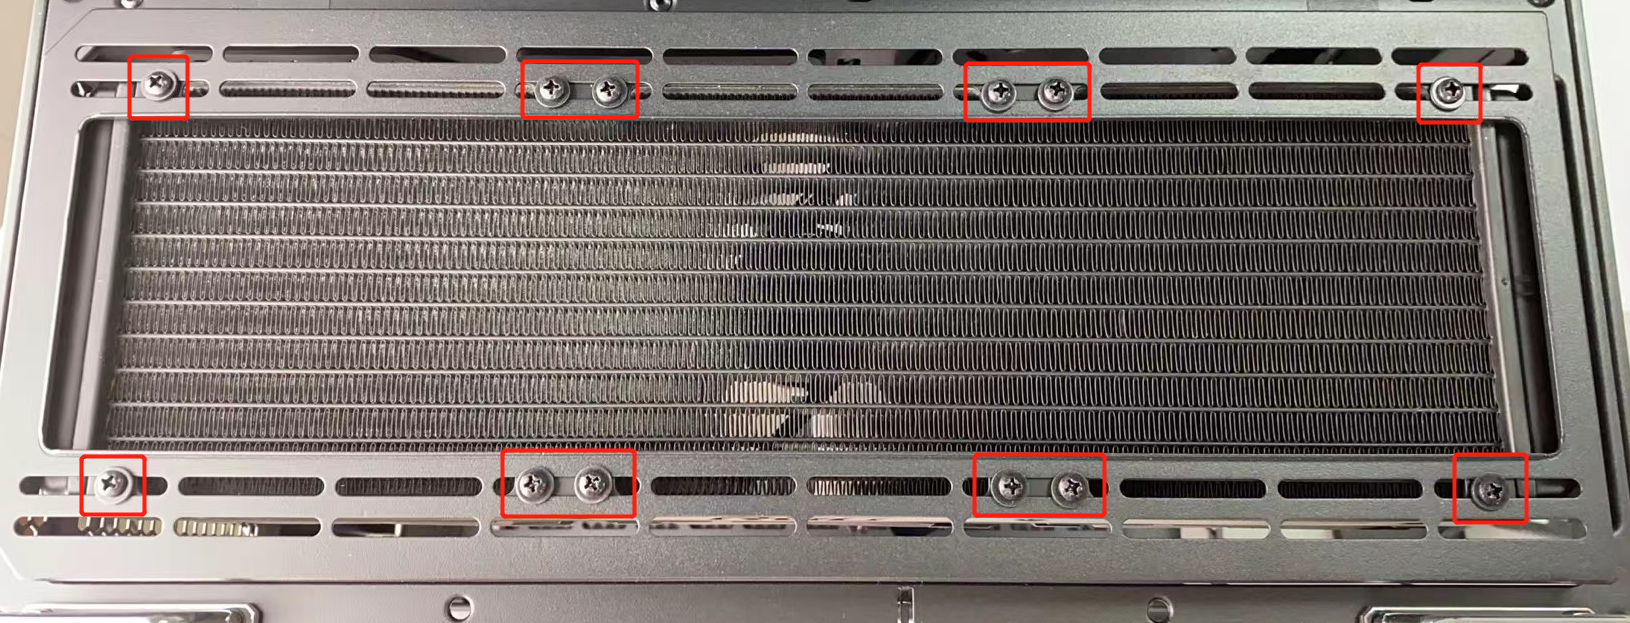
3.4 Put the washers in the screw pack into the short screws and screw the water cooling module to the chassis from the outside of the chassis, as shown in the following figure.
3.5 Connect the 9pin USB connector of the water cooling pump to the 9pin USB interface of the MB, as shown in the following figure.

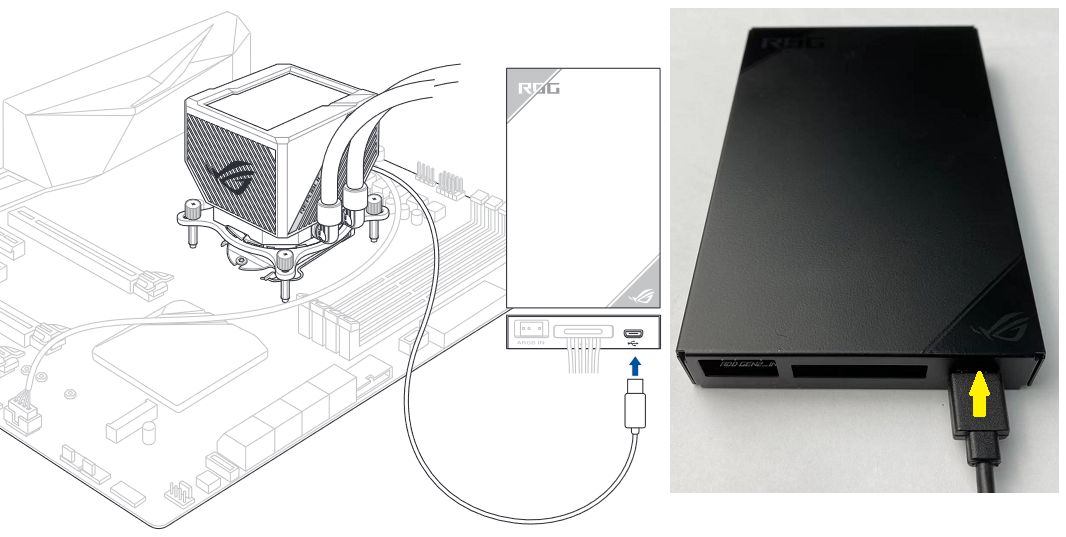
3.6 Connect the micro USB connector of the water cooling pump to the micro USB interface of the fan controller, as shown in the following figure.
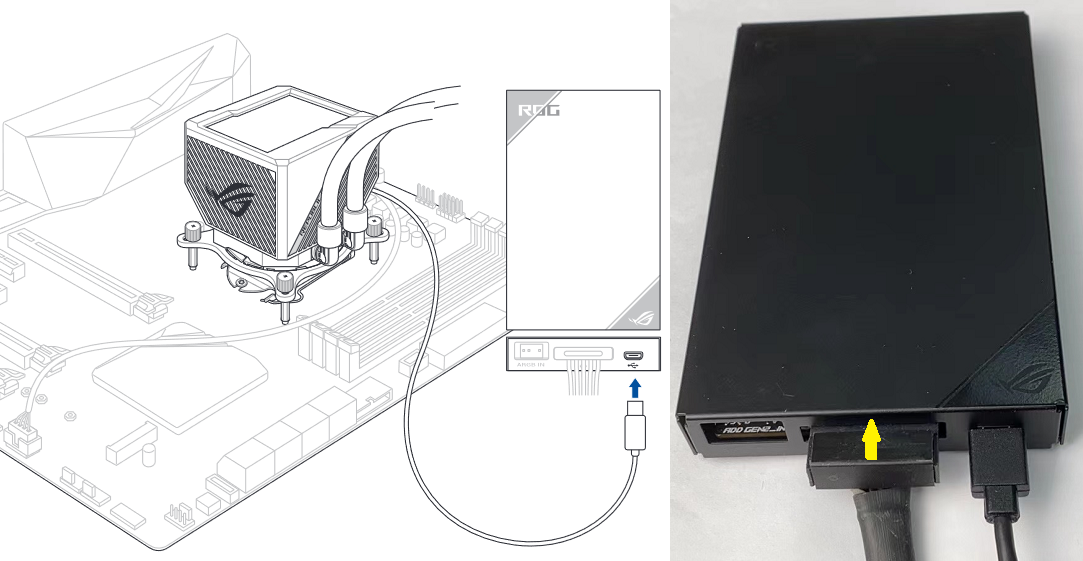
3.7 Connect the SATA power cable on the power supply to the SATA power interface of the fan controller, as shown in the following figure.
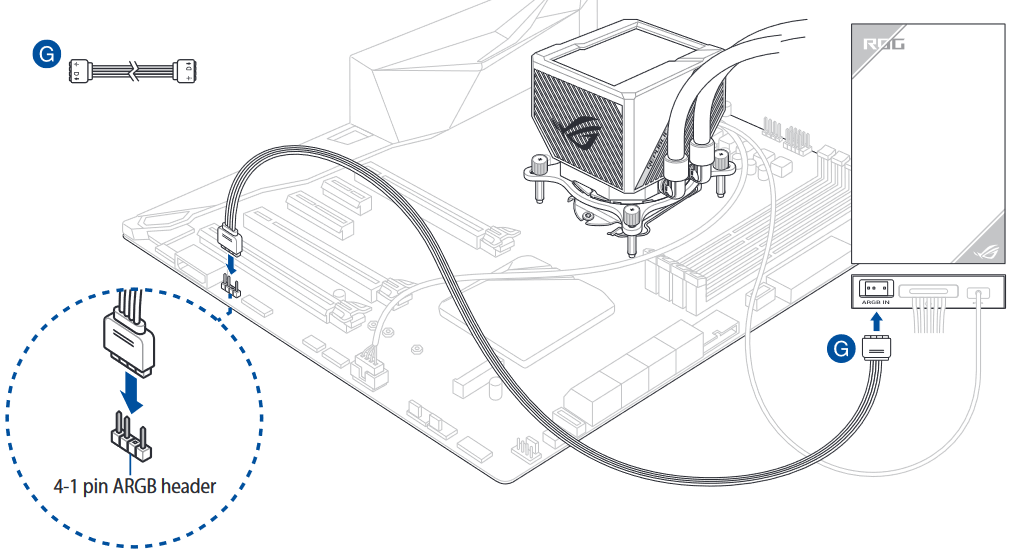
3.8 Connect one end of the 4-1 pin ARGB cable in the package to the ARGB interface of the fan controller, and the other end to the ARGB interface of the MB, as shown in the following figure.
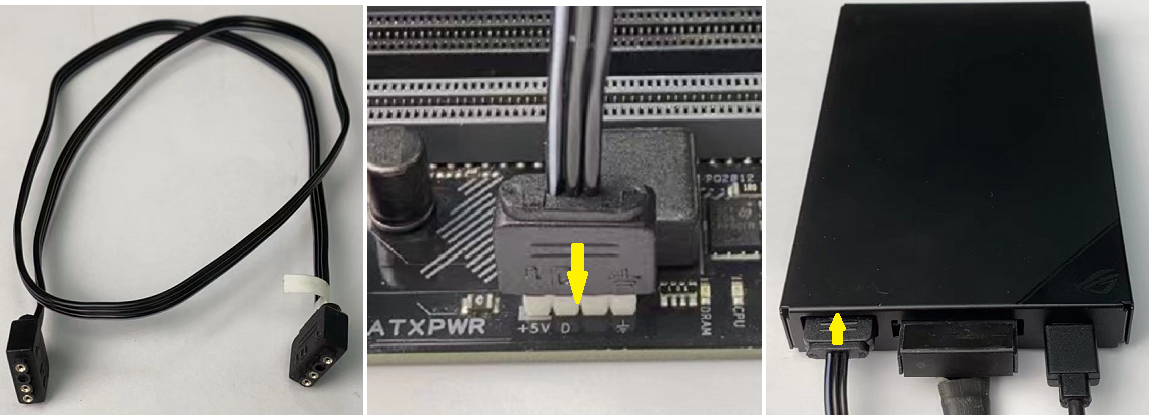
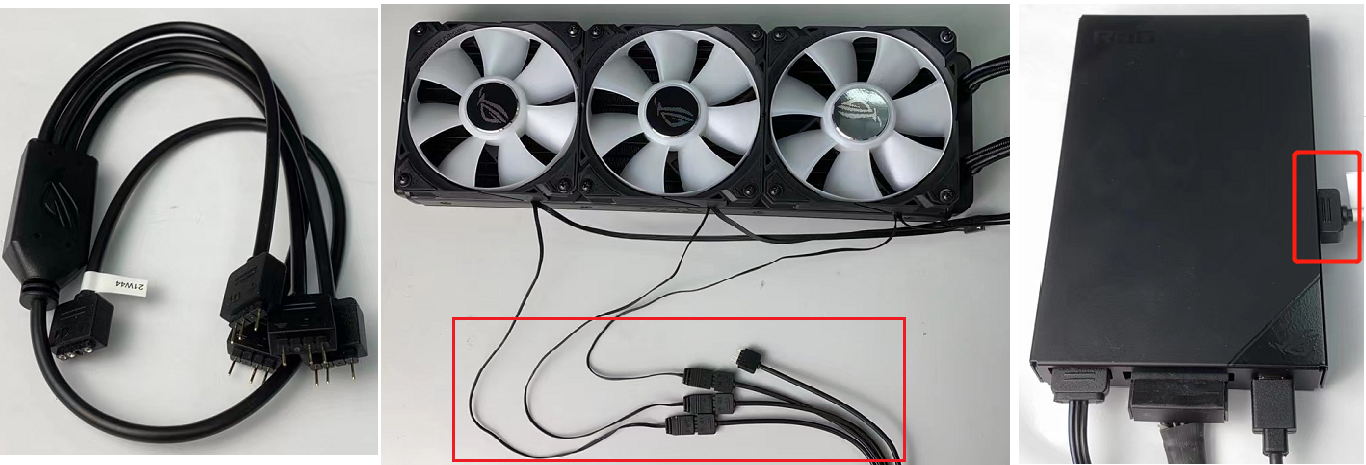
3.9 Connect the ARGB connectors of the three fans to the 4-1 pin ARGB cable in the package, and then connect the other end of the cable to one of the ARGB connectors on the side of the fan controller, as shown in the following figure.
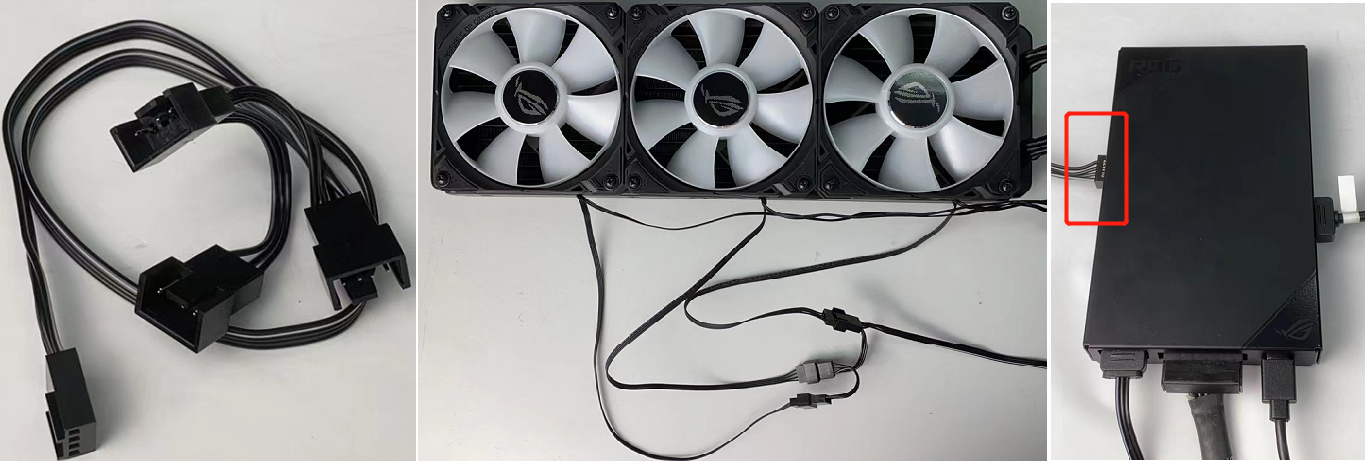
3.10 Connect the Fan connectors of the three fans to the 4-in-1 fan cable in the package, and then connect the other end of the cable to one of the Fan connectors on the side of the fan controller, as shown in the following figure.
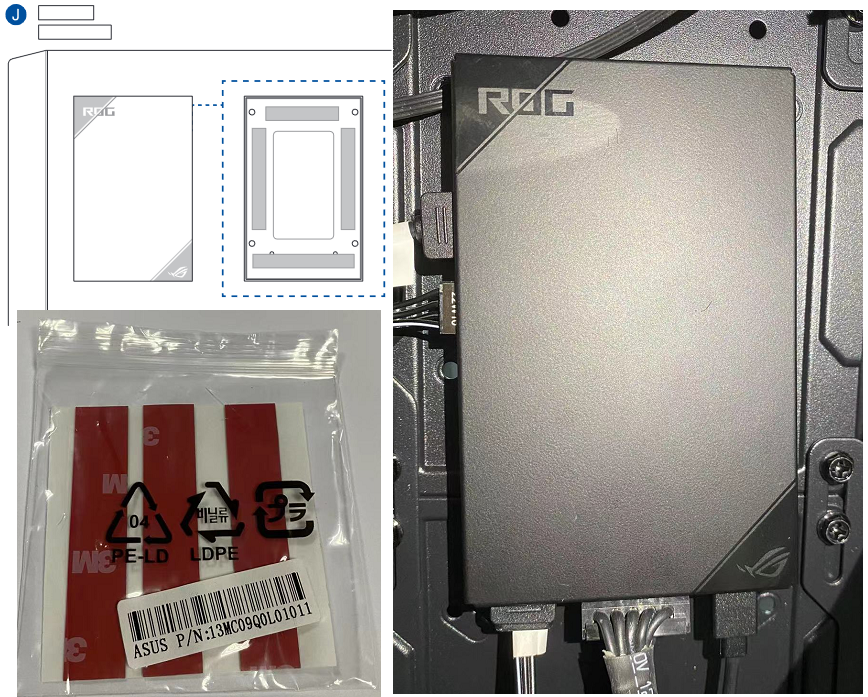
3.11 Find the tape in the package and stick it to the back of the fan controller, then stick the fan controller to the appropriate location inside the chassis, as shown in the following figure.
3.12 After the water cooling installation is completed, as shown in the picture below.
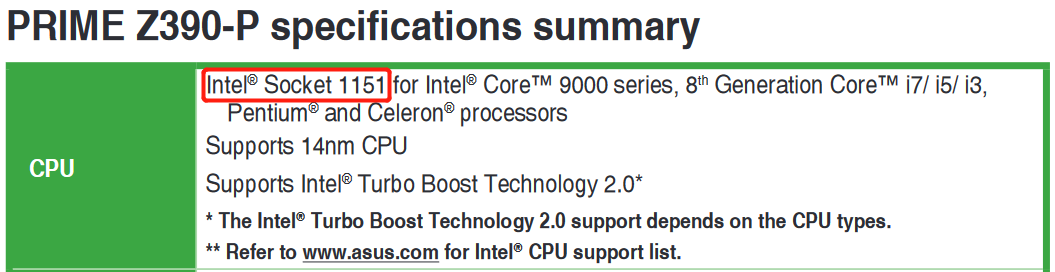
Q1: How to confirm your CPU socket of Intel MB is 115X, 1200 or 1700?
A1: As shown in the following figure, you can find your MB CPU socket in the [CPU] field of the user manual specification list.
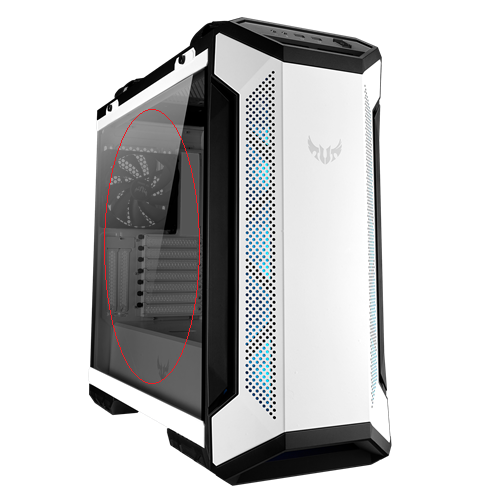
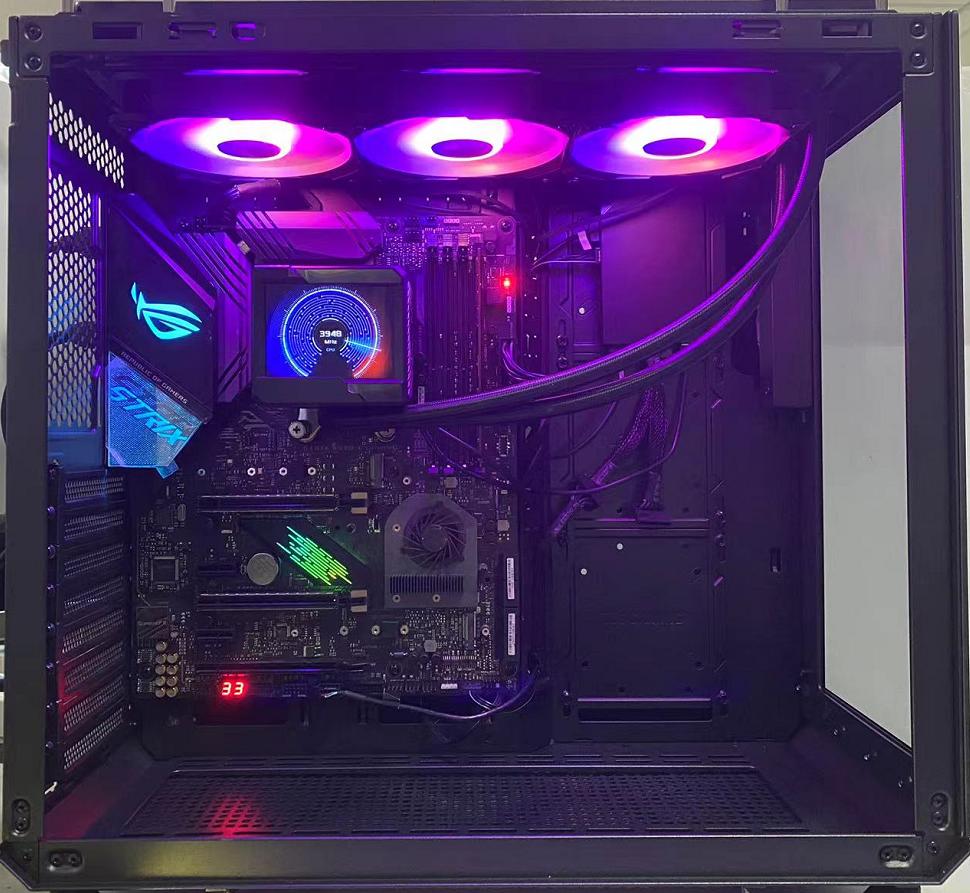
Q2: Chassis suggestions for ROG RYUJIN II series AIO water cooling.
A2: Since the water cooling pump has a LCD screen, you can choose a side transparent case to see the pictures or information displayed on the LCD screen.
For example: TUF Gaming GT501 White Edition, you can see the water cooling LCD screen inside the case through the tempered glass.