Related Topics
[RT-BE58 Go/RT-AX57 Go] How ASUS Router Guest Portal Turns a Simple Login Screen into a Branded Access Experience?
What is The dashboard loads?
ASUS Router’s Guest Portal is the kind of admin-side feature that quietly upgrades a basic Wi‑Fi login flow into something far more polished and practical. From a reviewer’s perspective, its value is not just that it lets a network owner create a captive portal; it is that the process feels straightforward enough for everyday use while still giving enough control to shape the guest experience. After signing in to the router account and opening the Network section, the portal editor appears in a way that makes the workflow easy to follow, even for users who are not network specialists. The feature is especially useful in homes, small offices, cafés, studios, and event spaces where guest access needs to look intentional rather than generic. By letting the administrator enter an SSID and brand name, preview changes live, and review the terms and layout before applying settings, ASUS gives users a practical way to present a cleaner, more professional access page. That matters because the guest portal is often the first interaction visitors have with the network, and a well-designed portal can improve trust, reduce confusion, and make the whole connection process feel more organized.
What are the benefits of The dashboard loads?
- Creates a more professional first impression: The guest portal lets the router owner replace a plain, default-looking access screen with a branded entry point that reflects the network’s identity. Entering the SSID and brand name helps the portal feel connected to the space it serves, whether that is a home office, retail counter, or hospitality setting. For a reviewer, this is one of the most visible upgrades because it changes the guest experience before anyone even connects, making the network feel curated instead of improvised.
- Makes customization easier to understand and control: The interface is designed around a simple sequence: open Network, choose Guest Portal, edit the captive portal, then review and apply. That structure reduces the friction that often comes with router configuration screens. The live preview updating as the user types is especially helpful because it removes guesswork and lets the administrator see how the portal will look in real time. This makes the feature more approachable for non-technical users while still giving enough control to fine-tune the result.
- Helps align access rules with the guest experience: Reviewing the terms and portal layout before applying settings gives the administrator a chance to make sure the page is not only visually acceptable but also functionally clear. That is important in places where guests need to understand usage terms, login expectations, or network access boundaries. The feature supports a more orderly setup by combining presentation and policy in one place, which can reduce confusion and make the network feel more trustworthy and easier to manage.
Setup Guide
Step 1: Sign in to the router admin account
Start by logging into the ASUS router account so the configuration tools become available. This is the entry point for managing guest access, and it ensures the user is working from the administrator side rather than a guest-facing screen.
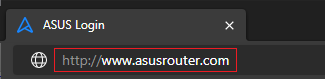
(1) Connect your computer to the router via wired or WiFi connection and enter your router's LAN IP or router URL http://www.asusrouter.com to the WEB GUI.
(2) Key in your router's username and password to log in.

Note: If you forget the user name and/or password, please restore the router to the factory default status and setup.
Please refer to [Wireless Router] How to reset the router to factory default setting? for how to restore the router to default status.
Step 2: Open the Network section
Once the dashboard loads, go into Network to reach the settings area where guest-related options are organized. This keeps the workflow focused and helps the user move directly toward the portal controls without searching through unrelated menus.

Step 3: Select Guest Portal
From the network options, choose Guest Portal to open the section dedicated to captive portal setup. This is the key step that shifts the interface from general network management into the page where the guest login experience can be customized.

Step 4: Launch the captive portal editor
A captive portal editor appears, giving the administrator a dedicated workspace for shaping the guest login page. This view is important because it centralizes the visual and text-based settings in one place, making the process easier to manage.

Step 5: Enter the SSID and brand name
Fill in the SSID and brand name so the portal reflects the network identity the guest is meant to recognize. This step helps the page feel more intentional and makes the access screen match the environment or business using it.

Step 6: Check the live preview
As the user types, the preview updates immediately, which makes it easier to judge whether the portal looks right before saving. This real-time feedback reduces trial and error and helps the administrator catch layout or wording issues early.

Step 7: Review terms and layout
Take a careful look at the terms and the portal layout to confirm the page communicates the right information and presents it clearly. This review step matters because it balances appearance with usability, helping guests understand what they are agreeing to.
Step 8: Apply the new settings
When everything looks correct, apply the new settings to save the portal configuration. This commits the changes so the customized guest access page becomes active and ready for visitors to use.

Conclusion
ASUS Router’s Guest Portal stands out because it turns a routine network task into a polished, manageable experience. From a reviewer’s point of view, the biggest strength is the balance between simplicity and control: the steps are easy to follow, the preview responds in real time, and the final result can look much more professional than a standard guest login page. It is a strong fit for users who want their network to feel branded and organized without dealing with a complicated setup process. For small businesses, hospitality spaces, or anyone who regularly shares Wi‑Fi with visitors, this feature adds real practical value by making access clearer and more presentable.
How to get the (Utility / Firmware)?
You can download the latest drivers, software, firmware and user manuals in the ASUS Download Center.
If you need more information about the ASUS Download Center, please refer this link.