Related Topics
- [Desktop Chassis] What is the installed limitation of ROG Z11 GPU water block?
- [Desktop Chassis] ROG Z11 How to connect fans to the extension hub?
- [Computer Chassis] ROG Z11 can nameplate be customized?
- [Desktop Chassis] Are there any guidelines for ROG Z11 cable routing?
- [Gaming Cases] ROG Z11 case fan disassembly and assembly instructions
- [Computer chassis] ROG Z11 Case Side Panel Replacement
- [Desktop Chassis] ROG Z11 front panel disassembly and assembly instructions
- [Desktop Chassis] ROG Z11 extension hub disassembly and assembly instructions
[Computer Chassis] ROG Z11 Case FIO Module Replacement
Notice
1. Protect hands by wearing gloves before disassembly or assembly. Handle parts carefully, especially corners, to prevent scratches.
2. Handle glass side or front panels with extreme care during disassembly to prevent collisions, falls, or undue stress.
3. During disassembly, lay the case flat on a stable surface to prevent the side panel from falling.
4. Neatly arrange relevant wires during assembly to prevent damage to the wires.
5. Track all screws and small components during disassembly and assembly to avoid losing any parts..
Preparation
Tool: Phillips screwdriver PH2

1.Remove the top and lower panels, left and right-side panels, and then remove the filter.
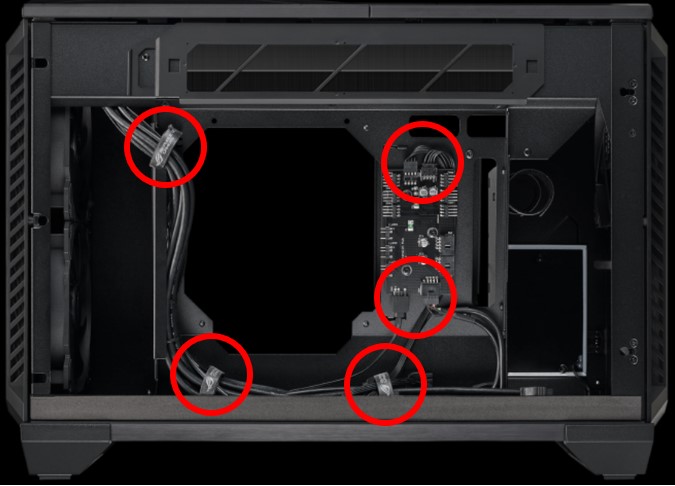
2.Loosen the front I/O module connector to the FAN HUB and release the cable tie.
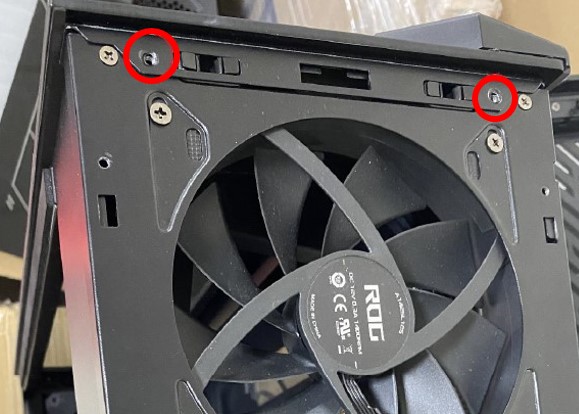
3.Loosen the two screws on top of the front panel.
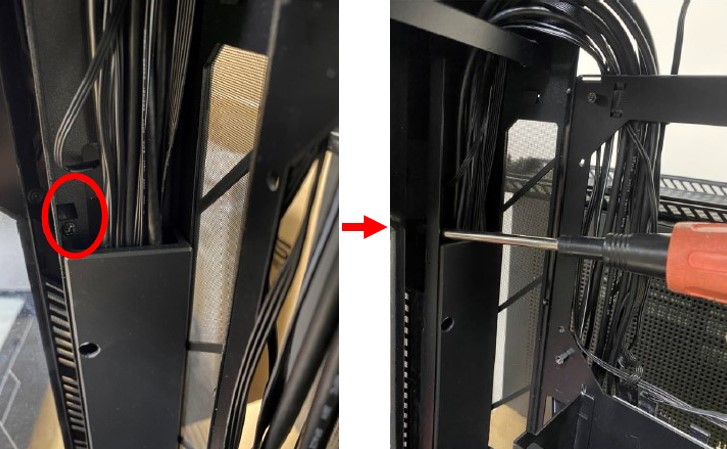
4.Loosen hidden safety screws.
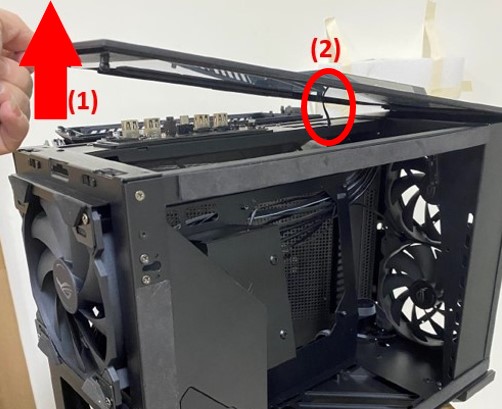
5.Lift up the panel, attention
(1)The plastic buckle may be a little tight, you need to use a little force.
(2)There are light cables connected to the panel, so be careful not to lift it up too high.
6.Remove the panel by pulling out the light board cable. Loosen the plastic back cover screws of the front I/O module and remove the back cover.
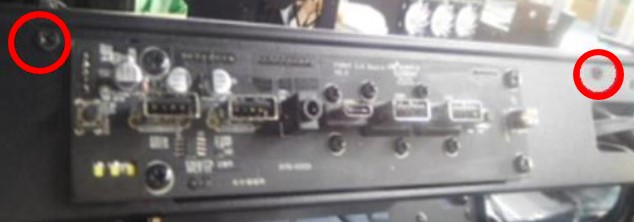
7.Remove the front I/O module by loosening the front I/O module screws.

If you need more information about our product, please visit ASUS official website.