How to tweak your ROG laptop’s performance with Armoury Crate’s Manual Mode
ROG laptops give you easy, one-click options for tuning your system's performance. But we know that not all ROG gamers are content to drive between the guard rails. To satisfy your desire for a fully customized gaming PC, we give you the power to take command through Manual Mode in Armoury Crate. Here, you'll find all the tools you need to get the exact balance of performance, temperatures, and fan noise you demand from your laptop.
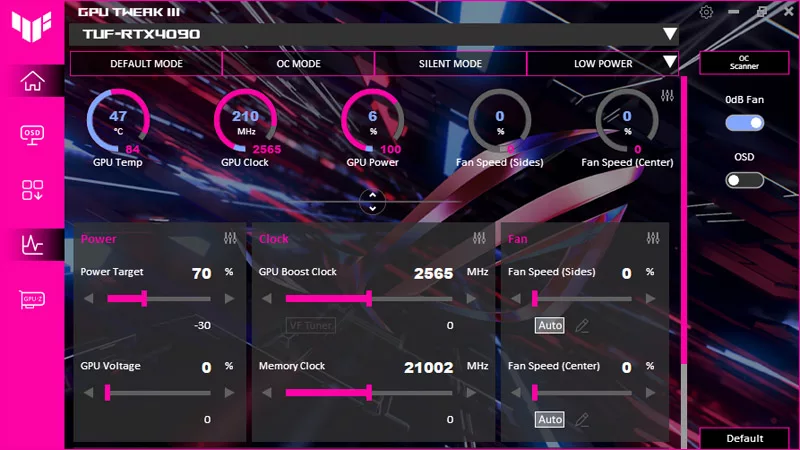
Armoury Crate’s pre-set performance modes are all most people will need to get the job done — Silent mode lowers power consumption for quiet operation, Performance mode strikes a balance between power and acoustics, and Turbo mode cranks everything to the max for high-octane gaming. But if you want more fine-grained control, Armoury Crate’s Manual mode lets you specify exact power, temperature, and fan targets to customize performance as you see fit. (And in some cases, like the Zephyrus Duo 16, Manual mode even allows you to push the system even further than Turbo mode allows.)
To enable Manual mode, open Armoury Crate, make sure GPU mode is set to Standard, Ultimate, or Optimized, and click the “Manual” option along the bottom of the screen. You’ll see a number of sliders appear, which you can start tweaking to your heart’s content. For best results, plug your laptop into a power source before continuing, as not all Manual mode options may be available when on battery power. In addition, not all options will be available on all machines, so the limits available to you may depend on your specific device.
Set your CPU power limits
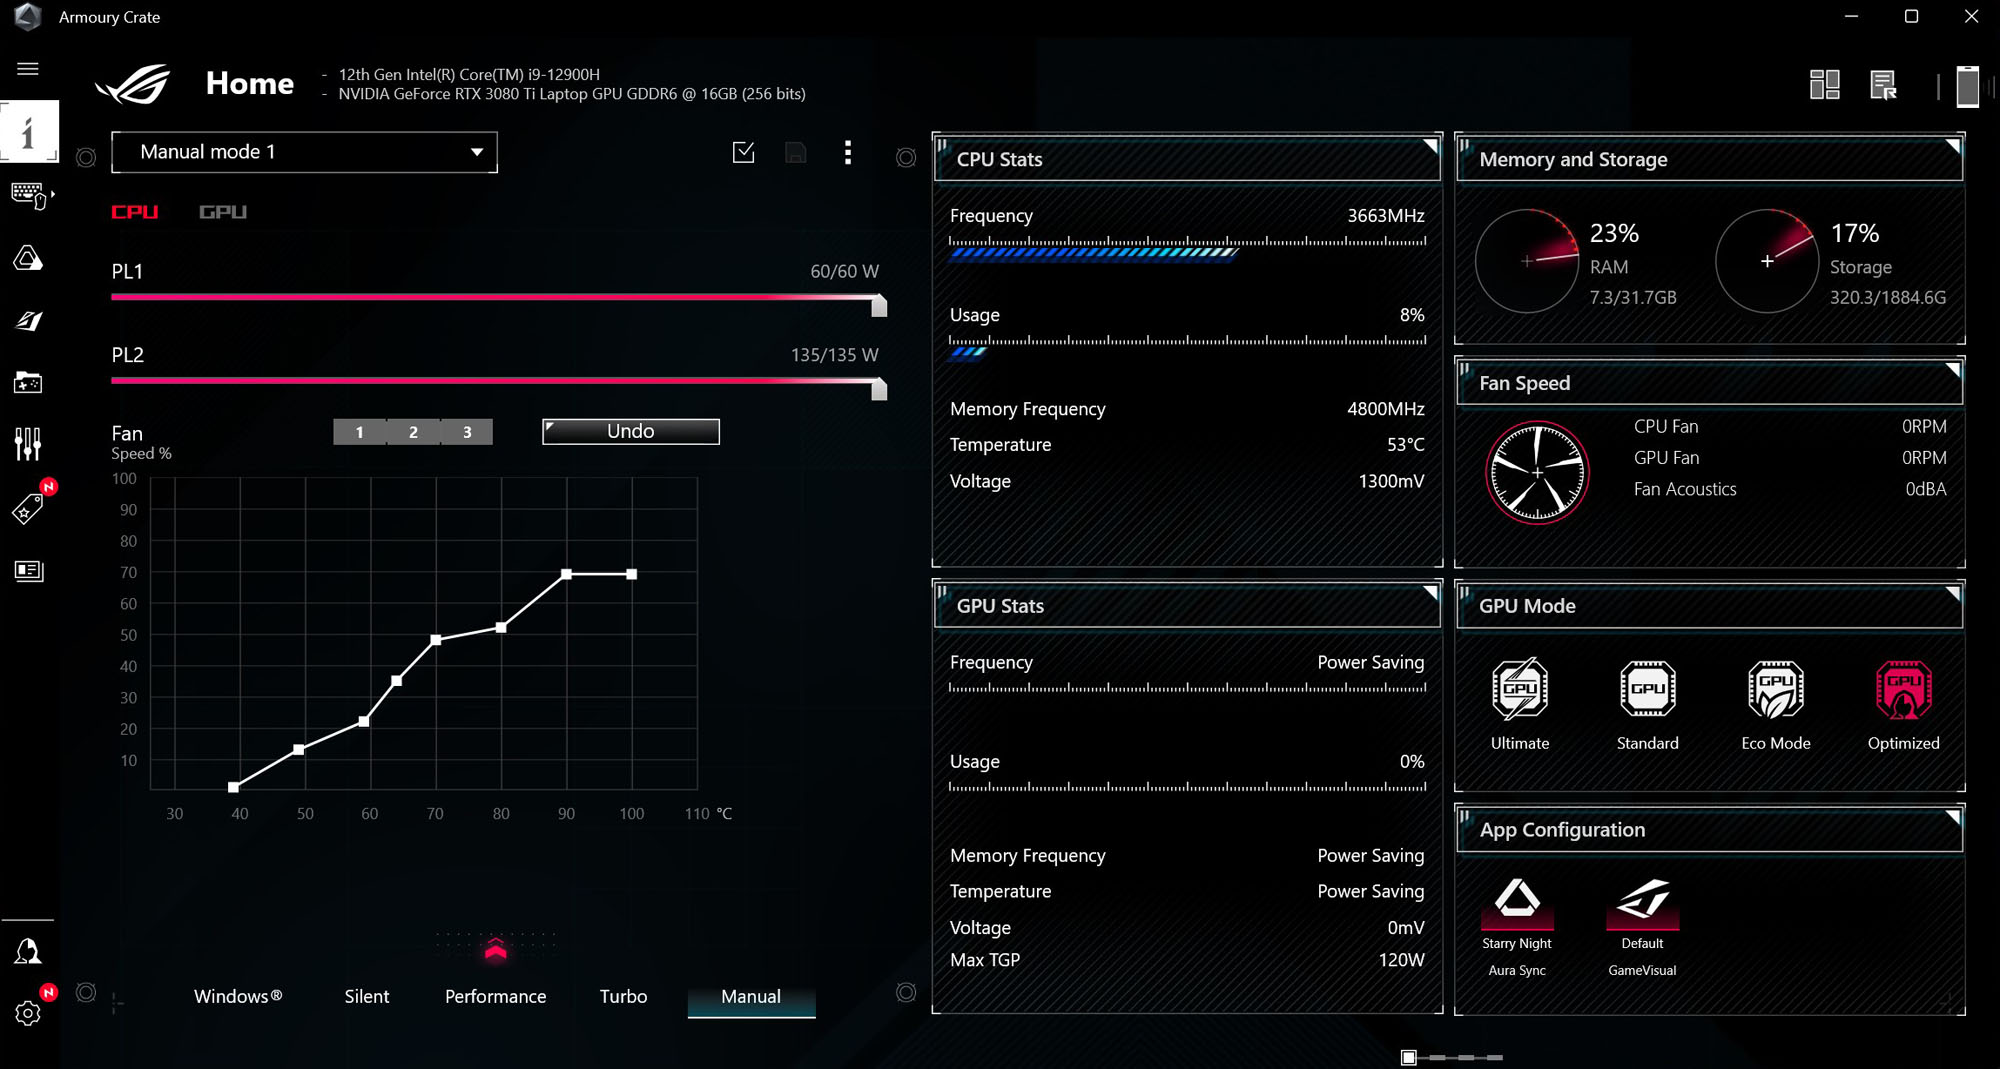
In Manual mode, you’ll see two options at the top of the Armoury Crate window — “CPU” and “GPU.”. Click the CPU option to adjust the behavior of your computer’s processor.
The sliders along the top denote the power limits of your CPU. The higher these targets, the better performance you’ll get from the CPU, though higher values also come with higher power consumption and higher temperatures. You may have to do some trial and error to strike the right balance.
On Intel machines, PL2 denotes the highest power target your CPU is capable of, though it can only boost this high for a maximum of 2 minutes. After that time period, it will ramp down to its PL1 value, which is the maximum power target it can sustain indefinitely.
On AMD machines, FPPT allows you to set the maximum power limit, which the CPU can sustain for up to 10 seconds. It can sustain power up to the SPPT value for up to 2 minutes, and the SPL value indefinitely. Set these to fit your preferences.
Set your GPU power limits
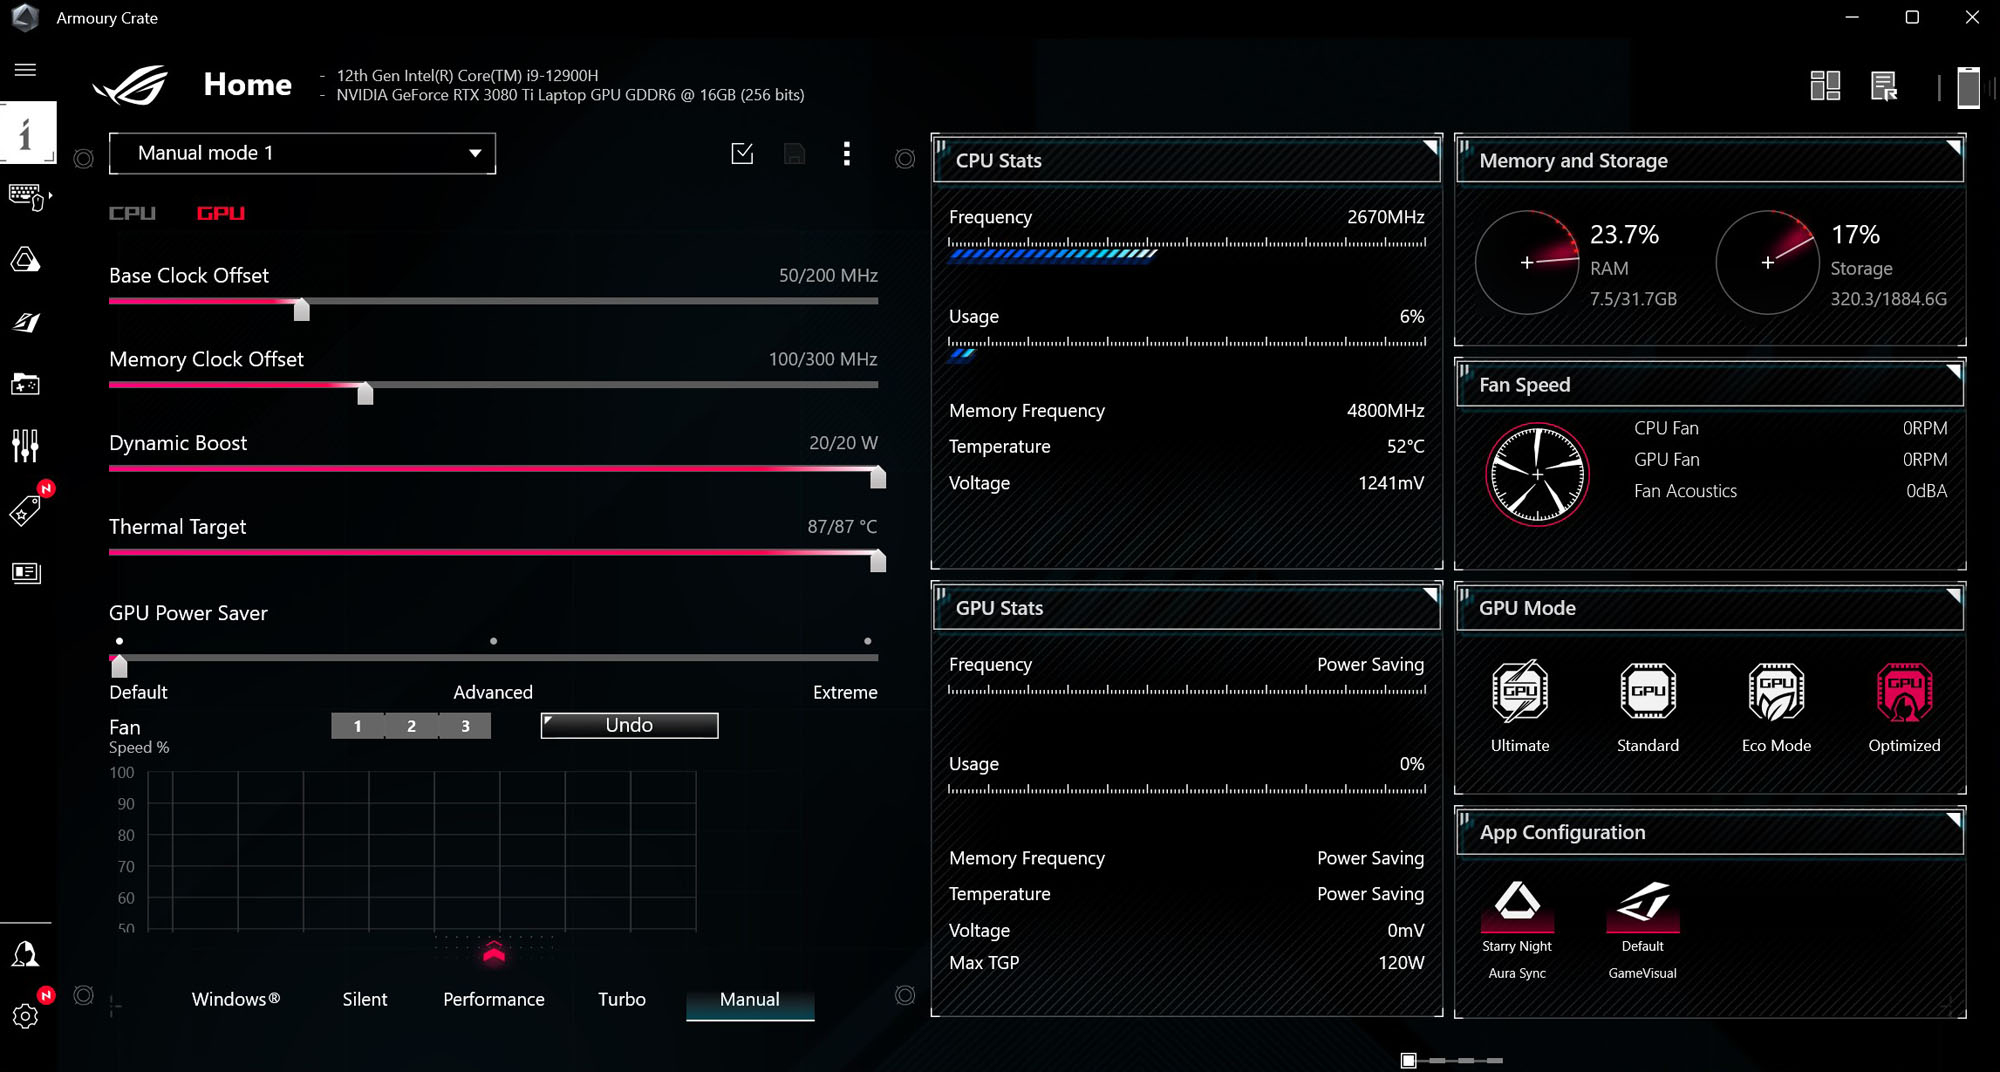
The GPU option at the top of the window, lets you set some targets for your graphics chip as well — this will affect performance, power consumption, and temperatures during graphically-intensive tasks like gaming sessions.
Along the top, you’ll see two sliders that let you overclock your GPU. The Base Clock Offset slider allows you to raise the GPU’s core clock, while the Memory Clock Offset increases the clock speed of the VRAM. Note that higher values than the stock values may decrease stability, so we recommend running benchmarks after tweaking these values to stress test the system. If you encounter any issues, try lowering these values back down until you find the sweet spot.
On laptops with NVIDIA GPUs, you’ll also see a Dynamic Boost slider. This feature allows the system to dynamically shift power from the CPU to the GPU when necessary — which can allow for better gaming performance in GPU-bound scenarios. The higher this value, the more wattage the system can shift from CPU to GPU.
The Thermal Target slider sets the target temperature of the GPU when under high load. If the temperature exceeds this target during gaming, the GPU will ramp down its clock speeds to sustain the target temperature you set. So lowering this slider will provide cooler temperatures and lower fan noise, but raising it can allow for higher performance.
Finally, on laptops with NVIDIA GPUs, you’ll also see a GPU Power Saver setting. This adjusts NVIDIA’s Whisper Mode feature, which lowers power usage to improve cooling, battery life, and fan acoustics. The Default setting allows the laptop to use its full power, while Advanced lowers power usage while aiming for a 60 frame-per-second performance target. Extreme lowers power even further to aim for a 40 frame-per-second performance target.
Set your fan curves
Once you've dialed in your power and thermal targets, you can also manually adjust your CPU and GPU’s fan speeds in their respective tabs. The graph is pretty straightforward: at the specified temperature on the X axis, the system will ramp the fans to the denoted speed on the Y-axis (measured in percentage of the fan’s capable speed). You can click the "1," "2," and "3" buttons to see some suggested starting points for your curve as well.
Choose the preset closest to your ideal fan curve, and then tweak the graph to fit your desired balance between temperature and acoustics. Be careful, though — if you set your power limits high and your fan curve too low, your laptop may get too hot and throttle its clock speeds down to stay within safe operating temperatures. That means certain manual configurations can actually reduce performance, even if the sliders show power at max levels. Manual mode won't stop you from creating something less than optimal if that's what you choose to do, so pay close attention and test your settings thoroughly every time you alter them.
Apply and save your settings
When you’re done creating your custom performance mode, click the Apply button (shaped like a checkmark in a box) in the upper right corner of the Performance Mode pane.
You can also click the three dots to create new Manual mode profiles, rename them, and save them for later. That way, if you have one profile for silent computing and one for maximum gaming power, you can switch between them at will. Just be sure to test, test, and re-test your manual settings to get them dialed in just right — and enjoy your newly-customized gaming machine.