Related Topics
[Windows 11/10] Connect to a Wi-Fi network
Applicable Products: Notebook, Desktop, All-in-One PC, Gaming Handheld, MiniPC
You can refer to this article to learn more about how to connect to a Wi-Fi network in Windows 11/10.
Please go to the corresponding instruction based on the current Windows operating system on your device:
Windows 11 operating system
- Click the [Network]
 icon on the taskbar①, then select
  icon to manage Wi-Fi connections②.
The icon that appears depends on your current connection state. (: No internet connection,  : Internet access with Wi-Fi network,
  : Internet access with Ethernet network)
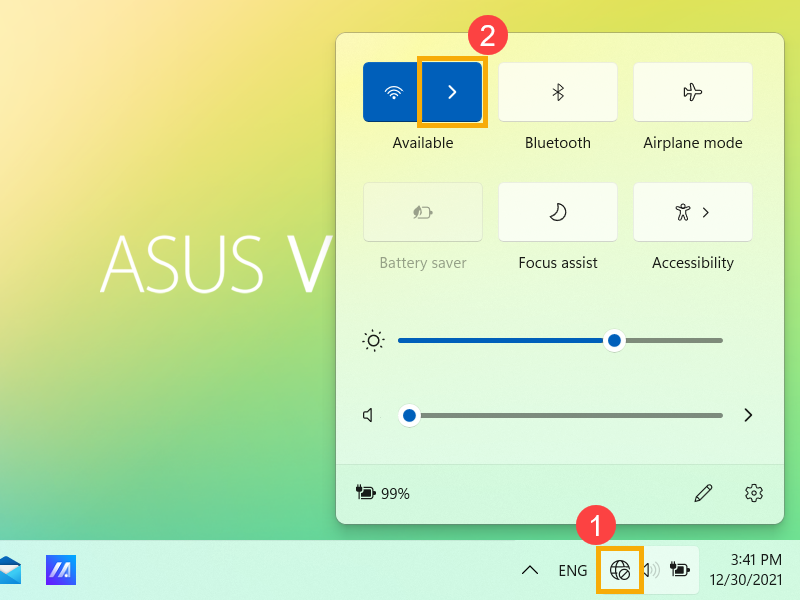
- Choose the Wi-Fi network you want, then select [Connect]③. If you select Connect automatically, your device will automatically connect to it when your device is under this Wi-Fi coverage.
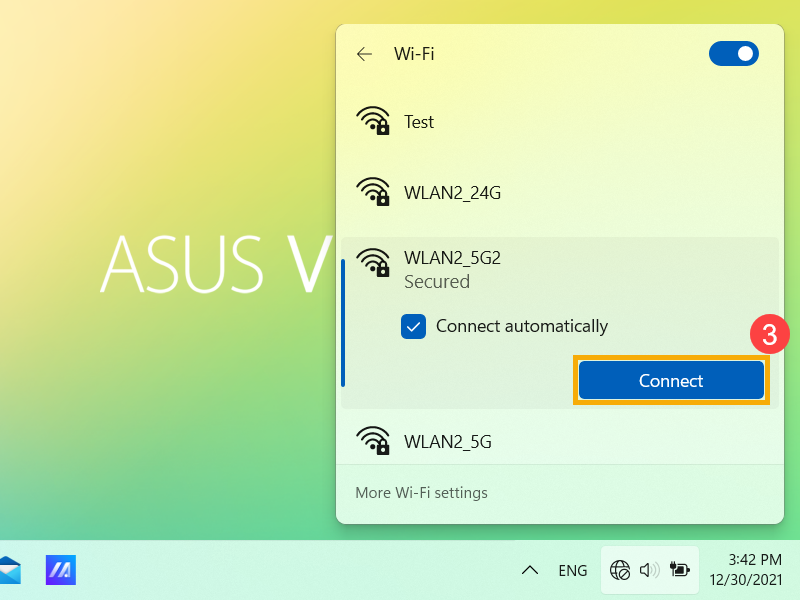
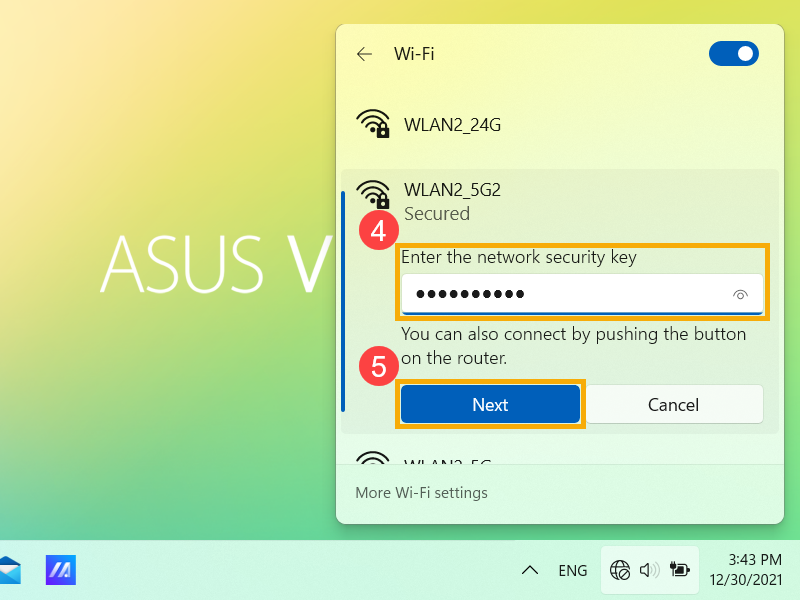
If you observe that Wi-Fi shown as turned off, please click the switch at the upper-right corner to turn Wi-Fi on.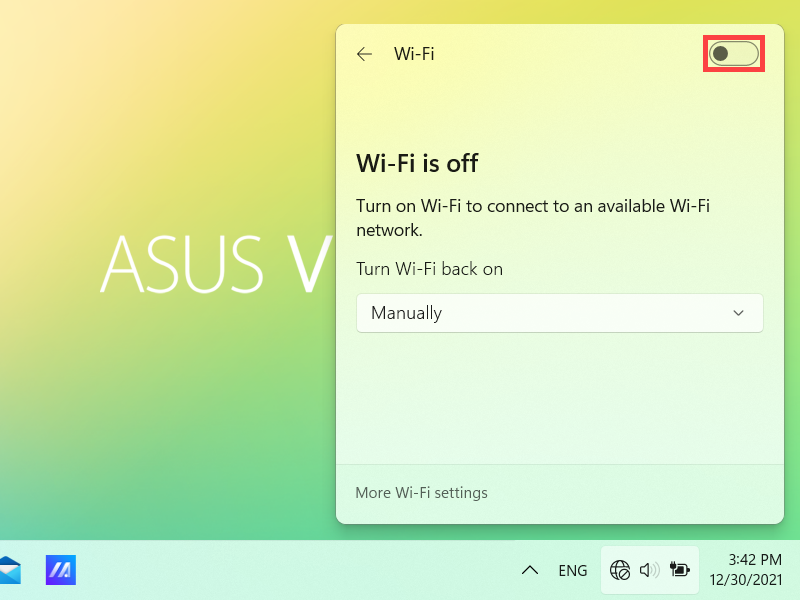
- Type the network password④, then select [Next]⑤.
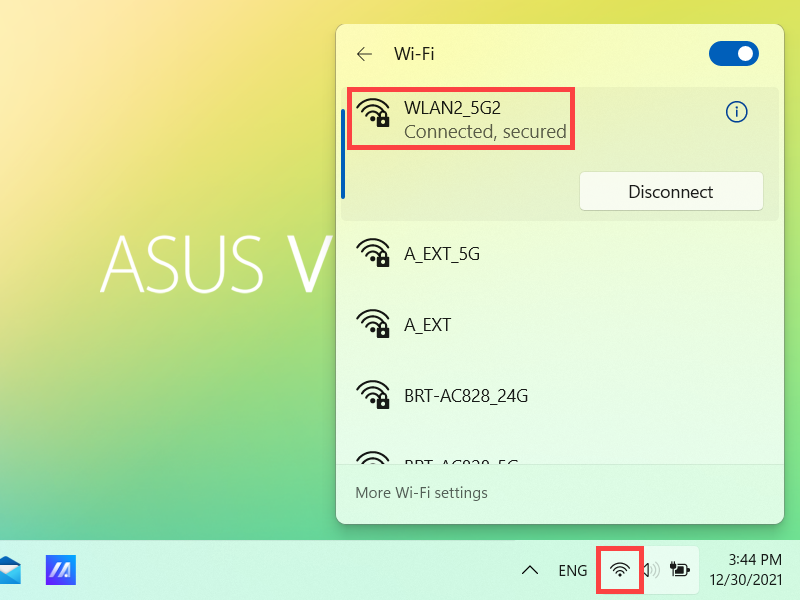
- After the connection is successful, the Wi-Fi network will display to Connected and the network icon changes to .
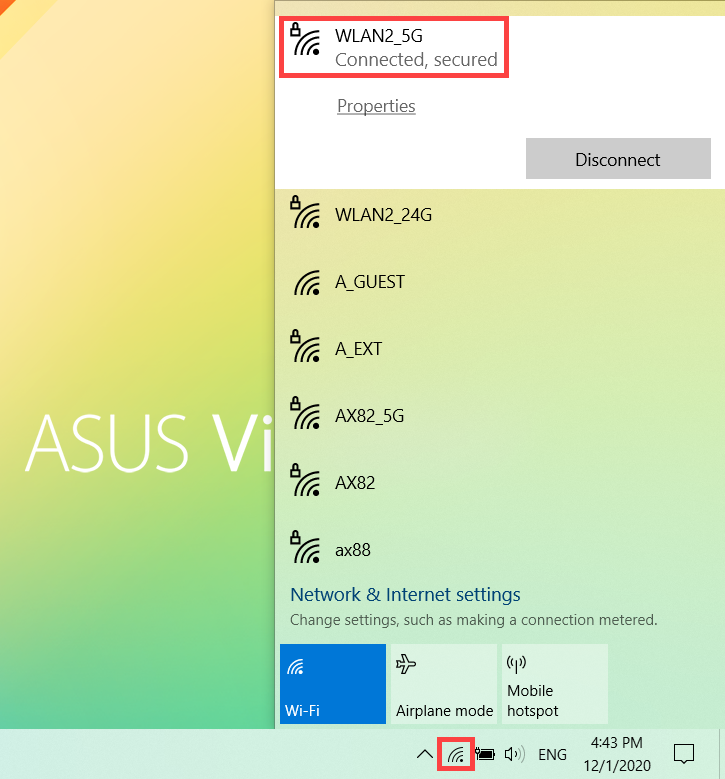
Windows 10 operating system
- Select the [Network]
 icon on the taskbar①.
The icon that appears depends on your current connection state. ( : No internet connection,
  : Internet access with Wi-Fi network,
  : Internet access with Ethernet network)
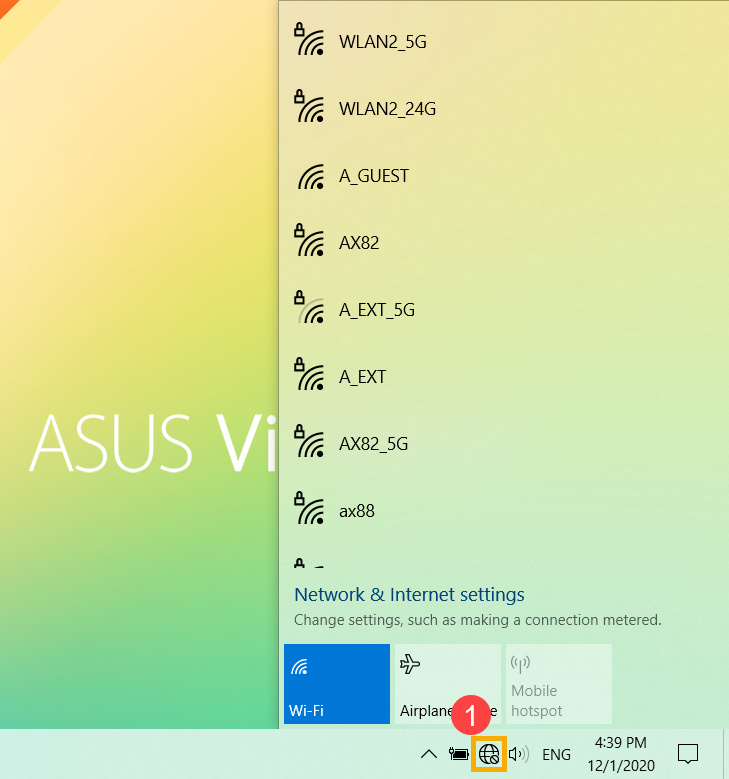
If you don’t see one of the network icons shown in above image, please select the Up arrow to see if it appears there.
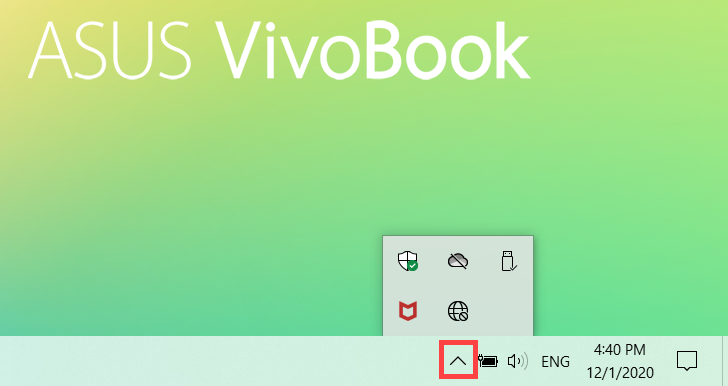
If you observe that Wi-Fi shown as turned off, please click below quick action to turn Wi-Fi on. (While the action displayed a blue color, it means to turn on.)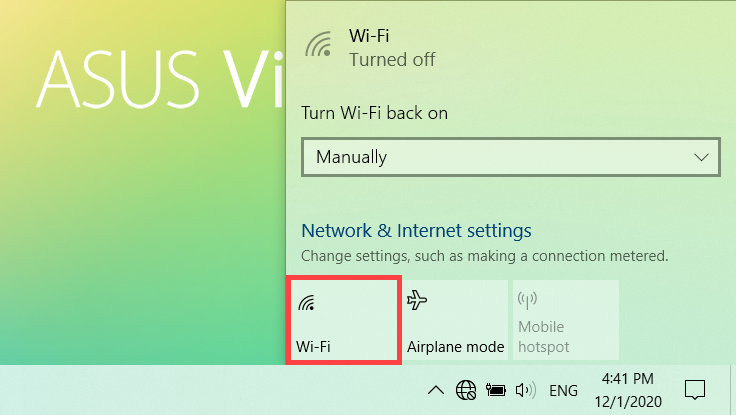
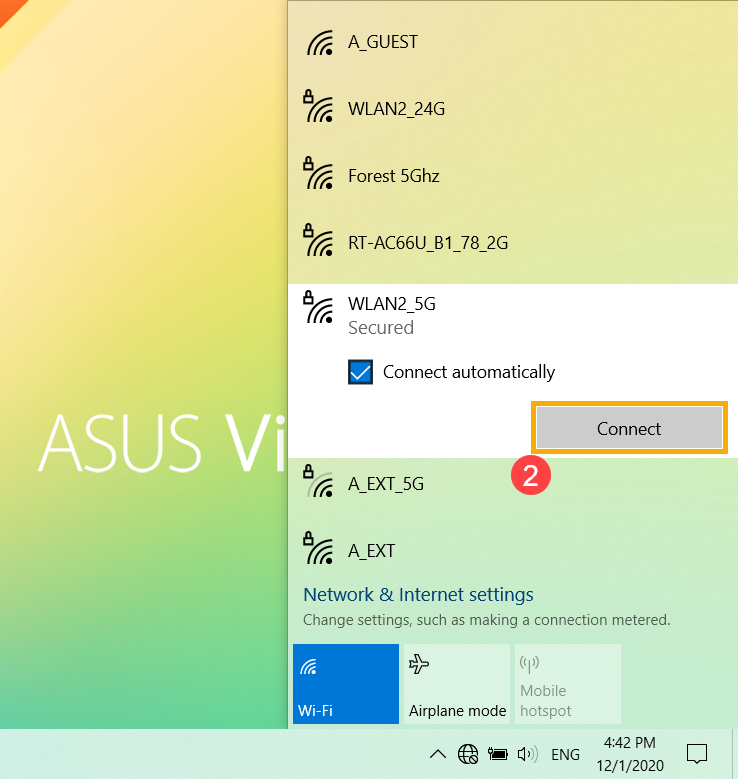
- Choose the Wi-Fi network you want, then select [Connect]②. If you select Connect automatically, your device will automatically connect to it when your device is under this Wi-Fi coverage.
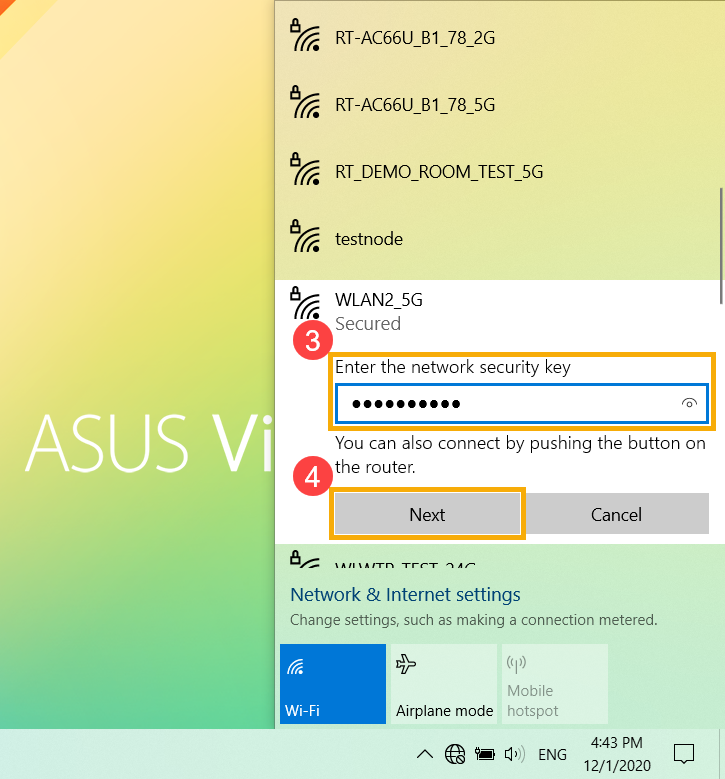
- Type the network password③, then select [Next]④.
- After the connection is successful, the Wi-Fi network will display to Connected and the network icon changes to
 .
.