How to install two M.2 SSDs in RAID 0 on Maximus IX Motherboards
M.2 PCIe SSDs are capable of being four times than SATA SSDs, and like graphics cards in SLI or CrossFire; you can drop in another for even more performance! If you are interested in building them in RAID 0 (Stripe) configuration on your ROG Z270 motherboard, here is a step-by-step guide to get you set up in no time! Here's more info about the different types of SSDs currently available.
The latest ROG Z270 motherboards offer four new exclusive options to cool your M.2 SSDs. For this guide, the ROG Maximus IX Code motherboard is being used to demonstrate, for those of you who already own M.2s already with heatsinks such as these Plextor M9Pe M.2 NVMe SSDs.
Let's quickly go through the M.2 installation process for the Maximus IX Code. It's not hard and should take you less than five minutes.


First, take off the cover for the M.2 compartment by removing the screw. There are a couple of hinges so only one screw is required to secure the panel. This compartment can hold M.2 Socket 3, with M Key, types 2242, 2260,2280 and 22110 (here's a quick guide for key types and lengths). Both SATA and PCIe modes are supported.


An M.2 screw pack comes with the motherboard consisting of a standoff and a screw. Screw in the standoff, insert the M.2 into place, and secure it with the screw.
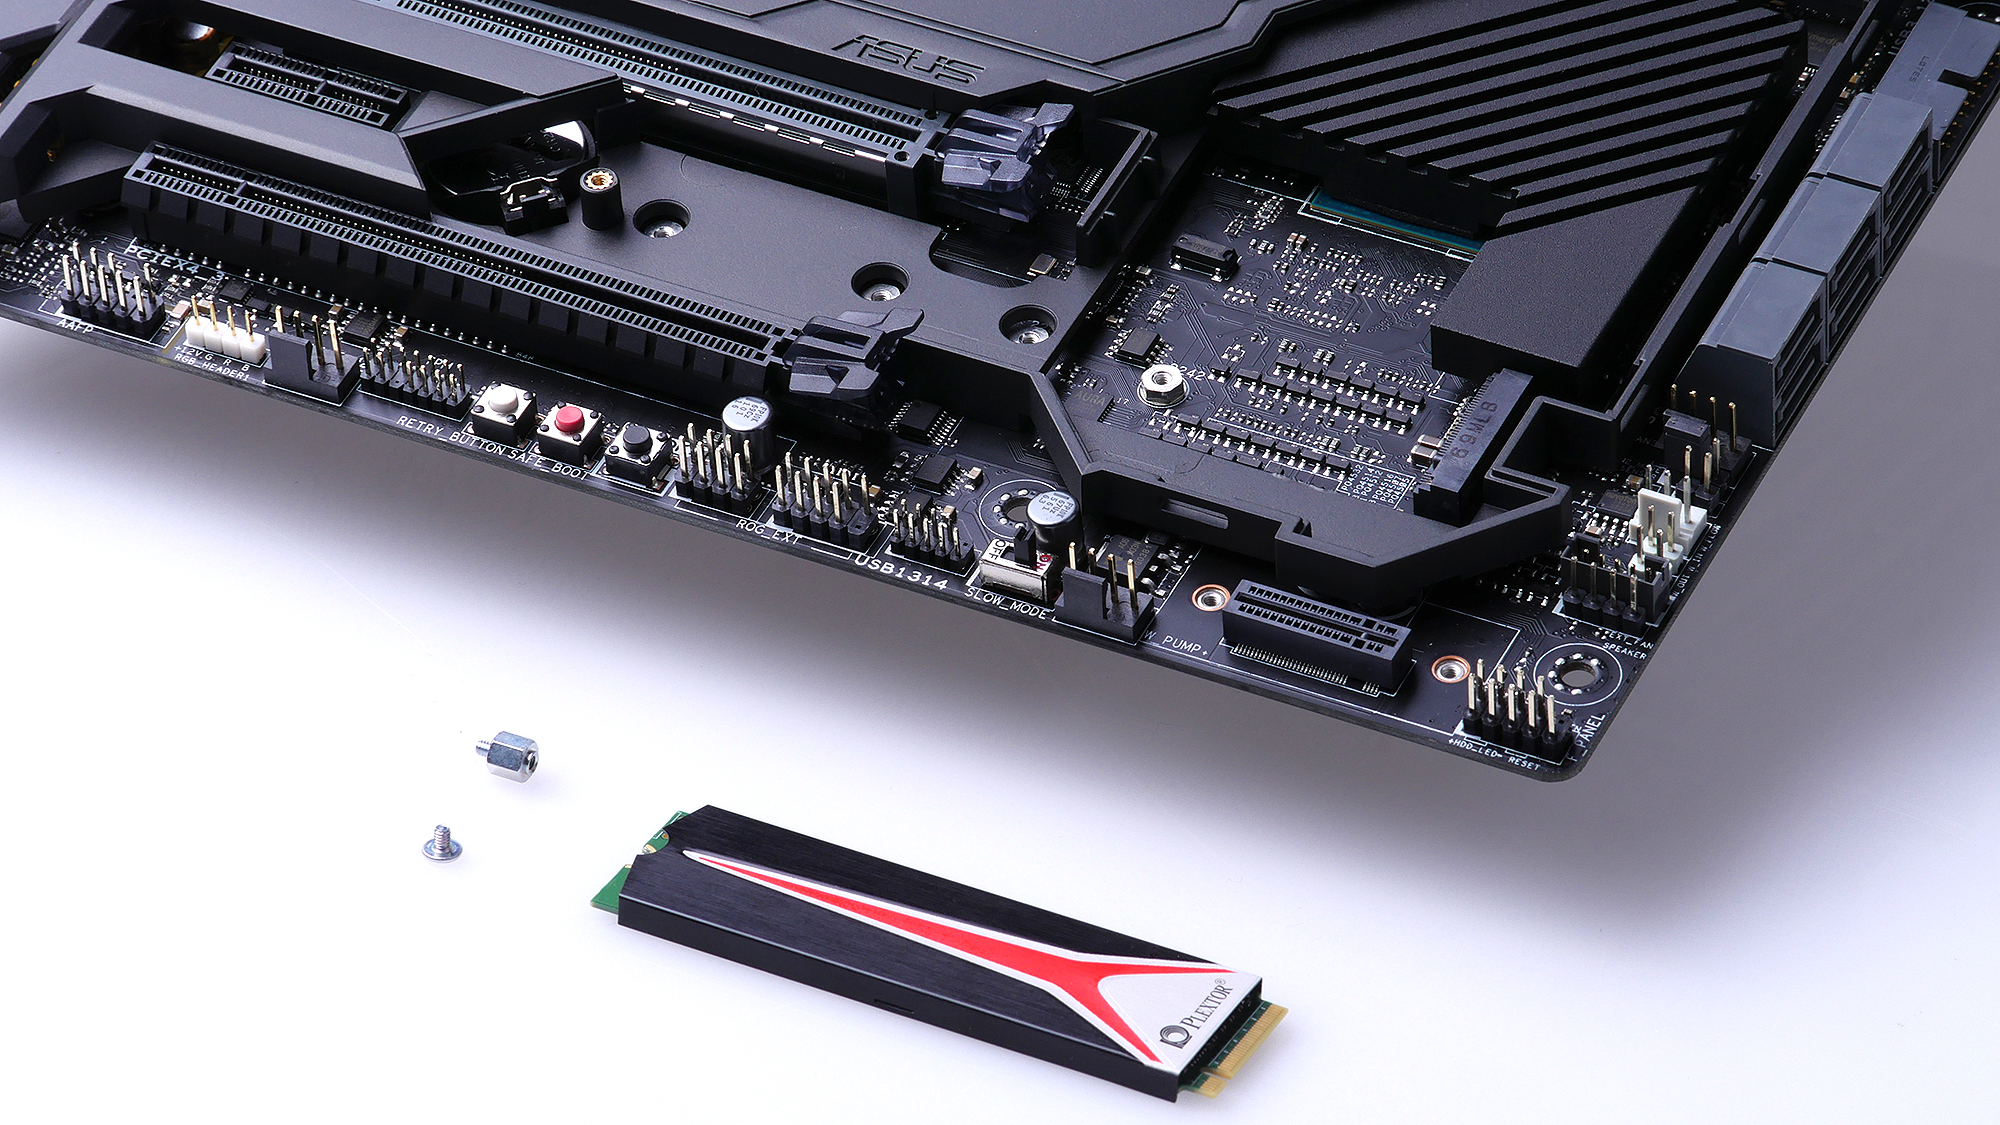

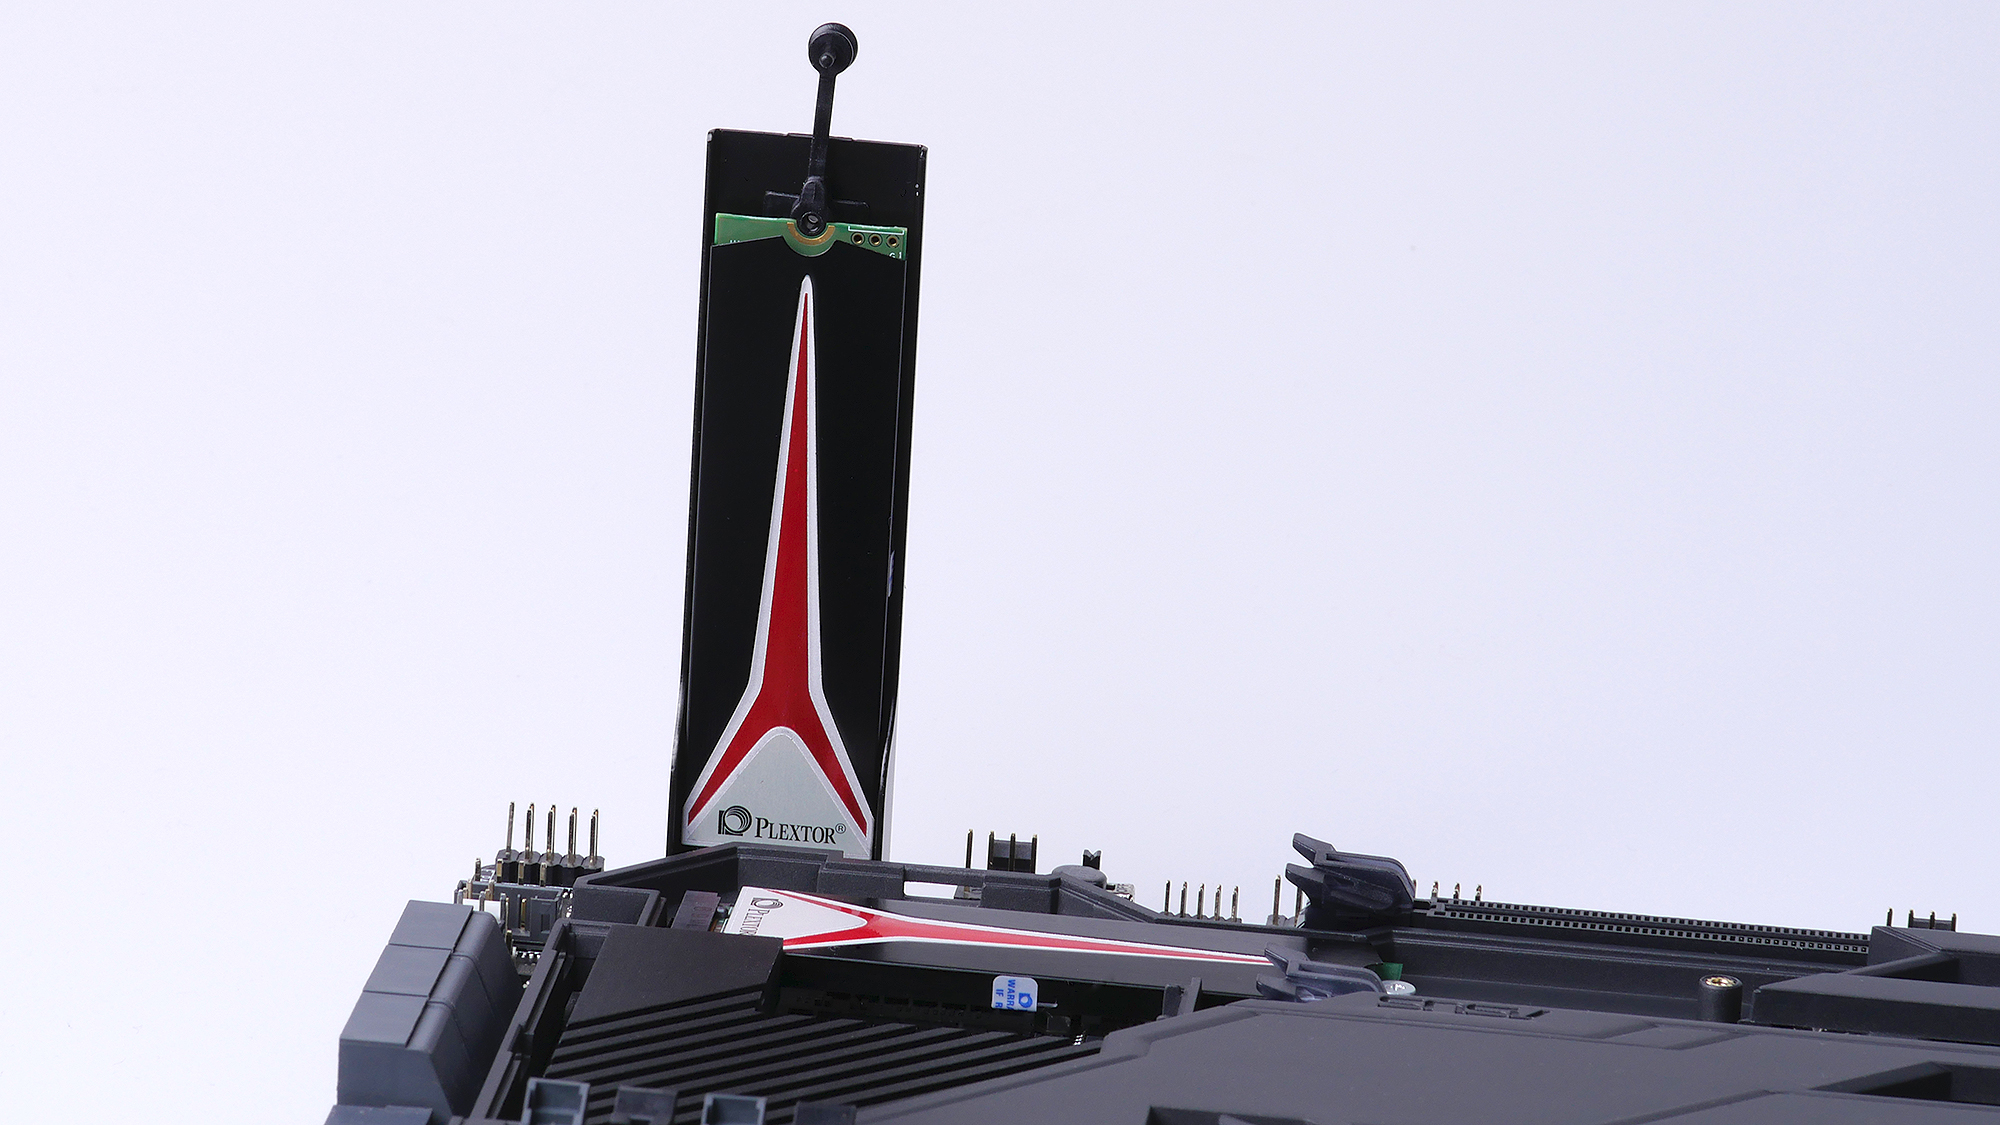
An M.2 bracket also comes with the motherboard for the second M.2 SSD. The vertical design allows good airflow around the SSD while requiring mimimal space on the motherboard. The bracket can hold M.2 types 2242, 2260 and 2280, while this slot supports PCIe mode.
It's important to secure the locking pin on the bracket first (see below, left) by pushing it into the hole and twisting, making sure the pin is on top. Now, insert the second M.2 and screw in the bracket with the two screws included.


Finally, secure the second M.2 with the locking pin like shown below.

Now you're ready to setup your RAID 0 configuration in BIOS.
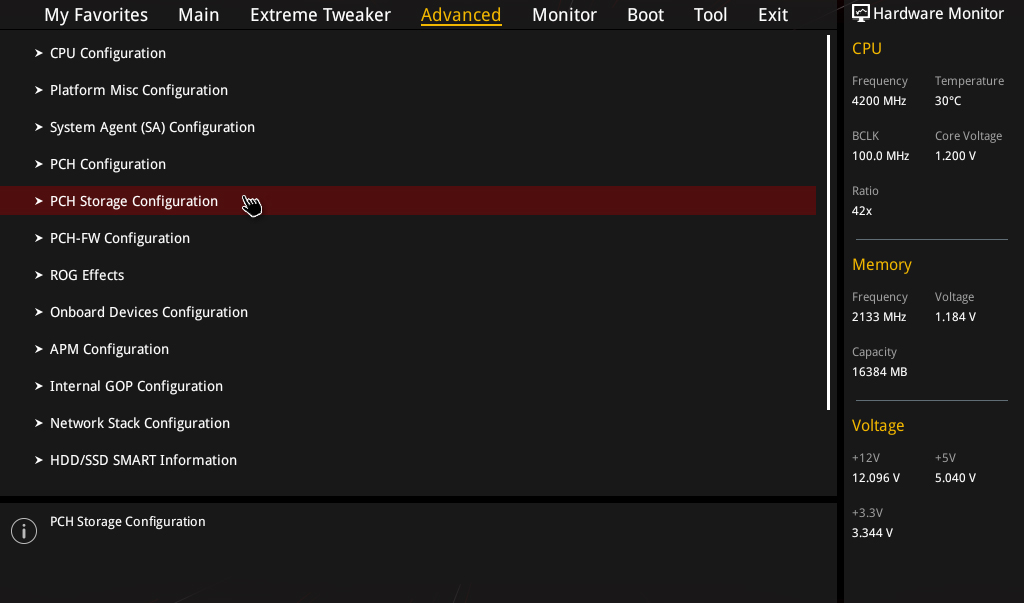
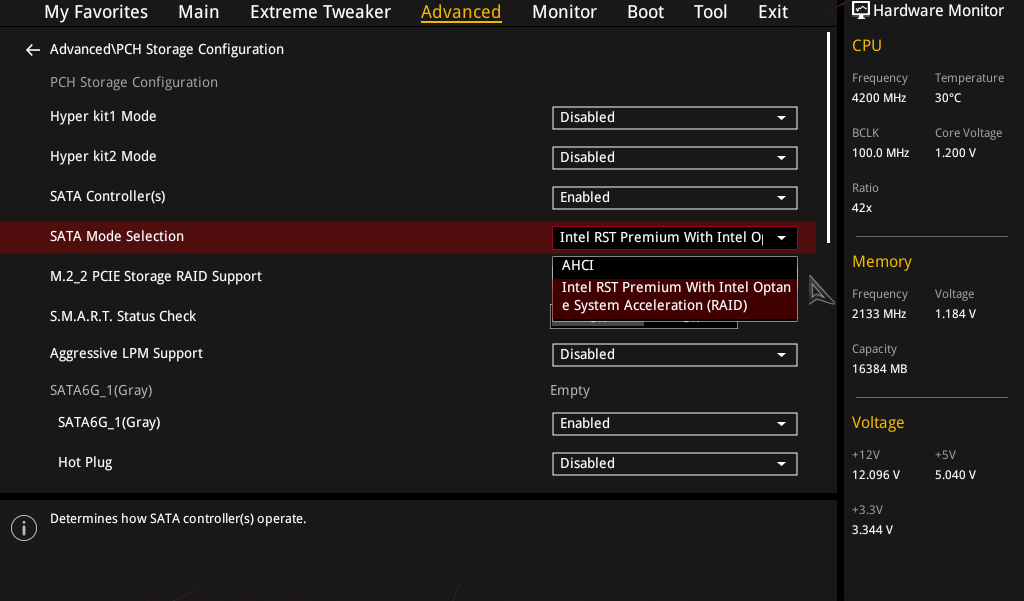
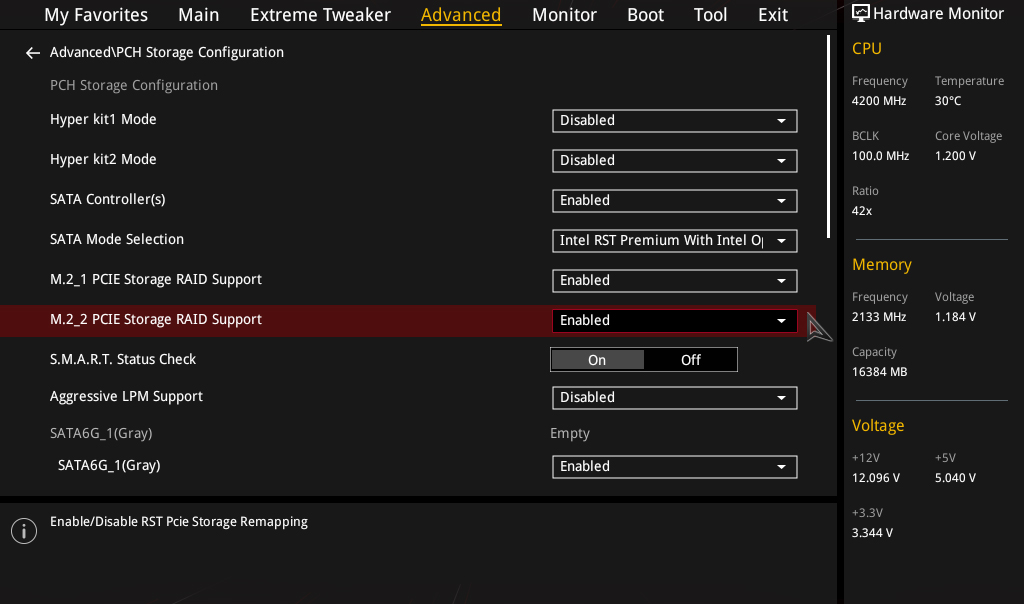
Enable RAID Support
Go to Advanced->PCH Storage Configuration->SATA Mode Selection, and select Intel RST Premium With Intel Optane System Acceleration (RAID).
Now Enable PCIe Storage RAID support for both M.2_1 and M.2_2.
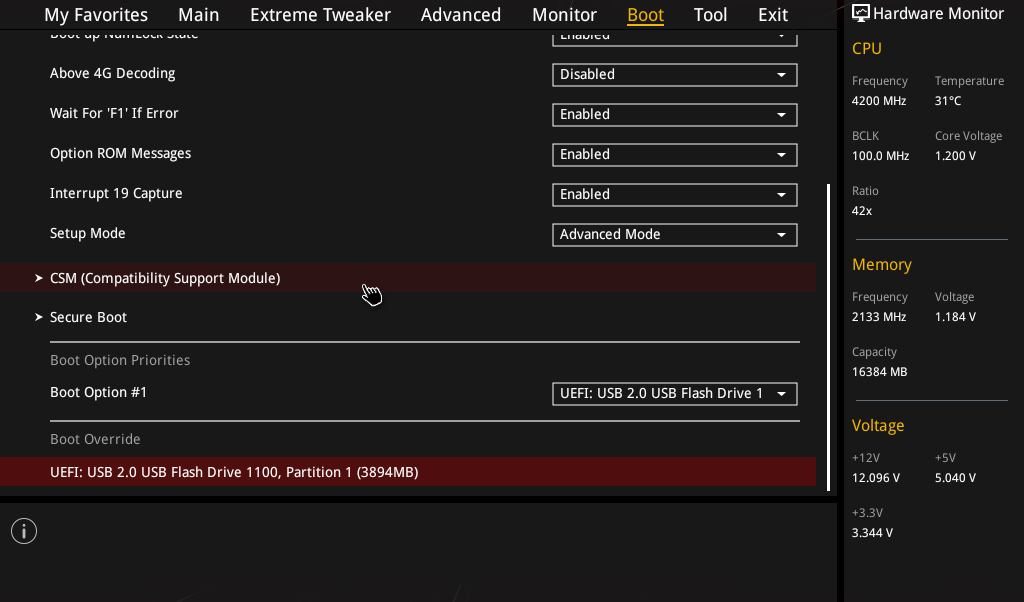
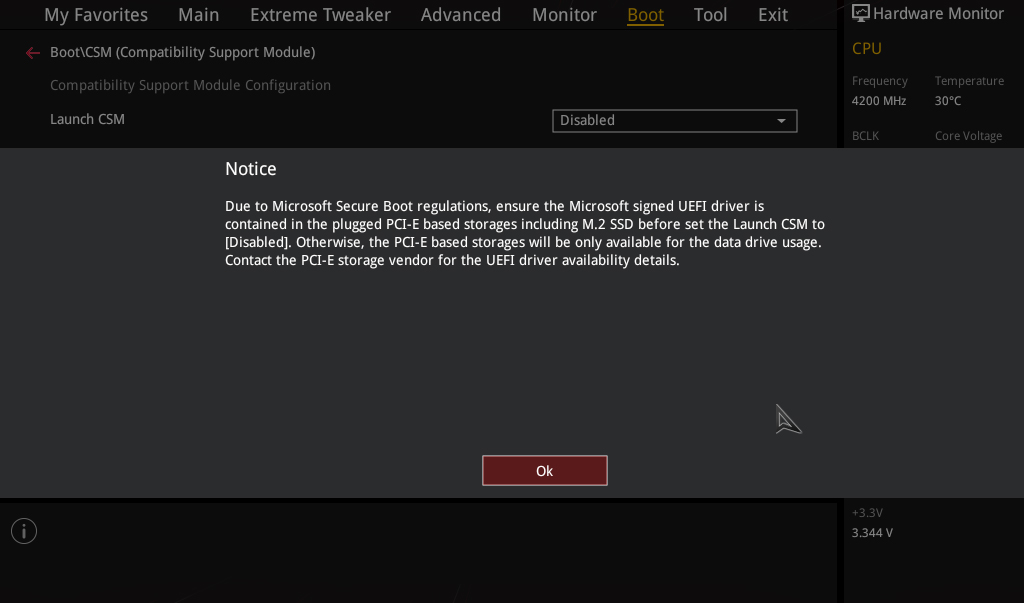
Disable CSM
If you plan on installing the OS on your new RAID volume (in other words - if you want to boot up faster than ever), then disable CSM.
Go to Boot->CSM (Compatibility Support Module)->Launch CSM, and select Disabled.

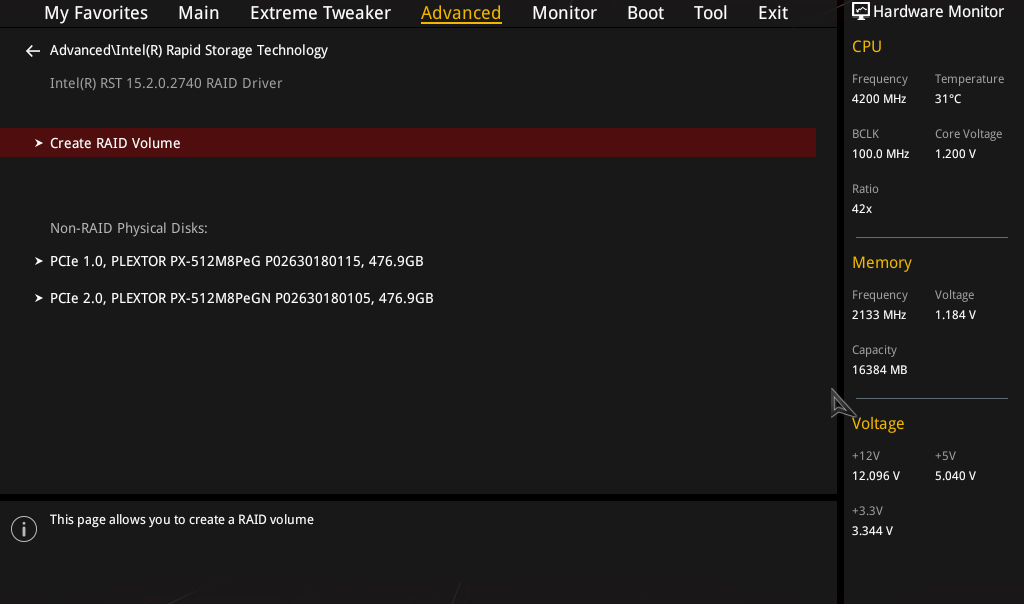
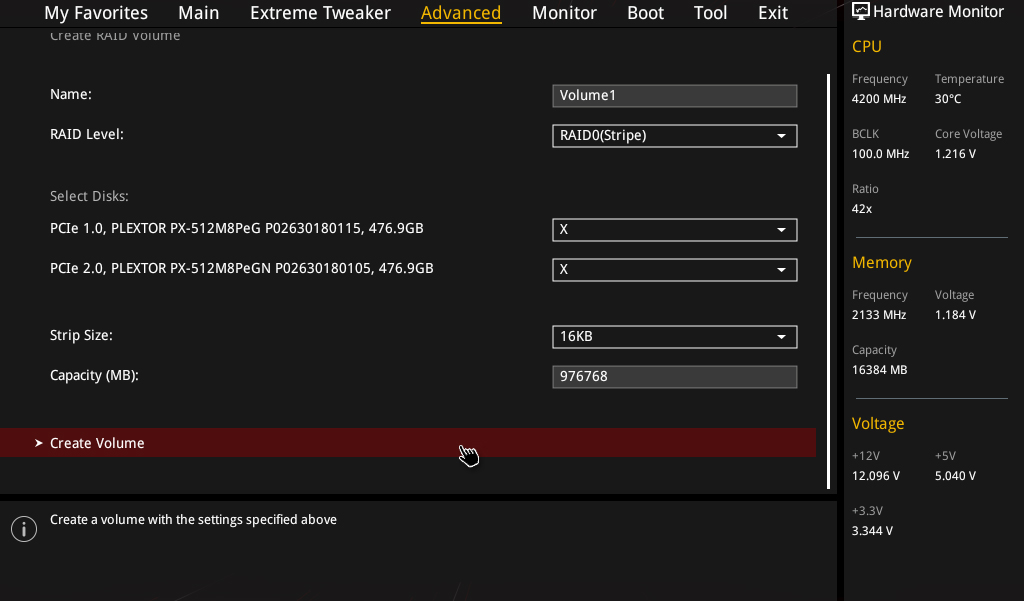
Create RAID Volume
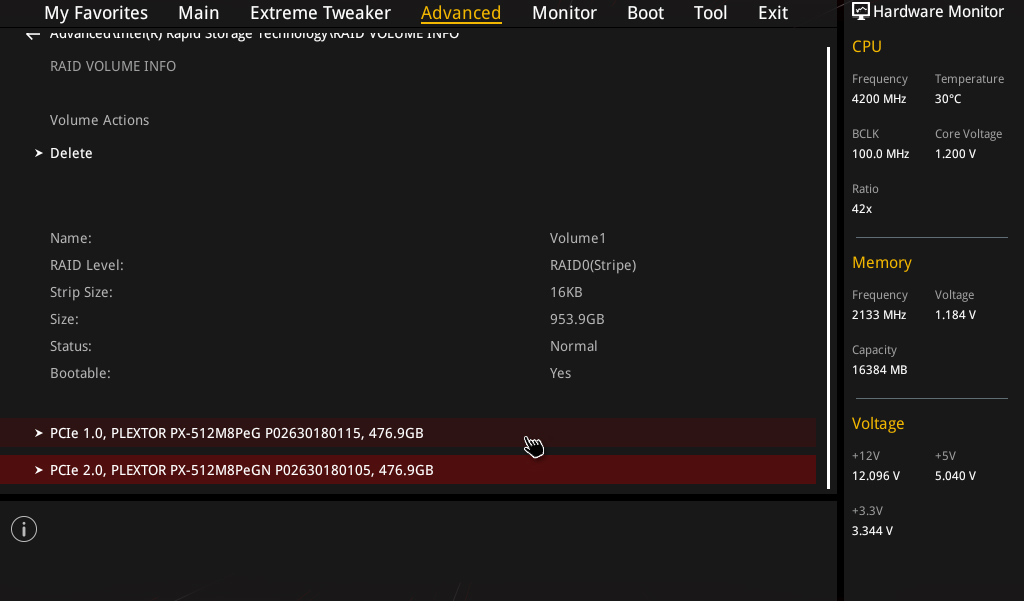
Go to Advanced->Intel(R) Rapid Storage Technology, and then Create RAID Volume. Make sure the RAID Level is RAID 0 (Stripe) (RAID 1 (Mirrored) offers reliability rather than performance). From here you can create or delete RAID volumes easily.
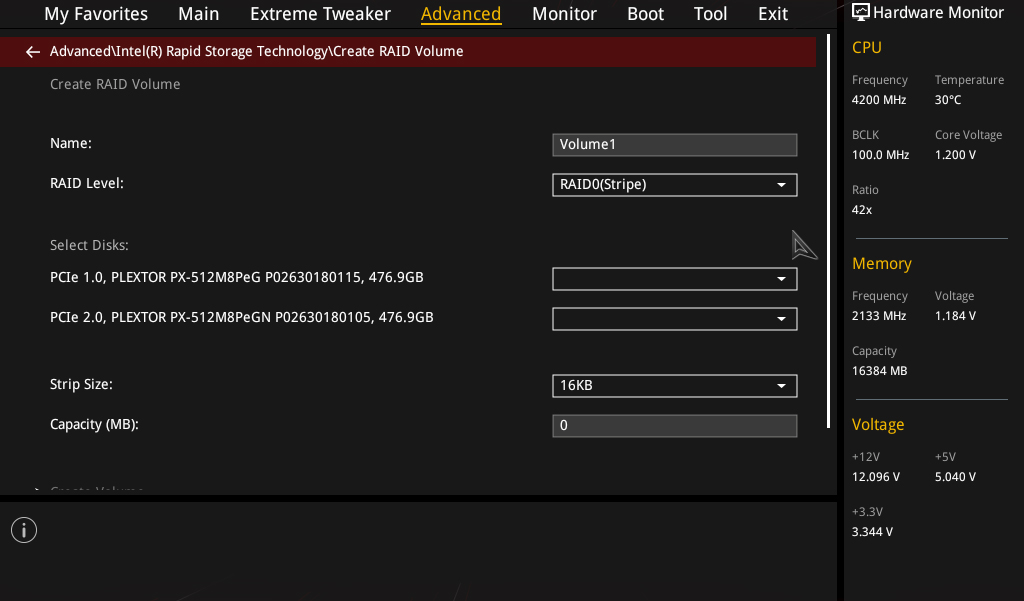
Select (X) for both of the M.2 SSDs. (If only one shows up, then go back and make sure you have enabled RAID support for both SSDs)
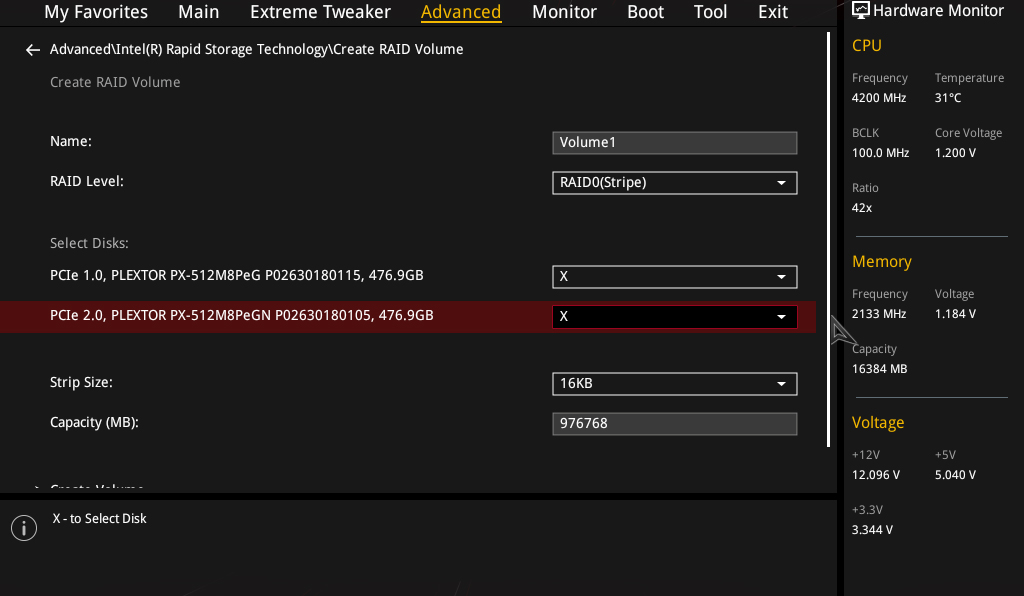
Select Create Volume.
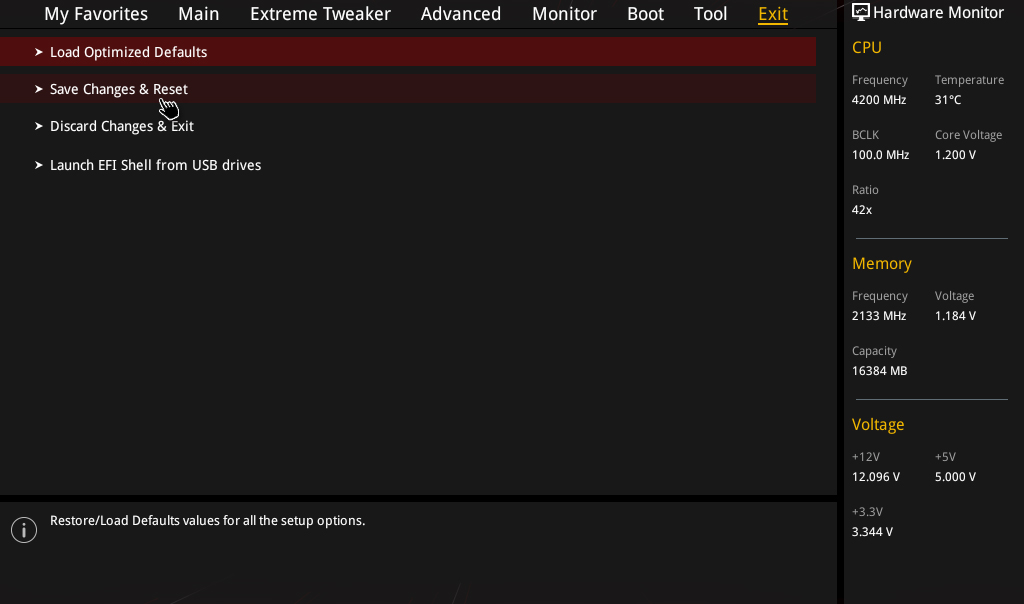
Save and Exit
Time to save and reboot.
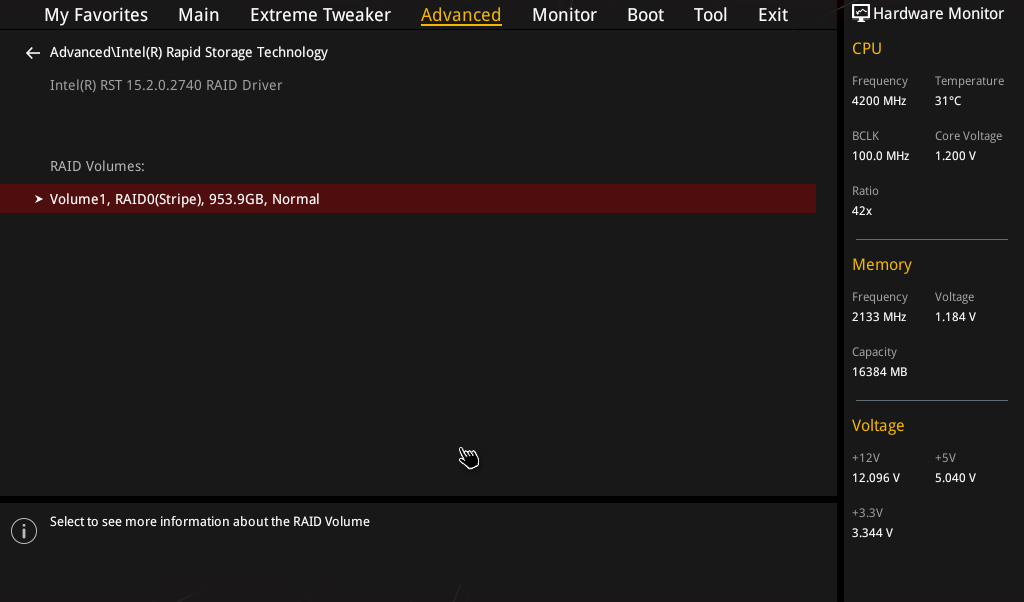
Confirm
To be sure before you install your OS, you can go back to see if your new RAID volume is showing up with both SSDs in RAID 0.

Install OS
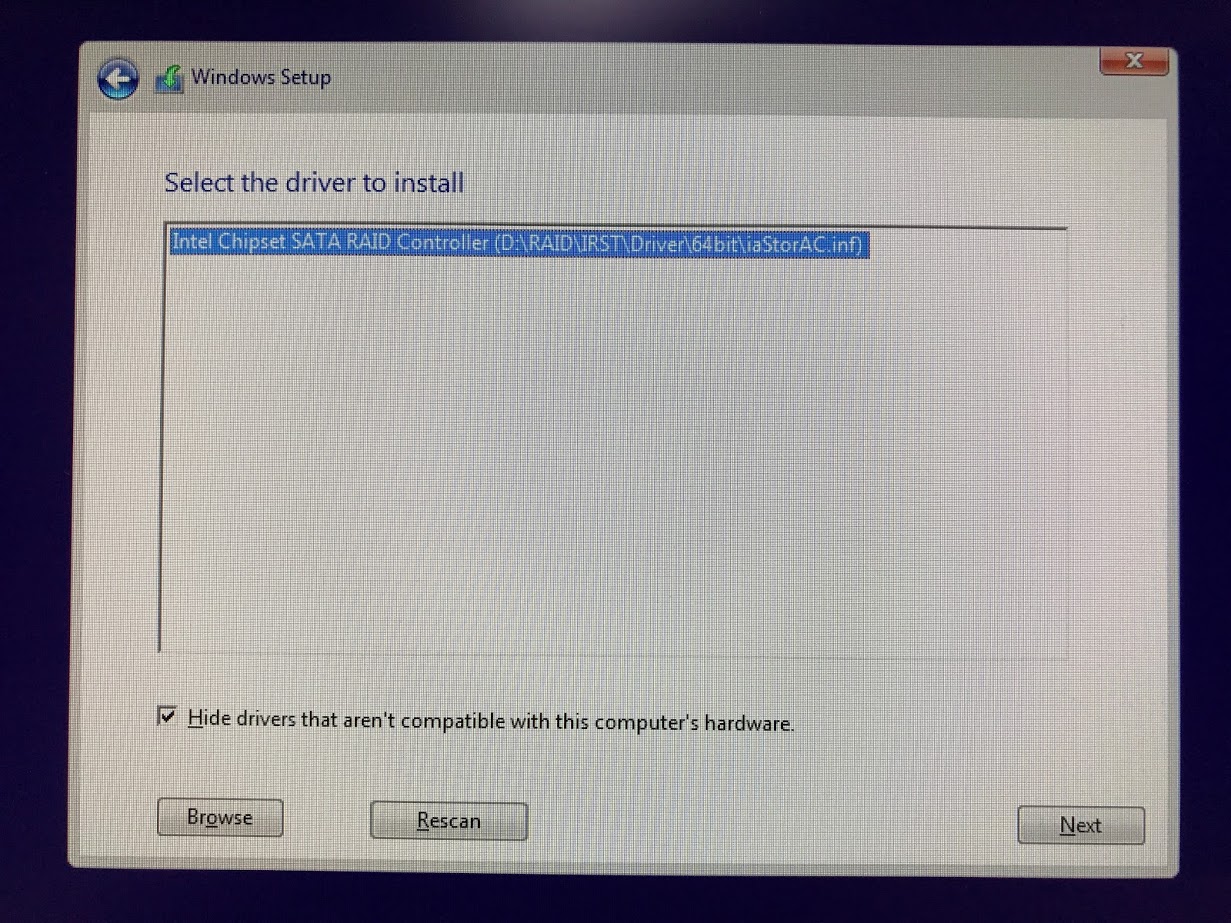
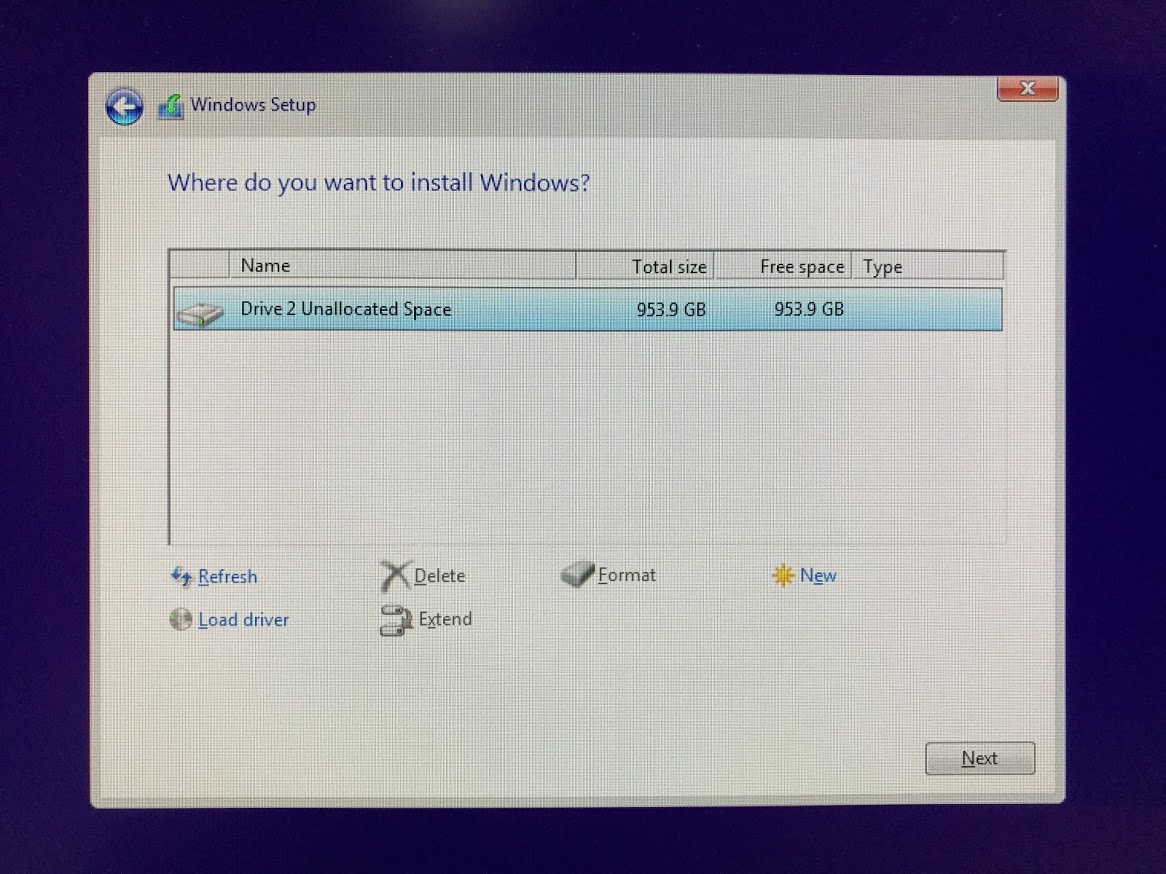
For those of you looking to increase the overall Windows experience by installing the OS to the RAID array, during the OS installation you will need to install the driver. Just download and copy onto a USB drive, use the file iaStorAC.inf to load the driver. When loading the driver it should look like this.
After the driver is installed, you can create or delete partitions however you like.
Finish installing Windows and watch everything load up in next to no time!