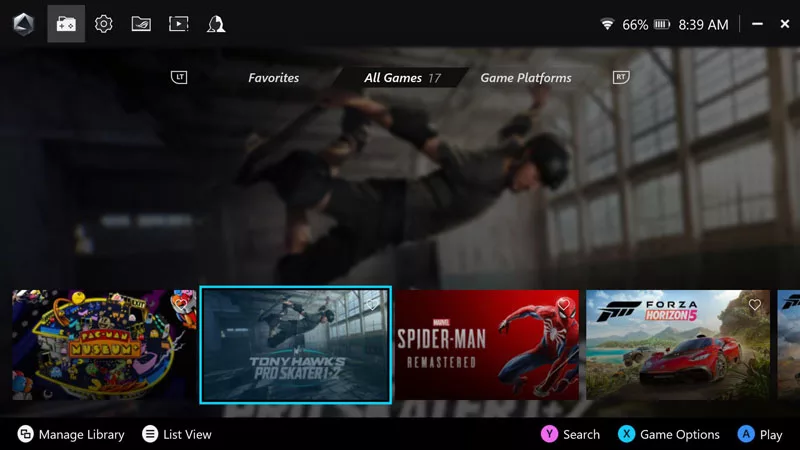
How to remap buttons and create custom game profiles on the ROG Ally and ROG Ally X
Navigating the basic menus and playing games on your ROG Ally will come easy to anyone who’s ever used a game console. But we wanted to give you full control over your experience: with Armoury Crate SE, you can remap almost every single button to fit your preferences and playstyle. Here’s everything you need to know about controlling, remapping, and customizing your ROG Ally buttons.
This is part of our ultimate guide to the ROG Ally series of articles. Need some ideas for games to play? Check out our favorite games for the ROG Ally as well.
Choose your loadout: Desktop, Gamepad, or Touch
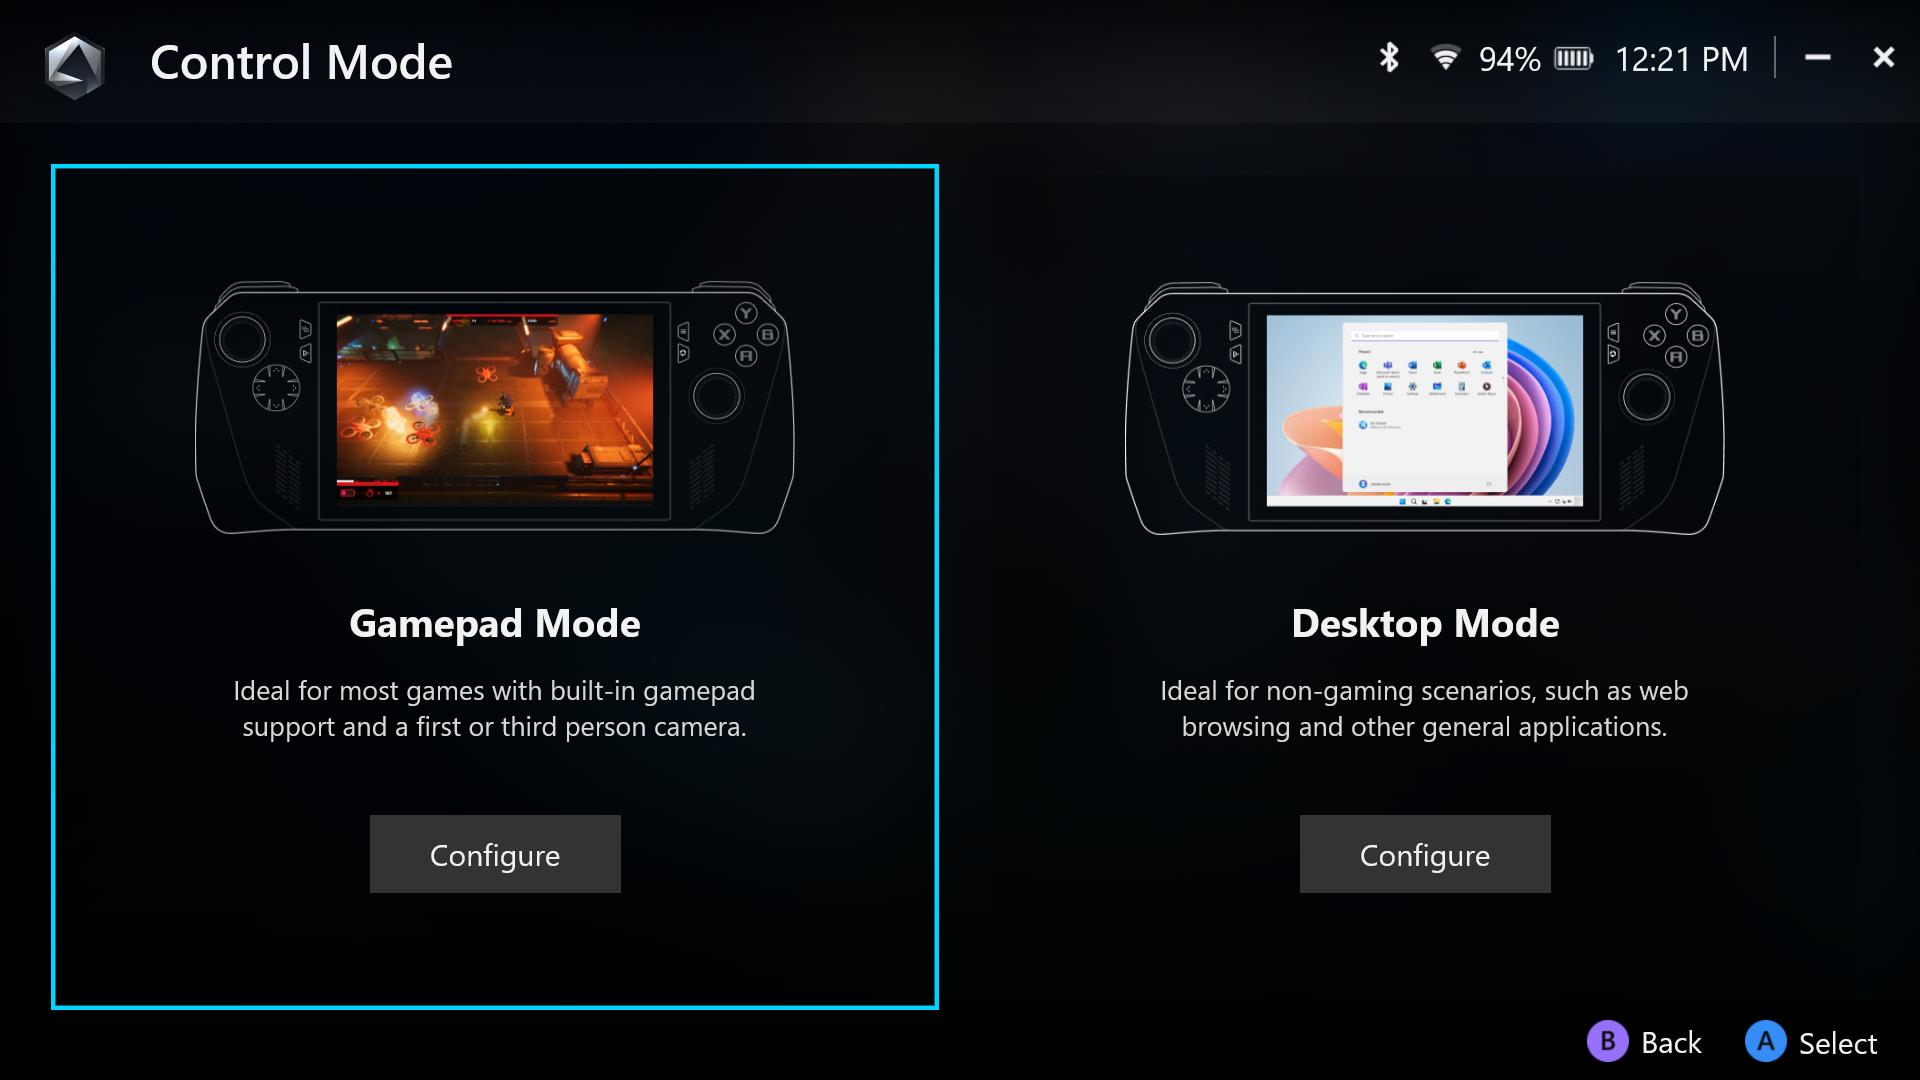
There are three ways to navigate your Ally and control games: using the controller as a gamepad, using the controller to emulate a mouse & keyboard, and using the touch screen.
Gamepad Mode is self-explanatory: in games and programs that support controllers, the buttons will translate 1:1, with the left stick usually acting as your navigation while the A button lets you select items (and B sends you back).
The touch screen is similarly simple to use: just touch the item you want to select. To bring up the on-screen keyboard, click inside a text box or open the Control Center and tap the Keyboard option.

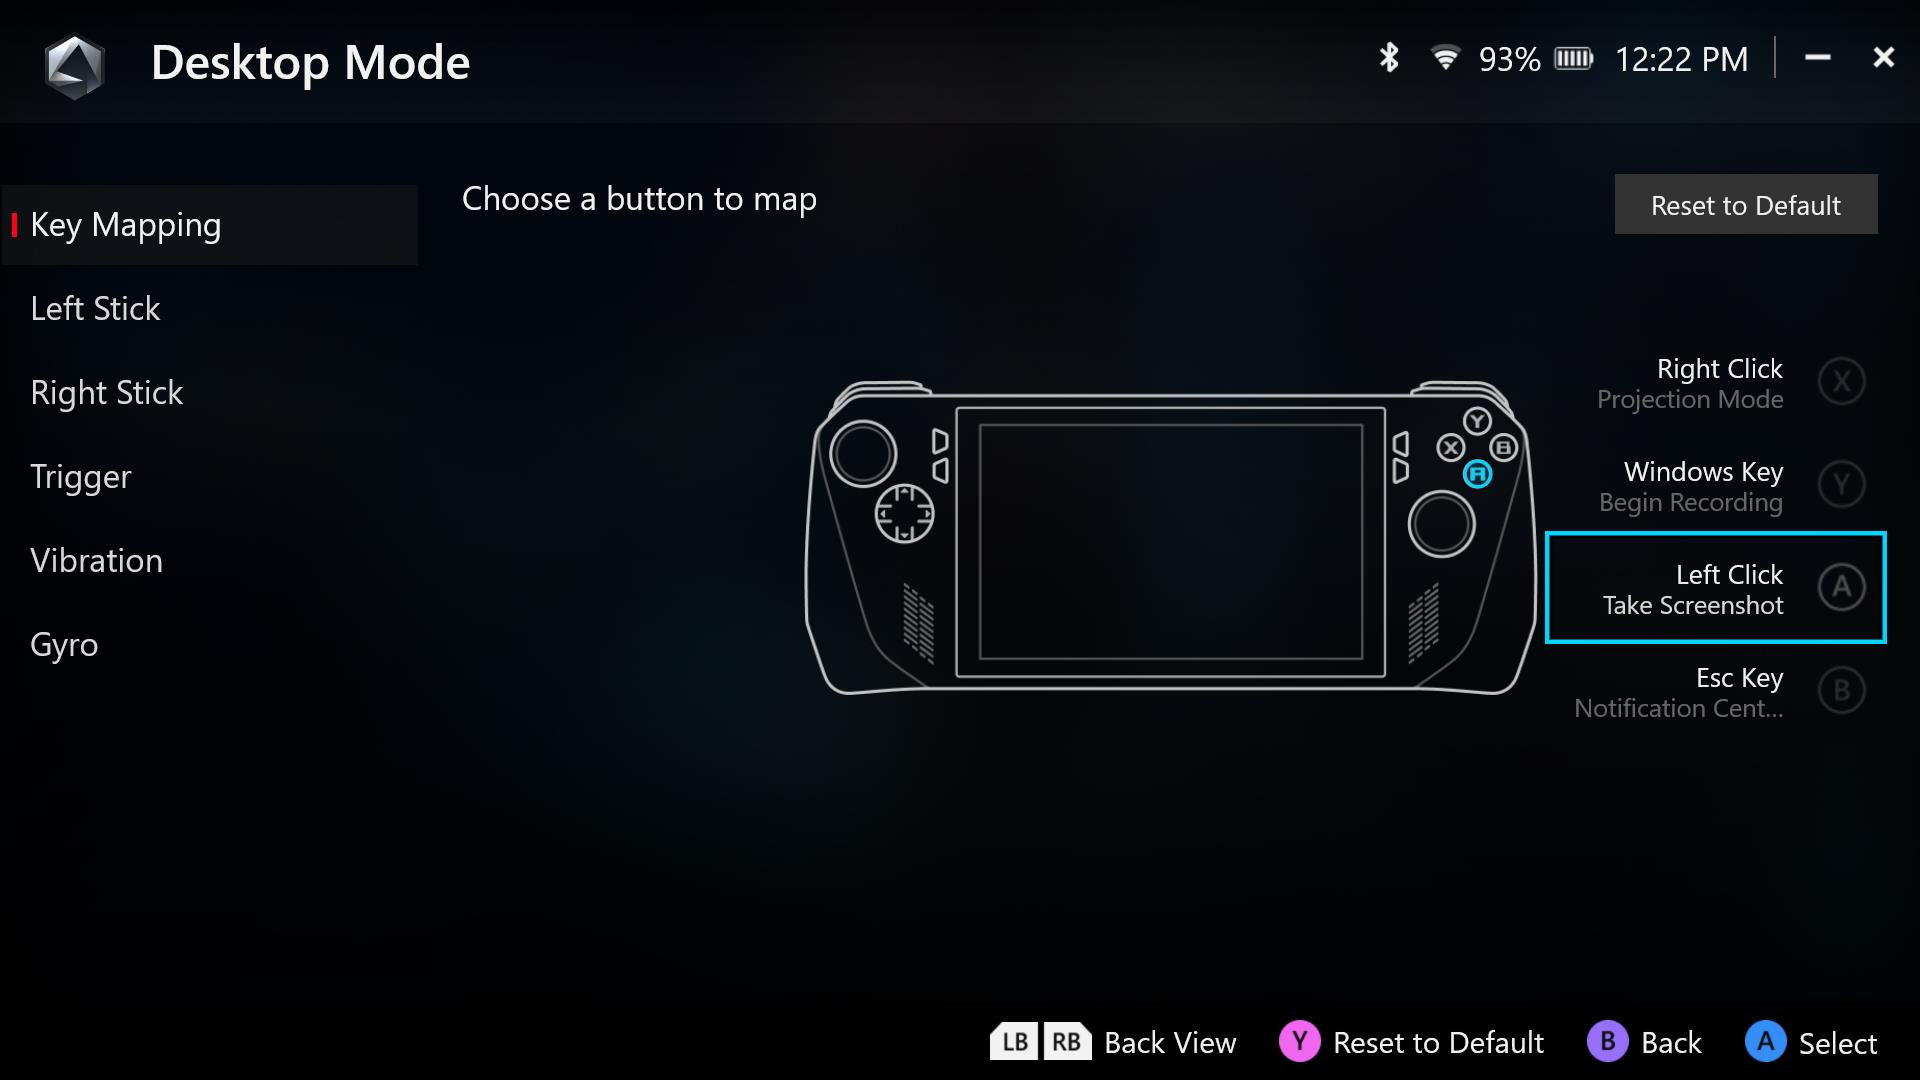
Desktop Mode is there for you when the other two modes aren’t. When you’re using an application that doesn’t support controllers (or you’re using the Windows desktop), your Ally will enter Desktop Mode, allowing you to move the on-screen cursor with your joystick and select items using the buttons, just as if you were using a traditional mouse. By default, the controls are as follows:
- Move the right joystick to move the cursor
- Press the right bumper (RB) to left-click
- Press the right trigger (RT) to right-click
- Press the A button for Enter
- Press the B button for Esc
There are lots of other shortcuts available in Desktop mode, but these will perform the basic functions. To see all the button mappings for desktop mode, just press and hold the Armoury Crate button on the controller — it’ll show you all the default functions you can access in Desktop Mode.
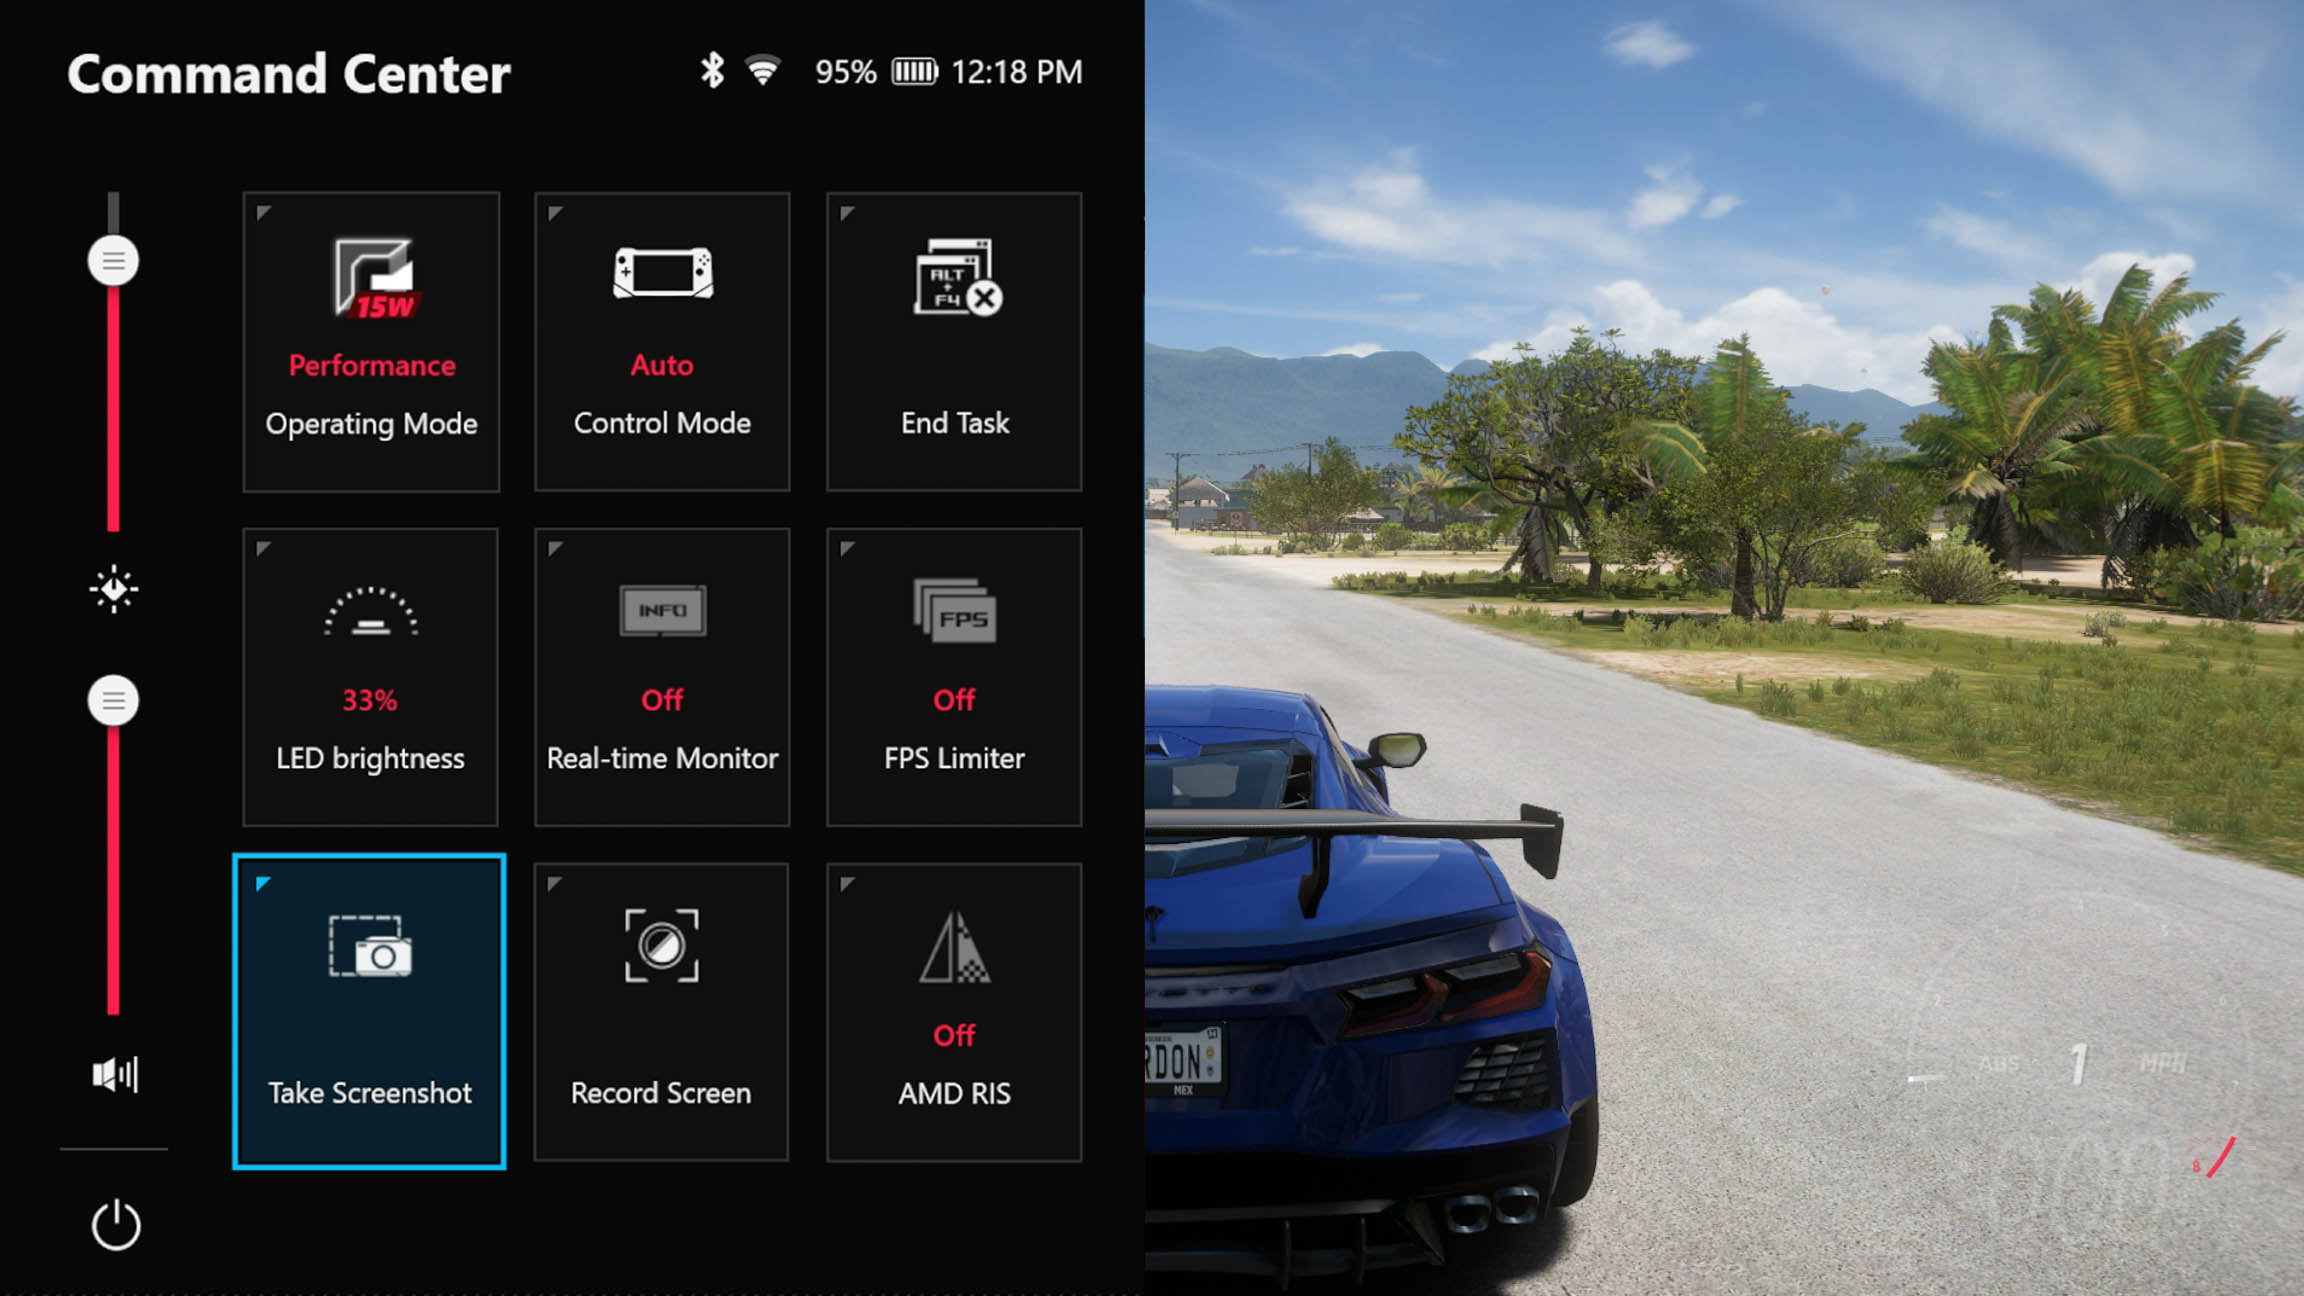
Out of the box, your Ally will be in the “Auto” control mode, meaning it will switch between the Gamepad and Desktop modes automatically when it detects a supported application. However, if you want to manually switch to one mode and keep it there, press the Control Center button and toggle Control Mode to the desired option.
Remap buttons, customize sticks and triggers, and adjust vibration
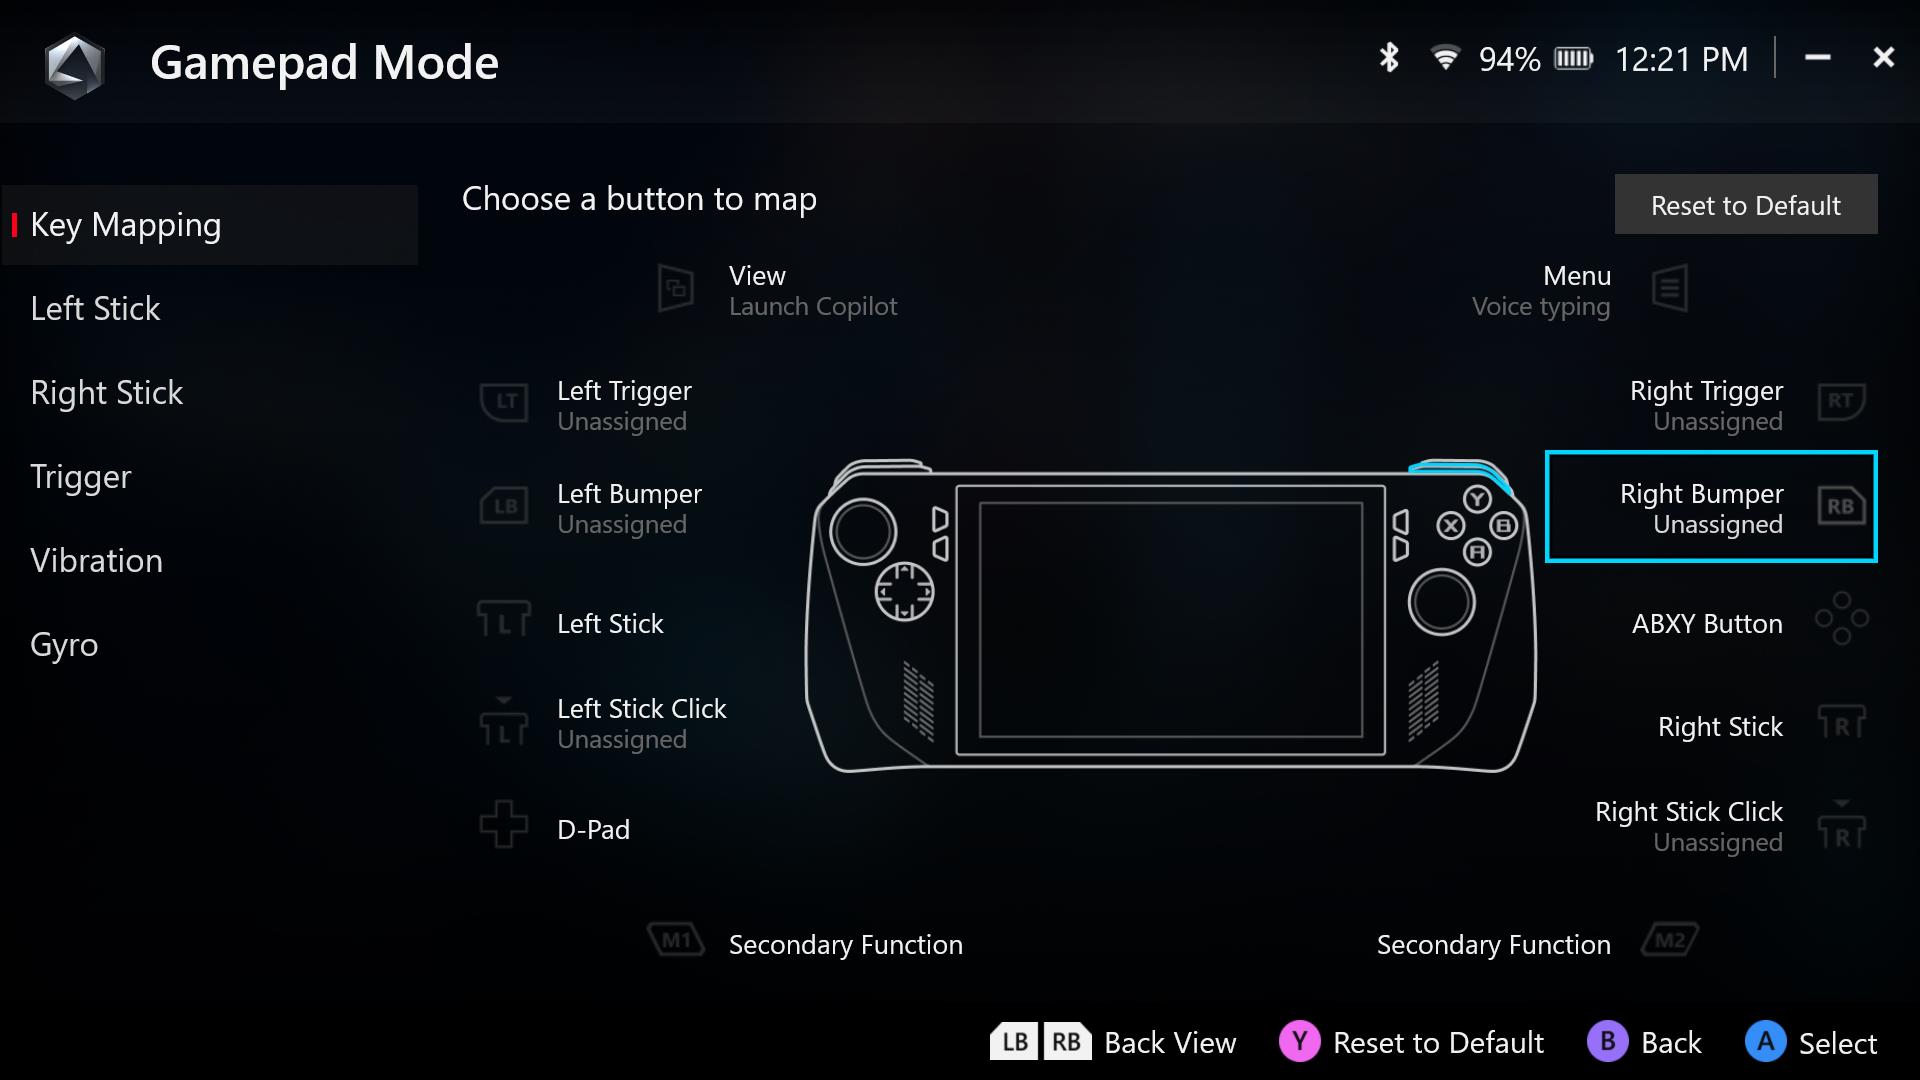
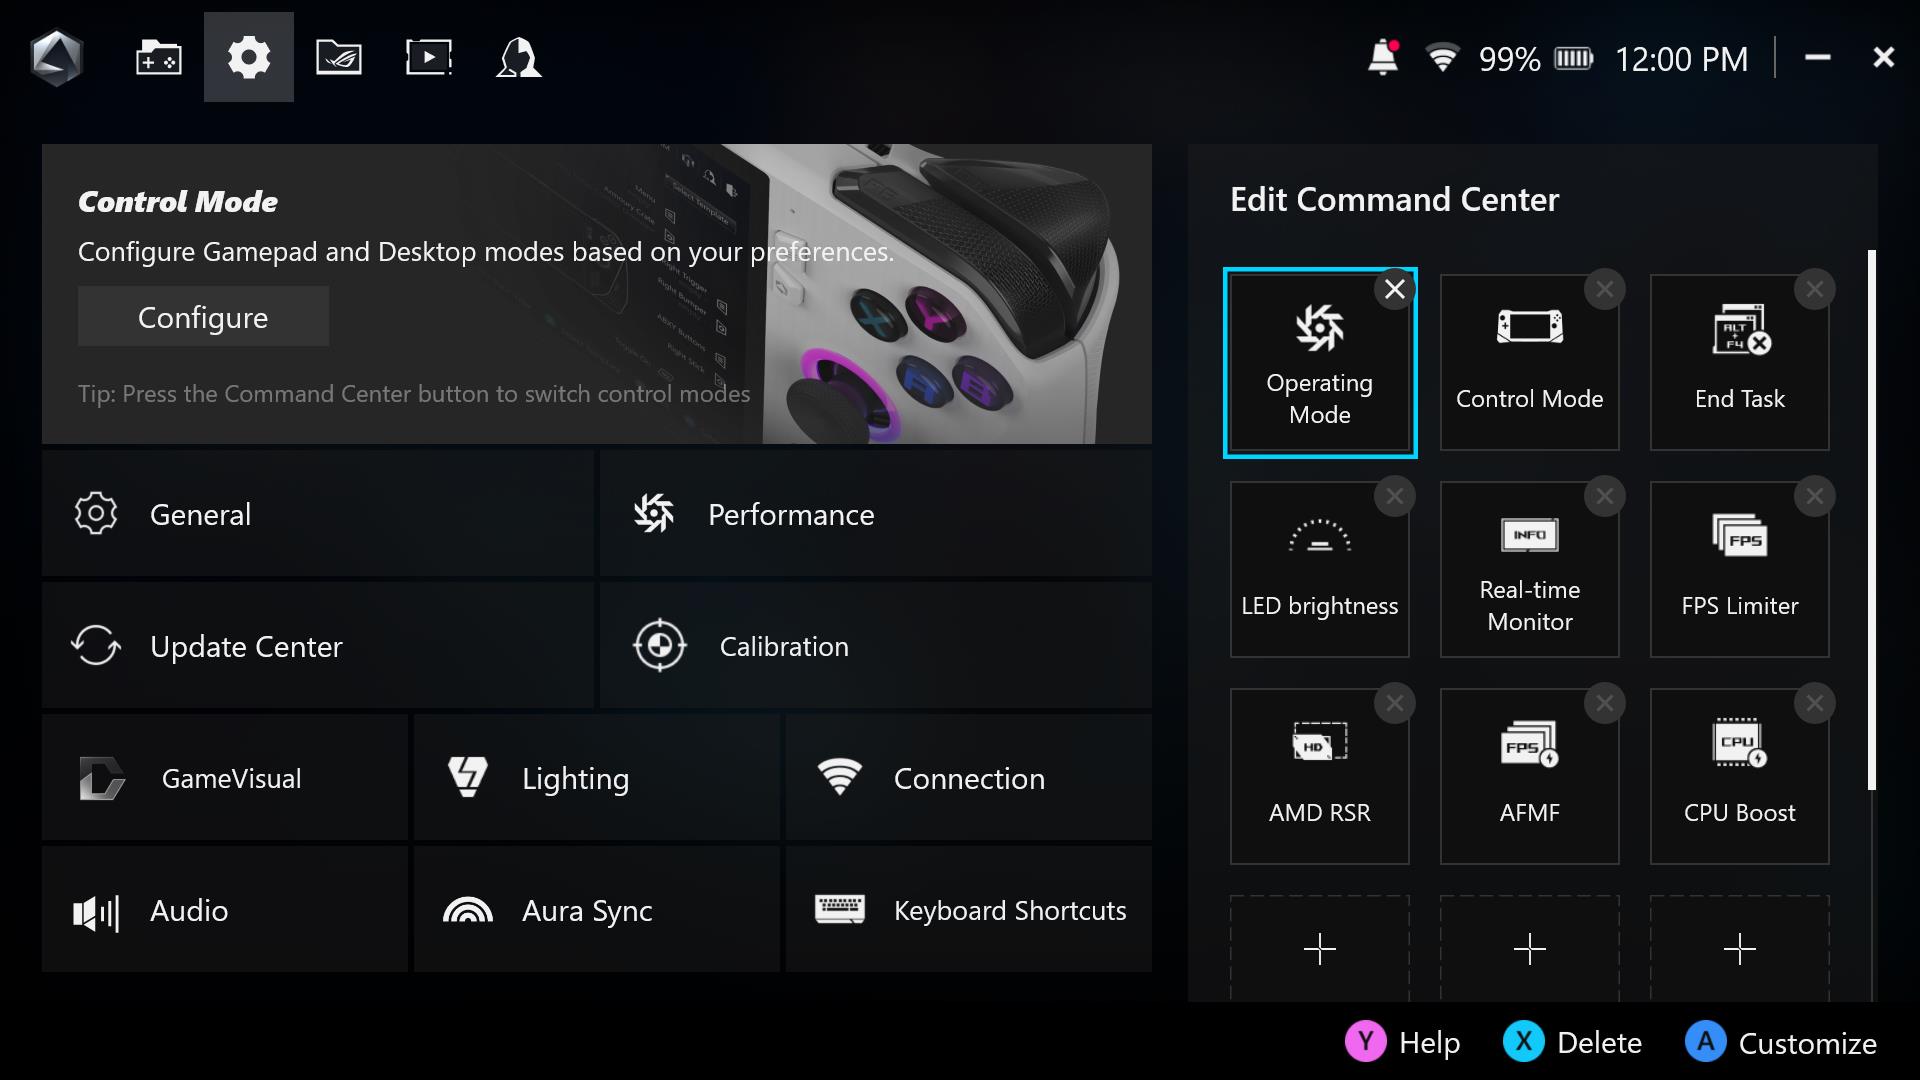
To remap the buttons on your gamepad, first open the Command Center and set the Control Mode to Auto before continuing. Then open Armoury Crate, navigate to the Settings tab, and select the Configure option under Control Mode. From here, you can choose to configure either Gamepad Mode or Desktop Mode.
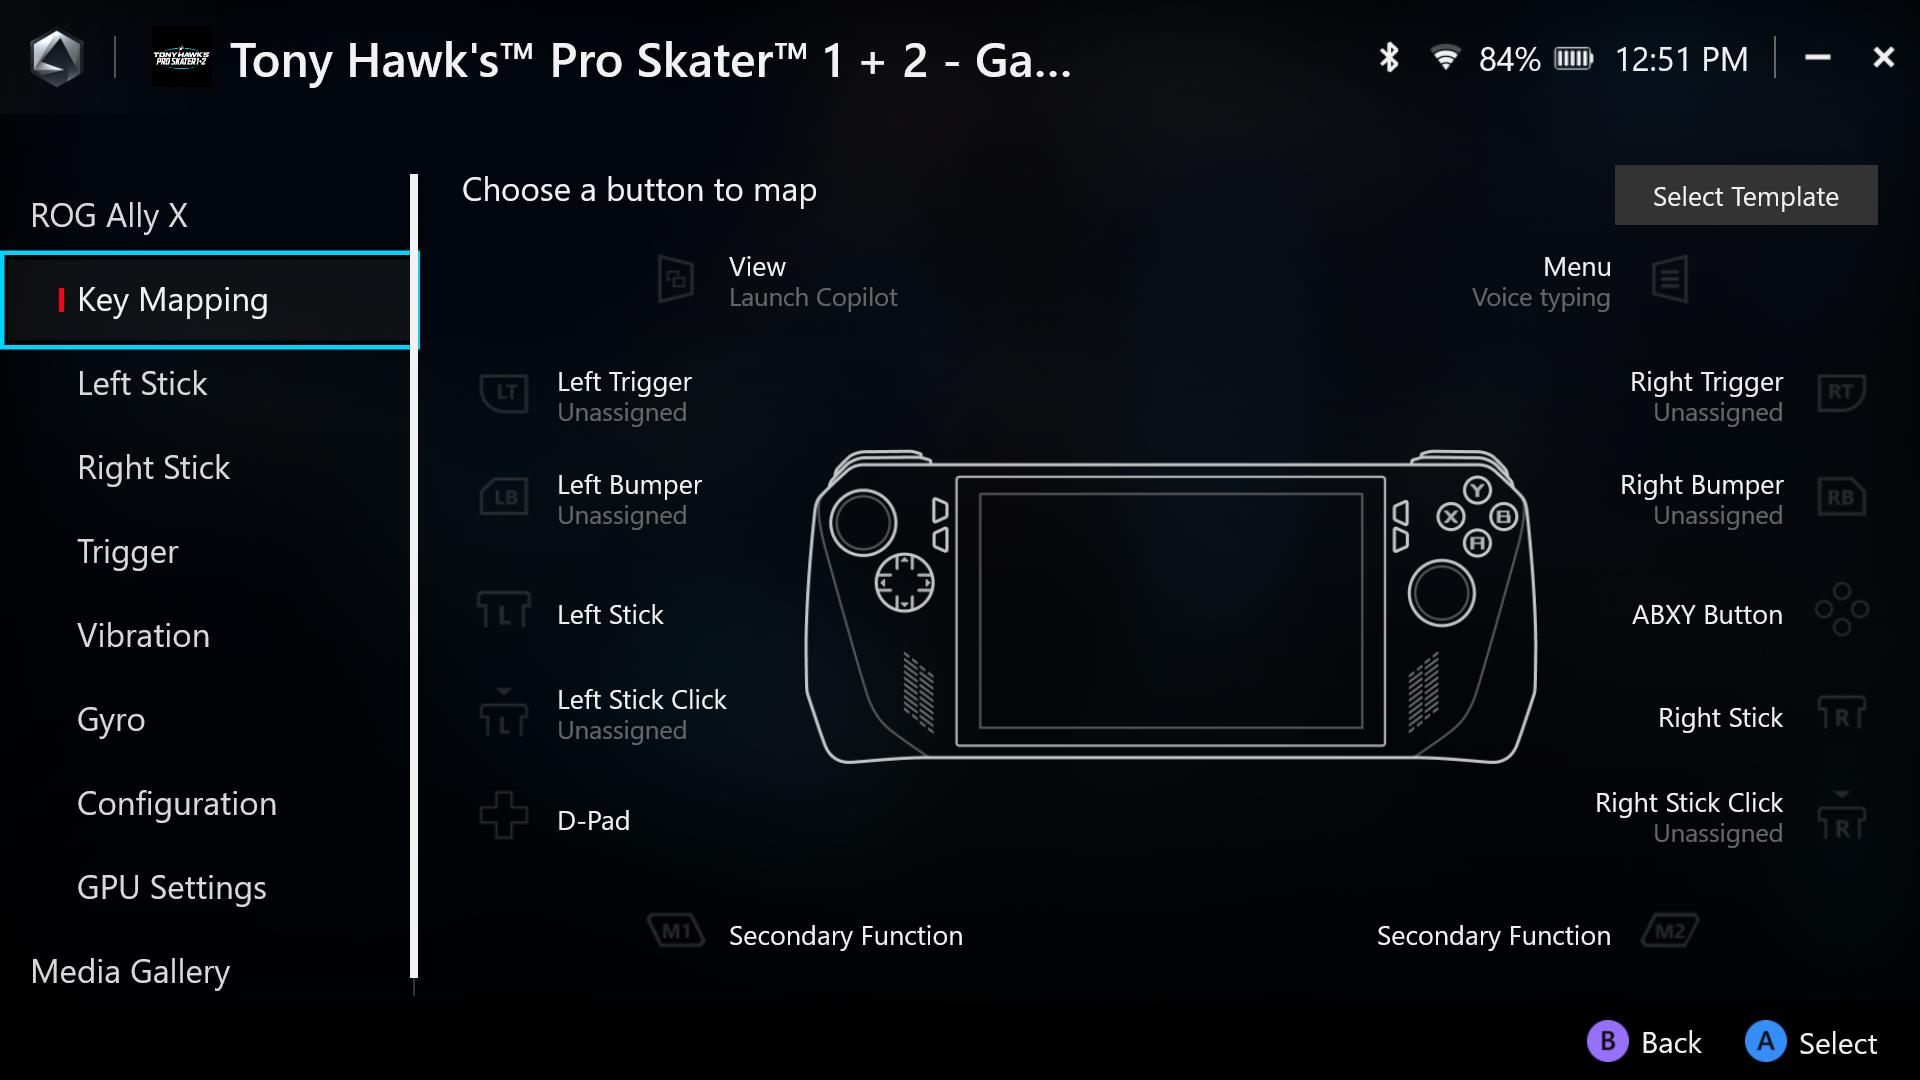
Once you’ve selected a mode to configure, use the control stick or touch screen to select a button to remap. For example, in Desktop Mode, I like to remap the A button to left-click and X to right-click, so let’s use that as an example. To remap the A button, click the ABXY Buttons option, tap the A button in the menu, and choose Primary Button. (We’ll discuss Secondary Functions in a moment.)
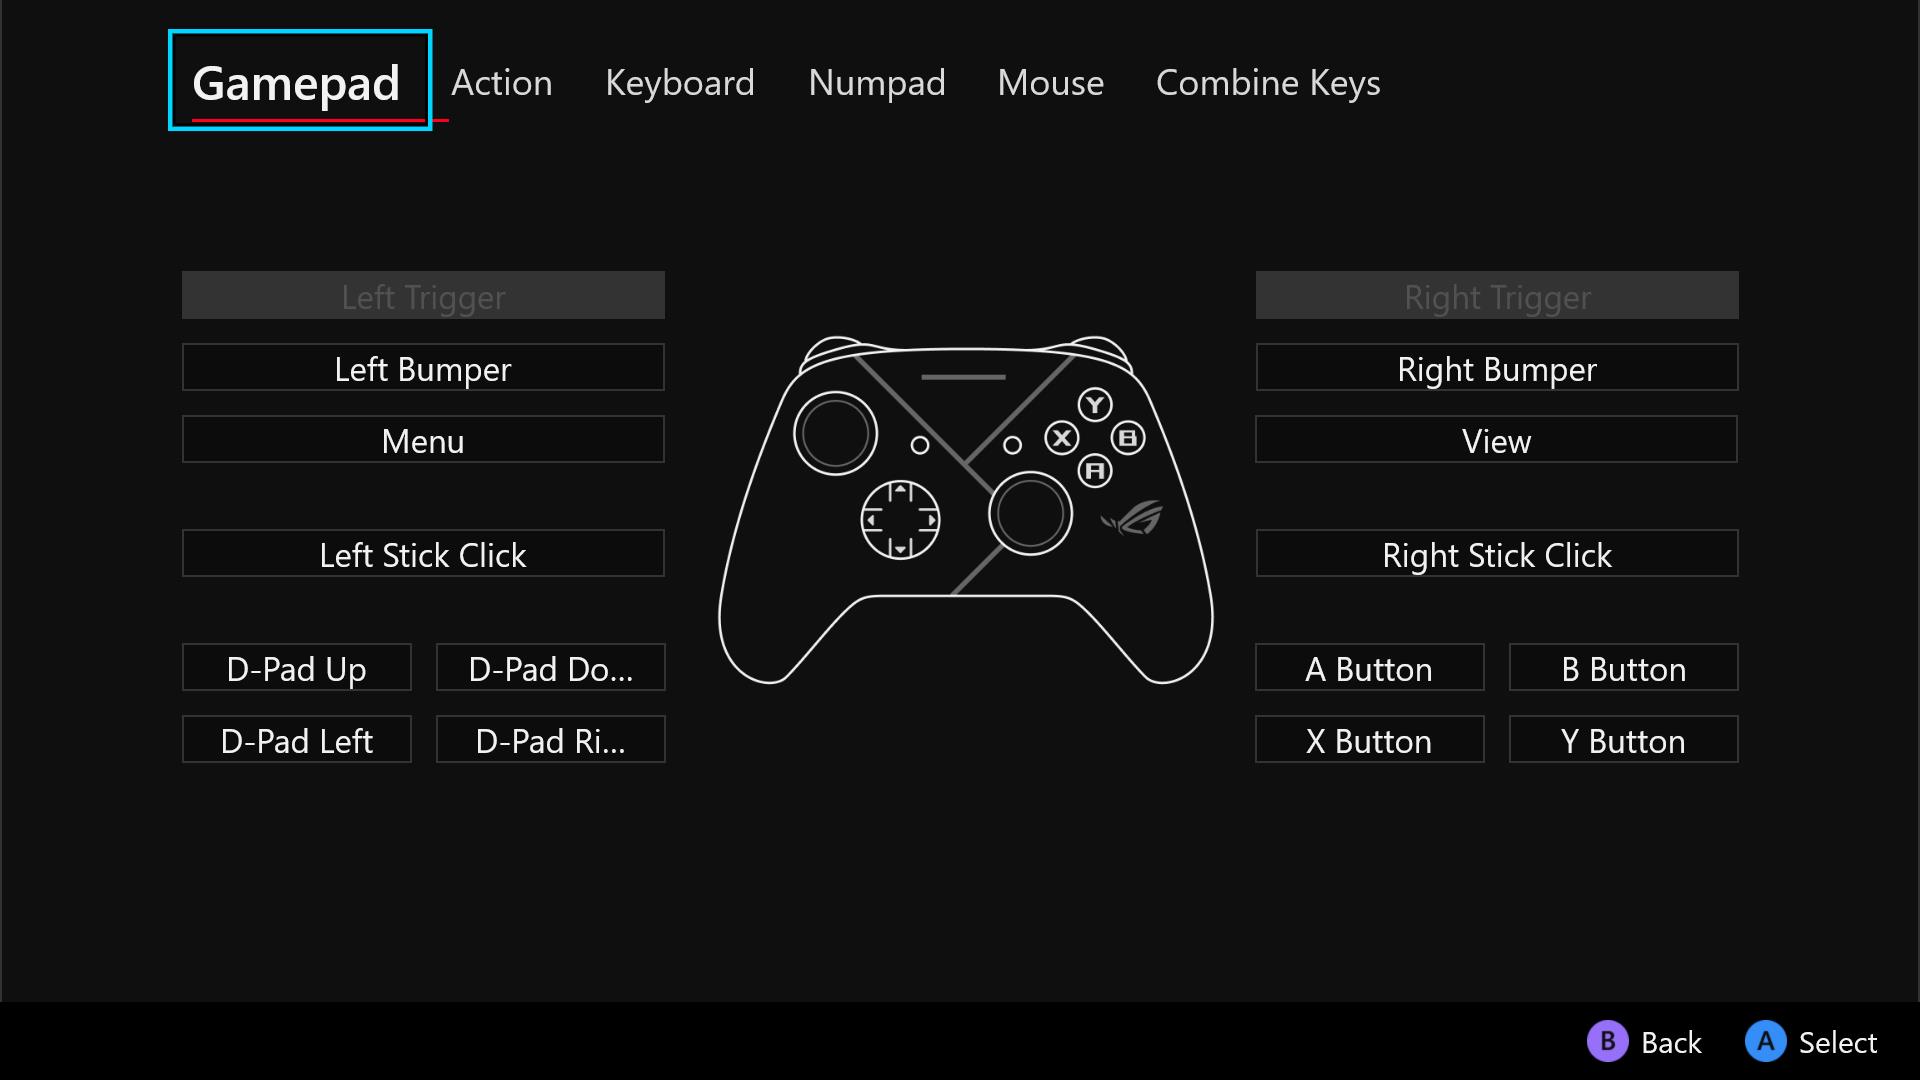
A new menu will pop up asking you what function you’d like to map to the A button. The Gamepad tab lets you map another button’s function (e.g. mapping the X button to the A button), the Action menu lets you map certain Windows actions (like showing the keyboard or bringing up Task Manager), the Keyboard and Numpad menus let you map keyboard keys, while the Mouse menu lets you map mouse clicks. I want the A button to invoke a left-click, so I’d select the Mouse tab, choose Left Click, and my button will be remapped. You can repeat this process for any other buttons you’d like to remap. (You cannot remap the Control Center, Armoury Crate, Volume, or Power buttons on the device.)
There are two special buttons on the back of the controller labeled M1 and M2. By default, these act as macro-style modifiers — if you press and hold one of them while pressing another button, you’ll invoke a secondary function. For example, out of the box, you can hold M1 or M2 and press Up on the D-Pad to show the on-screen keyboard. You can customize these Secondary Functions in the same way as described above.
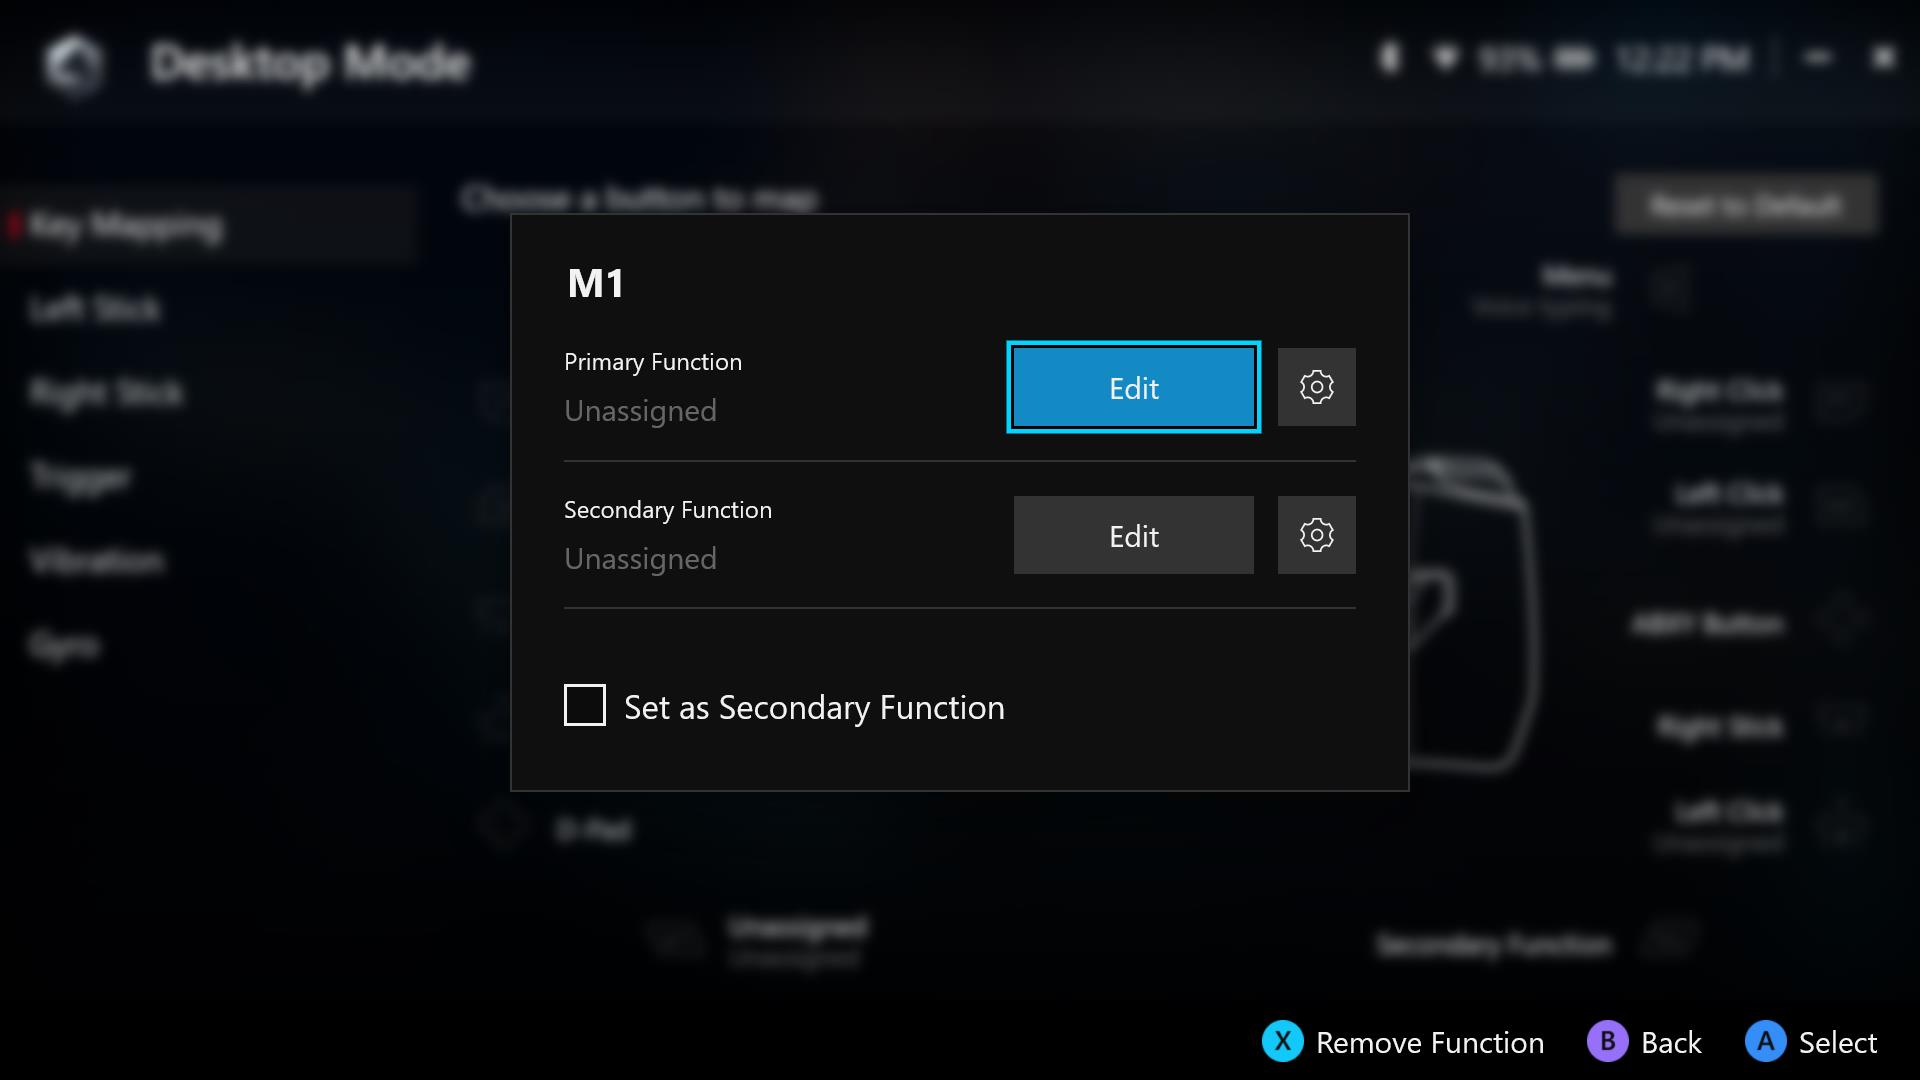
If you don’t need these secondary functions, you can also map the M1 and M2 buttons to their own actions. To do so, select them from the Key Mapping list and uncheck the “Set as Secondary Function” box. In certain games, for example, I like these paddles to act as the LB and RB bumpers, since my fingers tend to rest naturally on these paddles as I game.
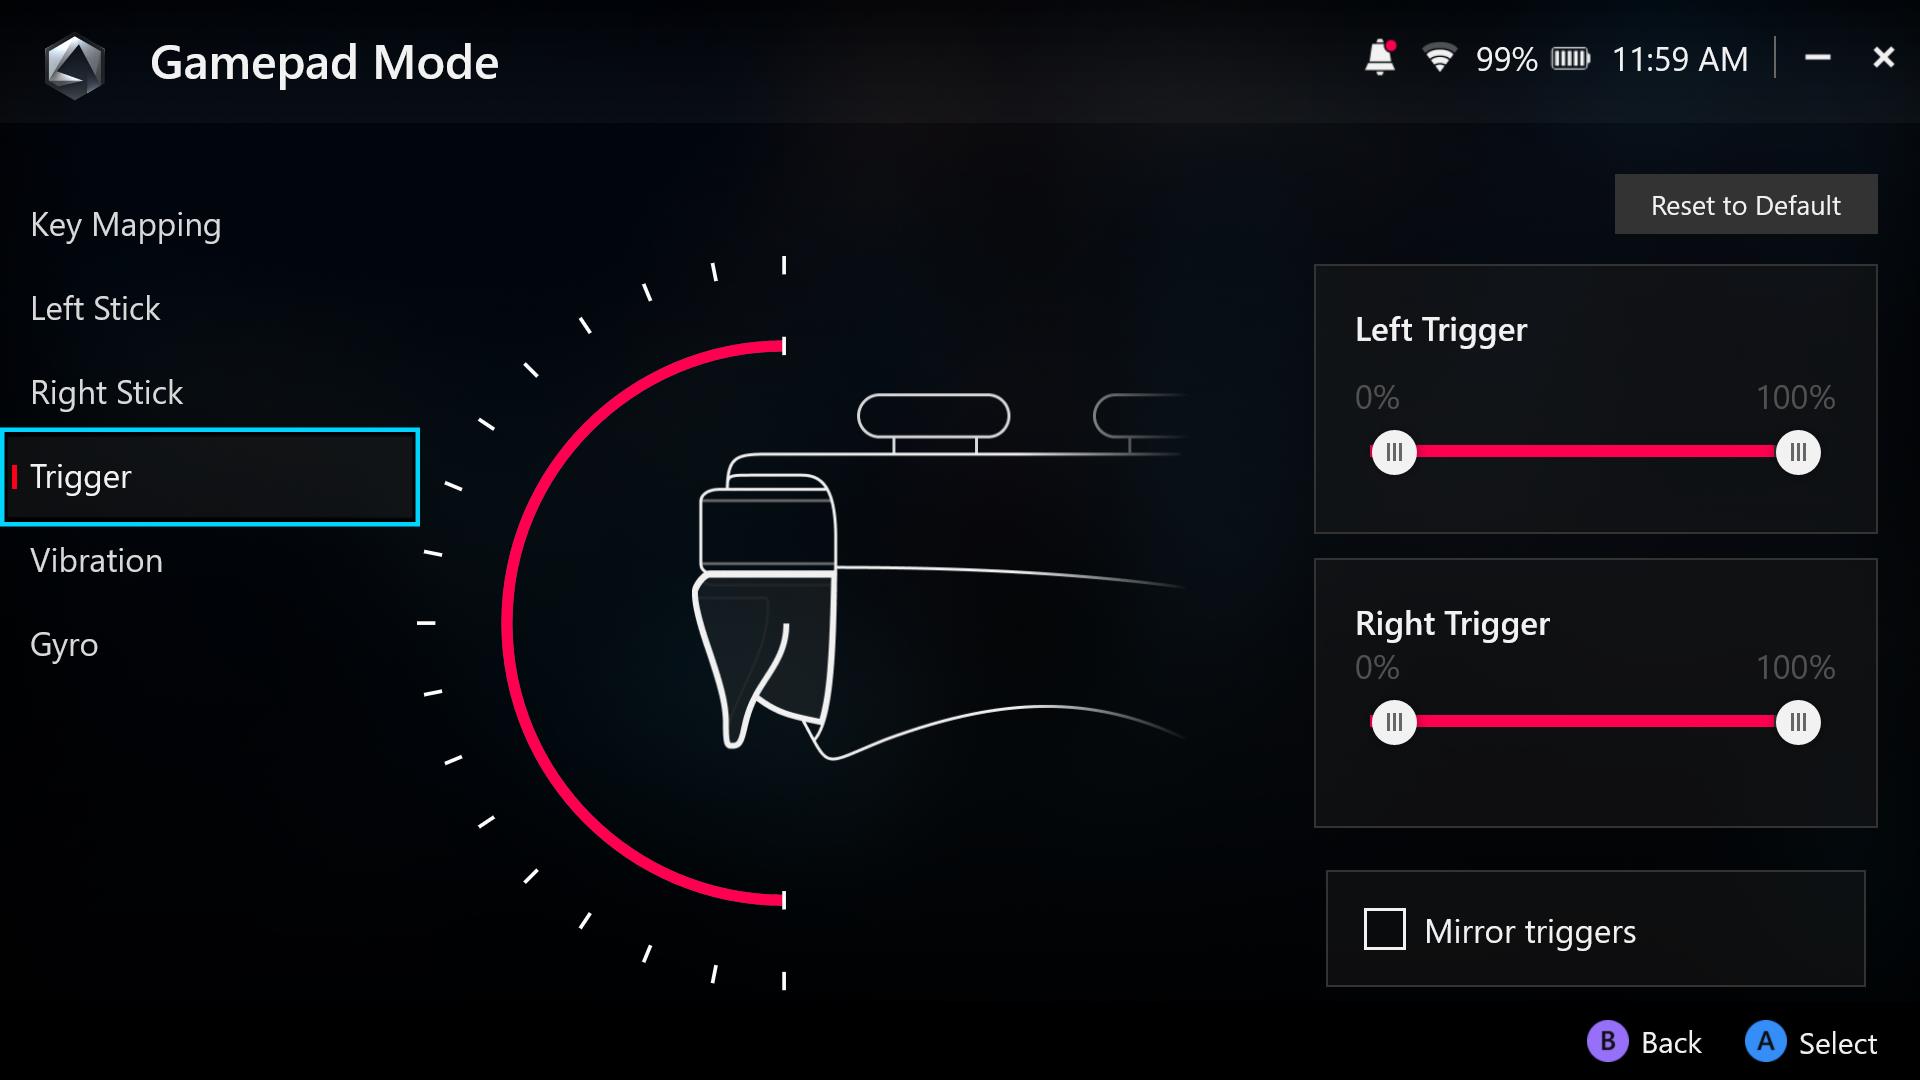
Finally, you can also select the Left Stick, Right Stick, and Trigger options in the left sidebar to customize the dead zone and sensitivity of these analog functions. Choosing the Vibration option will let you tweak the strength of the haptic feedback in the handles, which can be handy if you’re sensitive to haptics or want the device to be as quiet as possible.
Create a custom profile for any game
When you launch a game for the first time, it will create a new controller profile for you, inheriting whatever customizations you’ve made to the global button mappings at that time. (Or you can choose to start with a template based on your button mappings for another game.)
If you want to make changes to a game’s custom profile, select the game in Armoury Crate and press the X button on your controller. From here, you can adjust your key mappings as described above, and the changes will only apply to that game. Note that if you launch a game and later make changes to the global button mapping, you’ll still have to make those changes to the game’s individual profile as well.
Once you've dialed in your button mapping for a specific game, you can tap the Select Template button in the upper-right corner, scroll down to the game template you've created, and tap the gear icon to Export that button mapping as a file to share online or with friends. Above that template, you'll also see an Import button you can use to import other template files from the community.
If you'd like to use gyro control in a certain game, you can customize that in the Game Profile as well. Check out our full guide to ROG Ally gyro controls for the full details.
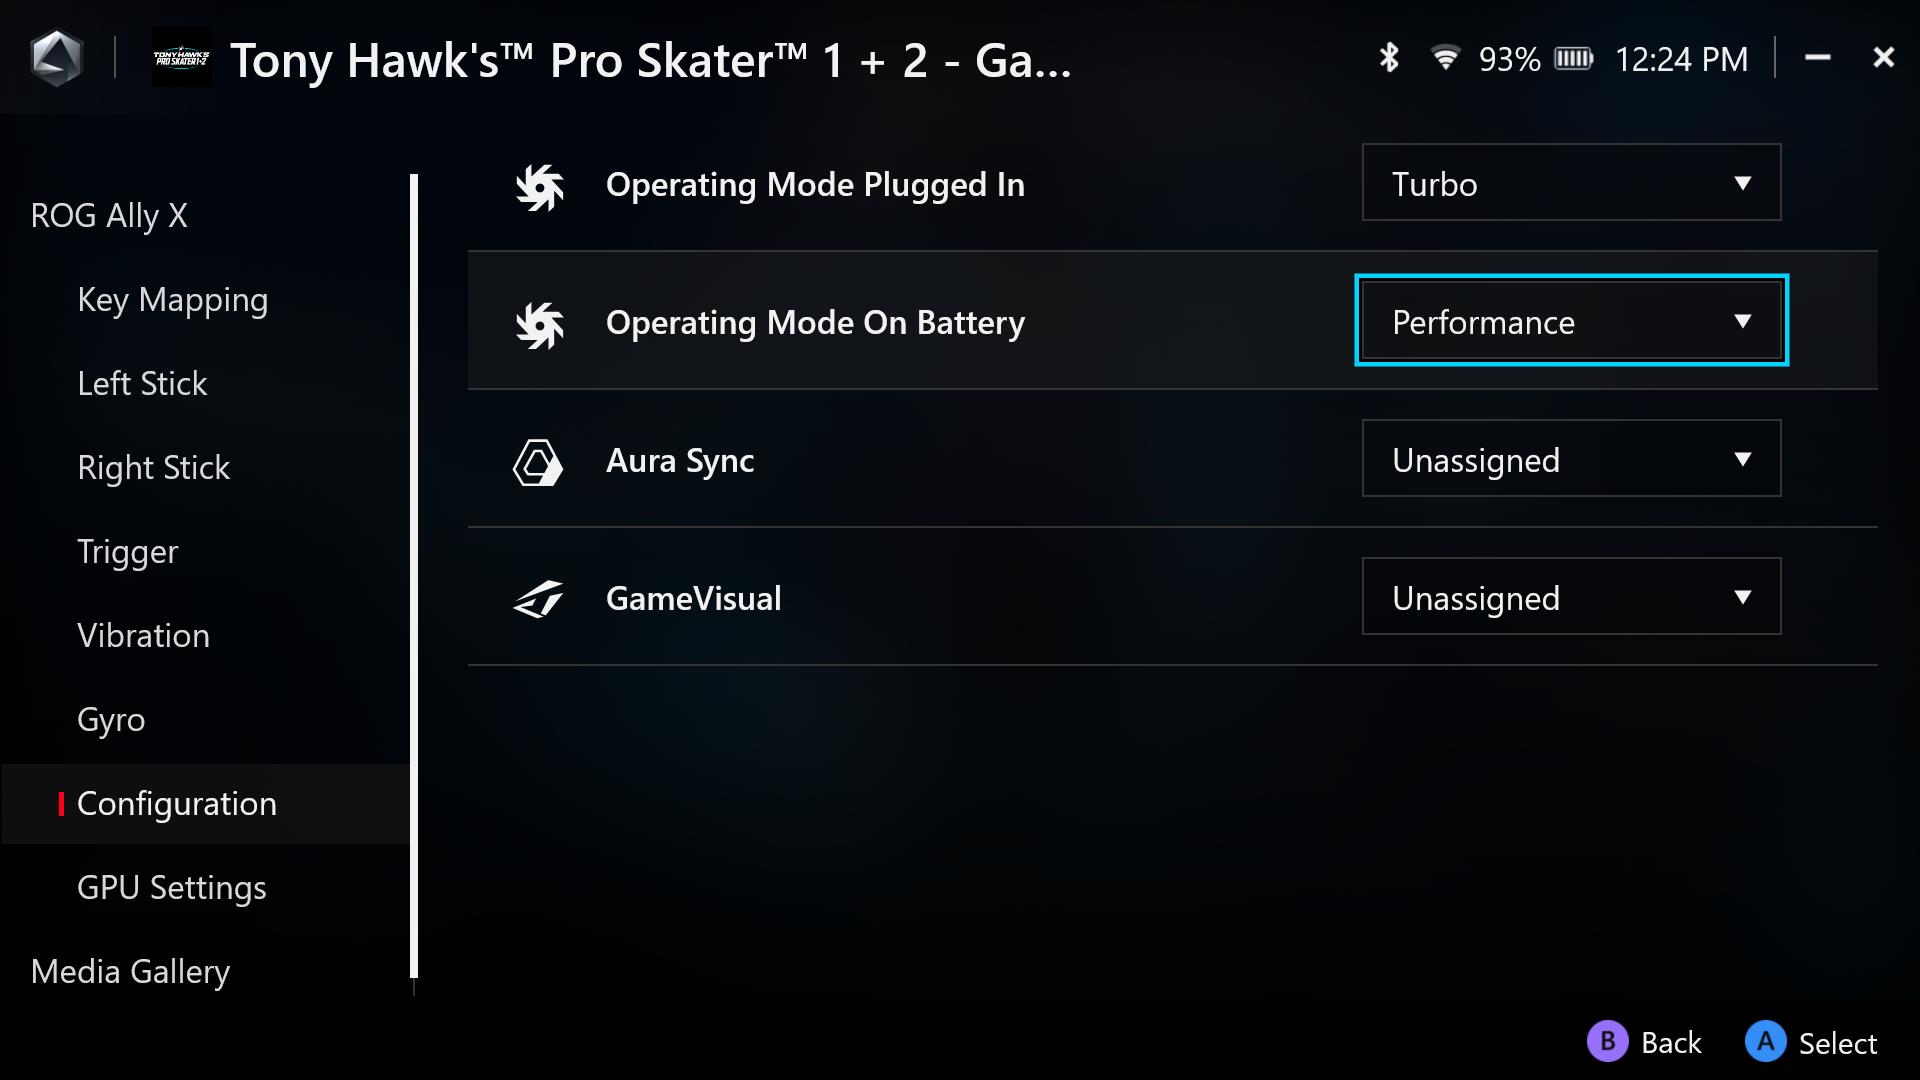
Game Profile also lets you set the game’s default operating mode, Aura Sync lighting pattern, and GameVisual display calibration, as well as customize the game’s appearance in your library with your own game art. You can even set certain GPU features to turn on or off automatically with certain games, including Radeon Super Resolution (RSR), which you can read about in this guide, and AMD Fluid Motion Frames (AFMF), which is described in this guide.
With Armoury Crate SE, you get a fully customizable experience, letting you play all your games, your way. For more tips and tricks, check out our full guide to the ROG Ally.
| Model | Type | Where to Buy (US) | Where to Buy (CA) |
|---|---|---|---|
| ROG Ally X | Handheld | ASUS Best Buy |
ASUS Best Buy |
| ROG Ally (Ryzen Z1 Extreme) | Handheld | ASUS Best Buy |
ASUS Best Buy Newegg Amazon |
| ROG Ally (Ryzen Z1) | Handheld | ASUS Best Buy Amazon Micro Center |