How to set up your monitor and PC for high-refresh-rate gaming
Stop us if you’ve heard this one before. You decided to splurge on a high-end monitor with a killer refresh rate because you heard about how much better 144Hz feels versus 60Hz. A year down the road, you’re unconvinced. There just isn’t much of an improvement compared to your old display. Then it hits you—you never adjusted your new monitor’s refresh rate, and you’ve been staring at 60Hz the whole time. Ouch.
If that’s you in the above scenario, don’t worry. You’re certainly not the first person to upgrade your PC only to leave features or functionality turned off. And the good news is that setting up your system to take full advantage of high-refresh gaming isn’t difficult at all. The process only takes a few minutes, and it’s one of the easiest ways to improve your gaming experience.
Why should you care about high refresh rates?
Just to be clear, the refresh rate is the frequency at which your monitor can update the information displayed on its LCD panel. 60Hz means the monitor can refresh 60 times every second. A 144Hz panel updates more than twice as often, and some of our latest displays refresh at 240Hz, 300Hz, or even higher still. A higher refresh rate yields smoother animation and feels more responsive, whether you’re whipping your mouse across the screen in Windows or blasting through your favorite first-person shooter. It’s really that simple: you can see what’s going on in your interactive game or application more times per second.
Refresh rate is independent of the frame rate you see in games, though. Ultra-demanding settings might limit your graphics card to 30 frames per second, meaning you see the same frame twice per refresh on a 60Hz display. A high-end GPU might crank out 120 frames per second or more, causing parts of two or more frames to show up each time that same screen updates. That’s because a graphics card draws its output to a region of its memory called a frame buffer, and it usually switches between two of those buffers each time a new frame is ready. The “front buffer” holds the last completed frame, and the “back buffer” is where the card draws its next frame. “Tearing” occurs when that buffer switch happens in the middle of a monitor refresh.
If your graphics card can manage high frame rates, choosing a 144Hz or faster monitor lets you see more of those updates from the graphics card every second, and it might reduce the visibility of tearing. That’s why competitive gamers usually choose the fastest monitors around and push for the highest frame rates possible.
Maximizing variables
Variable refresh rate monitors introduce a new wrinkle to the problem of optimizing your whole gaming rig for high refresh rates, though. It used to be that monitor refresh rates were static. Once you set 60Hz or 120Hz, the monitor would refresh that many times per second, no matter what. The stream of frames from your graphics card doesn’t usually mimic that behavior, though. A GPU might render 100 FPS as you jog through a post-apocalyptic landscape, and then suddenly drop to 40 FPS when a horde of space zombies descends upon your location. Those dramatic fluctuations can result in jarring artifacts like the tearing we mentioned earlier.
Variable refresh rate technology circumvents this problem entirely. A monitor with AMD FreeSync or NVIDIA G-SYNC performs its refreshes in tandem with the graphics card’s output, so there is no mismatch between them. The monitor only updates when a new frame is ready to display, giving you a heightened perception of smoothness and none of the ugly compromises imposed by a fixed-refresh screen.
Because variable-refresh-rate screens march in lockstep with the graphics card, though, you might actually miss out on the benefits of a high-refresh-rate panel if the rest of your system isn’t up to snuff. Static 120Hz or 144Hz screens will always run at their fastest, so even if those screens show the same frame multiple times per second—as they would if a game was running at 60 FPS—they can still deliver a smoother perceived experience. If you buy a G-SYNC monitor with a 100Hz refresh rate and your game of choice can only run at 40 FPS with your graphics card, though, the experience will still be tear-free, but the net result is like having a perfect 40Hz monitor. To really enjoy high-refresh-rate FreeSync or G-SYNC screens at their fullest, you’ll want to check that your graphics card can push as many frames as possible with the titles and settings you prefer to play.
How to set it up
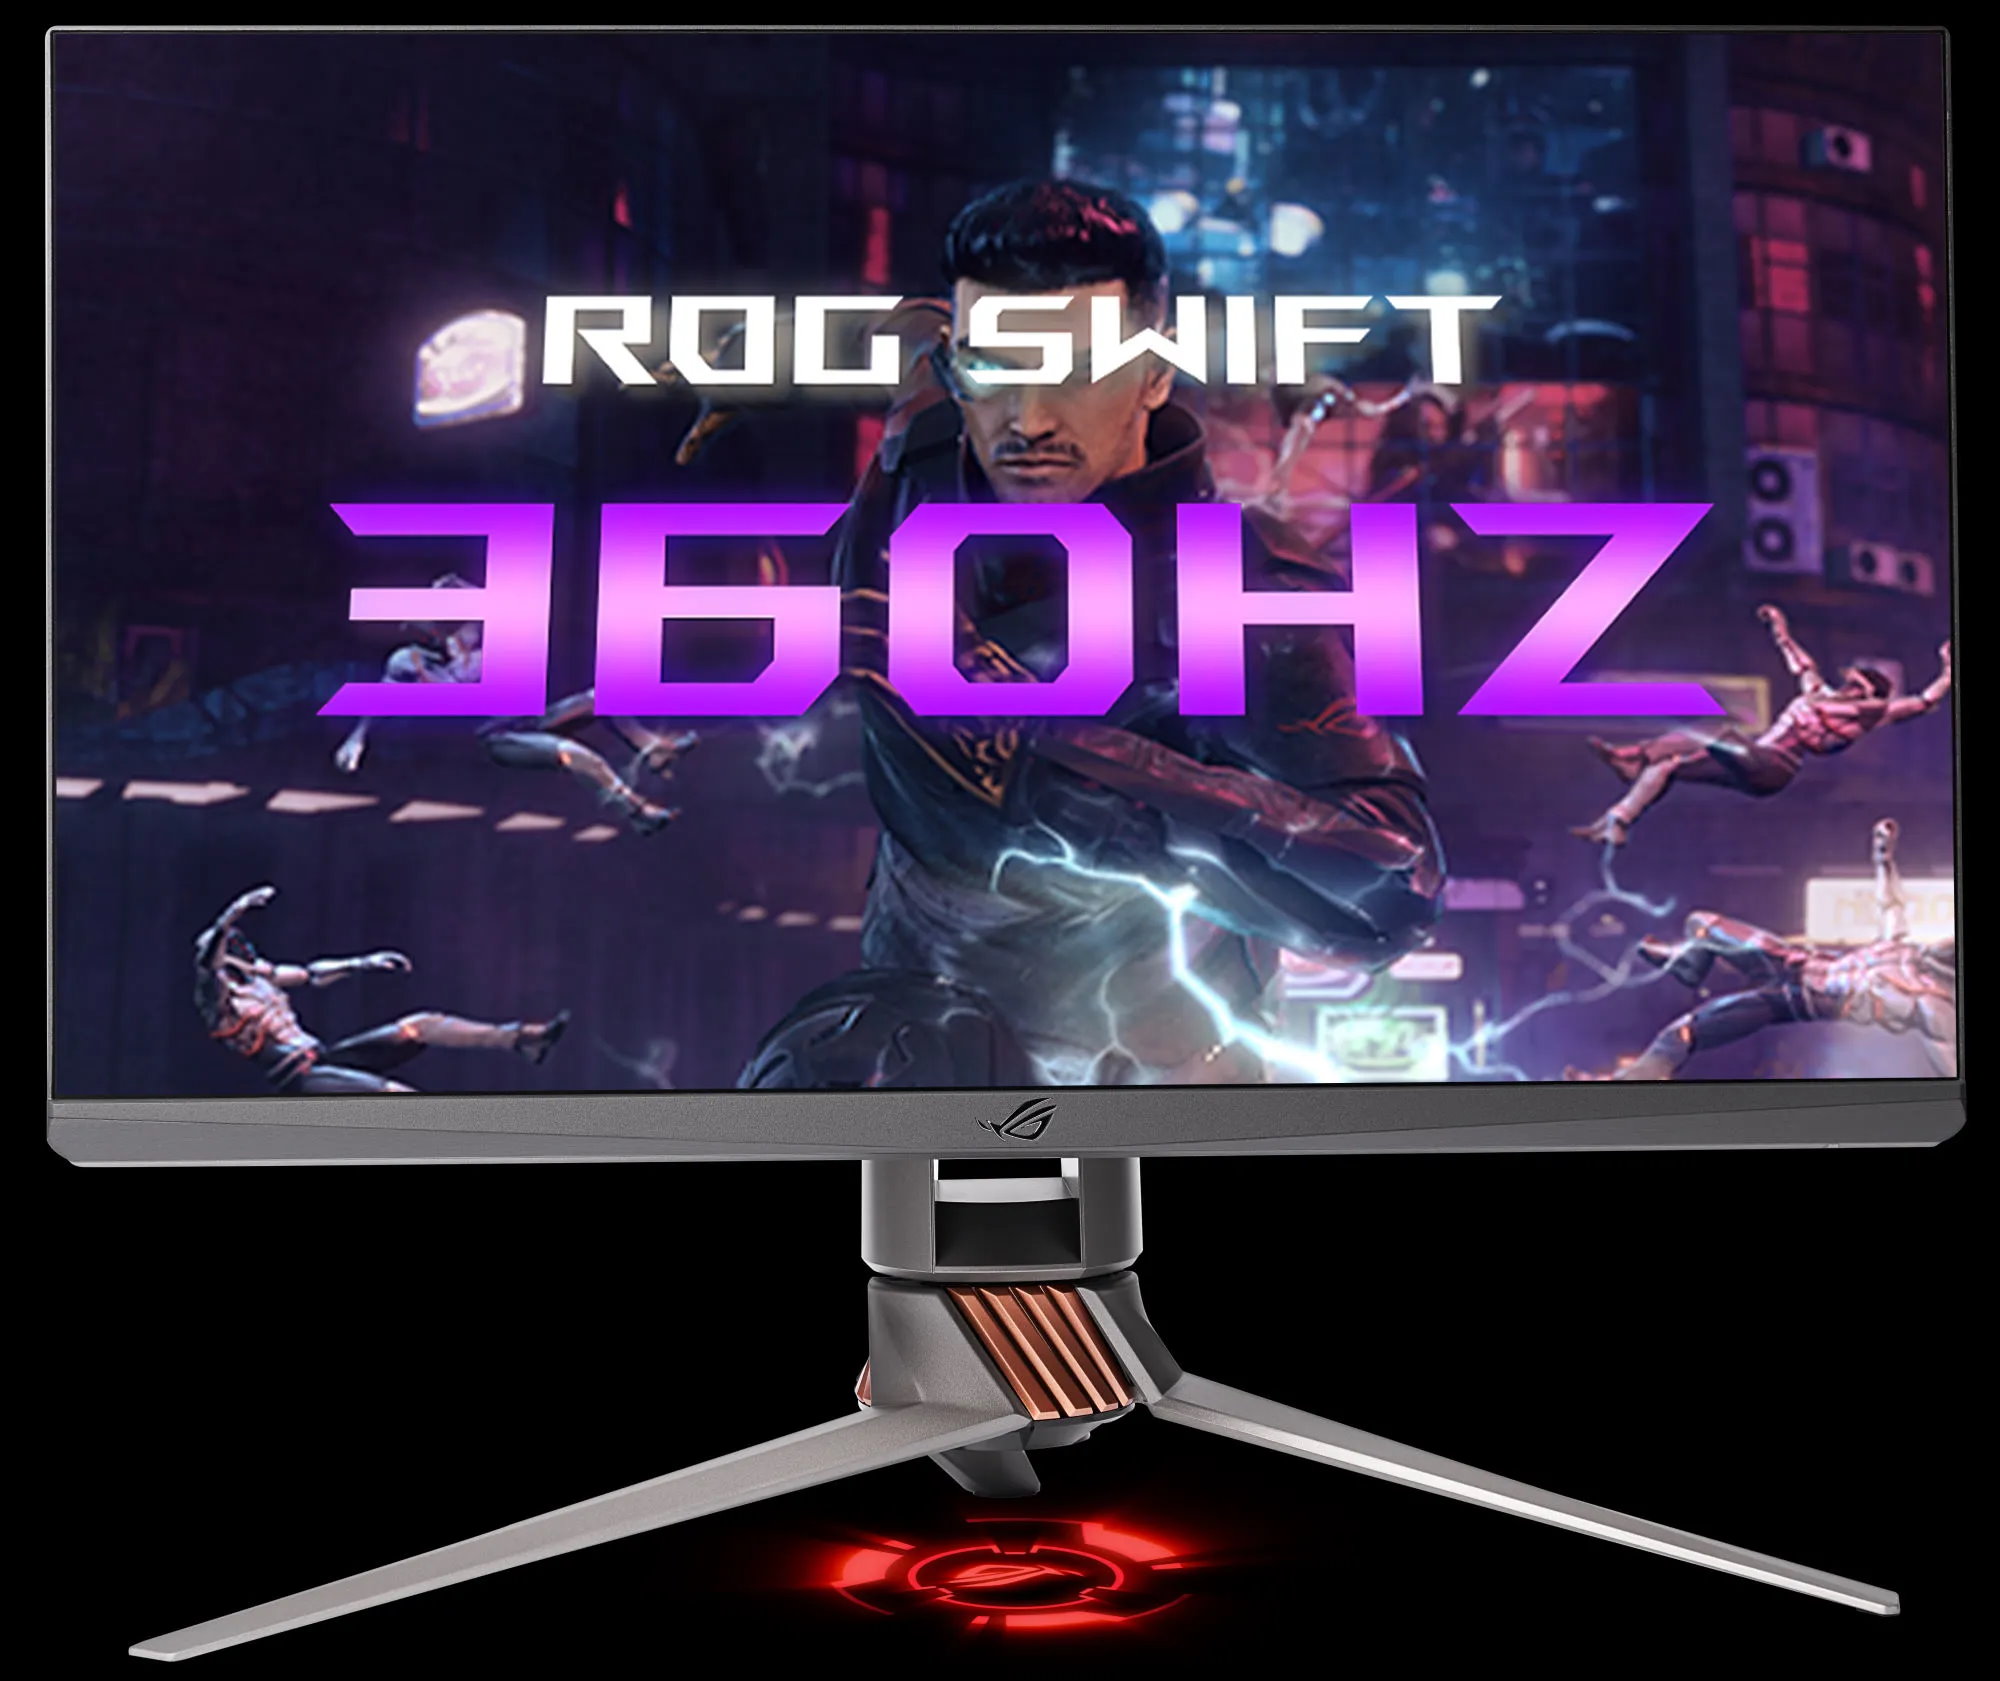
First off, you obviously need to make sure that you own a monitor capable of high refresh rates. Older displays are typically limited to 60Hz, period. That said, you don’t need to splurge on something like the ROG Strix XG248Q and its blistering 240Hz refresh rate to notice a difference. We offer a wide range of displays with 165Hz peak refresh rates, as well as some that top out at 100Hz like the ROG Strix XG35VQ.
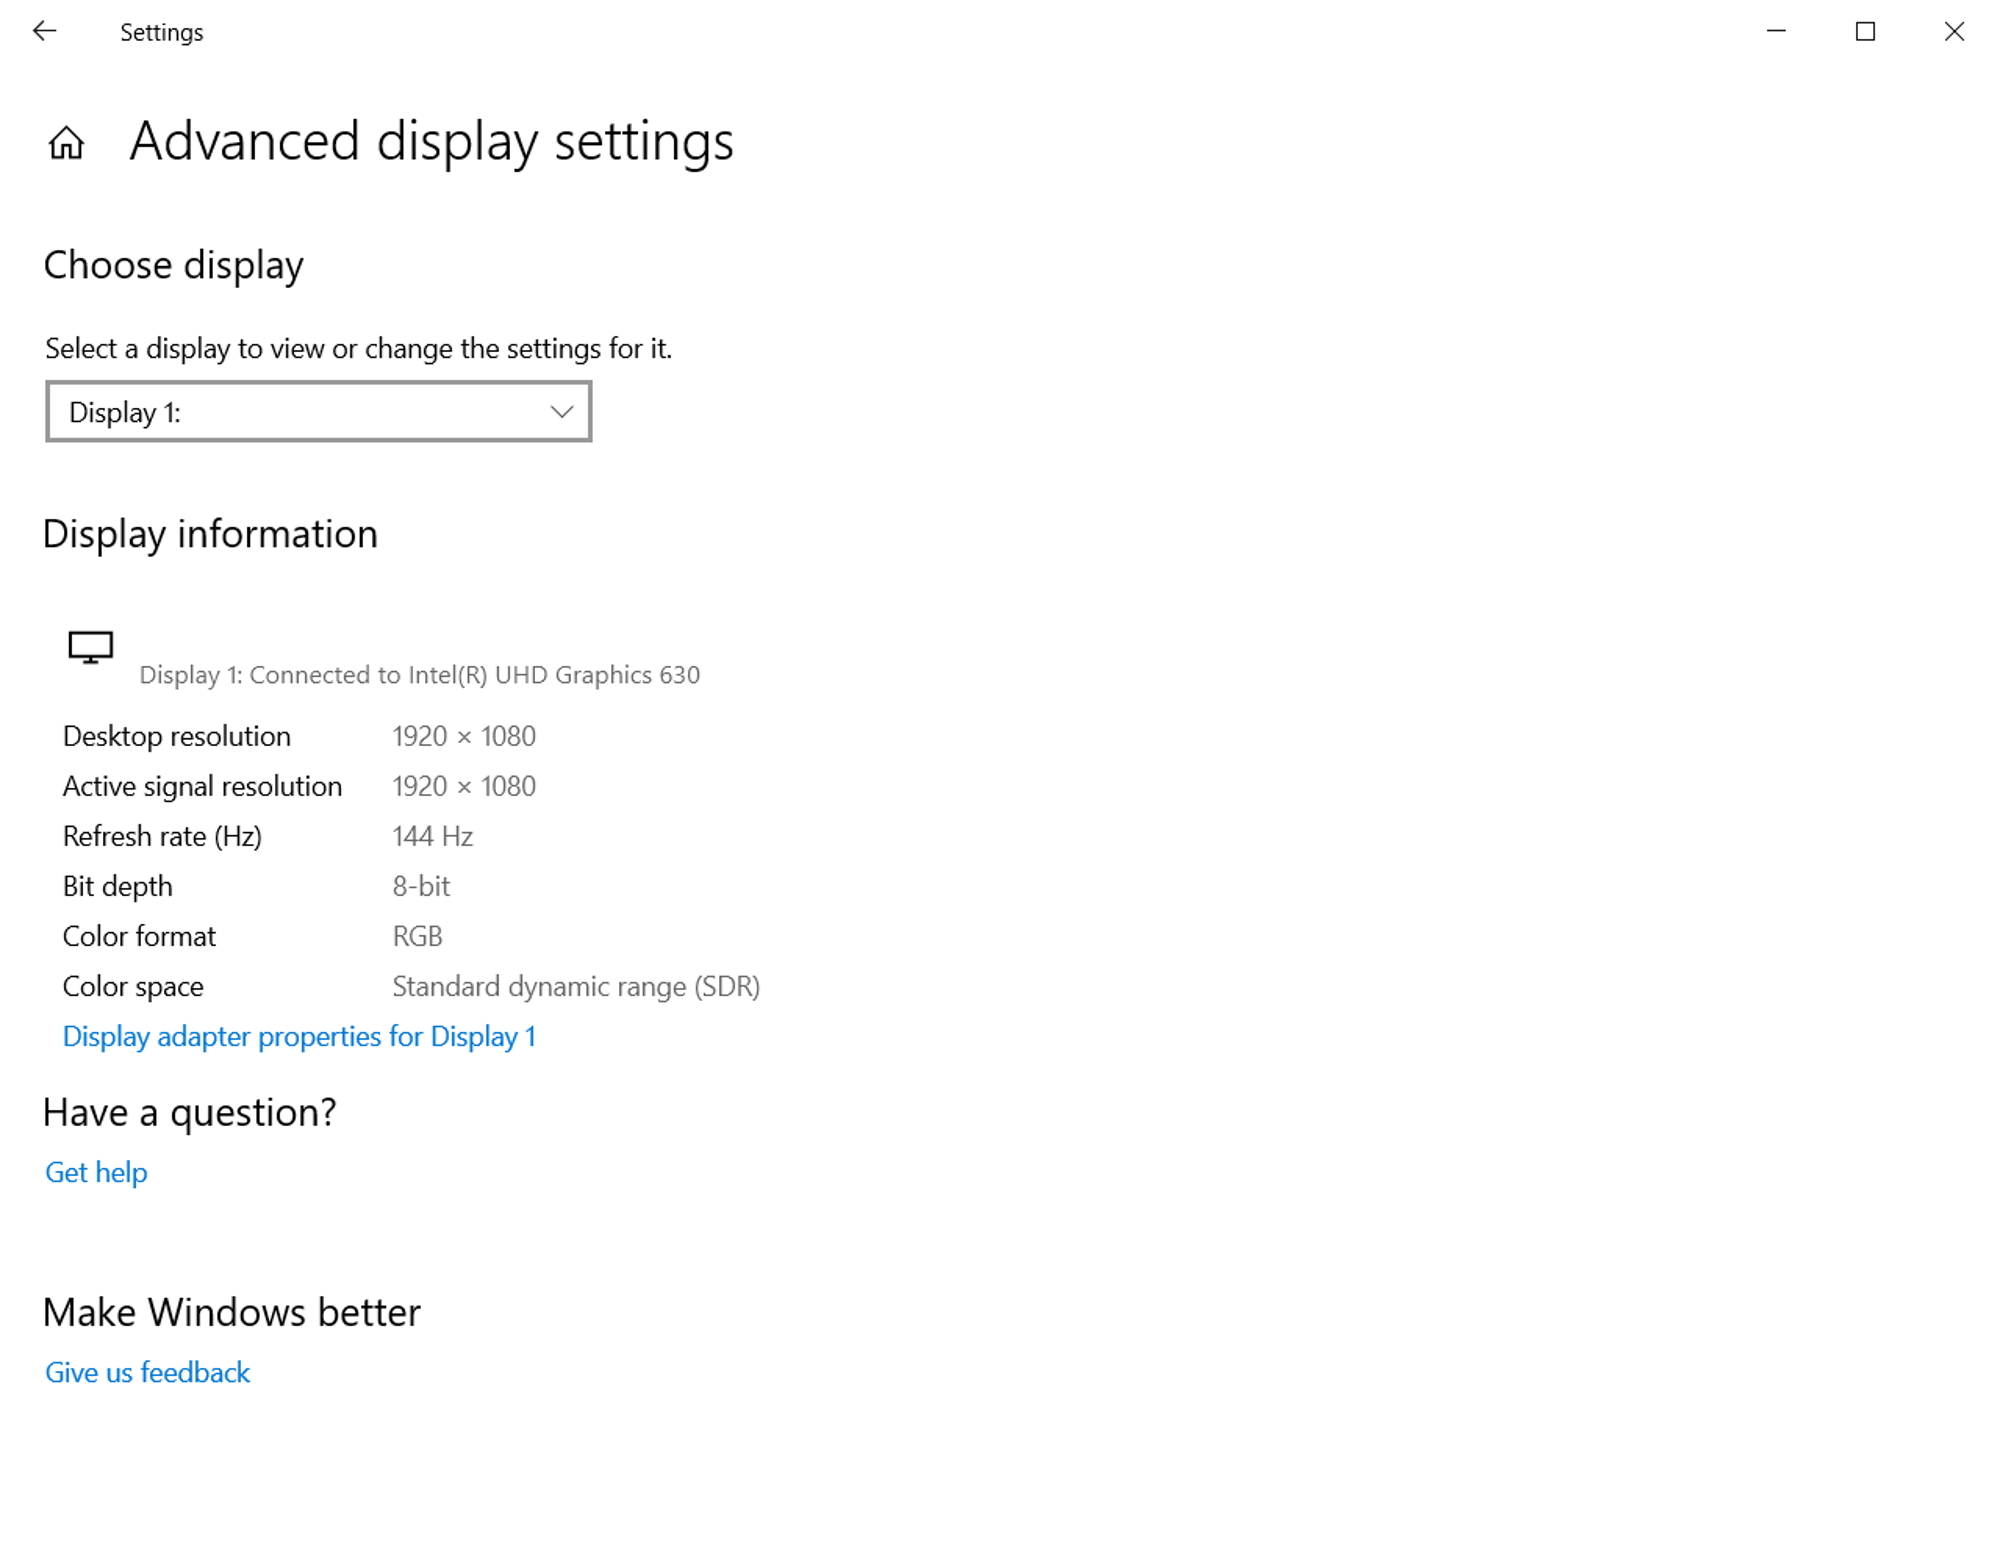
A simple way to check your monitor’s refresh rate is through Windows settings. In Windows 10, click Start and then click the Settings icon. When the window appears, click System. By default, you’ll see the Display pane. On the right side of the window, scroll all the way down until you see an “Advanced display settings” link and click it. The display information that pops up conveys desktop resolution, refresh rate, bit depth, and color space. To change your resolution, click the “Display adapter properties” link. A new window pops up with information about your graphics card. Select the Monitor tab and, under “Screen refresh rate,” click on the drop-down menu to view your available settings.
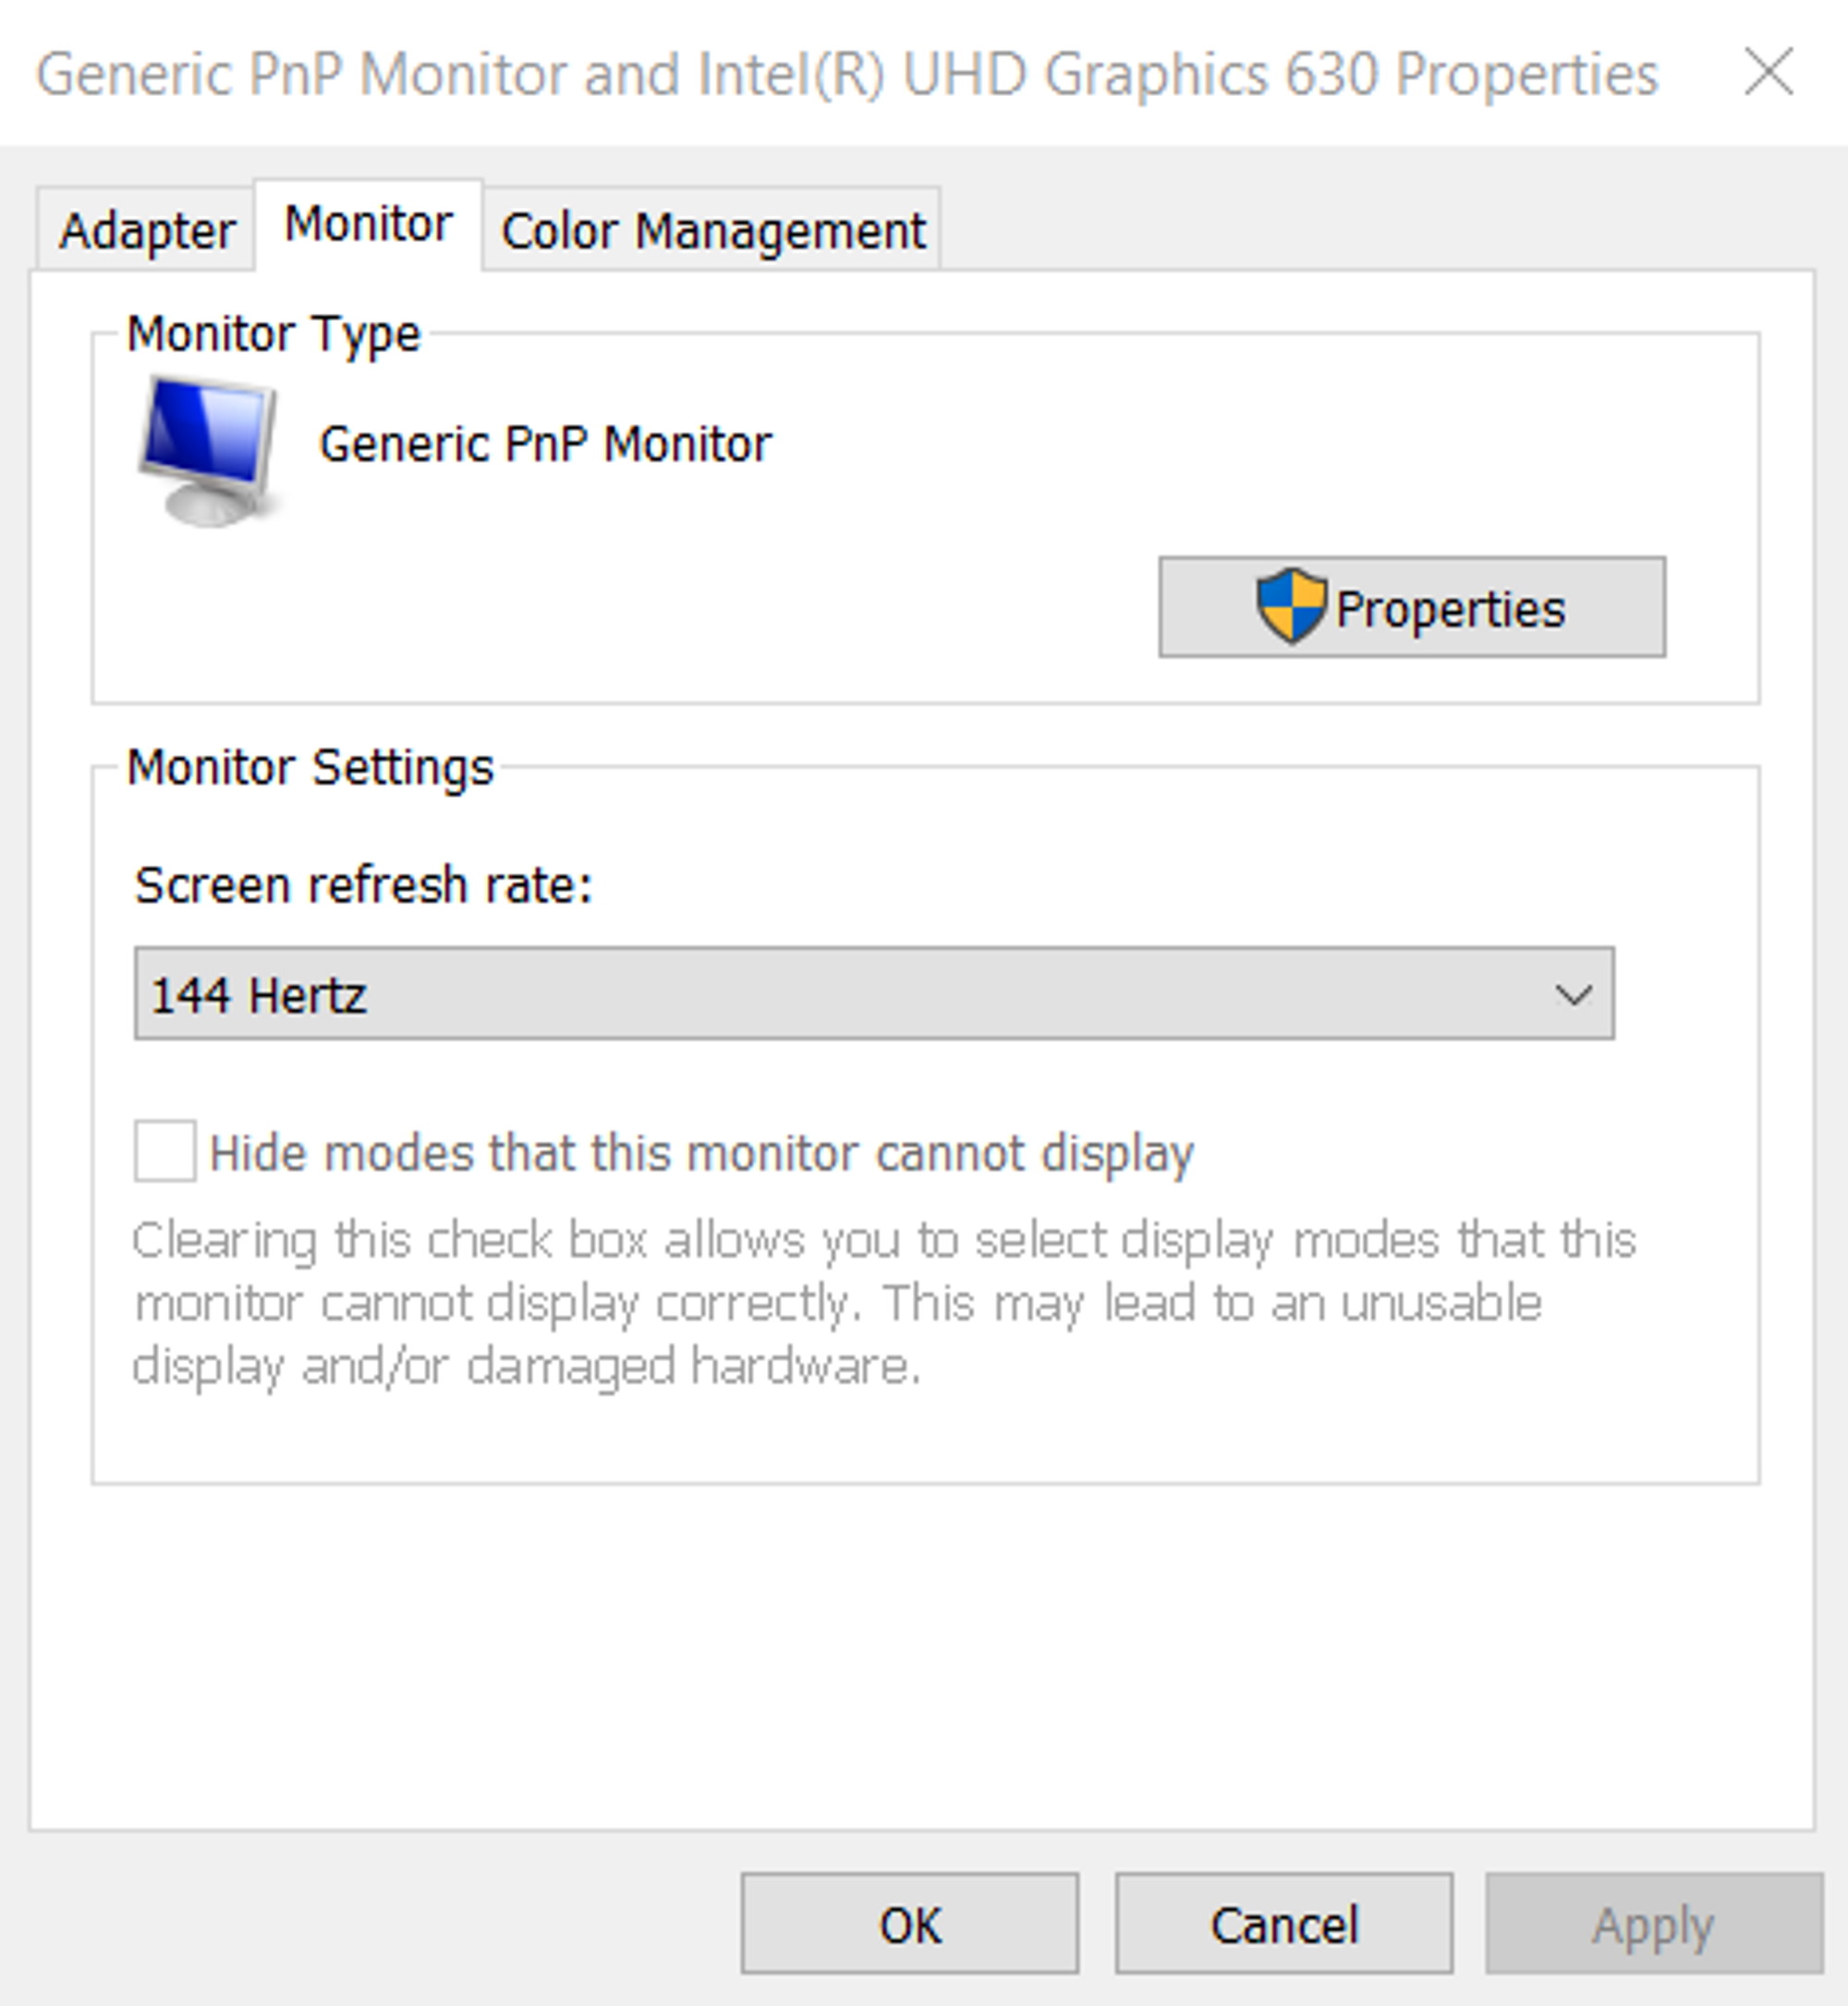
Every monitor’s options are different. But this is where you can ensure that you’re using the highest possible refresh rate for your display. Find the biggest number in the drop-down and click Apply. Don’t worry if the Windows desktop disappears for a moment; it’s supposed to do that. When it blinks back on, choose to either “Keep changes” or revert back to the previous setting in the unlikely event that it doesn't work. Then click OK to close the window.
That’s the simplest, most universal way of adjusting your monitor’s refresh rate. But you can also do it through AMD Radeon Settings or the NVIDIA Control Panel.
If you have an AMD card installed, right-click on the Windows desktop and select AMD Radeon Settings. When the application opens, click the Display tab. Your monitor is shown at the top of the window. At the bottom of the application, find “Custom Resolutions,” then click +Create. Then, in the Refresh Rate (Hz) area, click whatever number is there and punch in the one you want. You can’t enter a number that exceeds your monitor’s maximum refresh rate, so you’ll want to know that information before proceeding. If the number already entered didn’t match your display’s refresh rate, click Save.
For systems sporting an NVIDIA graphics card, right-click the Windows desktop and select Nvidia Control Panel. Expand the Display tree on the left-hand pane and click the “Change resolution” link. Select the monitor you want to adjust and scroll down to “Choose the resolution.” Pick a resolution from the scroll menu and select a refresh rate from the drop-down next to it. Click Apply to save your settings.
Let ‘er rip
Dialing in a higher refresh rate may make animations in Windows smoother. However, it won’t necessarily benefit your games unless your graphics subsystem can keep up. If you want to see higher frame rates from your existing graphics card, try running games at a lower resolution or specifying a less demanding detail preset to alleviate some of its existing workload.
The even better solution is to figure out how much graphics horsepower you need for high frame rates in the games you enjoy most. Upgrading to a high-performance graphics card allows you to enjoy great performance using the best quality settings possible. Some scenes are bound to be more demanding than others, so pairing a new GPU to a gaming monitor with variable refresh rate support helps keep the action running at its fastest and smoothest.
With your carefully-balanced graphics card installed on a motherboard hosting a similarly-matched CPU and plenty of system memory, you’re ready for the gaming experience of your life. Just don’t forget to set your monitor’s refresh rate as high as it can go.