Turn on suggestions
Auto-suggest helps you quickly narrow down your search results by suggesting possible matches as you type.
Showing results for
- Republic of Gamers Forum
- Discussions
- Case Mods & PC Builds
- Tutorial Project: OS-LB Colyn - Paint & Light Modd...
Options
- Subscribe to RSS Feed
- Mark Topic as New
- Mark Topic as Read
- Float this Topic for Current User
- Bookmark
- Subscribe
- Mute
- Printer Friendly Page
Tutorial Project: OS-LB Colyn - Paint & Light Modding
Options
- Mark as New
- Bookmark
- Subscribe
- Mute
- Subscribe to RSS Feed
- Permalink
06-12-2012
02:45 AM
- last edited on
03-06-2024
08:36 PM
by
![]() ROGBot
ROGBot
Hi Everyone,
As I mentioned in my Fallout Cause SP, I was done for the season modding wise. This project is actually for a client who has asked me with quite a bit of detail exactly what he wants. Since it was simple enough and not to expensive, I figured it´s a cool way to do a sort of tutorial about painting and light modding on a budget for those of you who want to get in to modding but have no idea where to start.
This project should be done in a matter of days, and well, I hope it helps you newbies to get ideas of what to do for your first project. For those of you more experienced and hardcore modders I invite you to comment on this thread giving suggestions on things newbies can do and of course feel free to correct my way of doing things if you feel yours is better or simply easier for newbies to do, I will be using my methods which I have learned out of trial and error over the years.
Because it is meant to be a budget mod I am going to be using spraycans as opposed to my usual compressor and gun to show you that you can get a decent finish even with cans. And that at the end of the day most of us buy compressors and paintguns to do fine detailing and to save money (paint is much cheaper if it doesnt come in a spraycan).
Things you will need for this mod (hardware and accesories not included, that part is really up to you).
1: Sanding paper of two kinds. First a High gritt to remove old paint from the old chasis and a low gritt to sand down between paint layers (this last one is not essential but you will find you get a much smoother finish by doing so).
2: Spraycan Primer (Acrylic based, not plastic, sinthetic or any other kind), I will be using a grey primer but really any other color primer is fine.
3: Spraycan Paint, (Acrylic based, not plastic, sinthetic or any other kind) 1 400ml can should be enough for a mid-size chasis if you do it right but get 2, just in case and of course extra cans for any other secondary colors.
4: Spraycan Clear Lacquer (Acrylic based, not plastic, sinthetic or any other kind), once all is dry you need this to seal the job and prevent paint from peeling off and scratching due to use and abuse.
5: An old chasis, the older and cheaper, the better.
6: Masking tape or Painters Tape, the second one gives you a cleaner finish but the first one is much cheaper, so it´s up to you.
Total Cost in my specific case (this may vary) 60€
Optional: A Dremel rotatory tool. Get the wired one, not the wireless one. If you go for the most basic one (the 200) it should be enough for what you need for this project (i.e. the cutting discs it brings) Total Cost in my local store: 40€
//
Let´s get started.
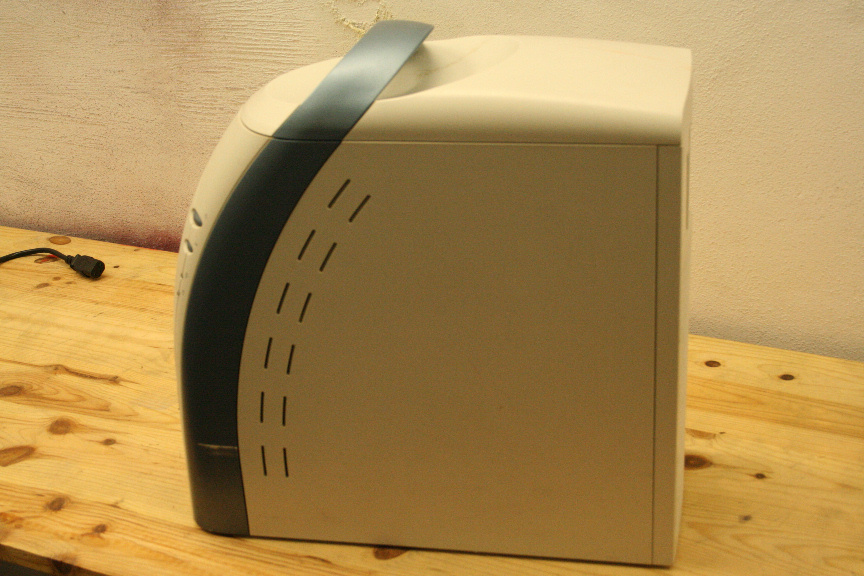
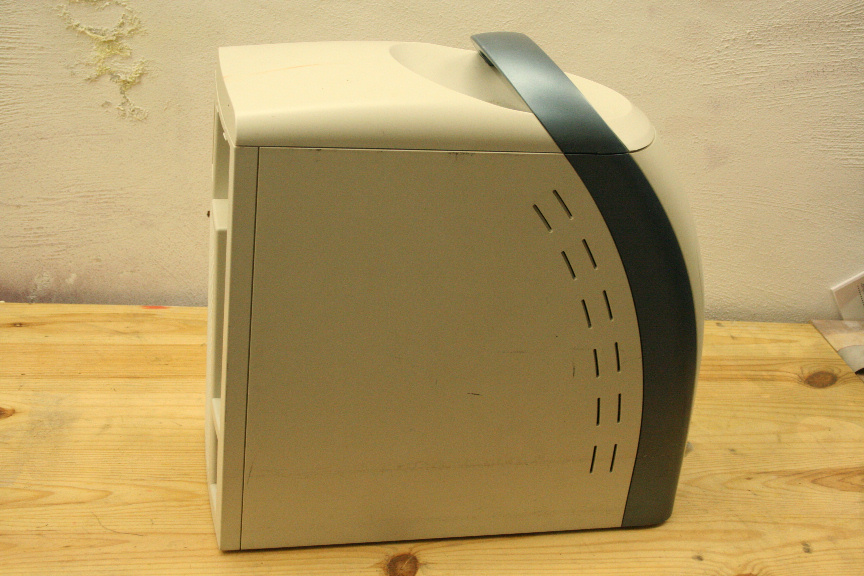
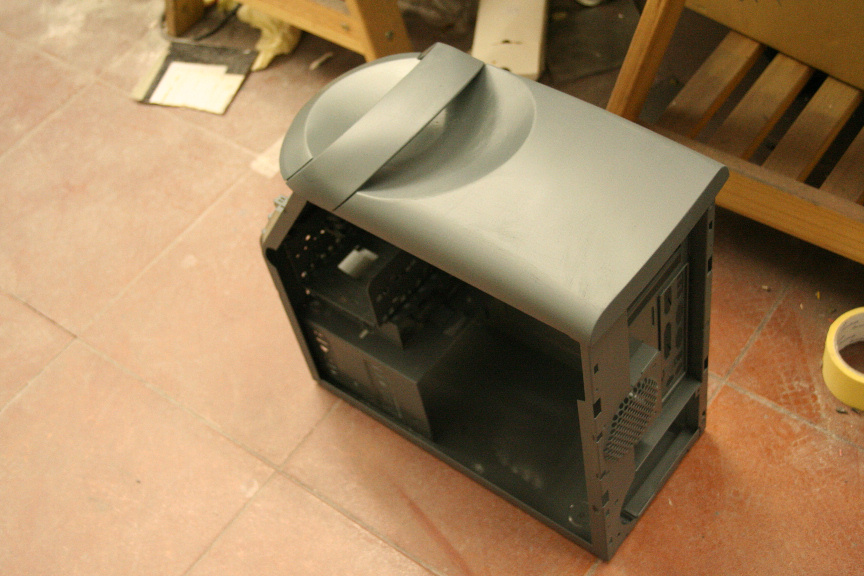
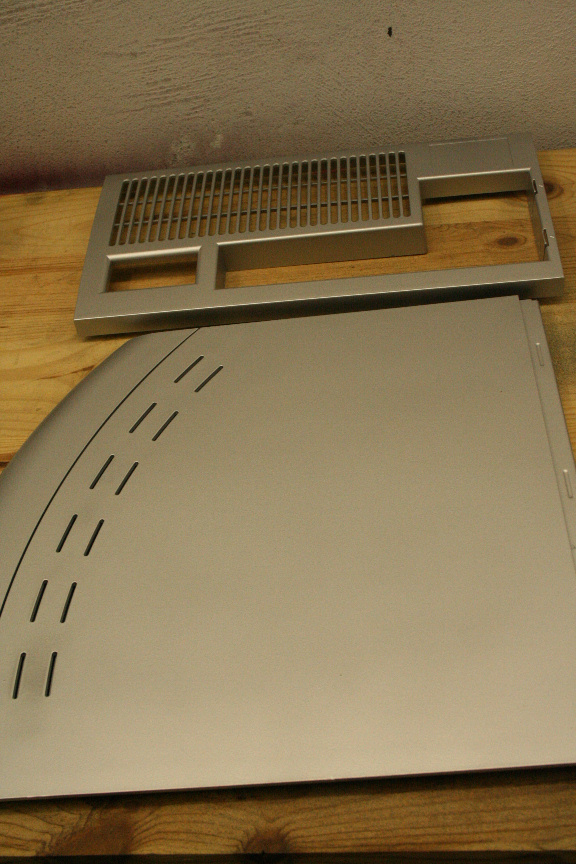
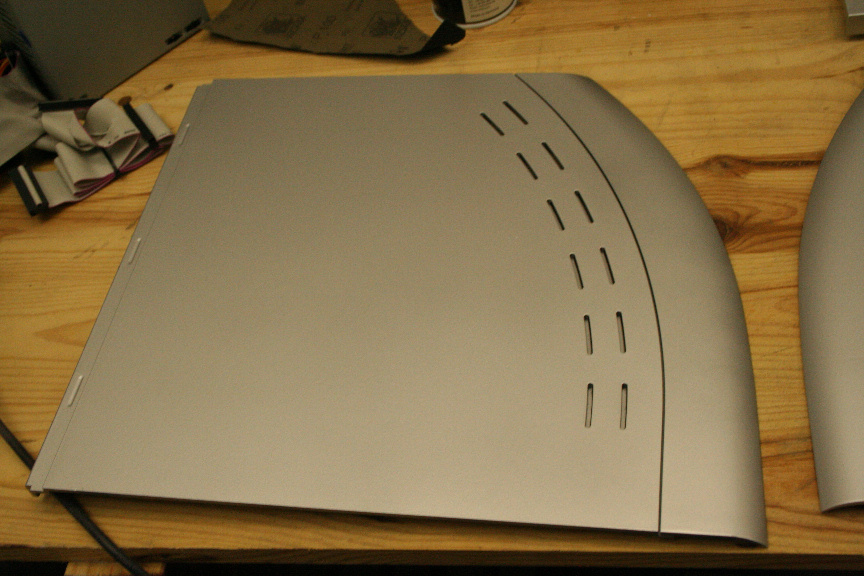
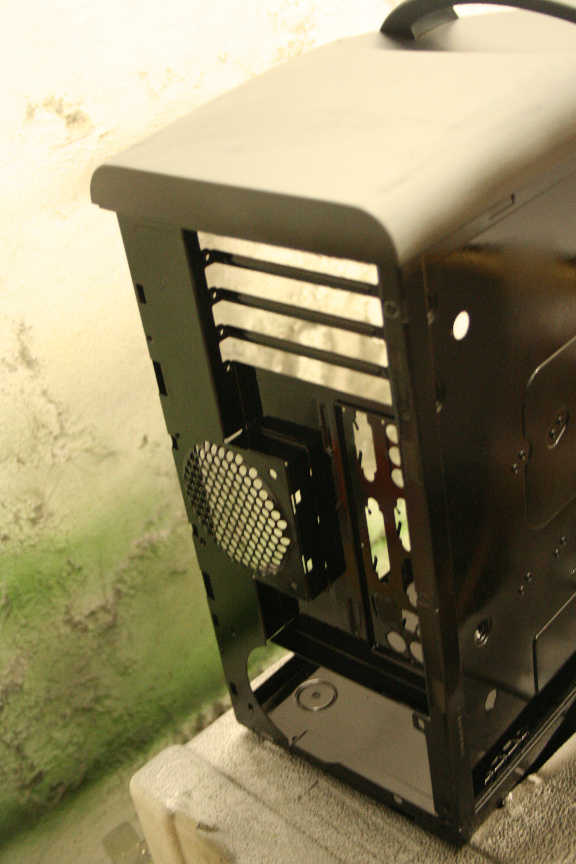
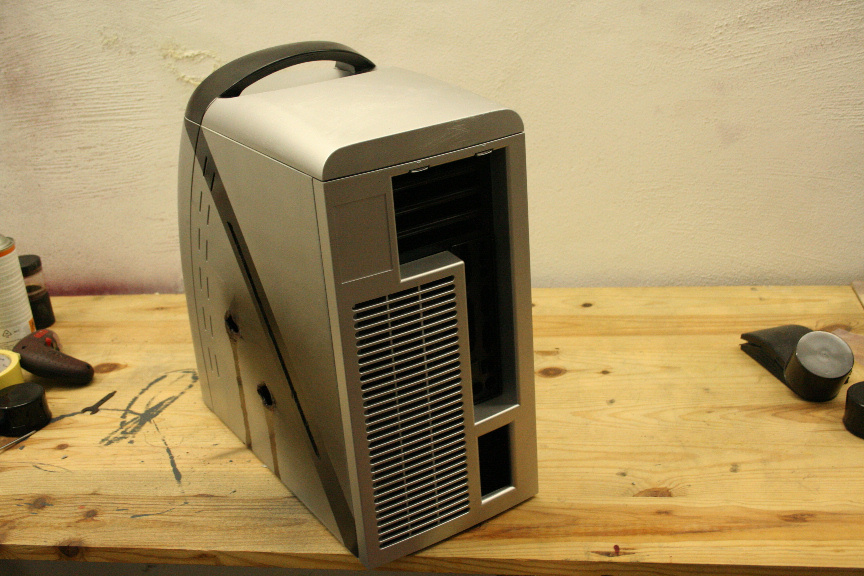
First, the chasis, this specific chasis was given to me by the client, he wanted a cylon inspired chasis, just slightly, nothing to fancy to have as his lanbox, Becuase of the old-school curves and handle, this old chasis makes a perfect candidate.
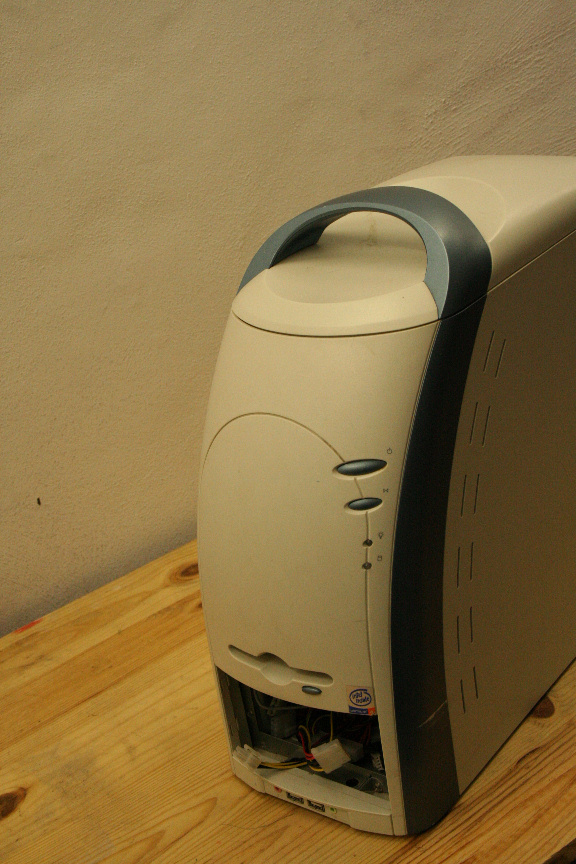
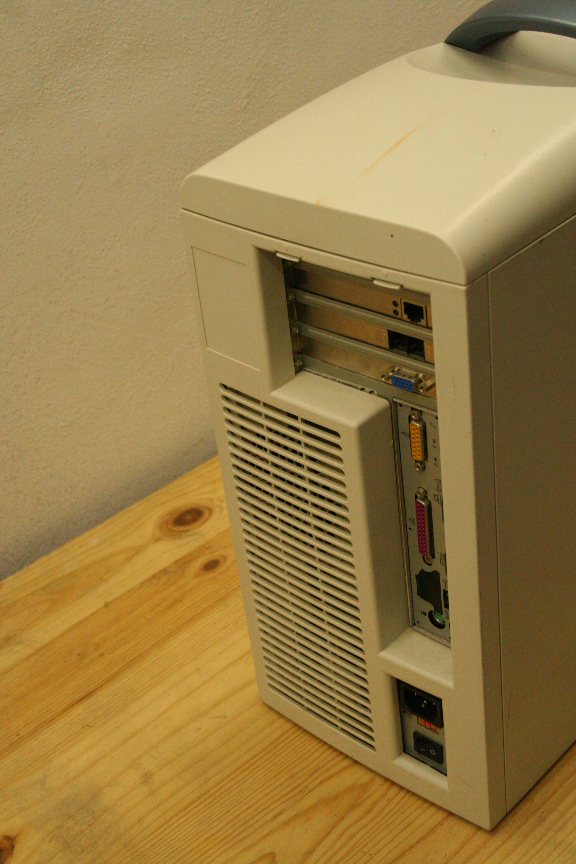
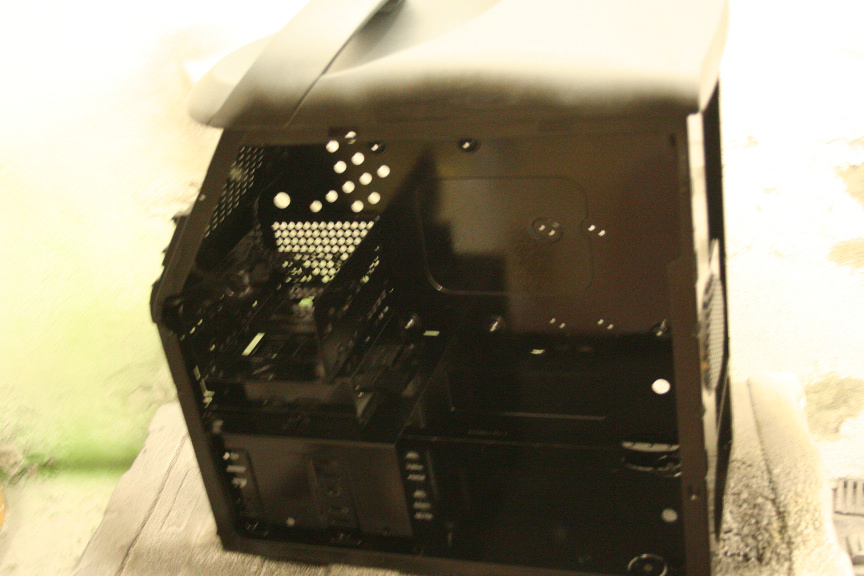
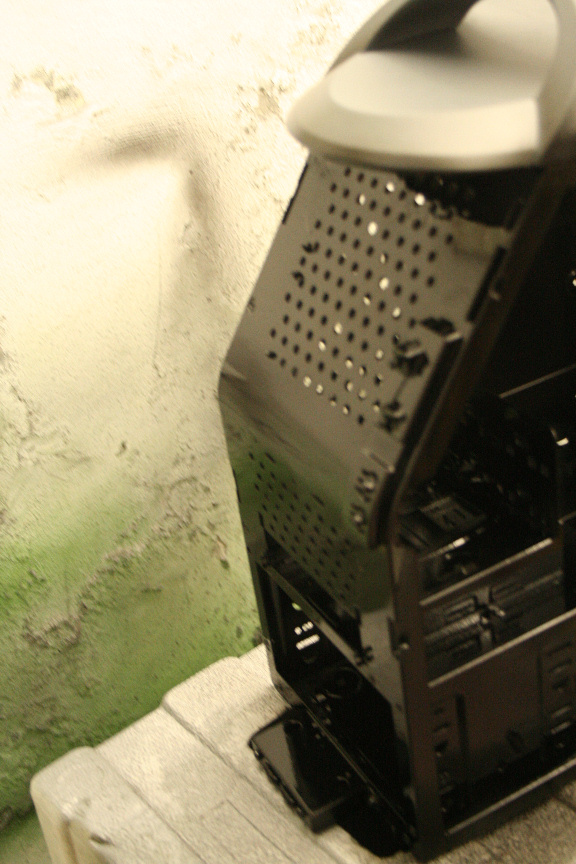
We have to dismantle everything that can possibly come off, as it will make our lifes easier when it comes to sanding and painting, not to mention a better finish.
Once that is done we need to sand it down using the high gritt sanding paper, this will remove any superficial paint and all the dirt that has acumulated on the surface over the many years. Once that is done, we need to clean it, personally, I use distilled water to do so, others use alcohol, it´s up to you, just don´t use normal water.
Now that it´s dry, it´s time for a coat of primer (I find one coat is enough, again, it´s up to you).
The great thing about acrylic based paint is that it dries in no time whatsoever, you can go ahead and do the second coat in a matter of 15 min if you don´t care about the light gritt sanding in between, in which case I recommend waiting 20-30 min before doing so which is what I normally do unless I want a dirty finish, like I wanted on the fallout cause sp project..
Ok Now we´re ready for some paint. Because of the theme chosen for this project, I´m going for some gun metal, although any alloy wheel metal should do the job!
Modding Portfolio
Neonit Customs
As I mentioned in my Fallout Cause SP, I was done for the season modding wise. This project is actually for a client who has asked me with quite a bit of detail exactly what he wants. Since it was simple enough and not to expensive, I figured it´s a cool way to do a sort of tutorial about painting and light modding on a budget for those of you who want to get in to modding but have no idea where to start.
This project should be done in a matter of days, and well, I hope it helps you newbies to get ideas of what to do for your first project. For those of you more experienced and hardcore modders I invite you to comment on this thread giving suggestions on things newbies can do and of course feel free to correct my way of doing things if you feel yours is better or simply easier for newbies to do, I will be using my methods which I have learned out of trial and error over the years.
Because it is meant to be a budget mod I am going to be using spraycans as opposed to my usual compressor and gun to show you that you can get a decent finish even with cans. And that at the end of the day most of us buy compressors and paintguns to do fine detailing and to save money (paint is much cheaper if it doesnt come in a spraycan).
Things you will need for this mod (hardware and accesories not included, that part is really up to you).
1: Sanding paper of two kinds. First a High gritt to remove old paint from the old chasis and a low gritt to sand down between paint layers (this last one is not essential but you will find you get a much smoother finish by doing so).
2: Spraycan Primer (Acrylic based, not plastic, sinthetic or any other kind), I will be using a grey primer but really any other color primer is fine.
3: Spraycan Paint, (Acrylic based, not plastic, sinthetic or any other kind) 1 400ml can should be enough for a mid-size chasis if you do it right but get 2, just in case and of course extra cans for any other secondary colors.
4: Spraycan Clear Lacquer (Acrylic based, not plastic, sinthetic or any other kind), once all is dry you need this to seal the job and prevent paint from peeling off and scratching due to use and abuse.
5: An old chasis, the older and cheaper, the better.
6: Masking tape or Painters Tape, the second one gives you a cleaner finish but the first one is much cheaper, so it´s up to you.
Total Cost in my specific case (this may vary) 60€
Optional: A Dremel rotatory tool. Get the wired one, not the wireless one. If you go for the most basic one (the 200) it should be enough for what you need for this project (i.e. the cutting discs it brings) Total Cost in my local store: 40€
//
Let´s get started.
First, the chasis, this specific chasis was given to me by the client, he wanted a cylon inspired chasis, just slightly, nothing to fancy to have as his lanbox, Becuase of the old-school curves and handle, this old chasis makes a perfect candidate.
We have to dismantle everything that can possibly come off, as it will make our lifes easier when it comes to sanding and painting, not to mention a better finish.
Once that is done we need to sand it down using the high gritt sanding paper, this will remove any superficial paint and all the dirt that has acumulated on the surface over the many years. Once that is done, we need to clean it, personally, I use distilled water to do so, others use alcohol, it´s up to you, just don´t use normal water.
Now that it´s dry, it´s time for a coat of primer (I find one coat is enough, again, it´s up to you).
The great thing about acrylic based paint is that it dries in no time whatsoever, you can go ahead and do the second coat in a matter of 15 min if you don´t care about the light gritt sanding in between, in which case I recommend waiting 20-30 min before doing so which is what I normally do unless I want a dirty finish, like I wanted on the fallout cause sp project..
Ok Now we´re ready for some paint. Because of the theme chosen for this project, I´m going for some gun metal, although any alloy wheel metal should do the job!
Neonit Customs
4,702 Views
3 REPLIES 3
Options
- Mark as New
- Bookmark
- Subscribe
- Mute
- Subscribe to RSS Feed
- Permalink
06-12-2012 02:47 AM
As for the inside of the case, I suggested dark red to the client as I remember the inside of cylons being bionic but I might be wrong here? Aniway, the client wants black, so black it is. To match the outside, I´ve gone for a glossy black, for newbies however I recommend matt black as glossy basically shows every single mistake you have and will ever make. Not to mention any irregularity on the case´s surface.

And that´s it for today, more tomorrow!
//
Hi Guys,
Second day of the tutorial proyect.
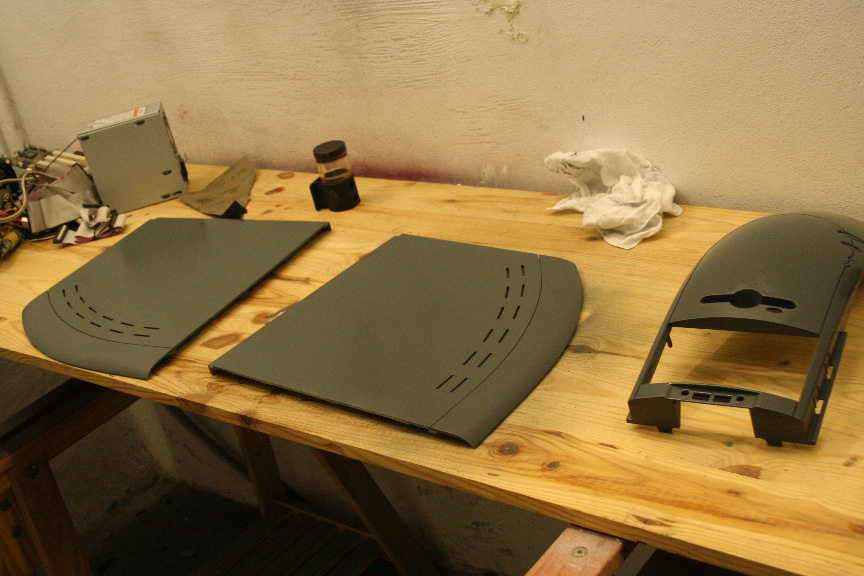
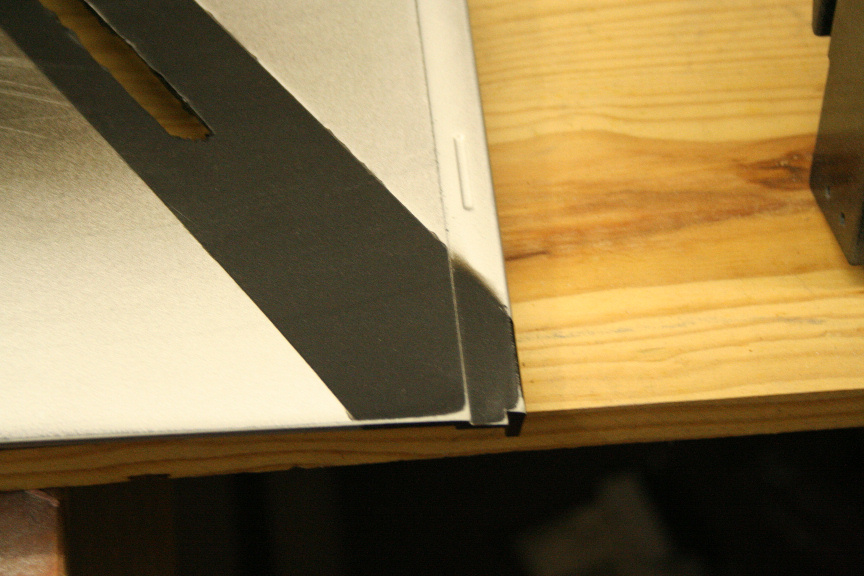
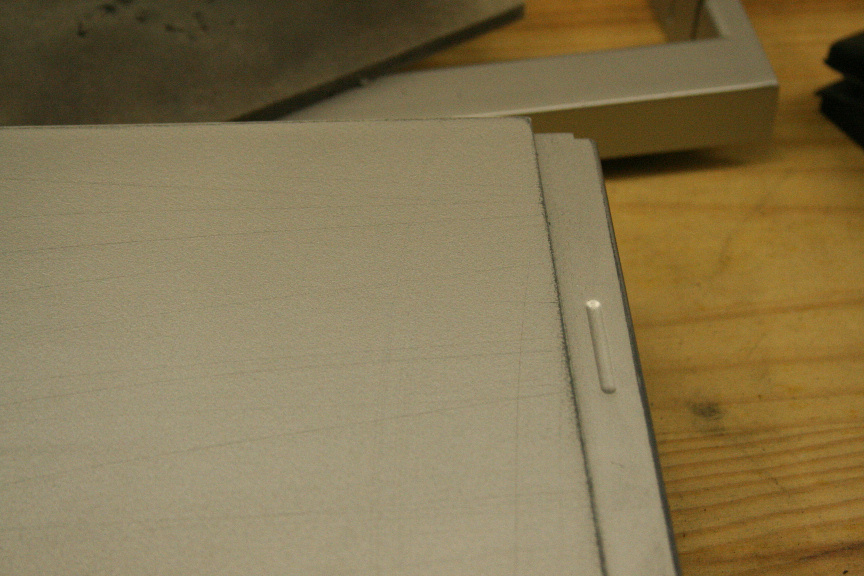
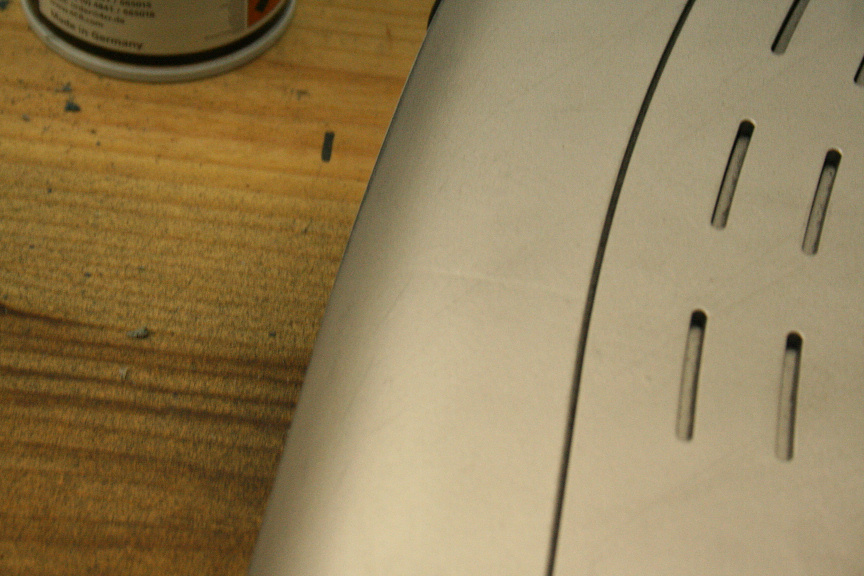
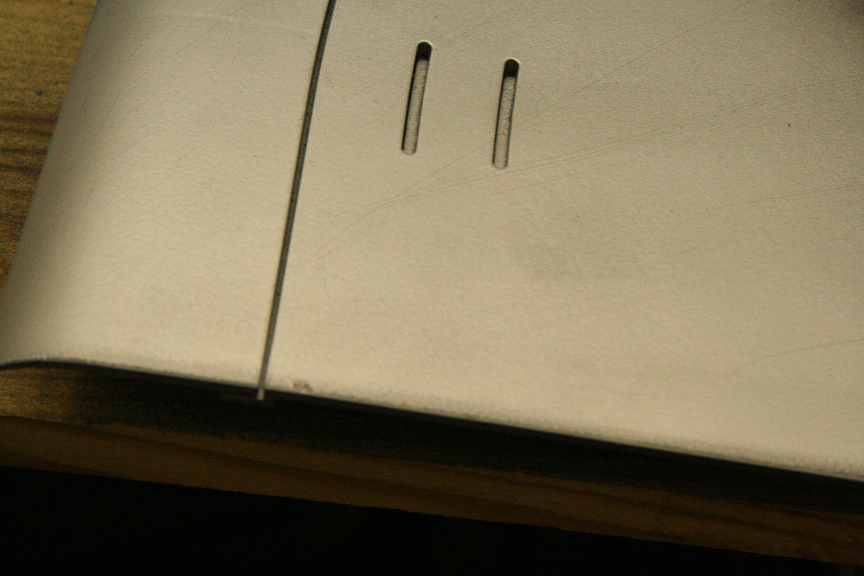
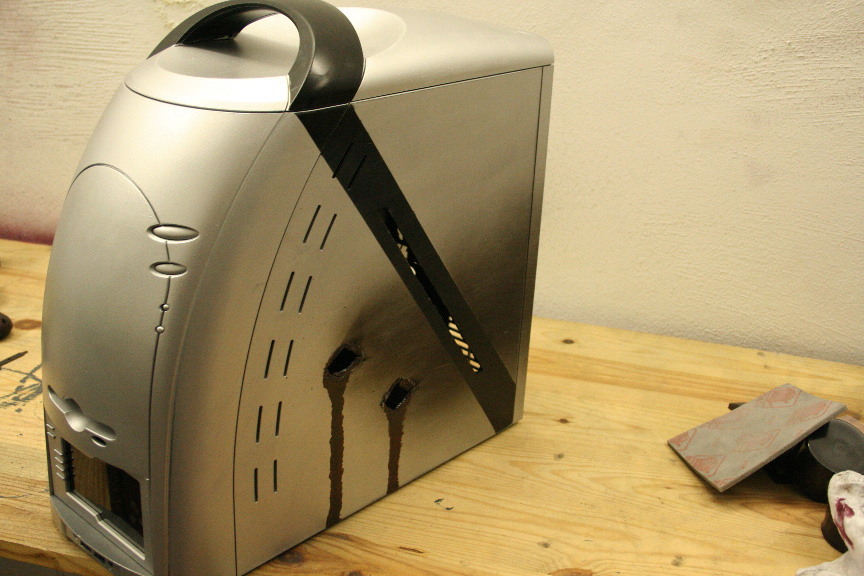
Everything in the case except the base chasis is made out of plastic like a lot of old cases tend to do, specially when they attempted to modernize them by not making them a simple square case as making these curves in steel would be a lot more expensive for them. This, for our purpase is good and bad, bad because making clean cuts is quite hard as the plastic melts when using a dremel or any other kind of automatic cutting tool, however doing it by hand wouldn´t give us a very clean finish either, so we use the dremel (obviously for those of you who decide against buying such a tool or similar, you can either try to do it manually or skip this step all togueter) and once done, we sand it down using the high gritt, and the low gritt for the surface after the cuts are done.
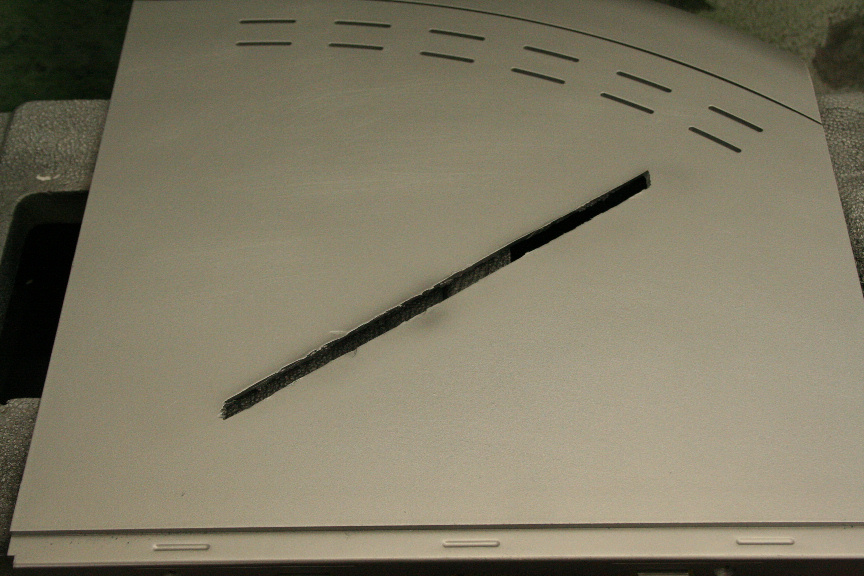
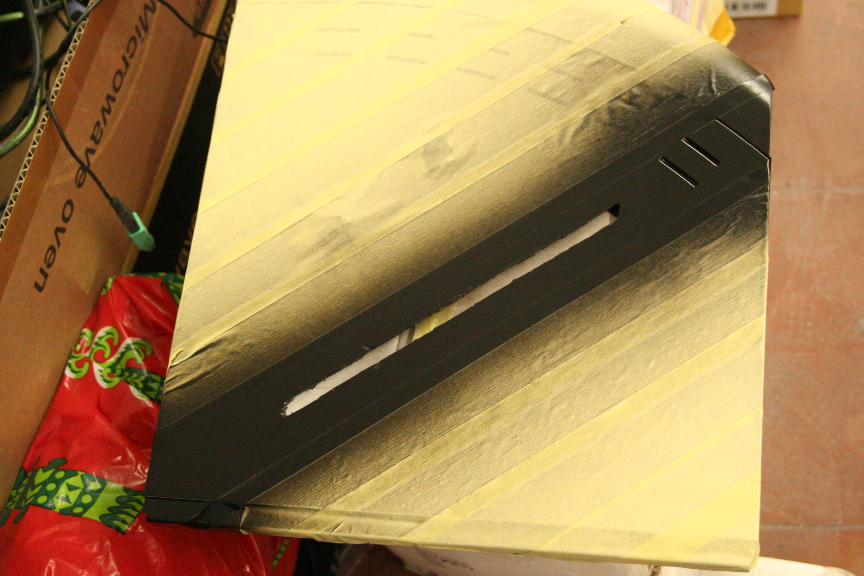
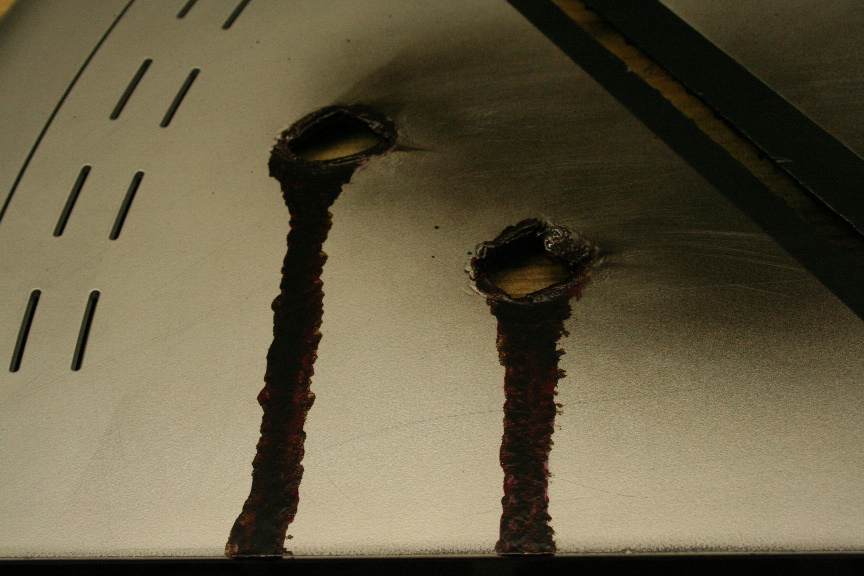
I´ve made a diagonal cut that will go with the black strip design in order to further down the line add a red cathode, I sanded it down and did as clean a cut as possible (to my skills) being entirely made out of plastic:
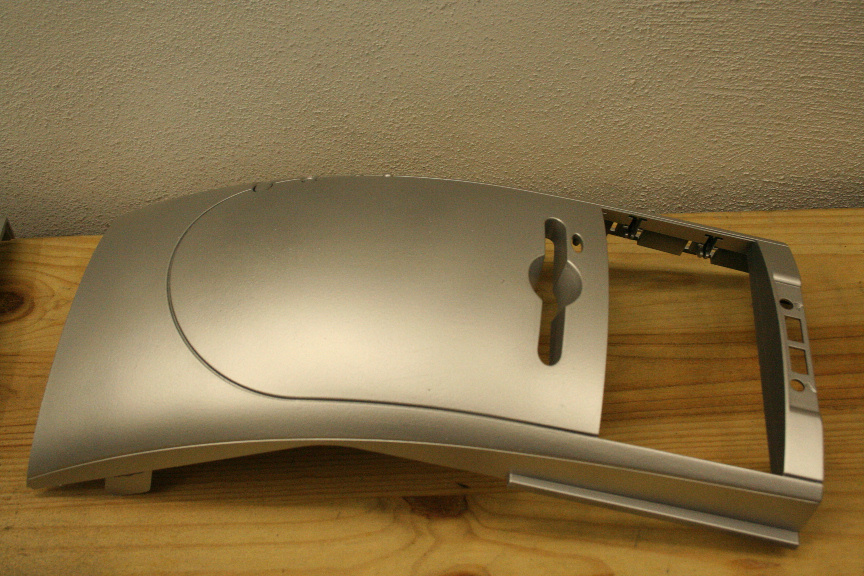
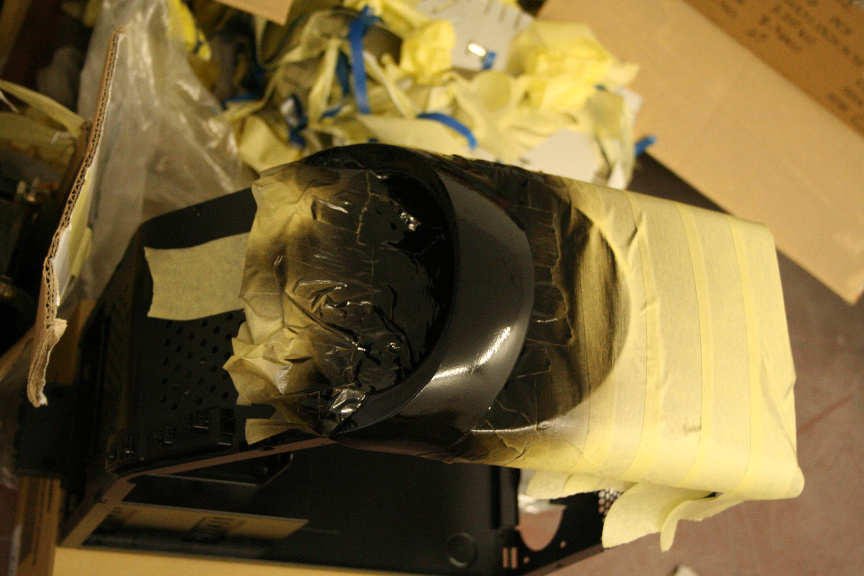
While that dried I´ve gone ahead and I´ve painted the top gun metal and covered everything except the handle witch will match the side strips, in order to paint it black:
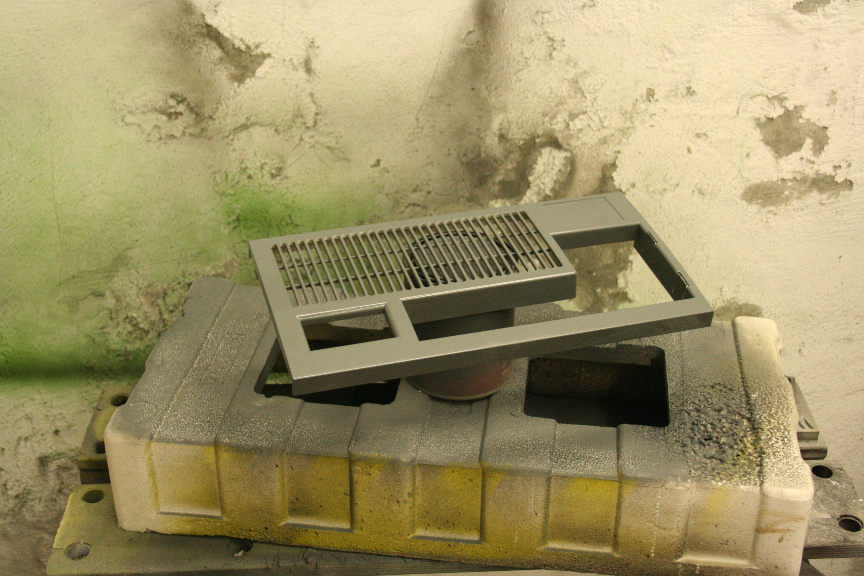
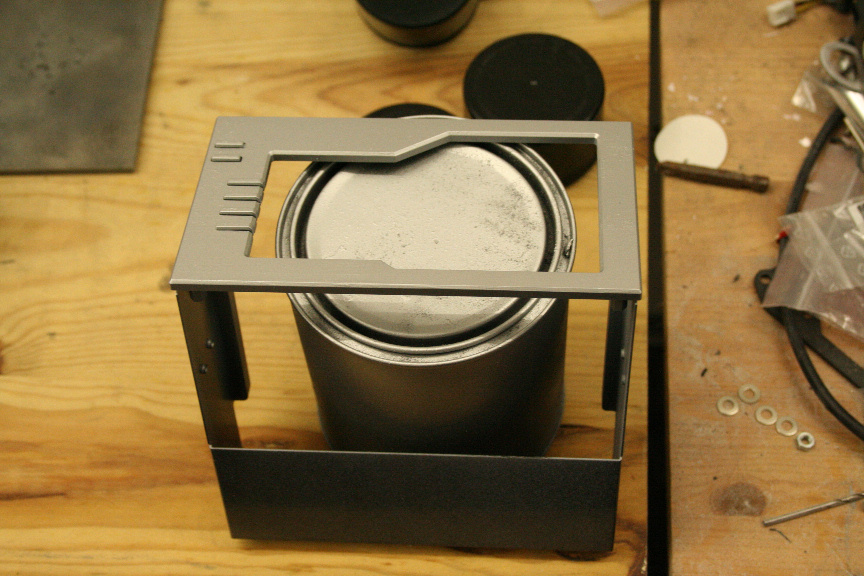
While we wait for that to dry, I´ve painted what we´re going to be mounting on the front, in this case, the dual dimm version of the NZXT Sentry which I´ve taken apart (only 4 screws hold the pcb and lcd to it´s casing) in, of course, a gun metal tone.
Now that the side is dry I´ve gone ahead and masked everything that will remain gun metal with masking tape, for the border between gun metal and black I´ve used painters tape, to give us that perfect line.
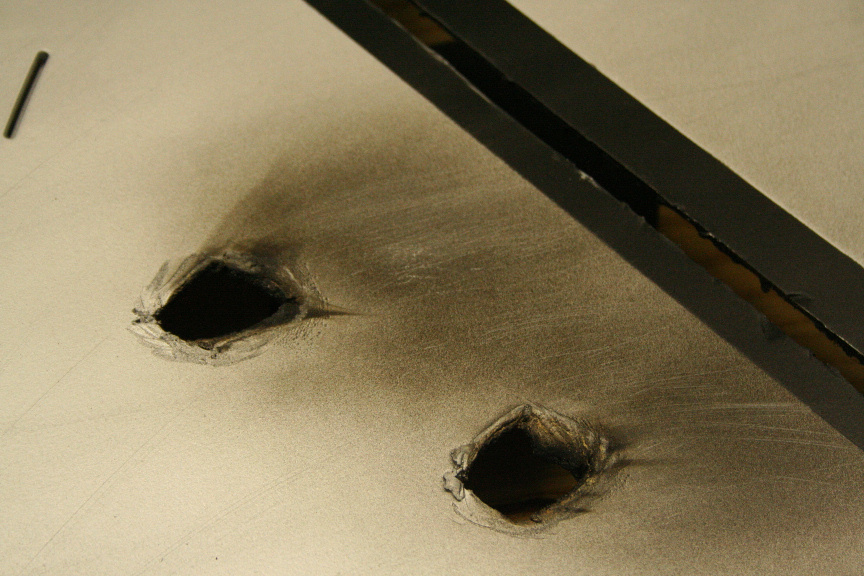
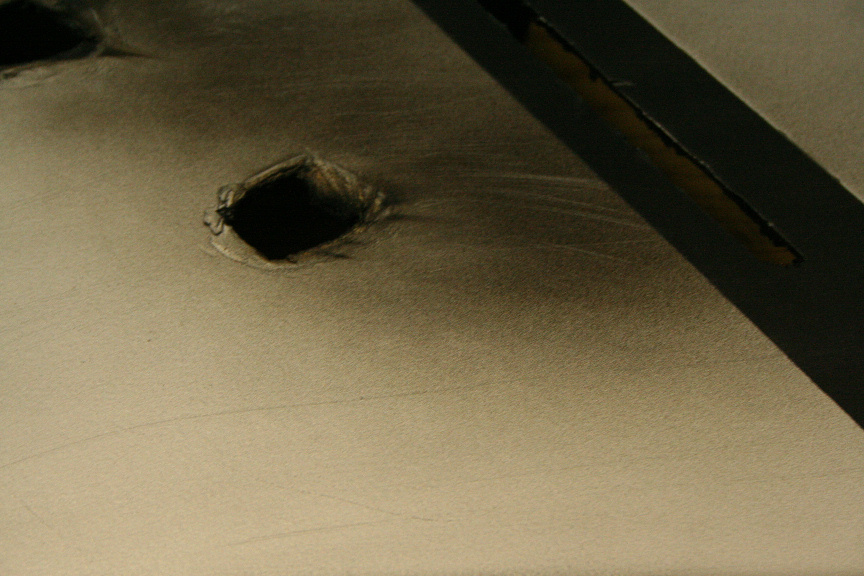
I´ve repeated the process on the other side and it´s dry now, I´ve also gone ahead and given it some war wounds and remember when I said plastic had it´s good and bad side? well this is the good side, because plastic melts it´s so much easier to give it a burn effect, hell it ain´t even an effect, we literally get some matches or a lighter and go ahead and burn the borders of the hole done with a dremel. Once done, we get the black spraycan and spray very gently and right next to it sideways so only traces of paint get on the surface, this gives us that burned effect on the rest of the side:

Modding Portfolio
Neonit Customs
And that´s it for today, more tomorrow!
//
Hi Guys,
Second day of the tutorial proyect.
Everything in the case except the base chasis is made out of plastic like a lot of old cases tend to do, specially when they attempted to modernize them by not making them a simple square case as making these curves in steel would be a lot more expensive for them. This, for our purpase is good and bad, bad because making clean cuts is quite hard as the plastic melts when using a dremel or any other kind of automatic cutting tool, however doing it by hand wouldn´t give us a very clean finish either, so we use the dremel (obviously for those of you who decide against buying such a tool or similar, you can either try to do it manually or skip this step all togueter) and once done, we sand it down using the high gritt, and the low gritt for the surface after the cuts are done.
I´ve made a diagonal cut that will go with the black strip design in order to further down the line add a red cathode, I sanded it down and did as clean a cut as possible (to my skills) being entirely made out of plastic:
While that dried I´ve gone ahead and I´ve painted the top gun metal and covered everything except the handle witch will match the side strips, in order to paint it black:
While we wait for that to dry, I´ve painted what we´re going to be mounting on the front, in this case, the dual dimm version of the NZXT Sentry which I´ve taken apart (only 4 screws hold the pcb and lcd to it´s casing) in, of course, a gun metal tone.
Now that the side is dry I´ve gone ahead and masked everything that will remain gun metal with masking tape, for the border between gun metal and black I´ve used painters tape, to give us that perfect line.
I´ve repeated the process on the other side and it´s dry now, I´ve also gone ahead and given it some war wounds and remember when I said plastic had it´s good and bad side? well this is the good side, because plastic melts it´s so much easier to give it a burn effect, hell it ain´t even an effect, we literally get some matches or a lighter and go ahead and burn the borders of the hole done with a dremel. Once done, we get the black spraycan and spray very gently and right next to it sideways so only traces of paint get on the surface, this gives us that burned effect on the rest of the side:
Neonit Customs
Options
- Mark as New
- Bookmark
- Subscribe
- Mute
- Subscribe to RSS Feed
- Permalink
06-12-2012 02:49 AM
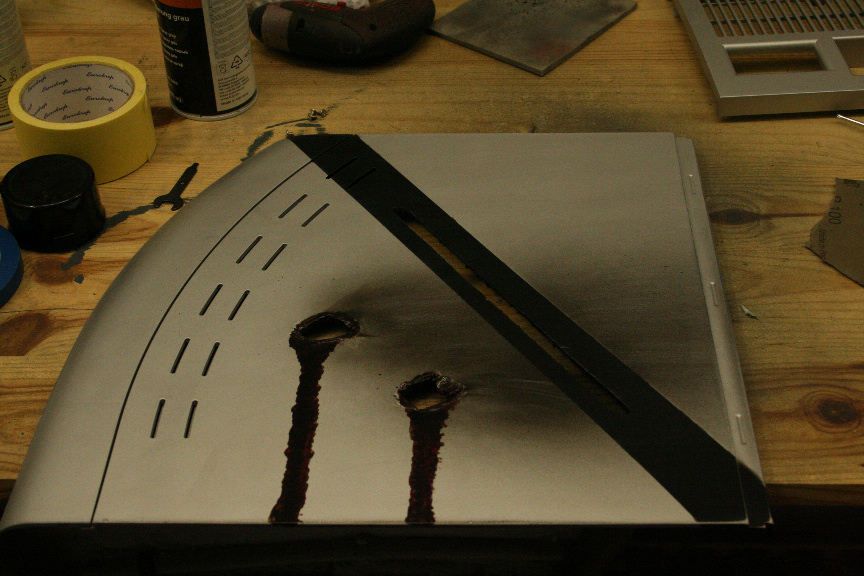
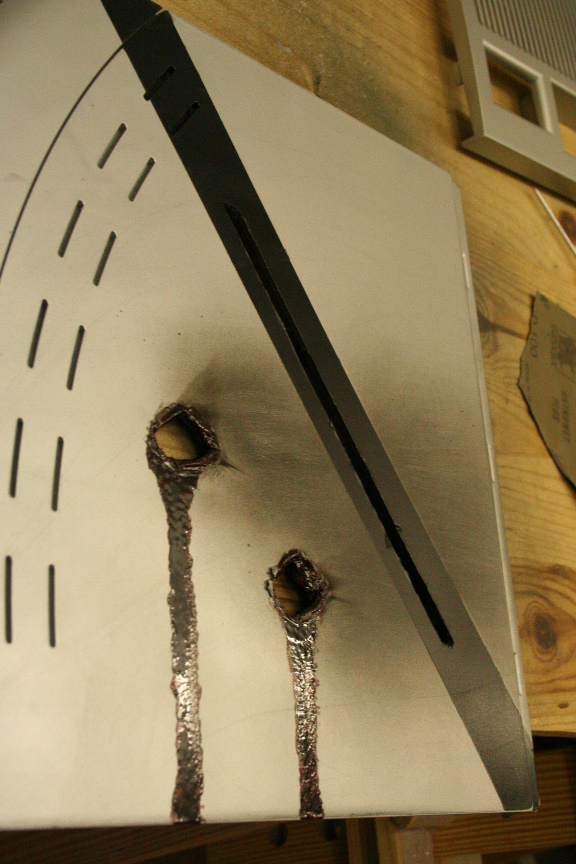
While I´m at it, with the high gritt sanding paper, I´ve gone ahead and given it wear and tear on the borders and lightly scratched the hole surface (but be carefull not to go all the way down to the plastic, we still want to keep that gun metal color. If you mess up, don´t panic, just give it a light coat of gun metal, wait for it to dry, and try again ; )
Now I didn´t quite remember if the original cylons had something similar to blood inside, but I remember the modern cylon ships did, but it wasnt as red as blood, it was quite darker with a tone of brown. So I´ve gone ahead and made him bleed through the wounds with a blood red, giving it a rust brown slightly on top so we still see red tones. It also helps it give that dry look, like it didn´t just happen, it´s been like that for a while.
While all that dries, I´ve gone ahead and re-assemble the nzxt sentry:

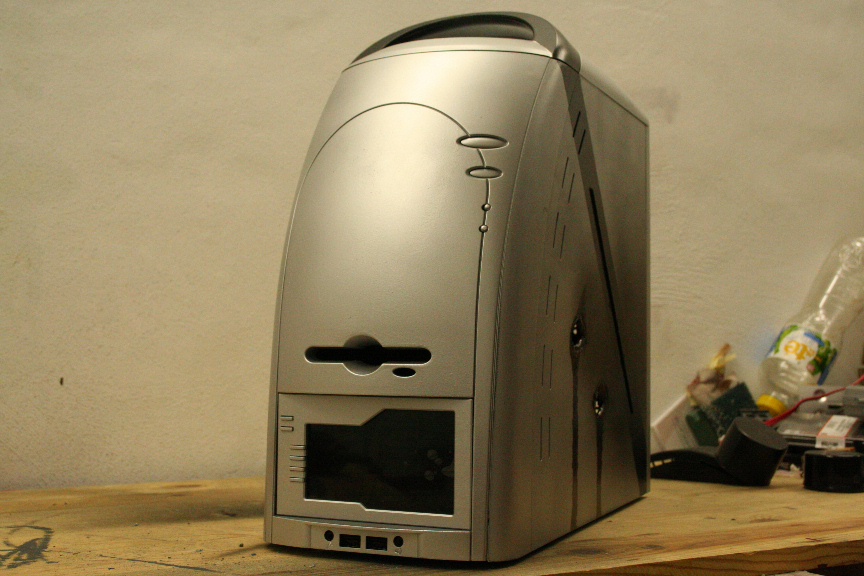
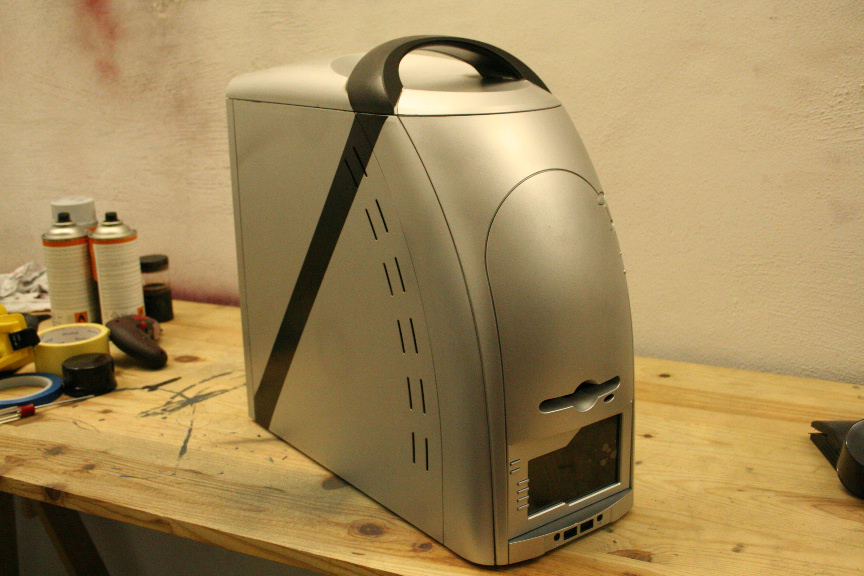
Waited for a couple of hours and put togueter the whole thing to give you an idea of how it´s going to look, no hardware inside or lights, just the bare paint, except of course some other symbols and paint details which will do further on.
Modding Portfolio
Neonit Customs
Now I didn´t quite remember if the original cylons had something similar to blood inside, but I remember the modern cylon ships did, but it wasnt as red as blood, it was quite darker with a tone of brown. So I´ve gone ahead and made him bleed through the wounds with a blood red, giving it a rust brown slightly on top so we still see red tones. It also helps it give that dry look, like it didn´t just happen, it´s been like that for a while.
While all that dries, I´ve gone ahead and re-assemble the nzxt sentry:
Waited for a couple of hours and put togueter the whole thing to give you an idea of how it´s going to look, no hardware inside or lights, just the bare paint, except of course some other symbols and paint details which will do further on.
Neonit Customs
Options
- Mark as New
- Bookmark
- Subscribe
- Mute
- Subscribe to RSS Feed
- Permalink
06-12-2012 02:50 AM
That´s all for today : )
//
Hi!
Third Day of the tutorial:
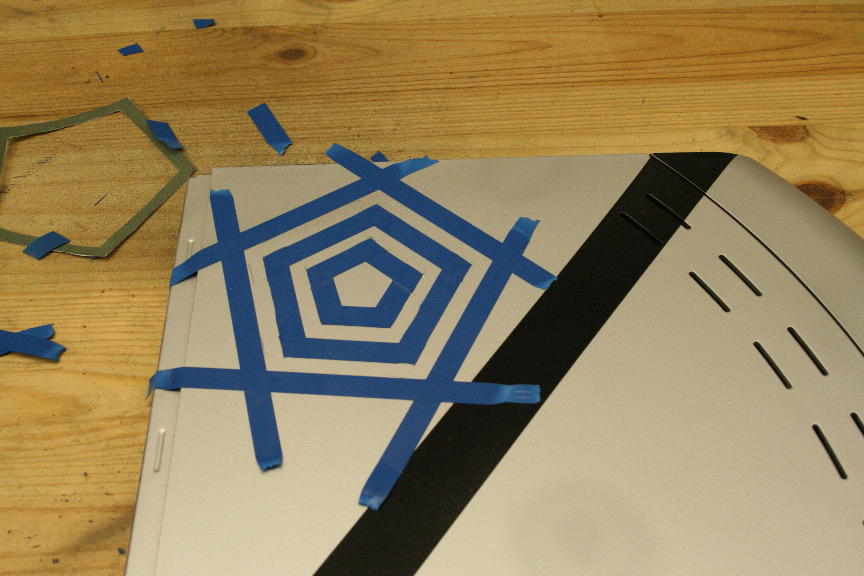
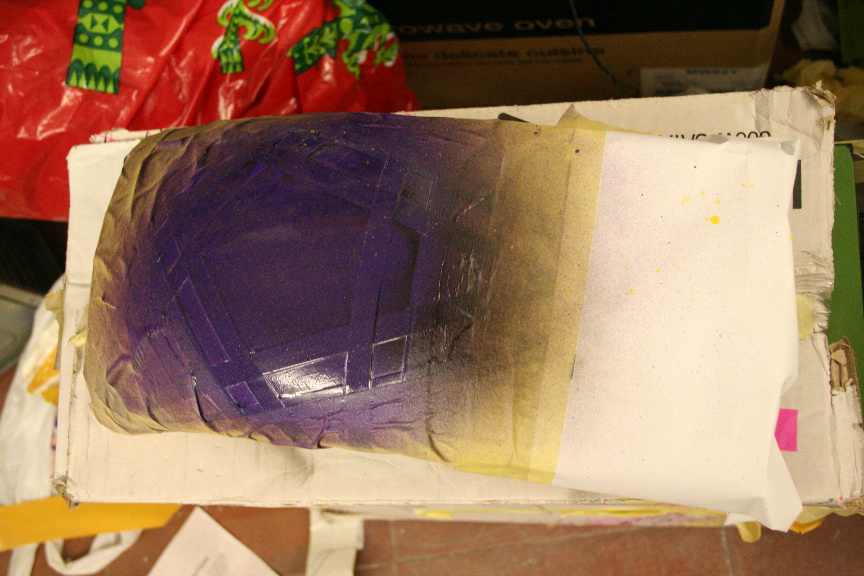
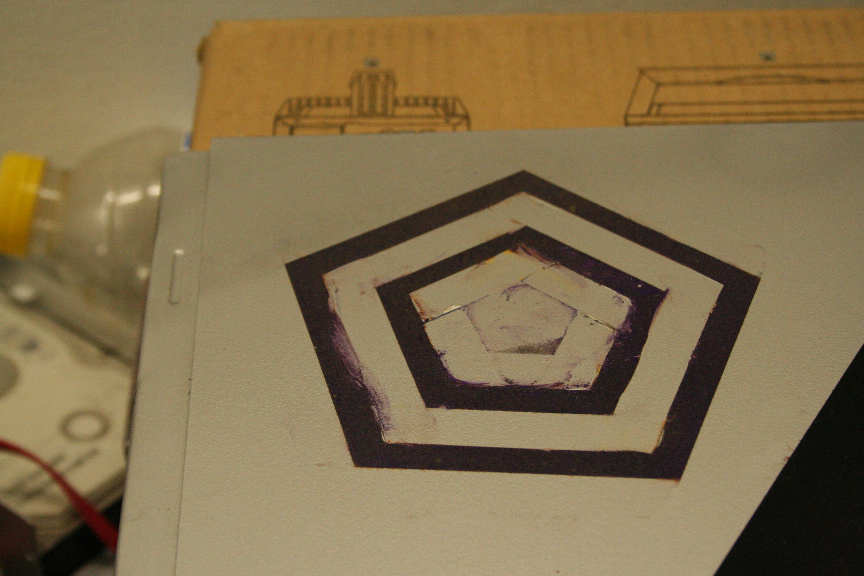
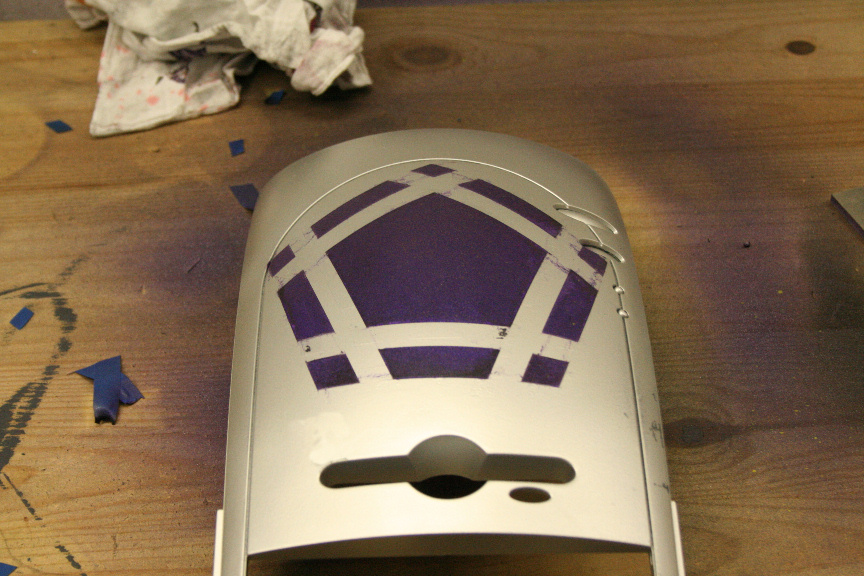
Today I did the Cylon logos on the case, I wanted to use the classic one on the side and a modernized version on the front. Instead of the classic green I´ve gone for some purple.
Now, this is what happens when they dont have the usual detailing tape your normally use and trust, you go for another brand which says it does the same thing... except it didn´t, the paint went under it and created a slight mess, but no problem, I will be touching it up tomorrow, and this way since this is a tutorial you can also see the things that can go wrong and how to fix them!
In the next 4 photos, you will see the preparation and the unfortunate result:
That´s all for today, more tomorrow!
//
Hi everyone,
I can´t do much till I get some more gun metal paint on Monday, so for now, I´ve done some illumination testing, for this I figured you really need a video, so I apologize for the quality as I had to use my phone (It´s also the first time I do a video with it, not a big fan of phones :P).
Aniway, enjoy!
PS: I am now taking a break over xmas, will return with a last stage update on the first few days of january : )
Neonit Customs
Related Content
- [Build Log] Bowser Airship. A suspended (ceiling) 3D printed case mod in Case Mods & PC Builds
- Der8Auer Ocean in Case Mods & PC Builds
- [Build Log] -ColorFalls- A RGB Wall Hanging 3D Printed Case by 8-Bit Builder in Case Mods & PC Builds
- Resident Evil 2 Remake Sponsored by Asus in Case Mods & PC Builds
- [Build Log] -Aurora Cubes- A RGB 3D Printed Case by 8-Bit Builder in Case Mods & PC Builds
