Helldivers 2 on the ROG Ally: performance guide & best settings
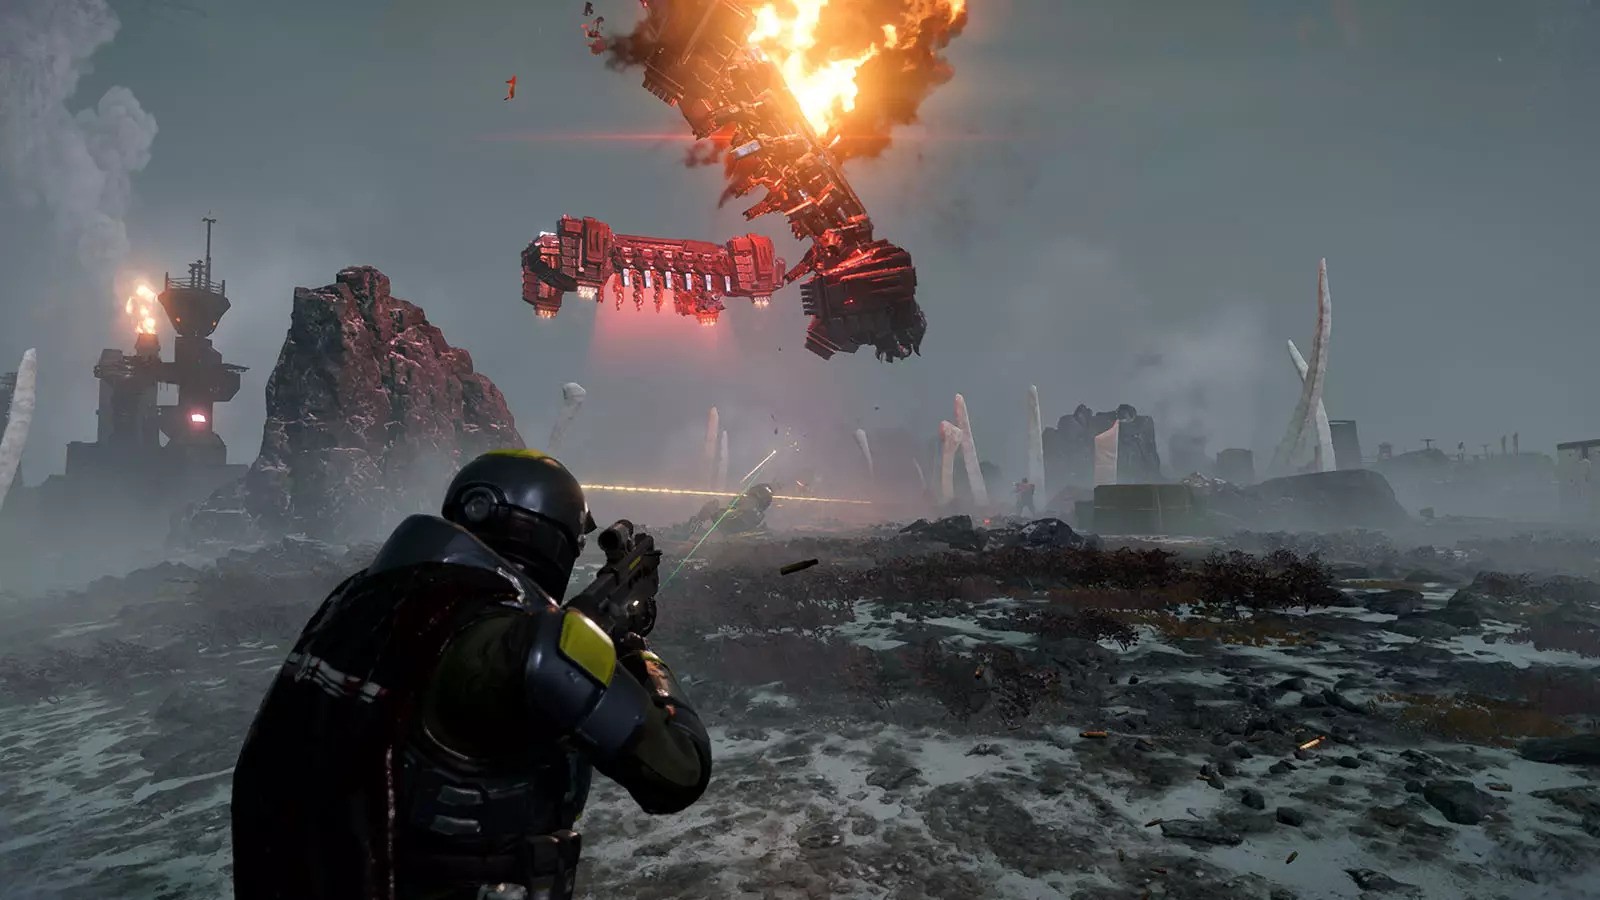 Image credit: Gamesplanet
We can’t stop playing Helldivers 2, and if you haven’t enlisted in the fight for Super Earth, it’s high time you joined ranks. And if you get so addicted that you can’t pull yourself away, bring it with you on the ROG Ally. Here are the ideal settings for the handheld system.
This is part of our ultimate guide to the ROG Ally series of articles. For more great games, check out our recommendations here.
What framerate to expect in Helldivers 2 on the ROG Ally
With the right configuration, you should be able to dial in a good balance of image quality and performance, though the right balance will depend somewhat on your preferences. With Helldivers 2, you have a few options and combinations you can go with.
At 1080p with the Low quality preset and Render Scale set to Balanced, we found Helldivers 2 ran around 40-45 FPS on the ROG Ally with the Z1 Extreme in its 25W Turbo mode. The image quality left a bit to be desired, though, which is why we also produced some optimized settings for those who prefer slightly higher quality visuals.
With our optimized settings and Render Scale set to Balanced, the image looked noticeably better with a framerate around 35-40 FPS. Boost that Render Scale to Quality for even further improvements to the image, and you’ll see performance closer to 30-35 FPS, maybe climbing a bit higher depending on the mission. Your numbers may vary as the game receives more updates, as well as the mission you play, the graphics drivers you’re using, and whether your Ally is plugged in.
No matter which of those options you choose, motion will feel pretty smooth thanks to the Ally’s FreeSync Premium display. This variable refresh rate (VRR) feature eliminates screen tearing and minimizes the stutter other handhelds experience when framerates don’t match the capabilities of your screen. So experiment, find the right balance of settings you like, and go carry your squad.
Helldivers 2 optimized graphics settings for the ROG Ally
After testing all the graphics options in Helldivers 2, here are the settings we recommend for the ROG Ally:
- Resolution: 1920x1080, the native resolution of the ROG Ally’s display.
- Render Scale: Balanced or Quality. This option renders the game at a lower resolution before scaling it back up to 1080p, providing better performance. You can set this to your preferences using the performance targets listed above — Balanced will net you 35-40 FPS with slightly lower image quality, while Quality will range from 30-35 FPS with slightly better image quality.
- Vertical Field of View: 55. We left this at the default setting. While you can change it to suit your playstyle, note that changing Field of View may affect your performance.
- Motion Blur: Set to taste. Motion Blur doesn’t affect performance in any meaningful way, so you can set this however you want — though most people prefer it turned off.
- Depth of Field: Set to taste. Similarly, you can set Depth of Field to your taste — some people like the added realism it adds to the image, while others prefer to see everything clearly at all times. It shouldn’t affect performance too heavily one way or the other.
- Bloom: On. Bloom should not affect performance too heavily, and it's a nice effect to have on the image.
- Sharpness: Set to taste. Sharpening is handy if you’re using the game’s temporal anti-aliasing (TAA) setting, which can add a bit of blur to the image — though if you opt to turn AA off, you’ll want to decrease this setting accordingly to avoid over-sharpening.
- Texture Quality: Medium. Low textures look significantly blurrier, so we highly recommend turning this up to Medium — provided you’ve also increased your Ally’s VRAM to at least 6GB in Armoury Crate SE.
- Object Detail Quality: Low. This affects the level of detail in the geometry of some objects. We’re going with Low for performance reasons, but if the occasional pop-in bothers you, Medium may be worth the small hit you'll take to performance.
- Render Distance: High. This determines how far into the distance you can see, which is not only important for visual quality, but gameplay as well. Since it doesn’t affect performance too heavily, we recommend High.
- Shadow Quality: Lowest. While Medium and above look best here, they hit performance too hard for us to truly recommend. Low and Lowest have similar performance, but look noticeably different, so you can decide which you like better — we prefer the less intense shadows of the Lowest setting.
- Particle Quality: Lowest. This affects the resolution of particle effects like fire, clouds, and smoke. We went with Lowest for the performance improvements.
- Reflection Quality: Low. The Lowest setting here turns off reflections entirely, which makes the game look a bit too flat and lifeless. Low adds some cube map reflections which improves the image significantly. High adds screen space reflections for an even better image, but it hits performance a bit too hard for our tastes.
- Space Quality: Low. This determines the quality of certain objects in the sky, but since the difference is so small, we recommend Low to claw back a few frames.
- Ambient Occlusion: On. As with most games, Ambient Occlusion (or SSAO) adds small shadows where two objects meet, giving a huge amount of depth to the image. And since it doesn’t affect performance too heavily, we definitely recommend turning this on.
- Screen-Space Global Illumination: Off. This improves the realism of in-game lighting, but it’s fairly subtle, so to keep performance high we’re leaving it off.
- Vegetation and Rubble Density: Medium. Higher settings will add more grass, rocks, and other objects to the ground. Medium doesn’t hit performance too hard and adds some extra depth to the scene, so we kicked this one up a notch.
- Terrain Quality: Medium. Medium makes the ground look more realistic and 3D than lower settings, with a very small hit to performance.
- Volumetric Fog Quality: Lowest. This setting affects the resolution of fog and other volumetric effects, and in most cases, the visual difference is small and the performance hit is large, so we recommend Lowest. That said, on certain levels, High will give you more visibility through fog, which could be an advantage in gameplay — but you’ll pay for it in framerate.
- Volumetric Cloud Quality: Lowest. This does the same as the above setting, but for clouds, and it’s barely noticeable on the Ally’s compact screen. Stick with Lowest to keep the framerate up.
- Lighting Quality: Low. This has a rather large effect on overall realism in lighting, but it also comes with a very noticeable hit to performance. For the Ally, we recommend sticking with Low.
- Anti-Aliasing: On. Since we're recommending lower than native resolution with our Render Scale setting, anti-aliasing is all but necessary to remove jagged edges and shimmering. If you prefer the sharper-but-shimmery image you get with AA turned off, feel free to turn this off — just be sure to turn down the sharpness as well, like we mentioned above.
Of course, all of these settings are just our recommendations, so feel free to adjust them to your own tastes and performance targets. We’ve noted a few places where you might start adjusting things up or down, and ultimately the choice is up to you. Now for the love of liberty, get back out there and kill some giant space bugs!
Author
Popular Post
Introducing the ROG Astral GeForce RTX 5090 and 5080: a new frontier of gaming graphics
The ROG Strix OLED XG27AQDPG kicks the refresh rate up to 500Hz

The complete list of GeForce GPU power specifications for 2024 ROG and TUF Gaming laptops
How to choose a gaming laptop: The ultimate 2025 buying guide
32-inch glossy WOLED panels debut in the ROG Strix OLED XG32UCWMG and XG32UCWG gaming monitors
LATEST ARTICLES

Introducing the ROG Xbox Ally and Ally X: ROG and Xbox team up to deliver the best in handheld gaming
We are incredibly proud to announce the ROG Xbox Ally series of handhelds, which take the ROG Ally lineup to all new heights in performance, comfort, and user experience.
Call of Duty Black Ops 6 on the ROG Ally and ROG Ally X: performance guide & best settings
Our optimized graphics settings will help you balance fidelity and framerate in the latest Call of Duty games on the ROG Ally.

God of War: Ragnarok on the ROG Ally and ROG Ally X: performance guide & best settings
Our optimized graphics settings will help you balance fidelity and framerate in God of War: Ragnarok on the ROG Ally and ROG Ally X.

Black Myth Wukong on the ROG Ally and ROG Ally X: performance guide & best settings
Our optimized graphics settings will help you balance fidelity and framerate in Black Myth Wukong on the ROG Ally and ROG Ally X.

The best games you can finish in one day on the ROG Ally and ROG Ally X
The ROG Ally and Ally X are perfect for quick gaming sessions home and away. Here are a few short gems that you can pick up, play, and complete in five hours or less.

The best Game Pass games for the ROG Ally and ROG Ally X
With three months of Game Pass included, every ROG Ally comes with an instant treasure trove of critically acclaimed games you can start playing right away.