How to overclock your graphics card with GPU Tweak III
Your PC’s graphics processing unit (GPU) plays a huge role in gaming performance. After all, it’s the component that renders all the complex 3D graphics and ray-traced lighting that make modern games look so good. So if you want maximum fidelity — or maximum framerate — you’ll want to make the absolute most of your graphics card. In fact, you can often squeeze a bit of extra performance out of the card if you're willing to do some tinkering. This process is called overclocking.
This is just an overview of what GPU Tweak III can do! Click here to see all of our GPU Tweak guides.
Learning how to overclock your graphics card can elevate your gaming experience, and with ASUS GPU Tweak III, you have a few different ways to extract this latent performance. You can read about all of GPU Tweak III’s features here, but this will be a step-by-step guide to performing GPU Tweak’s most important function: overclocking your GPU. This software works with graphics cards from any manufacturer, not just ASUS, so all you need to do is download and install it to get started.
Disclaimer: While overclocking is typically very safe, it will likely increase the temperature of your card, and may cause instability and crashes during the testing process. As long as you don’t leave your card at unstable settings, you shouldn’t have to worry too much — your card has many built-in protections to avoid permanent damage. Just proceed at your own risk.
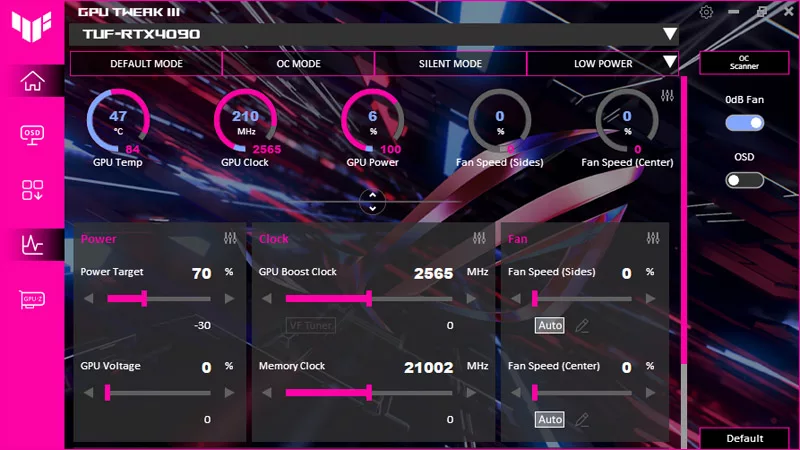
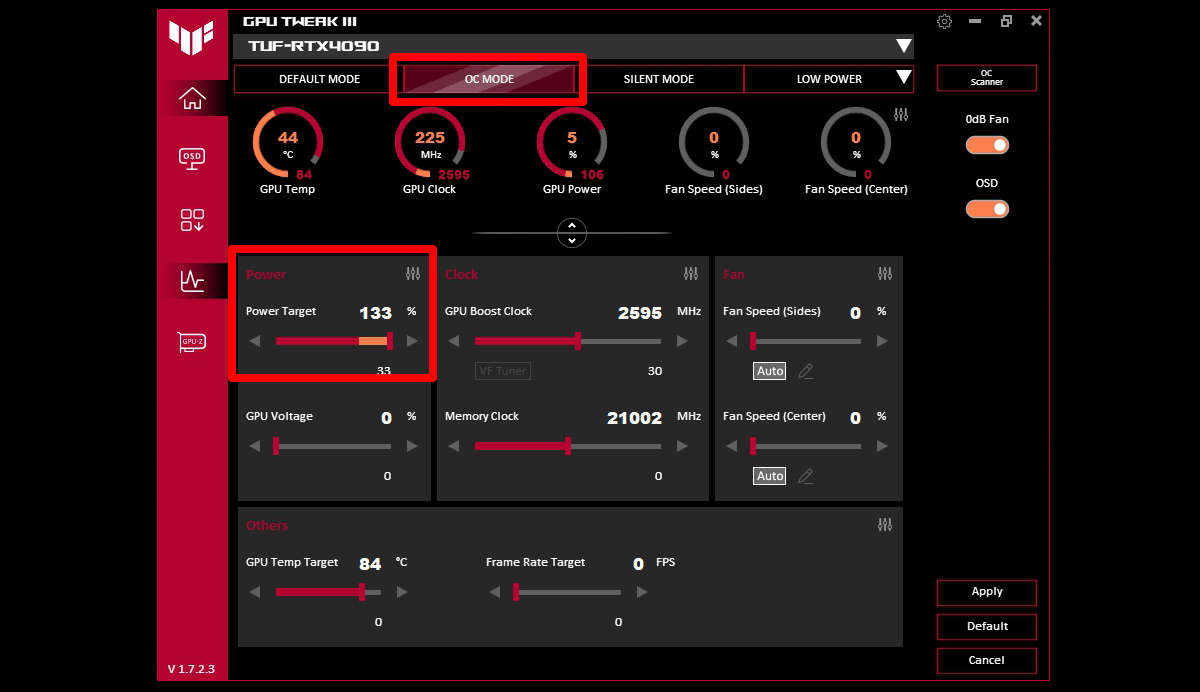
The easy way: turn on OC Mode and increase the Power Limit
If you want extra performance but don’t want to spend hours fiddling with sliders, we’ve given you two one-click options that will give you a boost with almost no effort. Open GPU Tweak III and adjust one or both of the following settings:
- Click the OC Mode button in the bar along the top of the program.
- Move the Power Target slider all the way to the right.
- Click Apply in the bottom-right corner.
Seriously, that’s it. Our OC Mode automatically sets the clock speed a little higher than the default, while increasing the power target allows the card’s built-in boosting algorithm to boost higher, longer, more often — meaning you get better performance. If you like, you can also increase the GPU Voltage and GPU Temp Target for a bit more improvement; just know that this will increase the heat output of your graphics card — though it has plenty of built-in protections that will prevent the card from reaching temperatures that are actually harmful. The card will throttle its speed before it reaches dangerous temperatures, so you don’t need to worry unless you want to keep noise levels low.
To save your settings, click the User Mode dropdown in the upper-right corner and choose Add New. Give your settings a name, and click Save. Now you can access these settings in just a few clicks from that dropdown in the future. You can also click Save As in the bottom-right corner at any time to save the currently applied settings.
This is the easiest way to boost performance in GPU Tweak III, but you can push performance even further with the methods below — so read on if you want even more bang for your buck.
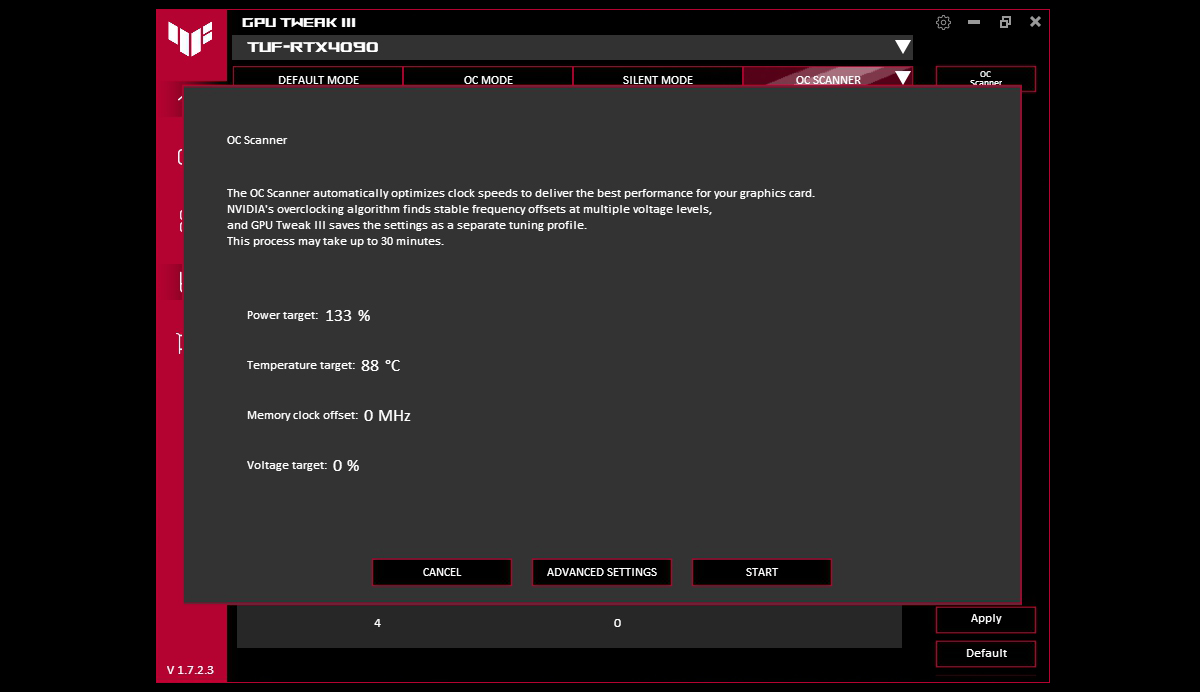
Go a little further: auto-overclock your GPU with OC Scanner
Every card is capable of different maximum clocks — even if you own the exact same model of graphics card from the same manufacturer as I do, each of our cards will overclock slightly differently. This phenomenon is called the “silicon lottery,” and it’s why manual overclocking requires a bit more work than something like The Easy Way above.
However, we’ve simplified this process as well. If you have an NVIDIA-based card, GPU Tweak III includes an auto-overclocking function called OC Scanner. Instead of setting a predetermined clock speed like the OC Mode button, OC Scanner will actually run your card through a series of stress tests to find its maximum stable overclock. Like the method above, it only takes a few clicks — it just requires a bit more waiting. But you can set it, go play some games on your ROG Ally, and come back when it’s finished. You don’t need to be in front of the PC for the whole process. Here’s what you need to do:
- Click the OC Scanner button in the upper-right corner of the GPU Tweak III window.
- (Optional): Click Advanced Settings and push the Temperature Target and/or Power Target higher to give it a bit more headroom if you desire. You can also adjust your GPU Voltage target, though be sure to research safe voltages for your specific GPU before doing so. Click Save.
- Click the Start button.
Let the OC Scanner do its thing (it took about a half hour on my rig), and when you come back, you’ll have an overclocked graphics card. You’ll find the OC Scanner settings have been saved in the upper right-hand dropdown as its own mode.
Since OC Scanner includes its own stress testing, your overclock should be quite stable. However, stability can always vary depending on the game, so if you want to validate its settings with your own stress tests and games, you can follow our benchmarking recommendations in the next section.
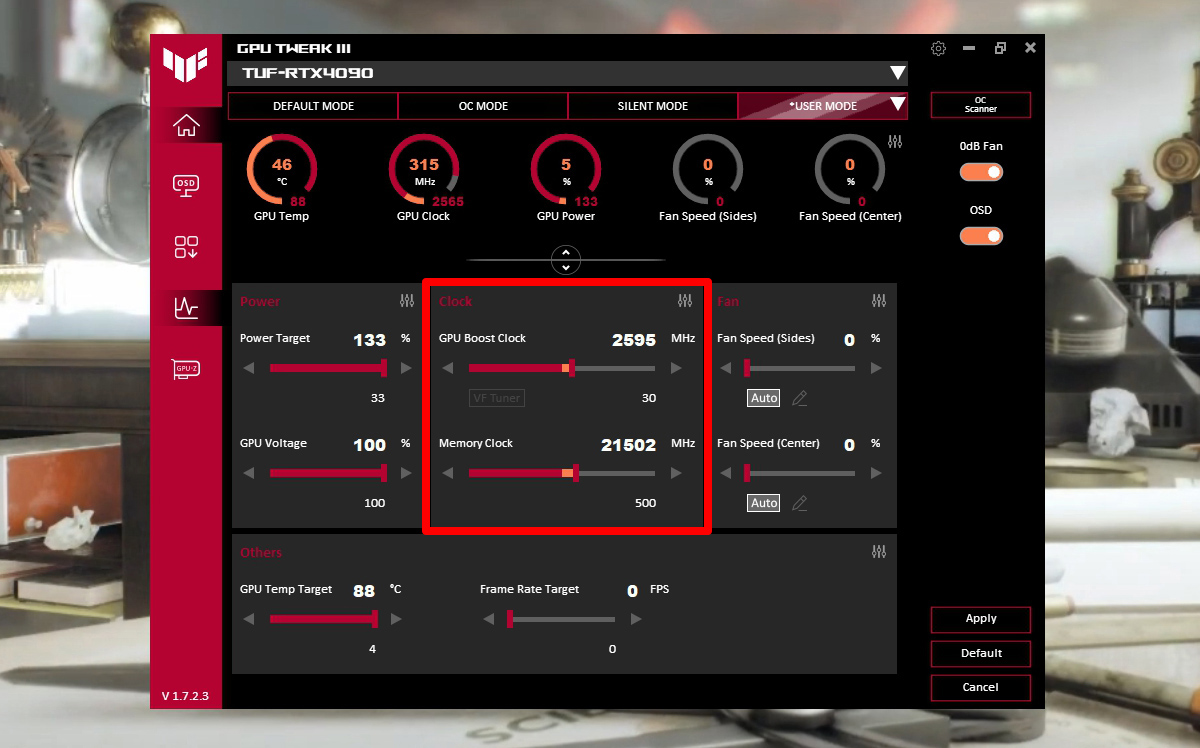
Boost it to the max: manually overclock the GPU core and memory
Most users will get the best return on their investment with the above two methods. But if you’re like me and enjoy tinkering with your hardware, a manual overclock can sometimes get you just a tad more performance than OC Scanner. Plus, it’s a fun way to learn more about how your hardware works and play with different functions.
While you can start overclocking from stock performance, you can save yourself a bit of time by running the OC Scanner first and then manually tuning from there. It’s up to you, and the steps involved are the same. You will, however, need a bit more software before you continue.
In order to stress test your card and ensure your overclock is stable, you’ll need a piece of software that generates 3D graphics complex enough to push your card to its maximum limit. Not all games will do this, so it’s best to use a dedicated benchmarking tool. I recommend the free combination of Unigine Superposition and Unigine Heaven. Superposition is the newer software, but it’s free version only lets you run one stress test from start to finish at a time. This is great during the overclocking process, but after you’re finished, you’ll want to run something on a loop for a few hours, which Unigine Heaven lets you do for free. If you click the toolbox in GPU Tweak’s left sidebar, you’ll also find ROG Furmark, which is another option for maxing out your GPU during stability testing.
Here’s how to manually overclock your GPU:
- Click the Default button in the lower-right corner to ensure you’re starting with stock settings.
- Increase the Power Target, GPU Voltage, and/or GPU Temp Target as desired. If your GPU Voltage is measured in %, you can safely move these sliders all the way to the right for maximum performance, or set them wherever you’re comfortable. If your GPU Voltage is measured in mV, you’ll want to research safe voltage I values for your specific GPU. Click Apply when finished. Alternatively, if you ran OC Scanner earlier, click the “User Mode” dropdown in the upper-right and select your OC Scanner settings and click Apply.
- Run a single benchmark round of Unigine Superposition at very high settings (enough to tax your GPU near 99%). When it finishes, write down the GPU Score and average framerate, along with the GPU Tweak III settings that got you that score.
- In GPU Tweak III, increase the GPU Boost Clock slider by 10MHz and click Apply. Click the GPU-Z option in the left sidebar to confirm that your changes have been applied to the GPU.
- Repeat step 2. If the benchmark completes successfully, write down your settings and repeat step 3.
- At some point, your benchmark will encounter problems. Maybe it crashes completely, or maybe or you see some artifacts on screen — graphical glitches like sparkles or flashes of black. If this happens, your overclock is unstable. Reboot your PC to start fresh, dial back to the last successful settings, and continue to step 6.
- Next, increase the Memory Clock by 100MHz, and run your stress test again, looking for artifacts and crashes. You’ll also want to make note of the final score and framerate — if performance is noticeably lower than the previous run, you’ll want to dial back the Memory Clock to the settings that reached the highest peak of performance.
Once you’ve found the highest-performing settings that stay stable, without any artifacts or crashing, you’ve successfully overclocked your graphics card! At this point, I recommend running Unigine Heaven on a loop for a few hours to make extra sure everything is stable.
Assign settings to different games with Profile Connect
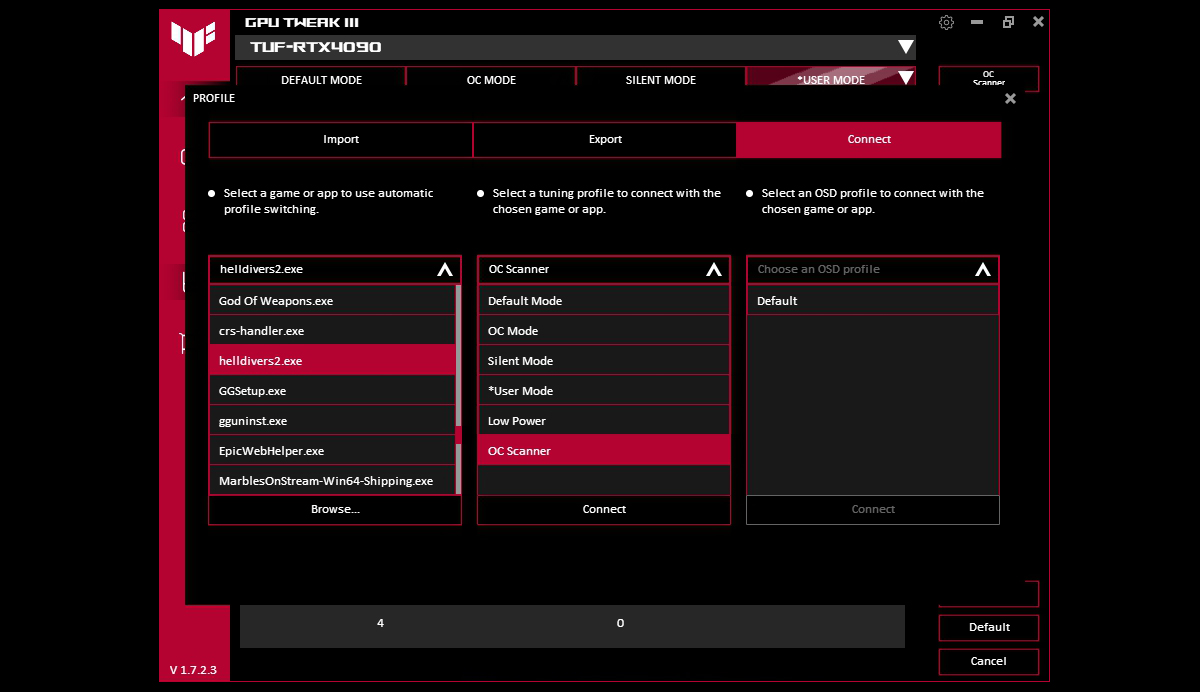
Not every game requires an all-out overclock. You might crave maximum performance in competitive games like Counter-Strike 2, but want a more silent, immersive experience in Elden Ring and God of War. GPU Tweak III’s Profile Connect allows you to automatically use different settings for different games. Here’s how to use it:
- Click the dropdown menu in the upper-right corner to see your saved profiles. Click the Connect button that appears at the top of the menu.
- Under the Connect tab, click the arrow next to the “Choose a game / application” menu. GPU Tweak III will scan your computer for applications.
- Select the game’s EXE file in the “Choose a game / application” menu, or click the Browse button to find it manually.
- Under “Choose a profile,” select one of your saved GPU Tweak profiles and click Connect.
Repeat this process for any other games you want to link to a profile, then close the window. The next time you launch the game or application in question, you should find that GPU Tweak III automatically loads your desired settings.
GPU Overclocking can be as easy as two clicks or a rabbit hole that leads to years of tweaking and extreme cooling endeavors. Wherever you fall on the spectrum, enjoy the process and rest easy in the knowledge you’ve eked a bit more performance out of your system. You earned it!