How to Cleanly Uninstall and Reinstall Armoury Crate
If you have ROG hardware in your PC—whether it’s one of our motherboards or an entire laptop—our Armoury Crate software manages many of the exclusive ROG features available to your rig. If you previously had Armoury Crate installed on your system, or you’re looking to do a clean reinstall to start from scratch, you need to take the proper steps. Here’s how get Armoury Crate back up and running with a clean slate.
Step One: Run the Armoury Crate Uninstaller
Armoury Crate uses a modular system, where it only downloads the components it needs for the hardware you have. If you have an ROG mouse and keyboard, for example, but not an ROG headset, it’ll only download the modules for those two pieces of hardware. That’s less for you to download, and less unnecessary bloat on your PC.
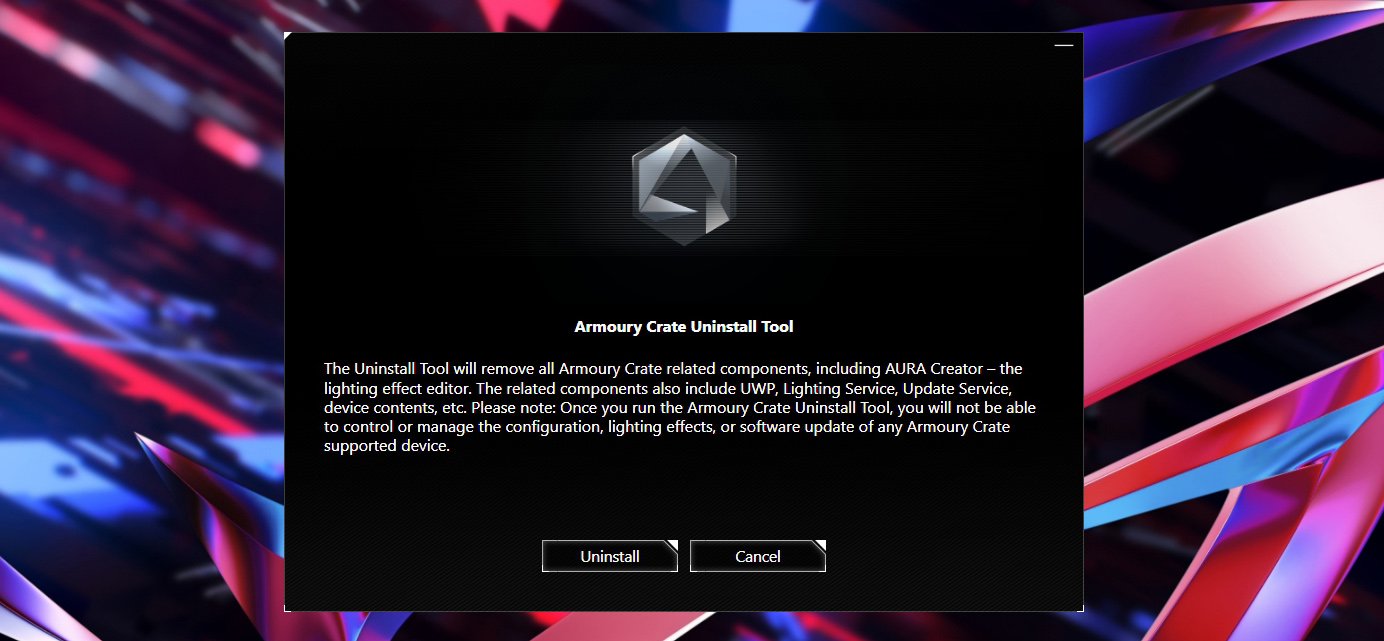
However, with multiple separate services governing these different pieces of hardware, we don’t recommend that you uninstall Armoury Crate using Windows’ built-in Add and Remove Programs menu, and we definitely don’t recommend the use of any “Registry Cleaners” or similar programs. Improper uninstallation and reinstallation can cause issues with certain features, so for best results and a clean system, you’ll need to use our dedicated Armoury Crate Uninstall Tool.

Head to the Armoury Crate support page, click the Show More link at the bottom, and click the Download button next to the Armoury Crate Uninstall Tool. Unzip the program and run it to cleanly remove any and all remnants of Armoury Crate from your PC. Even if you previously tried to uninstall Armoury Crate through Windows, this will ensure you don’t have any modules staying behind on your system.
Note that we don’t recommend uninstalling Armoury Crate permanently, especially on ROG laptops, since much of their basic functionality is governed by this software. Without it, your laptop will not perform optimally. So once you uninstall Armoury Crate, you'll want to reinstall it anew.
Step Two: Reinstall Armoury Crate and (Optionally) Aura Creator
Once Armoury Crate has been cleanly removed, you can return to the Armoury Crate support page, download the Armoury Crate & Aura Creator Installer. (The “Armoury Crate Full Installation Package” is only necessary if you don’t have internet access on the computer in question—otherwise, the standard installer will download what it needs at the time of installation.)
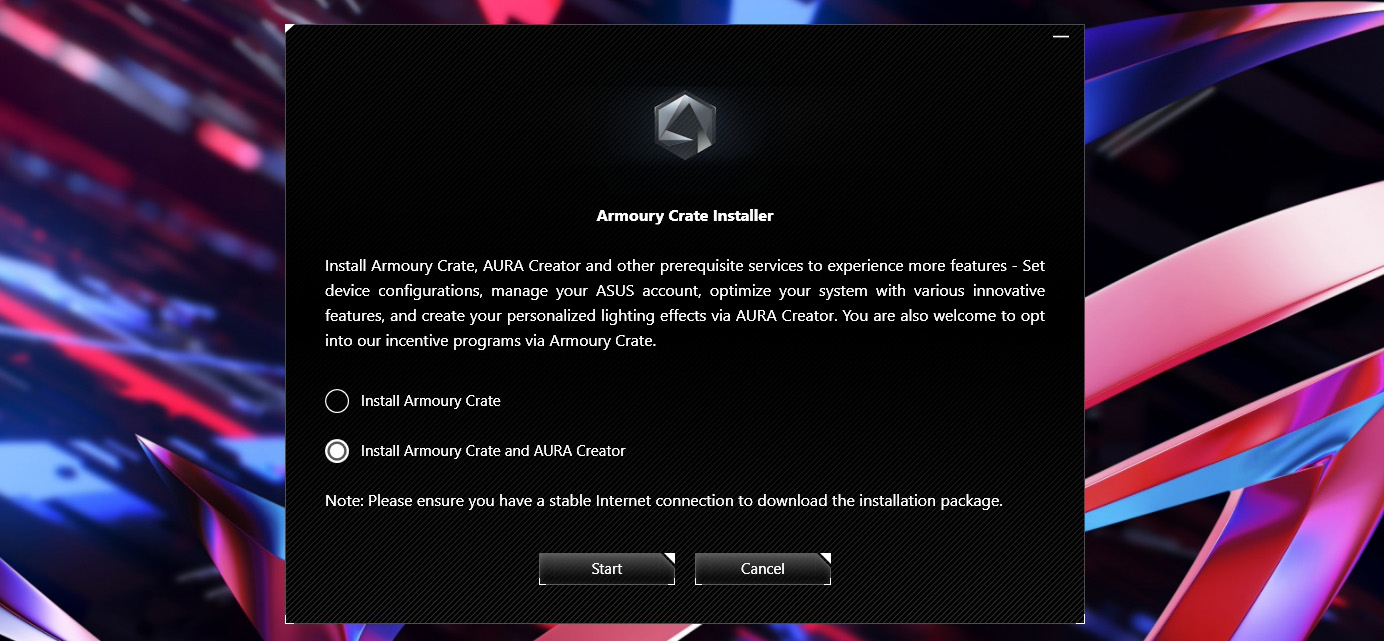
Unzip and run the installation program. You’ll be given the choice to install two pieces of software:
-
Armoury Crate is the main software required to control your ROG gear. It allows you to enable RGB lighting presets, tweak settings like AI Noise Cancellation, and (in the case of laptops) adjust your CPU, GPU, and fan presets.
-
Aura Creator is not required, but is an excellent addition if you want to create your own custom RGB patterns. Armoury Crate comes with a number of lighting settings built in, but for fine-grained control, Aura Creator takes RGB to the next level.
-
Our old Aura Sync Utility is no longer updated or supported, and its functionality has been built into Armoury Crate—so most users should no longer need it, and it should not be installed alongside Armoury Crate (unless you’re still using older components that require the standalone Aura Sync utility). Other ASUS software, such as AI Suite and GPU Tweak, will not interfere with Armoury Crate and can be installed separately.
The installation may take some time, so let it do its thing. When you relaunch Armoury Crate, you can check for compatible ROG hardware you have connected to the system and download the applicable modules.
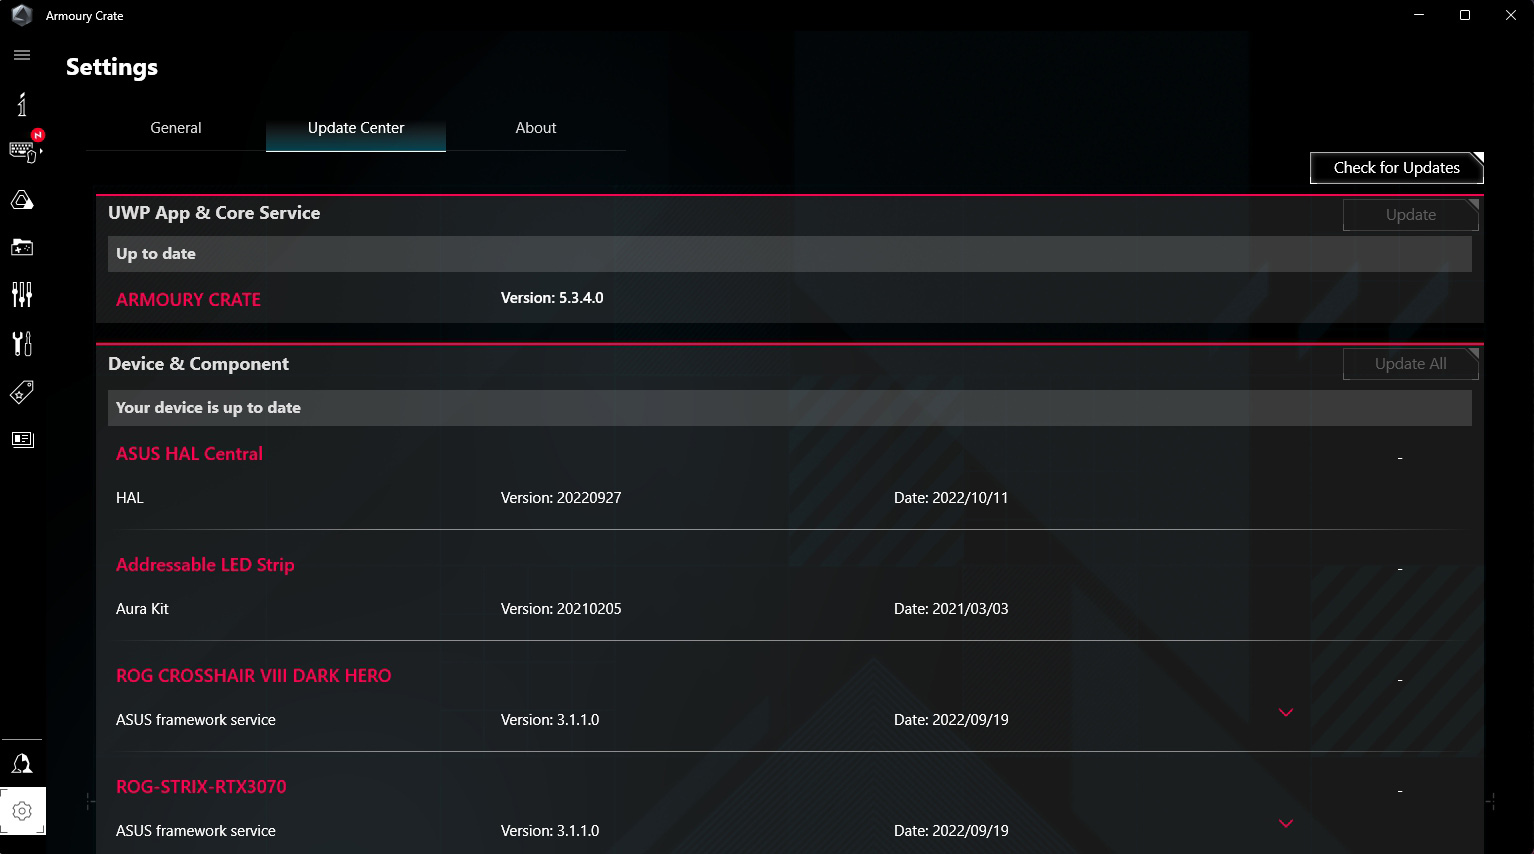
To do so, click the Settings cog in the bottom left corner and head to Update Center to make sure all of Armoury Crate’s components are up to date, then start tweaking to your heart’s content. If you run into any issues, check out our Armoury Crate FAQ, contact our talented support team, or join our Discord to get help from other ROG users.
Author
Popular Post

Prepare for Tandem OLED splendor with these new ROG gaming monitors
How to configure your PC's RGB lighting with Aura Sync

Red Dead Redemption 2 on the ROG Ally: performance guide & best settings
Graphics cards, monitors, motherboards, and more: everything ROG announced at Gamescom 2025
How to upgrade the SSD and reinstall Windows on your ROG Ally, ROG Xbox Ally, or ROG Xbox Ally X
LATEST ARTICLES

Level up your calls: ROG gear and tips to dominate Discord and Zoom alike
ROG headsets, laptops, and software give you the technology you need to effortlessly dominate virtual work meetings and gaming voice chats.

ROG Xbox Ally vs Gaming Laptop: which portable gaming device is right for you?
Both the ROG Xbox Ally and ROG gaming laptops have a lot to offer gamers, depending on what they're looking for.

Which ROG Xbox Ally to give the gamer in your life this holiday
The powerful, portable ROG Xbox Ally is the perfect gift for any gamer who wants to take their favorite games everywhere they go.
The best accessories to supercharge your ROG Xbox Ally
Here’s the must-have gear that’ll catapult your ROG Xbox Ally gaming to the next level.

How to boost gaming performance on the ROG Ally or ROG Xbox Ally
The ROG Ally is a true Full HD handheld ready to make your games look better than ever. Here's how to maximize its performance.
How to extend the battery life of your ROG Ally or ROG Xbox Ally
The ROG Ally’s compact, lightweight form factor allows you to play all your favorite modern games anywhere you go. Here are a few tips to extend your game time as long as possible.