How to easily replace the switches in your ROG gaming mouse
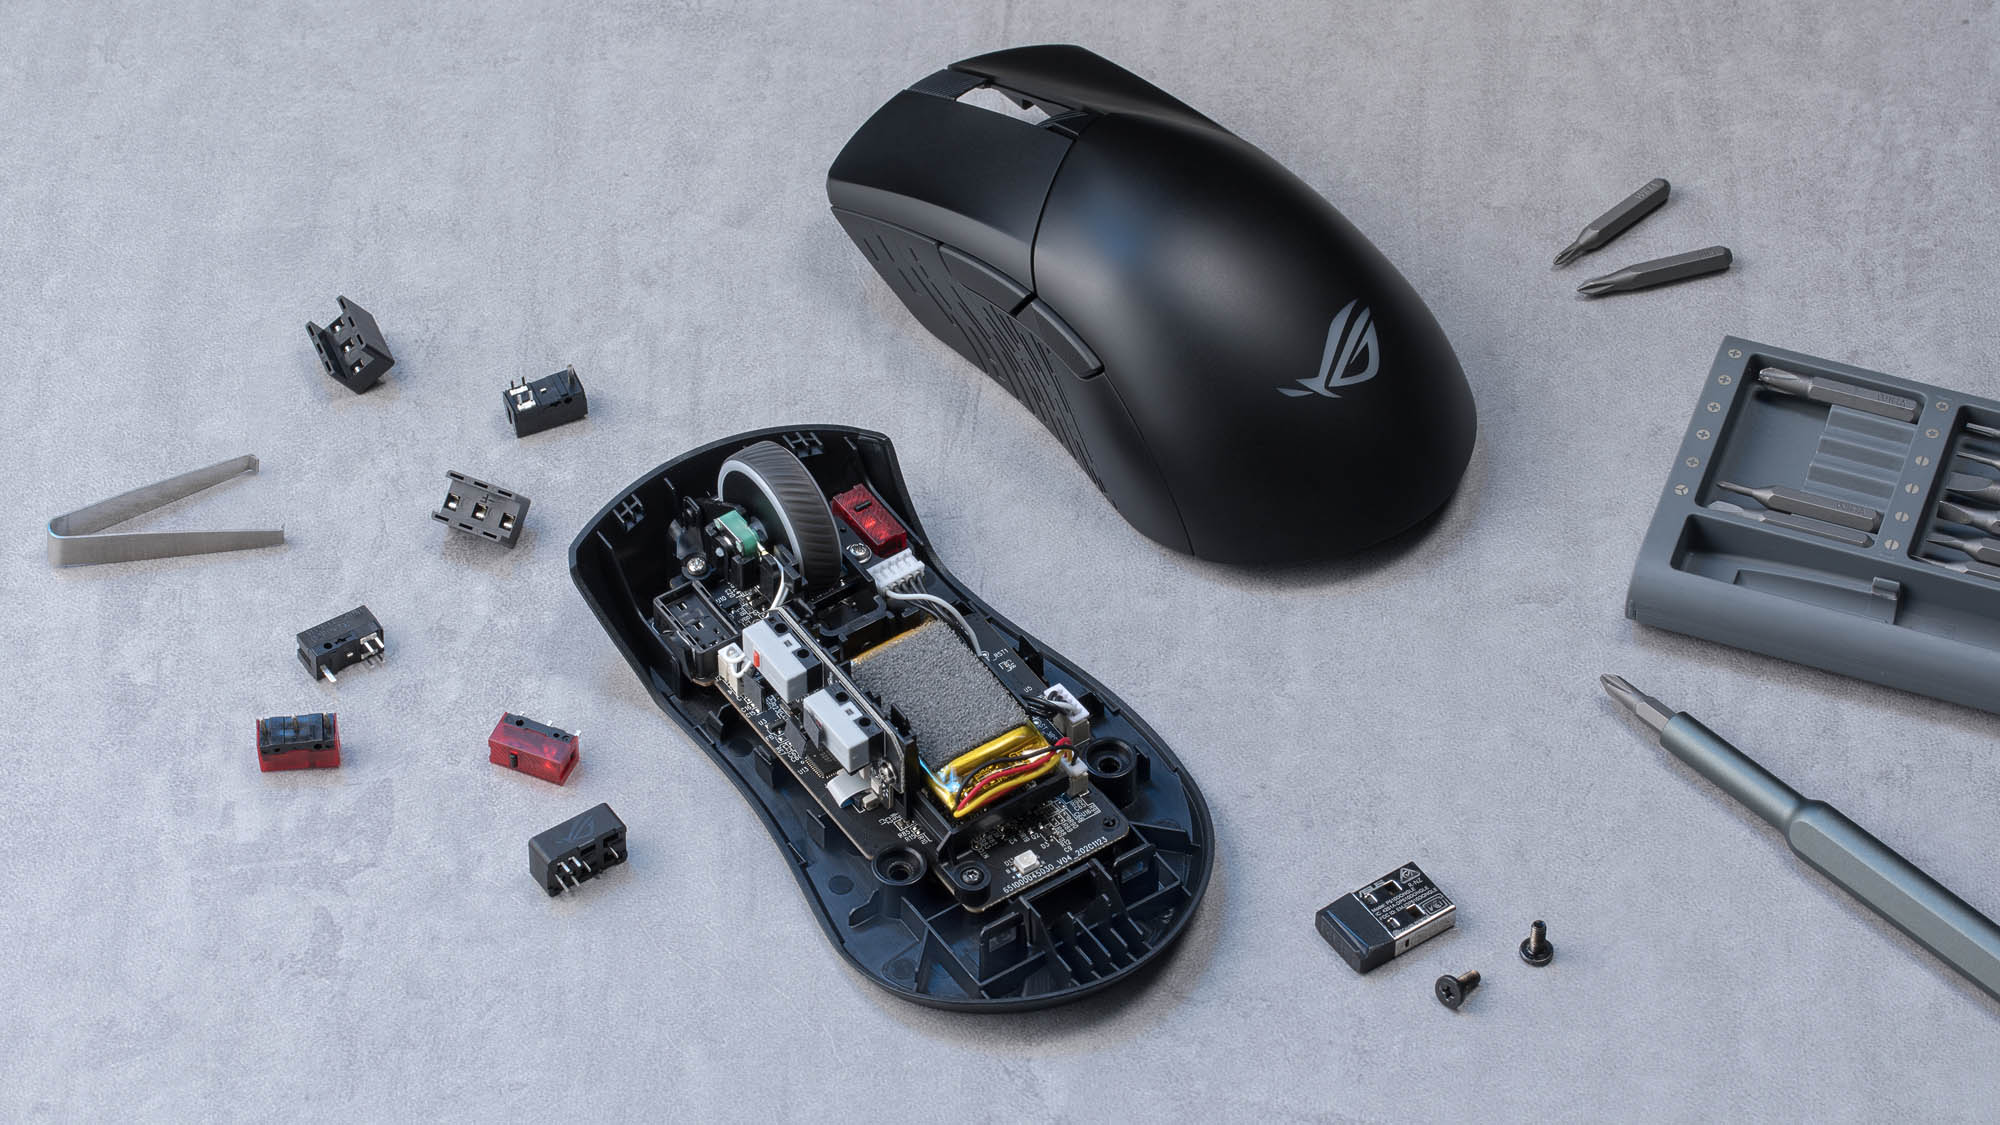
Every gamer has their own needs, preferences, and playstyle. That's why mechanical keyboards have become so popular, with multiple types of switches offering different sounds and feel. But we think the humble mouse deserves the same treatment, so we’ve designed our latest gaming mice with hot-swappable switches. Thanks to our exclusive push-fit socket design, replacing a switch is as easy as pulling the old one out and pushing the new one in.
Why swappable mouse switches are a must-have feature
Maybe this has happened to you: after years of use, after countless hours together, one button on your favorite gaming mouse stops working, forcing you to buy a brand new model. At ROG, we think this is a waste—not just of plastic and still-functioning parts, but of your hand-picked mouse that may not be easy to replace. You shouldn't have to buy a whole new mouse just because one tiny switch failed.
Reducing e-waste isn’t the only reason why you might want to replace the switches in your mouse, though. Much like the world of keyboards, different mouse switches have different characteristics–some may offer a more solid, hefty-feeling click, while others provide a more muted experience. You can choose between mechanical switches and optical switches, the latter of which uses a laser for the fastest possible response time for competitive gaming. With the sheer amount of options available at online retailers, you're bound to find one that completes your beloved mouse.
Most mice, however, do not allow for easy switch swapping, instead requiring you to dismantle the mouse and solder on new switches yourself. With ROG hot-swappable mouse switches, this process is a no-hassle, two-minute task.
How to replace the switches in your ROG mouse
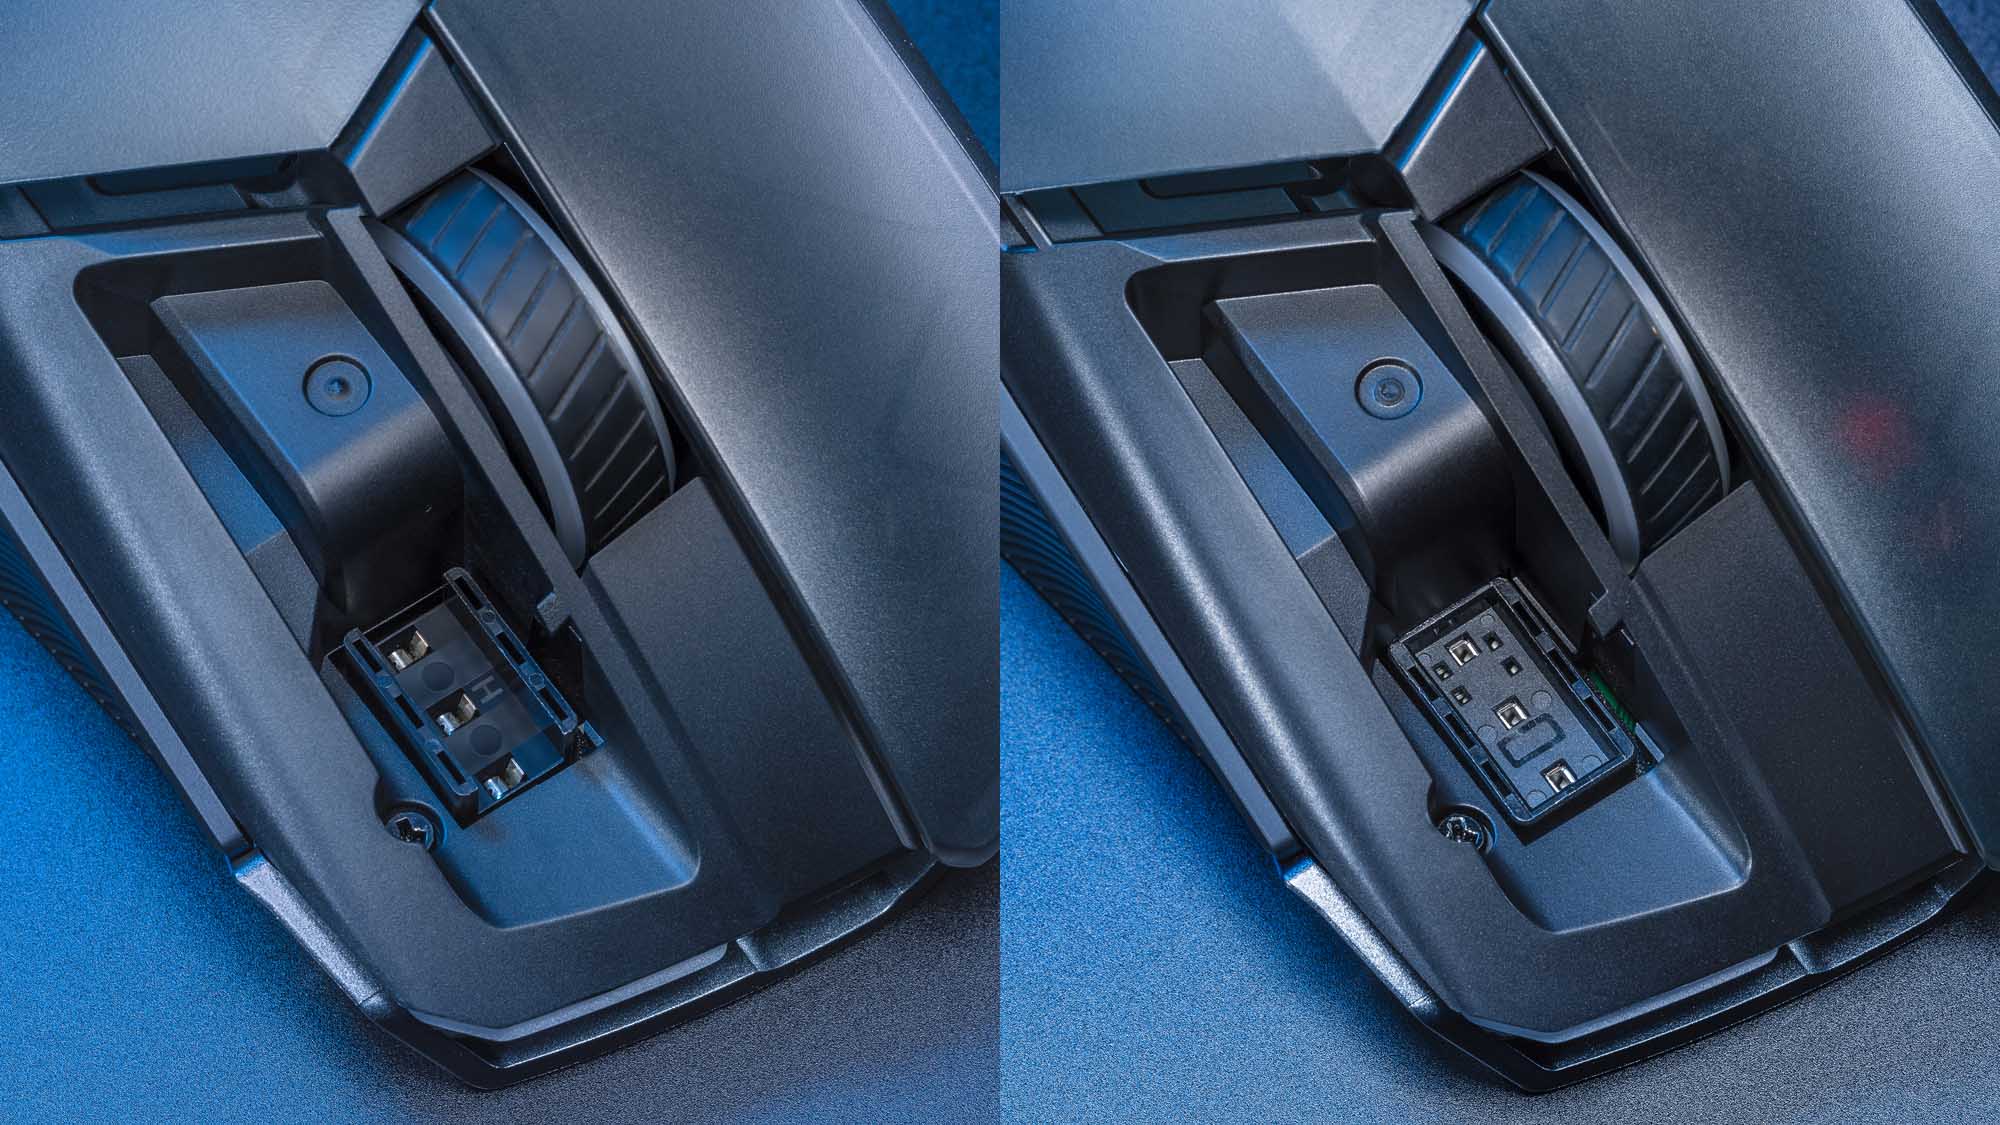
Before you begin, you’ll need new switches for your mouse. Mice with Gen I sockets (shown above on the left) are compatible with 3-pin mechanical switches, while newer mice with Gen II sockets (shown above on the right, like the ROG Gladius III) allow you to swap in 3-pin mechanical switches or 5-pin optical micro switches, with a stabilizer that ensures firm click strokes. You can see a full compatibility list for our push-fit sockets here. To get you started on your journey to find the perfect switch, some of our mouse models come with an extra set in the box, so you could try out different feels to find the one that best speaks to you.
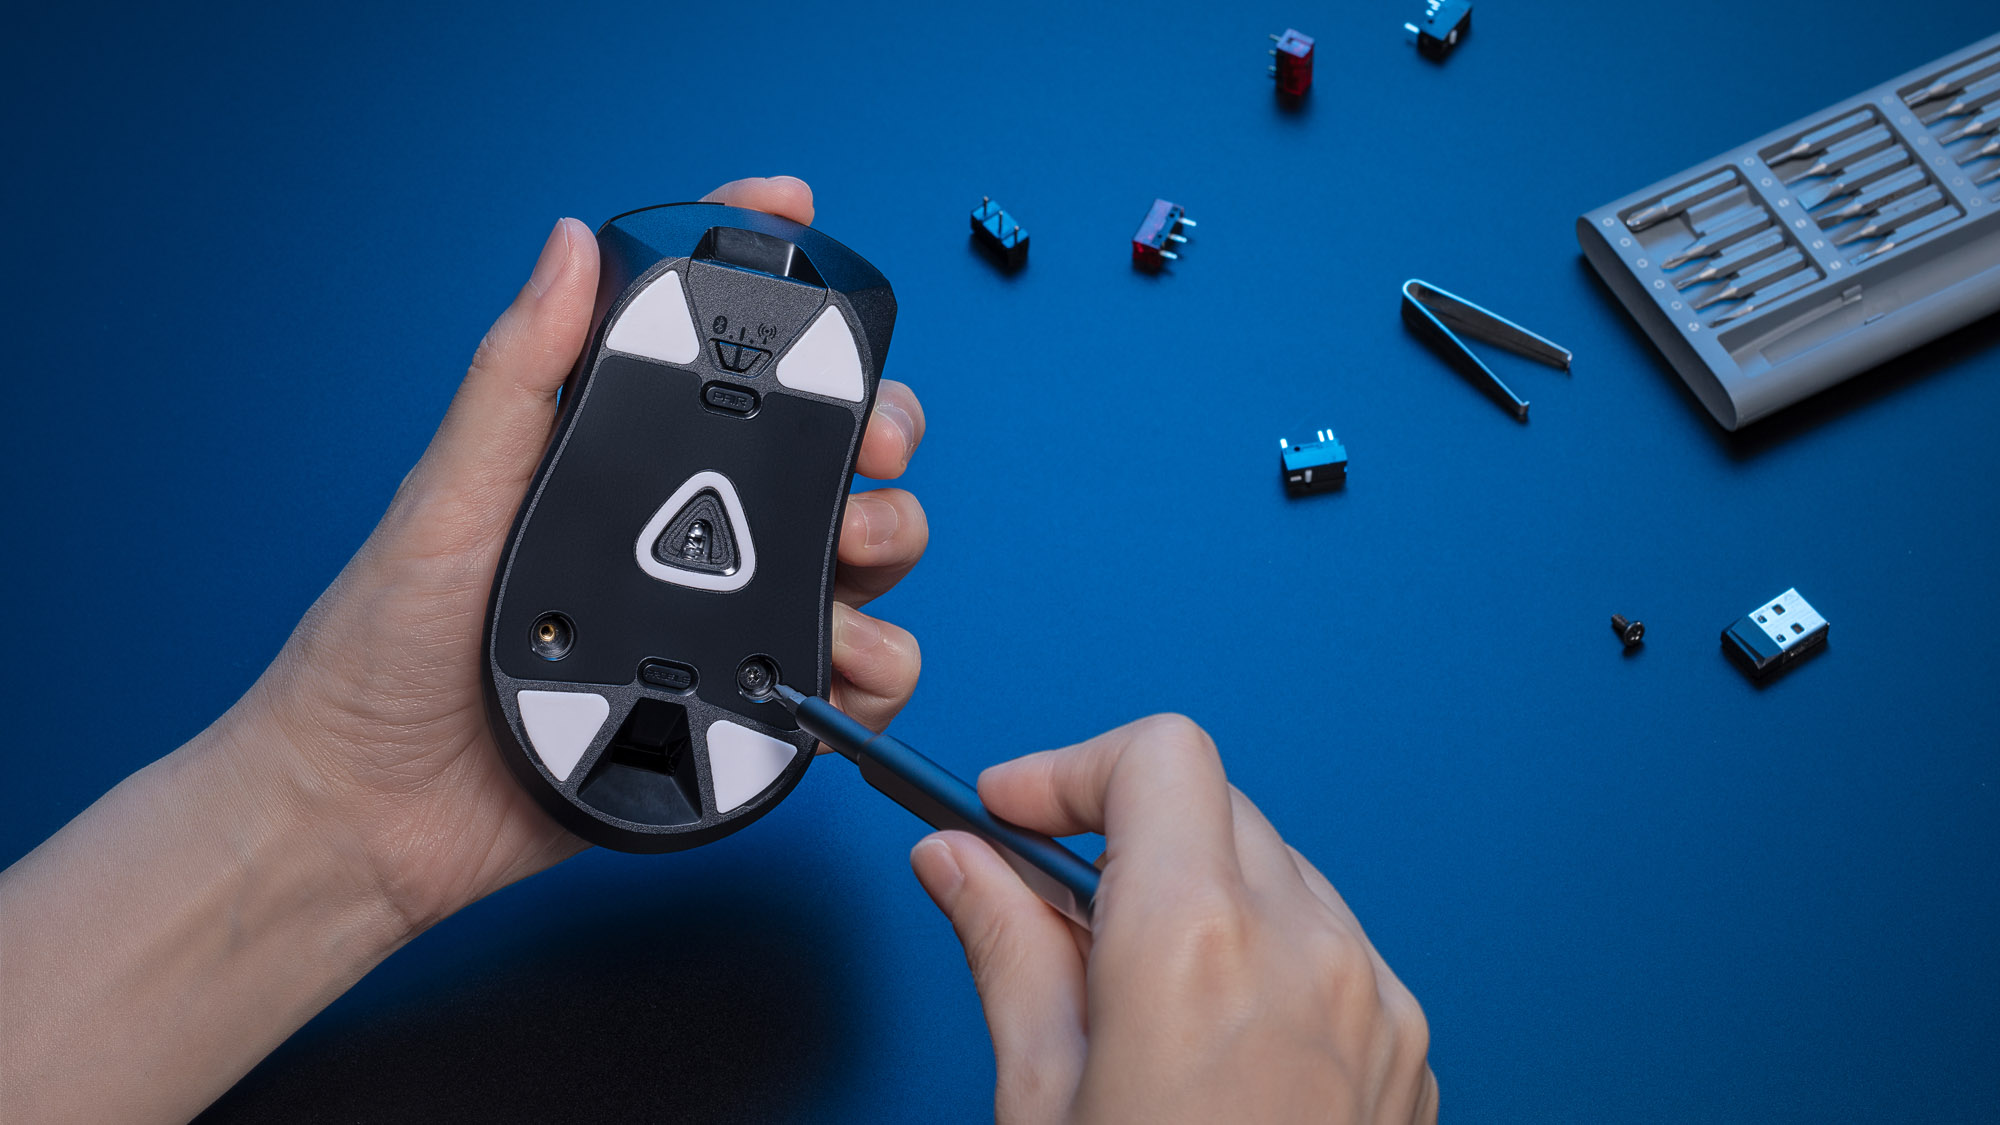
To remove the mouse’s top cover, unplug the mouse, flip it over, and remove the two rubber caps on the bottom with a set of tweezers. Then unscrew the two screws with a small Philips-head screwdriver.
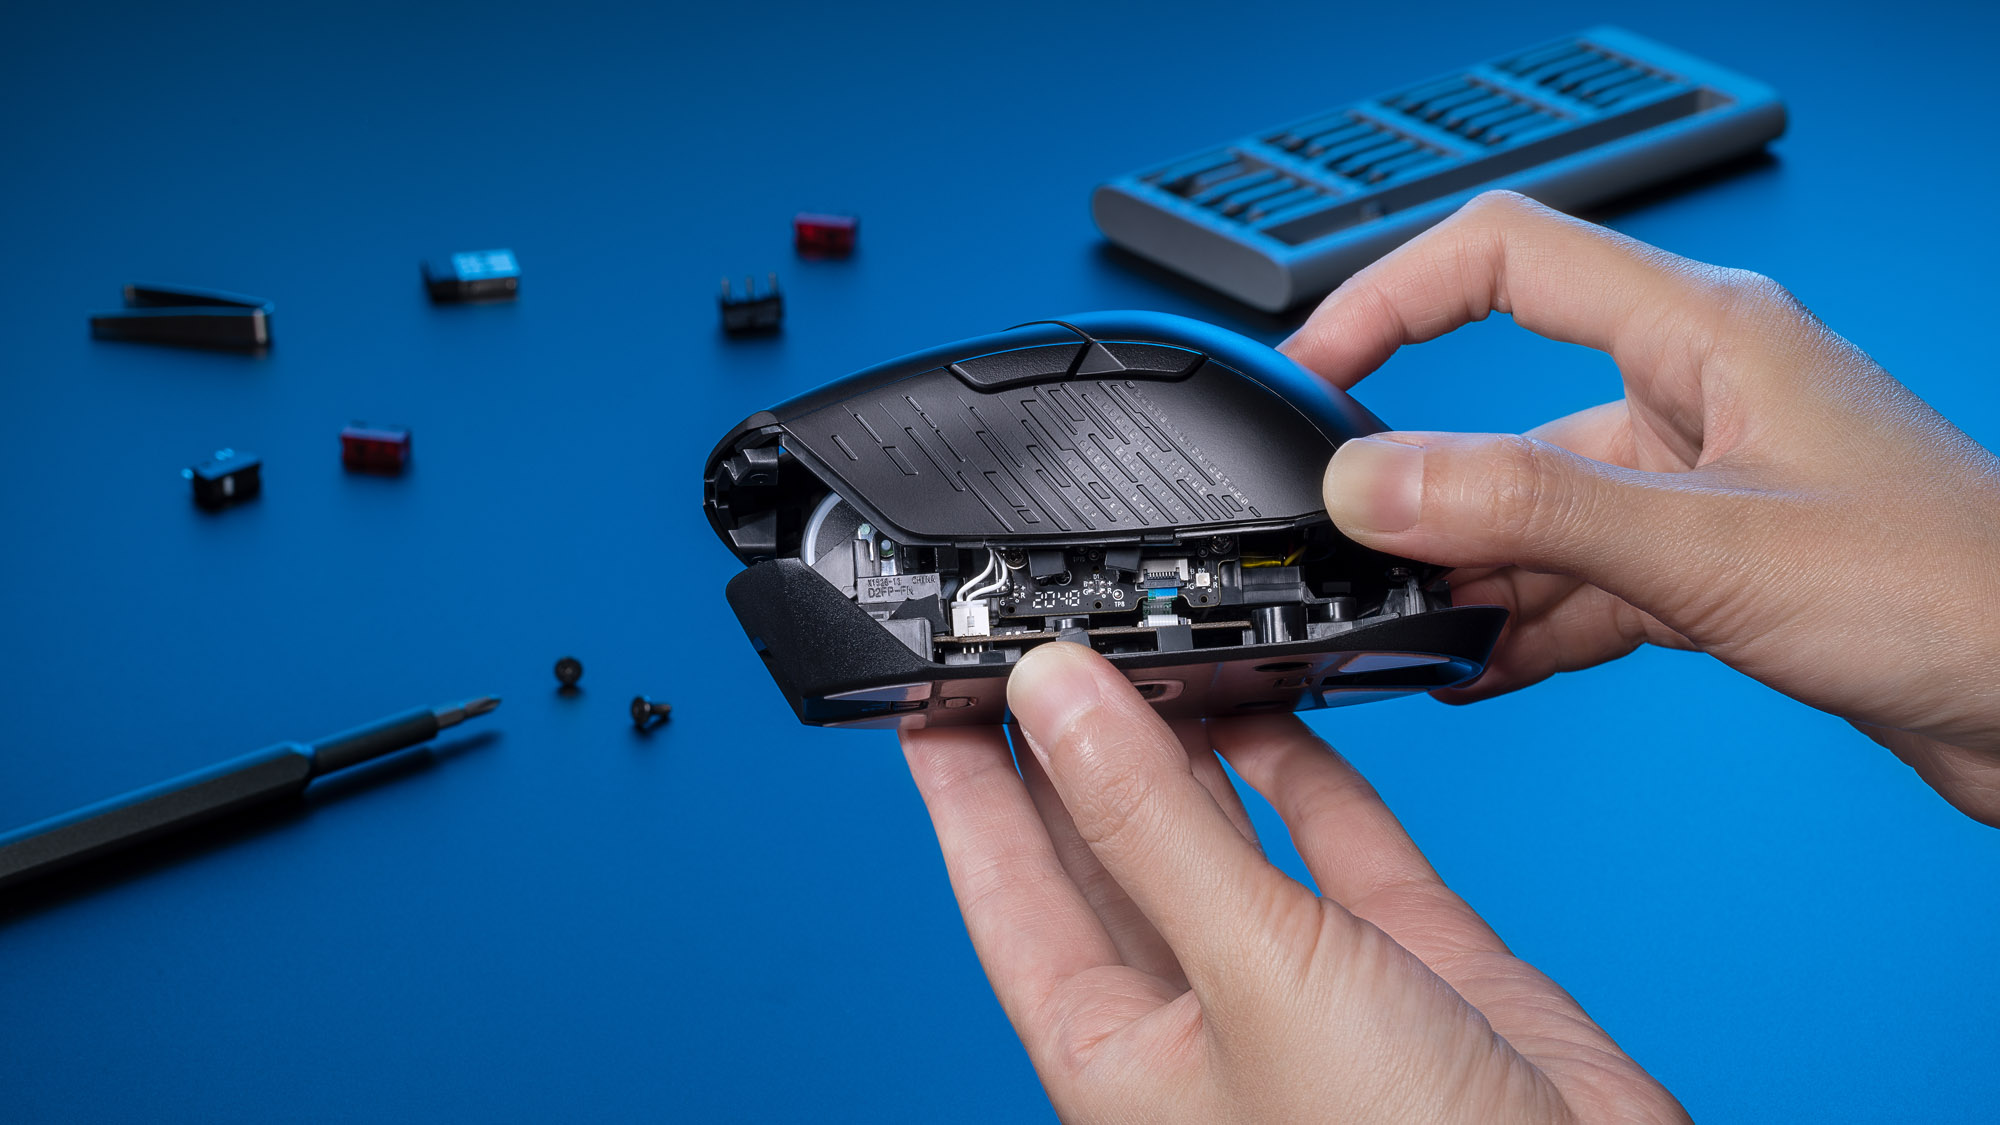
With the screws removed, you can now lift up the top cover.
Tip: If you’re having trouble getting it to pop free, a guitar pick or plastic spudger can help you get it loose.
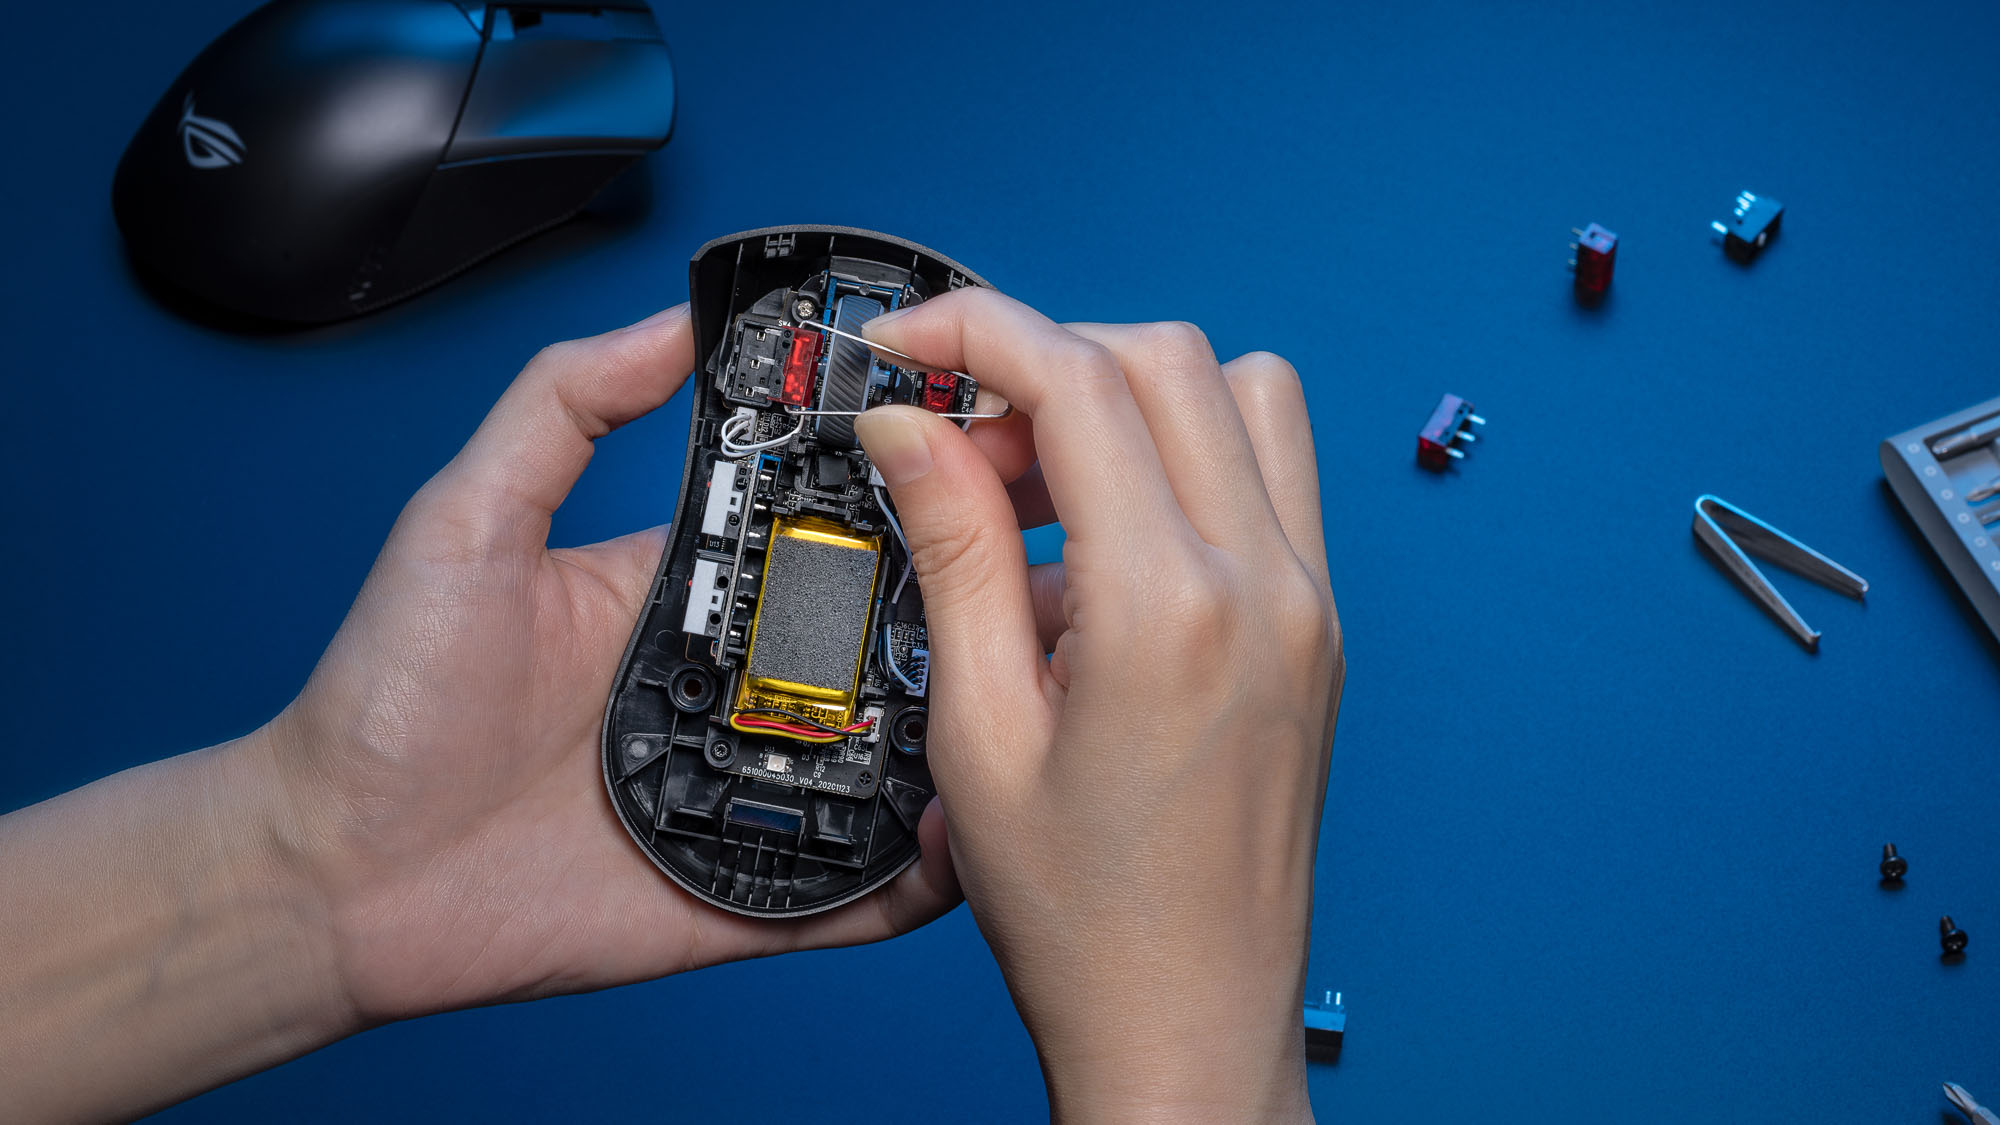
Next, locate the switches for the primary buttons, located on either side of the scroll wheel. Grab the included tweezers and lift up the switch or switches that you want to replace to remove them.
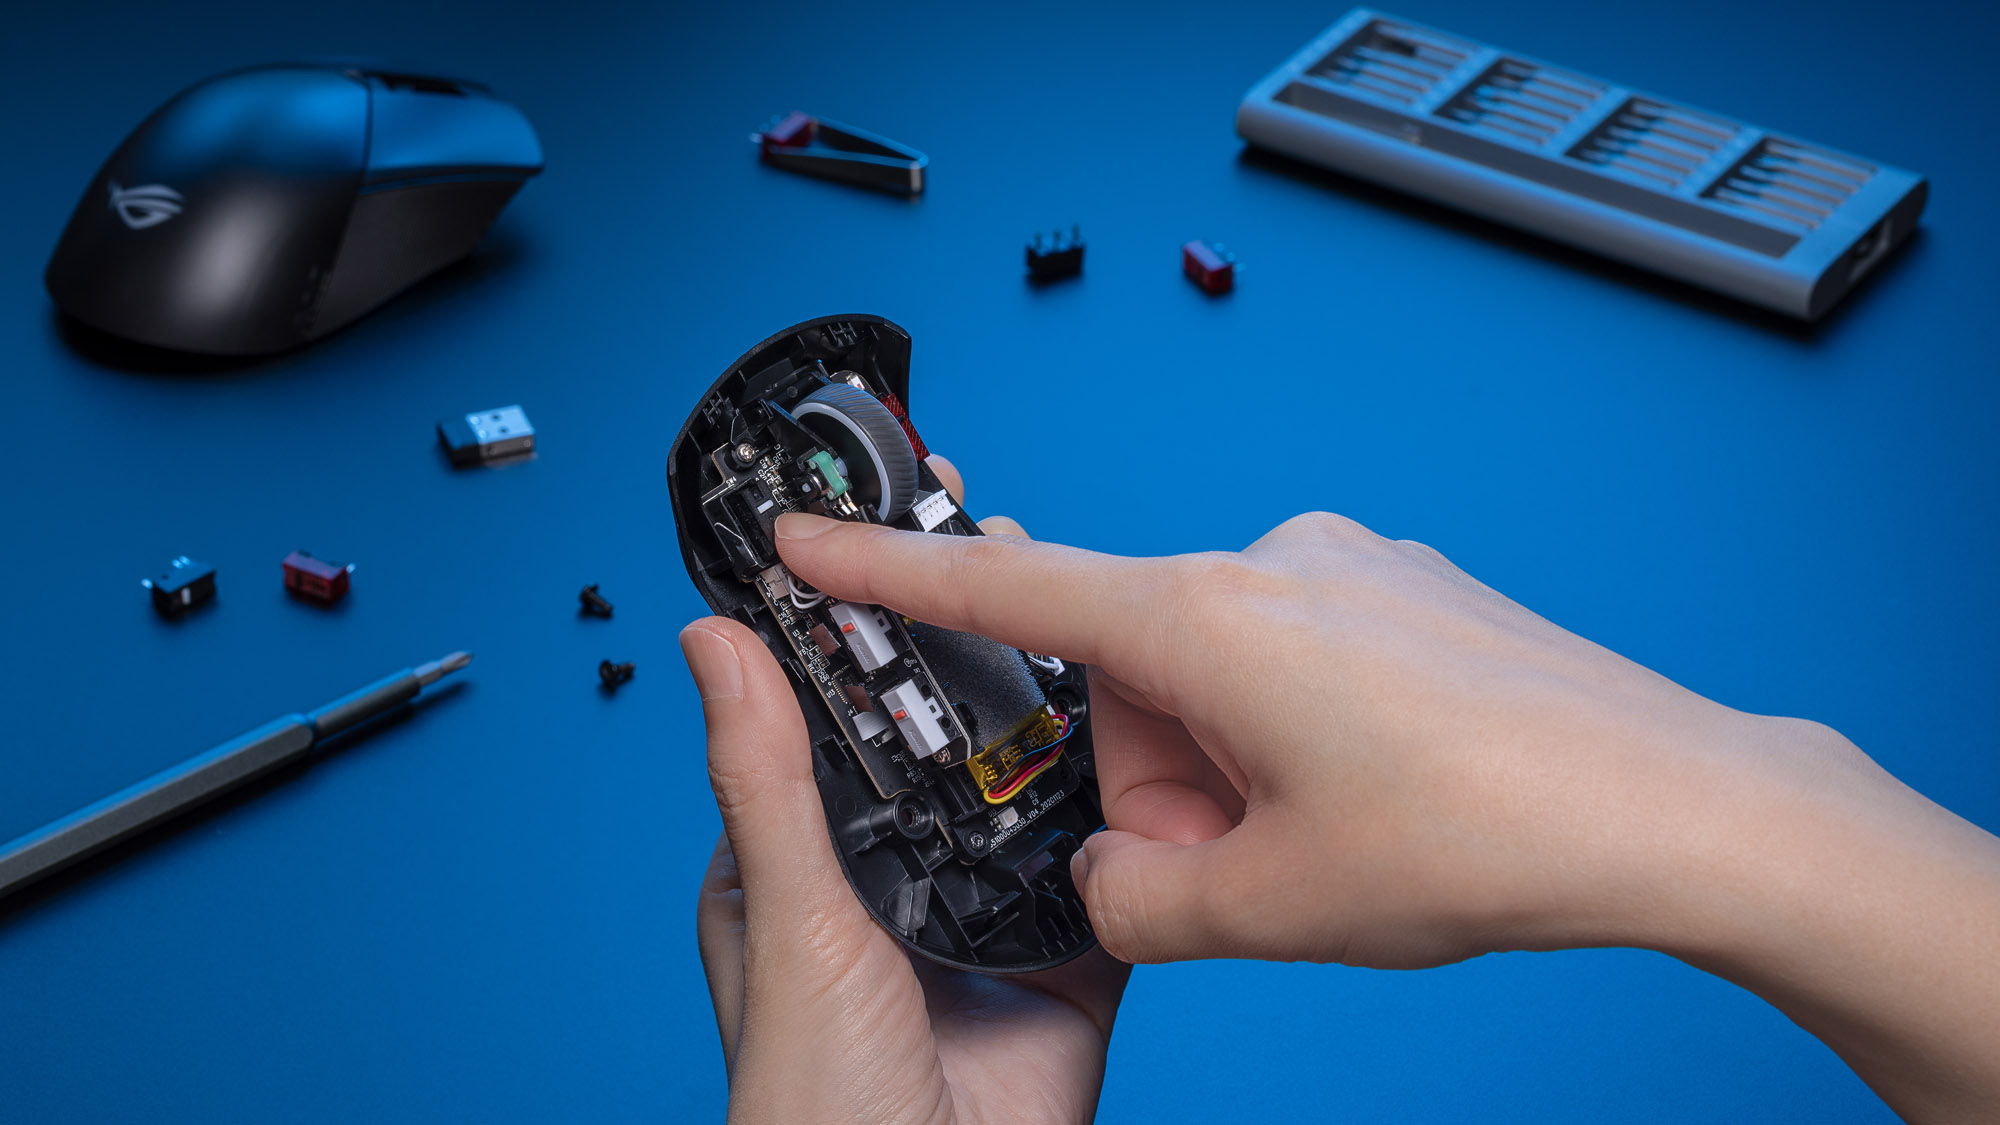
With the old switches removed, push your new switches in–no soldering iron required. Simply align the pins on the bottom of the switch with the holes in the socket, and apply gentle pressure until the switch clicks into place.
Tip: If you’re installing a five-pin optical switch, the switch will only fit in one direction. If you’re installing a three-pin switch, make sure that the small black button on top of the switch is oriented toward the front of the mouse.
Once you're finished, replace the cover, ensuring the two tabs in the front and the screw standoffs in the back align with one another. Re-insert the two screws along the bottom and press the rubber caps back in to cover the screw heads.
That’s it! Flip the connectivity toggle back to the mode of your choice, and you’re good to go. Whether you’ve just extended the lifespan of your ROG mouse by replacing a switch or whether you’ve installed a different set to try out a new experience, you’ve completed this easy process and are ready to get back to the game.
Autore
Post popolari
Come overclockare il sistema utilizzando AI Overclocking

Call of Duty Black Ops 6 on the ROG Ally and ROG Ally X: performance guide & best settings

Baldur’s Gate 3 on the ROG Ally: performance guide & best settings

Spider-Man Remastered on the ROG Ally performance guide & best settings

Celebrating one year of the ROG Ally (and its amazing community)
Ultimi Articoli
The best OLED gaming monitors from ROG: Find the perfect OLED for your battlestation
There's an ROG OLED gaming monitor for any PC gaming setup. Click here to find yours.

Surviving Frostpunk 2’s frozen hellscape
Frostpunk 2 is a bold sequel that pushes the franchise into uncharted, exciting territory.
Lightweight, precise, competition-ready: Meet the ROG Keris II Ace
The ROG Keris II Ace is an ultralight wireless gaming mouse purpose-built for competitive gamers and esports athletes.
The ROG Harpe Ace takes esports gaming to new heights in collaboration with Aim Lab
Seriously competitive gamers need every advantage they can get. That’s why ROG has joined forces with Aim Lab to create a next-level wireless gaming mouse for pro-level performance.
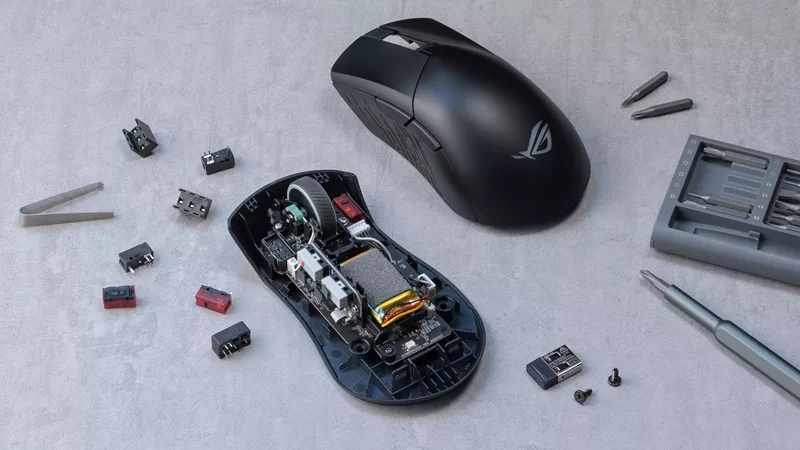
How to easily replace the switches in your ROG gaming mouse
Replacing our mice's hot-swappable switches is fast and easy.

ROG announces a cutting-edge arsenal of gaming gear at CES 2022
2022 is poised to be an awesome year for PC gaming. From brand-new laptops, high-refresh rate displays, feature-filled keyboards, and DIY PC components, here's all the new gear ROG announced at CES.