How To Set Up A RamCache On ASUS X79 Series Motherboards
Setting up a RamCache or RamDrive
With the recent launch of the X79 chipset and its support for Quad Channel memory once again the debate has been raised as to what can we do with additional memory as well as how can we benefit not only from the density but the increased bandwidth. Well the answer is easy use that memory as a cache or harddisk!
Actually the answer comes in the form of two items which have been used for some time in professional spaces and workstation and server environments. Currently at this time in the DIY industry memory pricing has hit an all time low with 4GB being not only readily available but low cost even for higher frequencies likeDDR3 1600. With this in mind this quick setup guide will show you how you can take the memory you would normally install on platform and not utilize it and not only utilize it but greatly benefit from it.
As we all know a PC’s DRAM memory is considerably faster than even the fastest mechanical HD or the fastest SSD or even raid configurations of either drive type; because of this memory not only offers a huge increase in potential performance over standard storage options but also will compliment any potential storage array configuration. In addition as memory is not limited in regards to a defined bus frequency of operation ( as is SATA you can not only improve performance by using a RamDisk or RamCache but continue to increase performance by using faster memory ) Such as using DDR3 1,333 will offer great performance but moving to DDR3 1,600 will offer even high performance gains.
What Is A RamCache?
A Ramcache essentially serves as an invisible prioritized hard drive ( in the sense data is present on it ). This hard drive is actually a cache and contains the most commonly accessed data on system. This cache improves performance by taking over key parts of reading and writing the most accessed data. Minimizing and in some cases eliminating the involvement of considerably slower standard storage options. As the read, write and access time performance of DRAM "memory" is considerably faster than that of standard storage devices this is where the huge increase in performance comes.
What you will need to setup a RamCache.
Required Items
Physical memory:
Personal Recommendation is nothing less than 16GB with a recommendation of 32GB if you also plan to setup a RamDisk as well.
An example of a current Quad Channel Kit of Memory is Corsair’s Vengeance Series. Different speeds and voltage ranges are available ( 1600 1.35v, 1600 1.5v or 1866 1.5v )

Software –
There are a number of solutions currently on the market. A couple of the applications that we’ve tried internally and had reliable results are linked below.
Superspeed.com
http://superspeed.com/download/trialversions.php
RamDisk Plus
SuperCache 5
Romex Software
http://www.romexsoftware.com/en-us/index.html
FancyCache
VSuite Ramdisk
Motherboards
ASUS P9X79 Series Motherboards are being used for this setup and configuration overview. All of our X79 series of board have been tuned for excellent memory compatibility as well support for higher densities and high frequencies. * The quality of the IMC ( integrated memory controller) will vary to a considerable degree as such in most situations the limitation on 8 dimm frequency support will be limited by the quality of the IMC not the motherboard or its UEFI. In internal testing we currently have been able to hold 8 dimm configurations in excess of 2400 speeds.

1. Complete windows installation depending on the capacity of your SSD you may find a significant reduction in useable space when increasing the quantity of system memory on your PC.
Be advised adjustments noted below can considerably reduce the used volume space after windows installation.
- Modification or disabling of Recycle Bin
- Modification or disabling of System Restore
- Modification of System Paging File ( it is NOT advised to disable your system paging file )
- Disabling of Hibernation functionality.
2. Once completed with adjustments to useable volume space in your OS volume install SuperSpeed RamCache.
For a video walkthrough please watch the linked video below.
[video]http://www.youtube.com/watch?v=qGrqMllHVVY[/video]
3. Begin with double clicking and launching the setup.exe file for SuperCache 5.

4. Prior to going through with the installation reference your current memory usage. This is just to get an idea of how much memory you are currently using right after a system post/boot. In most situations your overall initial footprint for memory usage will be approx 1.5 to 2.5GB of memory usage. This baseline number will be added with the amount being allocated either automatically or user defined so it is important to know how much active memory is being used.

5. As we see we verified the amount our OS installation was using and have proceeded to move forward with the installation. At this time we have maintained SuperCache’s default installation parameter of defining the cache volume automatically. If you would like to manually define a parameter at the offset uncheck the automatically box. Be advised recommendations of cache size vary depending on the applications, games etc being run on the system. My overall recommendation for a mixed usage PC ( Gaming, Multimedia Playback, Web Browsing, Content Creation or Productivity ) is 8.00GB.

6. Continue to click through the confirmation screens allowing the installation to proceed.


7. Once completed the installation will ask that you reboot the system. Please do so.
8. Once the installation is completed verify you new default memory usage as this now includes your SuperCache. Should you want to adjust the amount of memory used for SuperCache proceed forward.

9. Open the application and right click on the primary windows volume which has a SuperCache default installed to it. Select Cache from the range of options presented. Select configure this will take you to the configuring SuperCache console.


10. Once inside the configuration console you can adjust the SuperCache memory allocation under “Main Memory Allocation”. In the example I have adjusted to 8GB. In addition for additionally extending performance you can select to enable the Deferred Write Mode option. Be advised this option can potentially cause issues if power is suddenly cut, dropped from the system. It is advised you use a UPS with this option. As we are choosing to maximize performance we have selected this option. The advised option for “Lazywrite Latency selection is automatically set to (5s). Should you want to attempt to maximize performance further you can consider an option of 1s which internally has yielded a small additional bump in performance.
Once you have gone through these steps you will have successfully completed setup and configuration of a RamCache. If you have any questions or comments, or just want to show us your own RamCache setup, feel free to post them in the comment thread.
Author
Popular Posts

How to adjust your laptop's P-Cores and E-Cores for better performance and battery life

How to Cleanly Uninstall and Reinstall Armoury Crate
How to configure your PC's RGB lighting with Aura Sync
Introducing the ROG Astral GeForce RTX 5090 and 5080: a new frontier of gaming graphics
How to upgrade the SSD and reinstall Windows on your ROG Ally or Ally X
LATEST ARTICLES

Hands-on: The ROG Raikiri Pro took my couch gaming to the next level
I've been a diehard PC gamer all my life, but I often play on the couch. The ROG Raikiri Pro has improved my living room PC gaming immeasurably thanks to a few useful features and loads of customizability.
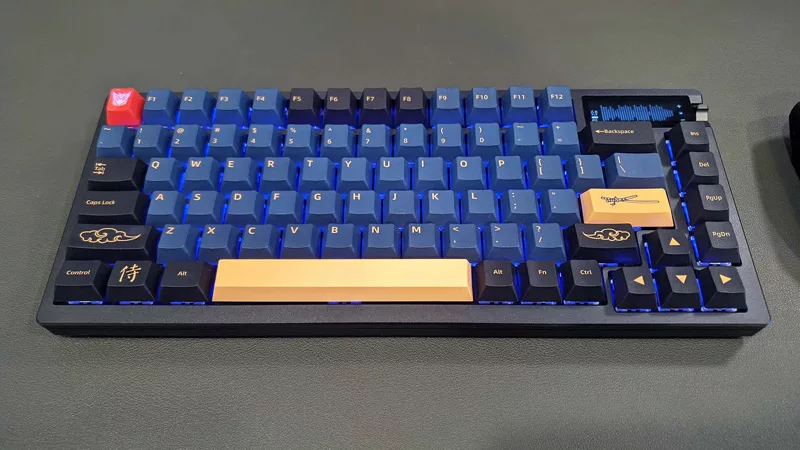
Hands-on: The ROG Azoth became the canvas for the keyboard of my dreams
Ever since I bought my first mechanical keyboard, I’ve been on a mission to mod and upgrade, mod and upgrade. But I think the ROG Azoth may actually be my endgame.

The Zephyrus M16 blends outstanding HDR gaming performance with undeniable luxury
The new ROG Zephyrus M16, with its Nebula HDR display, is like bringing a high-end home theater gaming setup with you wherever you go.
Radeon graphics and a stellar new display reinvigorate 2022 ROG Zephyrus G14
For a long time, I had to choose between underpowered ultraportable laptop and large laptops capable of gaming. But the ROG Zephyrus G14 puts admirable gaming chops into an ultra portable machine that travels anywhere.

Ready to rumble out of the box: Hands-on with the ROG Strix SCAR 15
Living on the move or in a smaller space isn't a roadblock to high-end gaming. The ROG Strix SCAR makes portable powerful.
The ROG Zephyrus S17 is an outstanding mixture of power and portability
The S17 has it all: top-tier hardware in a slim package with all the bells and whistles.