Call of Duty Black Ops 6 on the ROG Ally and ROG Ally X: performance guide & best settings
Call of Duty is a gaming institution, so when we set out to optimize the best games for the ROG Ally and ROG Ally X, we knew we had to tackle the iconic first-person shooter. Whether you’re playing one of the single-player campaigns, joining the chaos of Modern Warfare III’s multiplayer, taking down Zombies in Black Ops 6, or sneaking around the map of the free-to-play Call of Duty: Warzone, we’ve got the best settings to make the game look (and perform) beautifully.
This is part of our ultimate guide to the ROG Ally series of articles. For more great games, check out our recommendations here.
What framerate to expect in Call of Duty: Black Ops 6 on the ROG Ally and ROG Ally X
Due to Call of Duty‘s rolling release schedule and shared tech, these settings should apply to any of the most recent entries and game modes of the franchise: Modern Warfare III, Black Ops 6, and Warzone, for example. These are excellent looking games with a truckload of settings that allow you to tweak the graphics just how you like them. At 1080p with minimum settings and FSR 3 upscaling set to Quality, the Z1 Extreme in Turbo mode was easily able to achieve over 60 FPS in our multiplayer matches. Turning the Ally down to Performance mode still achieved good framerates mostly in the 40s, which may be a worthy tradeoff the battery boost you get in this mode.
But we can make the game look better without taking much of a hit to performance. Whether you’re more of a casual Call of Duty player or you just want to stop and admire the scenery once in a while, we put together some optimized settings that boost the game’s visuals where it counts, while still keeping performance smooth. At 1080p in Turbo mode with FSR 3 upscaling set to Quality and Frame Generation off, framerate hovers around 60 FPS with these settings, give or take a few frames, in multiplayer and in the built-in benchmark. You can even turn on FSR 3 Frame Generation to boost that to around 90 FPS, if you want.
Note that your performance may vary from the above numbers, especially in other modes like DMZ and Warzone due to their larger maps and high player counts. Performance can also vary depending on drivers, software, your field of view settings, and other factors – including whether your Ally is plugged in while you play. So consider this a starting point for your own customized settings.
Call of Duty: Black Ops 6 optimized graphics settings for the ROG Ally and ROG Ally X
Our optimized settings are designed to give you a nice visual experience while providing the performance you need to move quickly on the battlefield. Here’s what we recommend.
- Resolution: 1920x1080, the native resolution of the ROG Ally’s display.
- Screen Refresh Range: 120, the native refresh rate of the ROG Ally’s display.
- Field of View: 90. This setting, available in the View tab, can shrink or expand your character’s field of vision. This can give you a leg up on your opponents, but can also affect performance, since more objects have to be rendered on screen. Set this to fit your personal preference – we're just noting this here to show that we left it at the default settings for our performance testing, and that your framerate may vary if you adjust it up or down. Most of the other settings in the View tab are personal preference as well, and we left them at their defaults for our testing.
- Dynamic Resolution and Upscaling/Sharpening: FSR 3. All of your other graphics options reside under the Quality tab of the graphics settings. Upscaling options render the game at a lower resolution, then intelligently scale it up to improve performance while retaining excellent fidelity. Call of Duty offers numerous upscaling options, and they each have their own advantages. We like FSR 3 for its intelligent anti-aliasing abilities, while other people may prefer a simple CAS sharpening filter, and/or Dynamic Resolution (which scales the resolution up and down as you play, available in the Display settings). You can try out different options to see what you like, but for the purposes of this guide, we’re using FSR 3 with Dynamic Resolution off.
- AMD FSR Preset: Quality. With Upscaling/Sharpening highlighted, press X to choose an FSR preset. We think the Quality preset provides a nice boost to performance while still looking great.
- Frame Generation: Set to taste. This feature interpolates extra frames in order to increase motion smoothness. You can read more about how it works here, and set it on or off depending on your preferences and your framerate targets (see the section above).
- VRAM Scale Target: 80. We recommend leaving this at the default setting of 80.
- Texture Resolution: Normal (with VRAM increase). With the Ally’s default VRAM setting of 4GB, you’ll need textures set to Very Low to avoid stutters. However, if you’re using the Ally X, or if you increase the Ally’s VRAM allocation to 6GB or higher, you can raise texture quality to Normal to make the game look much better.
- Texture Filter Anisotropic: High. Anisotropic filtering makes textures look sharper when viewed at an angle, and doesn’t have a huge performance impact, so crank it up to High.
- Depth of Field: Set to taste. This adds a blur effect in certain scenarios, which looks nice but is more personal preference. It looks great in the campaign and multiplayer alike, but competitive online players will probably want it turned off.
- Detail Quality Level: Normal. This will add more detail to objects in the game world (as you’d expect), and Normal provides a nice balance of detail and framerate.
- Particle Resolution: Low. This affects the resolution of particles, and while it’s a nice visual boost, it’s harder to notice on the Ally’s more compact screen, and setting it to Low keeps the framerate smooth in those moments.
- Bullet Impacts: On. This shows bullet holes on objects after they’ve been shot. Since it doesn’t impact performance too heavily and it’s useful to have in multiplayer mode, we’ve turned it on.
- Persistent Effects: On. Similarly, we aren’t noticing a big performance change with persistent damage, so we’ve turned it on.
- Shader Quality: Low. Shader Quality affects the lighting around the map, but it’s hard to notice most of the time, and comes with a big performance hit. Keep this at Low.
- On-Demand Texture Streaming: Set to taste. This downloads textures as you play, but it can cause stuttering if your internet is slow, so users with spottier connections will want to choose Minimum. If you have a very stable Wi-Fi connection, try turning it up to Optimized.
- Local Texture Streaming Quality: Normal. This can reduce pop-in, so we recommend turning it up as it doesn’t heavily affect performance.
- Shadow Quality: High. This determines the resolution of many shadows in the game, and raising it can make shadows look much better. There is a small performance hit, but we think High provides the best balance of visuals and framerate.
- Screen Space Shadows: High. Similarly, this affects details of other types of shadows (like those on your weapon), and doesn’t have a noticeable performance impact in our testing.
- Occlusion and Screen Space Lighting: Low. This affects certain shadows around objects that intersect, and setting it to use GTAO, or Ground-Truth Ambient Occlusion, adds a noticeable boost of realism to the world that’s worth the small performance cost.
- Screen Space Reflections: Normal. This affects some subtle reflections in the world. Normal helps add realism without hurting performance the way that High does.
- Static Reflection Quality: High. This also affects the quality of certain reflections, and doesn’t hit your framerate hard, so set this to High.
- Tessellation: Near. With the Ally's default VRAM configuration, Tessellation should be off for the smoothest framerates. But if you’re using the Ally X or you increase the Ally’s VRAM reserve to 6GB or hgiher, you can set this to Near or All for more detailed surfaces.
- Volumetric Quality: Low. Higher volumetric quality settings make fog and certain light beams look nicer, but can also affect performance. We went with Low, but you can turn it up if you want nicer fog at the cost of a couple frames.
- Deferred Physics Quality: Off. This determines the quality of water physics, but it’s hard to notice in-game, so we recommend turning it off to save a few frames.
- Weather Grid Volumes: Normal. This determines the quality of certain weather effects in the game.
- Water Quality: Off. Like Deferred Physics, this is best kept off.
There's a lot of room to play with these settings, of course, so don’t take our word for it. Use these as a starting point for your own experimentation and find the best settings for you, your preferences, and your playstyle.
Author
Popular Post
Introducing the ROG Astral GeForce RTX 5090 and 5080: a new frontier of gaming graphics

The complete list of GeForce GPU power specifications for 2024 ROG and TUF Gaming laptops

ROG and Opera join forces for a special edition of Opera GX, the browser for gamers
ROG goes all-in on ATX 3.0: get your free 16-pin cable today
How to choose a gaming laptop: The ultimate 2025 buying guide
LATEST ARTICLES

Introducing the ROG Xbox Ally and Ally X: ROG and Xbox team up to deliver the best in handheld gaming
We are incredibly proud to announce the ROG Xbox Ally series of handhelds, which take the ROG Ally lineup to all new heights in performance, comfort, and user experience.
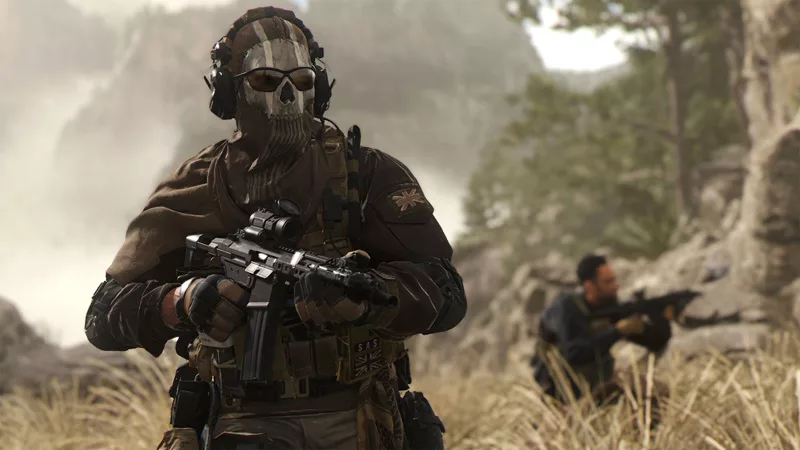
Call of Duty Black Ops 6 on the ROG Ally and ROG Ally X: performance guide & best settings
Our optimized graphics settings will help you balance fidelity and framerate in the latest Call of Duty games on the ROG Ally.

God of War: Ragnarok on the ROG Ally and ROG Ally X: performance guide & best settings
Our optimized graphics settings will help you balance fidelity and framerate in God of War: Ragnarok on the ROG Ally and ROG Ally X.

Black Myth Wukong on the ROG Ally and ROG Ally X: performance guide & best settings
Our optimized graphics settings will help you balance fidelity and framerate in Black Myth Wukong on the ROG Ally and ROG Ally X.

The best games you can finish in one day on the ROG Ally and ROG Ally X
The ROG Ally and Ally X are perfect for quick gaming sessions home and away. Here are a few short gems that you can pick up, play, and complete in five hours or less.
The best Game Pass games for the ROG Ally and ROG Ally X
With three months of Game Pass included, every ROG Ally comes with an instant treasure trove of critically acclaimed games you can start playing right away.
