CPU Core Voltage Offset Mode Overclocking
Originally written by Raja from ASUS North America, this guide discusses the principles of the less-used or misunderstood Offset Mode for CPU overclocking or even underclocking (if you're applying the theory to non-ROG hardware).
For the Maximus IV and Maximus V Series Motherboards
Many of you have asked us how to use Offset Mode in BIOS to over or underclock a CPU, so we’ve put together a quick guide that should help users better understand how to use the Offset Mode function. We’ve tried to keep things as simple as possible, while providing enough information to help further understanding of this feature.
Intel programs each processor with a stock voltage using a binary code (known as VID). This binary code is utilized by the motherboard voltage regulator module to set the correct voltage for the processor at stock operating frequency.
At stock, Intel’s power saving features such and SpeedStep, EIST and C-States are active. Under light loading conditions, SpeedStep reduces the CPU multiplier thus lowering the operating frequency. EIST dynamically lowers the VID while various C-States sends parts of the processor into low power or off state to help save power consumption.
As we increase the processor’s operating frequency, we’re going to need to increase VCore in order to facilitate higher switching frequencies of the processor core. The conventional method of doing this is simply to set voltage control to manual mode and type in the required voltage for stability at the selected operating frequency. However, the side effect of using this method is that the applied voltage code (VID) remains static under all loading conditions so we end up increasing power consumption and heat production under light loading conditions unnecessarily.
The workaround for this is to use Offset Mode in BIOS to set the processor’s operating voltage. In order to do this on the ROG boards we need to set CPU Voltage from Manual Mode to Offset Mode:


Note that on the ROG boards; Phase Control needs to be set changed from Extreme to Standard, Optimized or Manual in order for Offset Mode to become available in the CPU Voltage menu.

We recommend that you set Load-line Calibration to 75% if using Offset Mode to control Vcore.
With these two functions set, we can move back to the previous screen and change the CPU Turbo multiplier to a higher value, so that the processor ramps
to a higher frequency when under sufficient load from software:

As pointed out in earlier guides, most CPUs will scale to 4.5GHz with the right cooling. We’d recommend you start out lower than that to get a feel for
how well your processor scales with voltage. In our example we’ve selected a 43X multiplier, giving us a Turbo frequency circa 4.3GHz under load.
At this point we can reboot the system; the CPU voltage will be offset from stock voltage automatically – as you increase operating freqeuncy, the default voltage
will automatically increase. In order to find out what the new load voltage is, we can boot Windows and run a stress test, while keeping ROG CPU-Z open to get a rough
idea of how much voltage the processor is seeing under load or if you’re handy with a multimeter, the ROG boards have a measurement point situated near the DIMM
slots allowing for a more accurate reading.


With the “-“, (negative) voltage range selected, the voltage you select will be subtracted from the load voltage we saw in the operating system.
For example if our full load voltage was 1.376V in the operating system, and we’d like it to be 1.32V instead, we simply set 0.05V as
the negative offset (1.37V-0.05V=1.32V).

Bear in mind though that this will also offset your idle voltage by the same value. As an example, with the default voltage settings,
our 2500K processor’s idle voltage (at 16x CPU multiplier ratio) is 1.045V. If we subtract 0.05V from the full load voltage, the idle voltage
will be reduced by the same value:

So if we offset the voltage too far with the negative voltage scale, there will come a point where the idle voltage is no longer sufficient to sustain
the idle processor clock frequency.
If we wish to add voltage to the full load VID, we simply use the + offset and increase to increase the voltage level. The “+” offset scale isn’t as direct
as the” –“ scale when it comes to changing voltage, that’s because one of the features of SVID (serial VID) is that it allows the processor to request
voltage based upon operating frequency, current draw and thermal conditions- hence adding 0.05V to 1.376V results in a full load voltage of 1.40V.

Similarly the idle voltage is increased by only 0.025V, too:

That’s why we recommend getting a feel for how the offset range works with your processor, before pushing the system hard. Offset Mode may appear
to be an overly complex way to overclock initially, but once you get the hang of it the results are very worthwhile.
Author
Popular Posts

The ROG XREAL R1 gaming glasses let you game anywhere on a 171-inch 240Hz virtual screen

How to adjust your laptop's P-Cores and E-Cores for better performance and battery life

How to Cleanly Uninstall and Reinstall Armoury Crate

Prepare for ultra-sharp RGB Stripe OLED imagery with these three new ROG monitors
Check out the latest ROG gaming gear revealed at CES 2026
LATEST ARTICLES
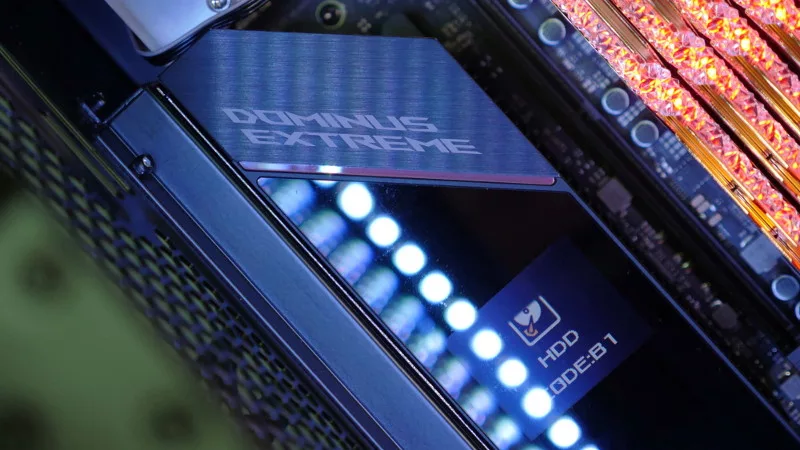
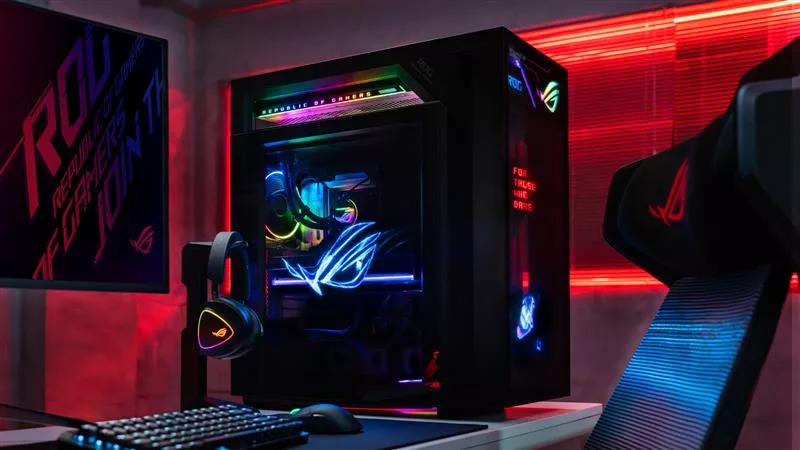
See the mammoth ROG Dominus build that takes Intel's 28-core Xeon W-3175X to the Extreme
The ROG Dominus Extreme pushes the boundaries of PC performance in our awesome CES 2019 build.

Breaking world records with the ROG Maximus XI Gene and the Intel Core i9-9900K
Tasked with pushing performance on the Z390 platform as far as possible, we invited the best overclockers to ROG HQ for a week of extreme overclocking.
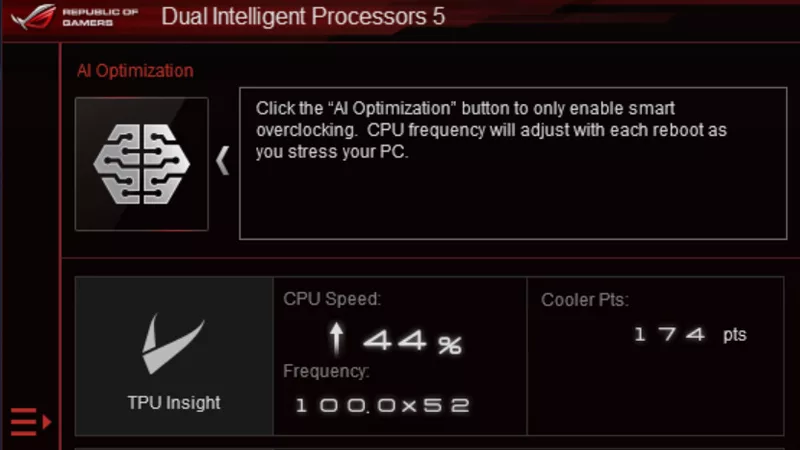
How to overclock your system using AI Overclocking
AI Overclocking one-click tuning makes its debut on Z390 motherboards and we have a quick how-to guide to get you started.
HW GURUS win the ROG OC Showdown Team Edition 2
The results are in from our second ROG OC Showdown Team Edition. See who posted the top scores.
Breaking records with the Maximus X Apex and i7-8700K
ROG is obsessed with chasing the highest overclocks and fastest performance, and Coffee Lake is our new muse on the Maximus X Apex.
The Rampage VI Apex claims more performance victories with Intel's new Core i9-7940X and i9-7980XE
After dominating extreme overclocking with the first wave of Skylake-X CPUs, we've taken the latest 14- and 18-core models to sub-zero extremes.