Cyberpunk 2077 on the ROG Ally: performance guide & best settings
While Cyberpunk 2077 is one of the most graphically-intensive games around, it’s possible to run it with good performance as long as you use the right settings. If you want to bring Night City with you on-the-go, here’s how to get it looking and performing beautifully on the ROG Ally.
This is part of our ultimate guide to the ROG Ally series of articles. For more great games, check out our recommendations here.
What framerate to expect in Cyberpunk 2077 on the ROG Ally
Cyberpunk may be the new Crysis, but it can still look excellent even with a number of the settings turned down, making it rather easy to optimize for the Ryzen Z1 Extreme. With minimum graphics settings at 1080p and FSR on Auto, you can expect Cyberpunk to spend most of its time between 45-70 FPS in Turbo Mode, depending on the scene (open world driving in the busy city will trend toward the lower end of that range, while indoor cutscenes will be higher). If you want to extend your battery life, you can set the Ally to Performance Mode, which will get you about 30-50 FPS – though you can play with the resolution and FSR settings if you want to push that a little higher.
With a few tweaks, however, you can bring out a lot more of Cyberpunk’s graphical beauty, without sacrificing too much performance. Our optimized settings below, at 1080p with FSR set to Quality, will produce an average framerate between 40-60 FPS in Turbo Mode — again, fluctuating depending on the scene. The Ally’s FreeSync Premium display will keep motion smooth and tear-free no matter which of these options you choose, though you can use the Command Center’s FPS limiter to create a more consistent experience, too. Remember too that your performance may vary slightly from our numbers depending on drivers, software, and other factors – like whether your Ally is plugged in.
Cyberpunk 2077 optimized graphics settings for the ROG Ally
Cyberpunk 2077's Low and Medium presets are pretty solid on their own, but to truly make the most out of the game's image quality while balancing performance, a custom collection of settings are ideal. Here are the best settings for Cyberpunk 2077 on the ROG Ally:
- Crowd Density: Low. You’ll find this setting in the “Gameplay” tab, and setting it to Low will keep the number of NPCs doesn’t drag down your CPU performance. You can set it higher if you like, just know that higher settings may cause more framerate dips, particularly when walking or driving through crowded areas in the open world.
- Resolution: 1920x1080, the native resolution of the ROG Ally display.
- Texture Quality: Medium. Medium textures look significantly better than Low, while High is a less noticeable jump with more VRAM usage. Medium provides a good balance, though you can also increase the amount of memory allocated to the GPU and crank textures higher, if you want.
- AMD FidelityFX Super Resolution 2.1 (FSR): On, Quality. This renders the game at a lower resolution to improve framerate, then uses temporal algorithms to scale the image back to 1080p. We recommend the Quality setting, which will give a solid improvement to performance over native 1080p with good image quality. You can step down to Balanced or Performance if you want to give up some fidelity for even better framerates, or turn FSR off entirely for a high fidelity experience at lower framerates. Set FSR Image Sharpening to taste.
- Field of View: 80. We left this setting at the default, though you can tweak it to fit your personal preference. Just know that wider fields of view can reduce performance, since the game has to render more at once.
- Film Grain, Chromatic Aberration, Lens Flare, and Motion Blur: Set to taste. These are more stylistic options, and whether you like them will depend on your own preferences. For the purpose of our tests, we left them on the default settings (but with motion blur off).
- Contact Shadows: On. This adds much more lifelike shadow detail in certain spots, but has a small enough performance hit that it’s worth turning on.
- Improved Facial Lighting Geometry: On. This doesn’t affect performance too heavily, so you can turn it on for slightly better looking faces.
- Anisotropy: 8. This affects the clarify of textures when seen at an angle. This is usually tough to tell the difference on a compact screen, and setting this to 8x seems to be a good balance for the Ally’s hardware.
- Local Shadow Mesh Quality: High. This setting doesn’t seem to affect performance too heavily, so you can go with High.
- Local Shadow Quality: Low. It's hard to tell the difference between High and Low on the Ally’s screen, so I think Low is worth the small performance bump. If you’re picky about shadows, though, you can turn this up for a small cost to framerate.
- Cascaded Shadows Range: High. This affects the distance at which shadows will render at a higher quality. At lower settings, faraway shadows will look more aliased, and while it can be tough to tell on the Ally’s more compact screen, it doesn’t have a huge performance cost, so High is well optimized here.
- Cascaded Shadows Resolution: Medium. This provides a good balance between performance and good-looking shadows. Shadows will look a bit better with this set to High, but it will come with a noticeable performance hit, so I recommend sticking with Medium.
- Distant Shadows Resolution: High. As its name implies, this affects the resolution of shadows in the distance. High looks better than low settings, without much performance impact.
- Volumetric Fog Resolution: Medium. This improves the smoothness of certain fog effects, at the cost of performance. You can turn it up for better looking lighting in certain areas, but it will affect performance quite a bit, which is why we’ve stuck with Medium here.
- Volumetric Cloud Quality: Medium. This affects the way clouds look in the sky, but Medium offers similar visual performance to Ultra with better performance.
- Max Dynamic Decals: Ultra. This alters how long certain effects last on surfaces in the game, like bullet holes in a wall. It doesn’t affect performance heavily, so you might as well crank this one up.
- Screen Space Reflection Quality: Low. This has one of the biggest impacts on performance in the game, so Low is the best option to keep a solid framerate. Low still looks decent, but if the grainy reflections bother you, you can raise this setting...just be prepared to pay for it in FPS.
- Subsurface Scattering Quality: Low. This option doesn’t seem to do a ton visually, so leave it to Low to keep your frames as high as possible.
- Ambient Occlusion: Low. Low looks very similar to higher settings, especially on the Ally’s handheld screen, but with much better performance.
- Color Precision: Medium. We don’t see a huge difference between the Color Precision settings, so give yourself some free performance with Medium.
- Mirror Quality: High. This only matters when you’re looking in the mirror, so you can set it to High if you want to see your character’s face in higher fidelity. There’s little motion in these moments, so the performance hit is acceptable, but you can turn it down if you wish.
- Level of Detail (LOD): Low. I couldn’t tell a huge difference between Low and High, but Low provides better performance, so let’s nab ourselves some extra frames with Low.
These are the settings we’ve found strike the best balance, though you can fiddle with them to fit your own preferences. For example, you could adjust resolution and FSR to get more frames at the cost of some sharpness – though it may allow you to turn settings like shadows, volumetrics, or reflections higher if you want to boost those effects. Consider these a starting point and enjoy!
Author
Popular Post
Introducing the ROG Astral GeForce RTX 5090 and 5080: a new frontier of gaming graphics

The complete list of GeForce GPU power specifications for 2024 ROG and TUF Gaming laptops

ROG and Opera join forces for a special edition of Opera GX, the browser for gamers
ROG goes all-in on ATX 3.0: get your free 16-pin cable today
How to choose a gaming laptop: The ultimate 2025 buying guide
LATEST ARTICLES
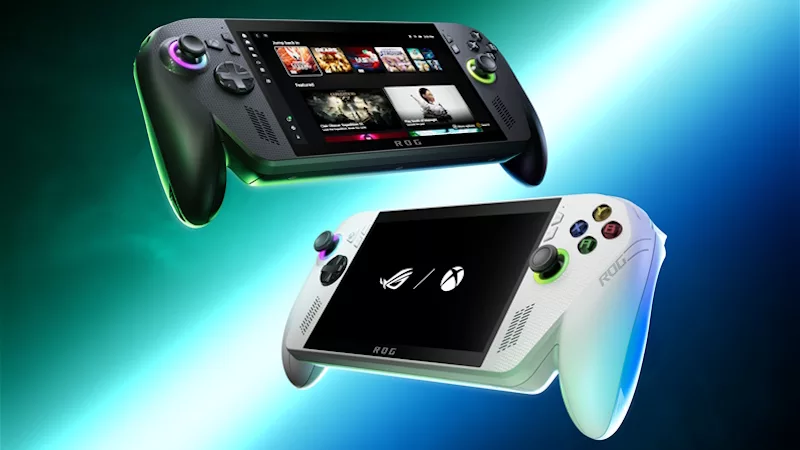
Introducing the ROG Xbox Ally and Ally X: ROG and Xbox team up to deliver the best in handheld gaming
We are incredibly proud to announce the ROG Xbox Ally series of handhelds, which take the ROG Ally lineup to all new heights in performance, comfort, and user experience.
Call of Duty Black Ops 6 on the ROG Ally and ROG Ally X: performance guide & best settings
Our optimized graphics settings will help you balance fidelity and framerate in the latest Call of Duty games on the ROG Ally.

God of War: Ragnarok on the ROG Ally and ROG Ally X: performance guide & best settings
Our optimized graphics settings will help you balance fidelity and framerate in God of War: Ragnarok on the ROG Ally and ROG Ally X.

Black Myth Wukong on the ROG Ally and ROG Ally X: performance guide & best settings
Our optimized graphics settings will help you balance fidelity and framerate in Black Myth Wukong on the ROG Ally and ROG Ally X.

The best games you can finish in one day on the ROG Ally and ROG Ally X
The ROG Ally and Ally X are perfect for quick gaming sessions home and away. Here are a few short gems that you can pick up, play, and complete in five hours or less.
The best Game Pass games for the ROG Ally and ROG Ally X
With three months of Game Pass included, every ROG Ally comes with an instant treasure trove of critically acclaimed games you can start playing right away.
